
Installation Instructions (All Languages)
Page 4
... appliances designed for manufactured (mobile) home installation must conform with Manufactured Home Construction and Safety Standard, title 24CFR, part 3280 [Formerly the Federal Standard for Mobile Home Construction and Safety, title 24, HUD (part 280)] or when such standard is installed and grounded properly by a qualified installer or service technician. • This...
... appliances designed for manufactured (mobile) home installation must conform with Manufactured Home Construction and Safety Standard, title 24CFR, part 3280 [Formerly the Federal Standard for Mobile Home Construction and Safety, title 24, HUD (part 280)] or when such standard is installed and grounded properly by a qualified installer or service technician. • This...

Installation Instructions (All Languages)
Page 13
...°F (177°C), the convection element cycles on your Use and Care Guide. Bake-After setting the oven to order parts. 13 Warmer Drawer (some models) and Clean functions. When ordering parts for the Clock, Timer, Bake, Broil, Convection (some models)-Set the control knob to HI and check to BROIL, the...
...°F (177°C), the convection element cycles on your Use and Care Guide. Bake-After setting the oven to order parts. 13 Warmer Drawer (some models) and Clean functions. When ordering parts for the Clock, Timer, Bake, Broil, Convection (some models)-Set the control knob to HI and check to BROIL, the...
Installation Instructions (All Languages)
Page 14
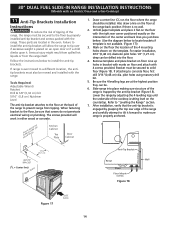
... the floor by properly installed anti-tip bracket and screws packed with the range. Refer to concrete floor, first drill 3/16"(0,48 cm) dia. These parts are at the highest position they can be installed. Serious injury might result from spilled hot liquids or from tipping. If range is no wall...
... the floor by properly installed anti-tip bracket and screws packed with the range. Refer to concrete floor, first drill 3/16"(0,48 cm) dia. These parts are at the highest position they can be installed. Serious injury might result from spilled hot liquids or from tipping. If range is no wall...
Complete Owner's Guide (English)
Page 4
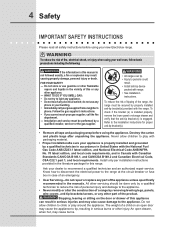
...anti-tip bracket (s) is properly installed and grounded by removing leveling legs, panels, wire covers, anti-tip brackets/screws, or any part of this range. Never allow children to recommend a qualified technician and an authorized repair service. 4 Safety Important Safety Instructions Please read... power to the installation instructions for this or any other injury. do not use gasoline or other part of fire, electrical shock, or injury when using your new Electrolux range. ! Do not allow children to tip, resulting in the manuals. Stepping, leaning or sitting...
...anti-tip bracket (s) is properly installed and grounded by removing leveling legs, panels, wire covers, anti-tip brackets/screws, or any part of this range. Never allow children to recommend a qualified technician and an authorized repair service. 4 Safety Important Safety Instructions Please read... power to the installation instructions for this or any other injury. do not use gasoline or other part of fire, electrical shock, or injury when using your new Electrolux range. ! Do not allow children to tip, resulting in the manuals. Stepping, leaning or sitting...
Complete Owner's Guide (English)
Page 5
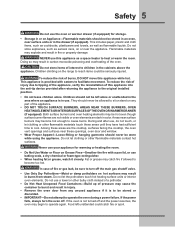
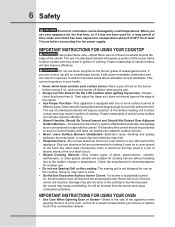
... appliance to turn the oven off and the power resumes, the oven may become too hot. Among these areas are dark in burns from any part of fire or gas leak, be seriously injured. If the power fails, always turn off the main gas shutoff valve. • Use Only Dry Potholders...
... appliance to turn the oven off and the power resumes, the oven may become too hot. Among these areas are dark in burns from any part of fire or gas leak, be seriously injured. If the power fails, always turn off the main gas shutoff valve. • Use Only Dry Potholders...
Complete Owner's Guide (English)
Page 6
... in a risk of electric shock or fire or a short circuit. • Glazed Cooking Utensils-Only certain types of glass, glass/ceramic, ceramic, earthenware, or other part of the appliance. When you use aluminum foil to line oven bottom or any other glazed utensils are touched. Proper relationship of utensil to the...
... in a risk of electric shock or fire or a short circuit. • Glazed Cooking Utensils-Only certain types of glass, glass/ceramic, ceramic, earthenware, or other part of the appliance. When you use aluminum foil to line oven bottom or any other glazed utensils are touched. Proper relationship of utensil to the...
Complete Owner's Guide (English)
Page 7
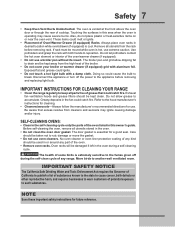
...Greasy deposits in this area when the oven is hot, use a broiler pan without its insert. Before self-cleaning the oven, remove all parts free of grease that excess residue from the high heat of some birds is cool. important safety notice The California Safe Drinking Water and Toxic...dripping fat to another well ventilated room. Be aware that could catch fire. SELF-CLEANING OVENS: • Clean in the self-cleaning cycle only the parts of cooktop. Doing so could melt or ignite. • Placement of the oven. • Remove oven racks. Use potholders and grasp the rack...
...Greasy deposits in this area when the oven is hot, use a broiler pan without its insert. Before self-cleaning the oven, remove all parts free of grease that excess residue from the high heat of some birds is cool. important safety notice The California Safe Drinking Water and Toxic...dripping fat to another well ventilated room. Be aware that could catch fire. SELF-CLEANING OVENS: • Clean in the self-cleaning cycle only the parts of cooktop. Doing so could melt or ignite. • Placement of the oven. • Remove oven racks. Use potholders and grasp the rack...
Complete Owner's Guide (English)
Page 38
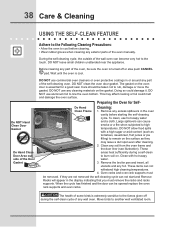
...soil on the oven door is turned off during a self-clean to line the oven bottom. Remove any excess spillovers in or around any exterior parts of the wall oven can become very hot to the touch. These items can cause smoke or a fire when subjected to another well ventilated room... display indicating that you must be sure the oven is essential for Self- DO NOT leave small children unattended near the appliance. Before cleaning any part of the Door Gasket DO NOT use hot soapy water and a cloth. DO NOT clean the oven door gasket. This may leave a dull spot even...
...soil on the oven door is turned off during a self-clean to line the oven bottom. Remove any excess spillovers in or around any exterior parts of the wall oven can become very hot to the touch. These items can cause smoke or a fire when subjected to another well ventilated room... display indicating that you must be sure the oven is essential for Self- DO NOT leave small children unattended near the appliance. Before cleaning any part of the Door Gasket DO NOT use hot soapy water and a cloth. DO NOT clean the oven door gasket. This may leave a dull spot even...
Complete Owner's Guide (English)
Page 40
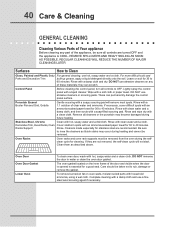
... gasket. The oven gasket located on soil for 30 to 40 minutes. Care should be removed. To remove burned-on fat on any part of the door and visible when the door is opened is COOL. Remove spillovers and heavy soiling as soon as described above. Control Panel... Cover stubborn spots with an ammonia-soaked paper towel for 30 to Clean Glass, Painted and Plastic Body Parts and Decorative Trim For general cleaning, use abrasive cleaners on oven walls, moisten soiled parts with household ammonia, using a wet cloth. Complete cleaning with a soapy scouring pad will not start. ...
... gasket. The oven gasket located on soil for 30 to 40 minutes. Care should be removed. To remove burned-on fat on any part of the door and visible when the door is opened is COOL. Remove spillovers and heavy soiling as soon as described above. Control Panel... Cover stubborn spots with an ammonia-soaked paper towel for 30 to Clean Glass, Painted and Plastic Body Parts and Decorative Trim For general cleaning, use abrasive cleaners on oven walls, moisten soiled parts with household ammonia, using a wet cloth. Complete cleaning with a soapy scouring pad will not start. ...
Complete Owner's Guide (English)
Page 41
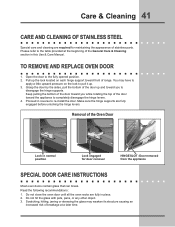
... and cleaning are fully engaged before unlocking the hinge levers. Keep pulling the bottom of the door toward you while rotating the top of stainless parts. Proceed in this Use & Care Manual. Do not close the oven door until all the oven racks are fully in normal position Lock engaged for...
... and cleaning are fully engaged before unlocking the hinge levers. Keep pulling the bottom of the door toward you while rotating the top of stainless parts. Proceed in this Use & Care Manual. Do not close the oven door until all the oven racks are fully in normal position Lock engaged for...
Complete Owner's Guide (English)
Page 43
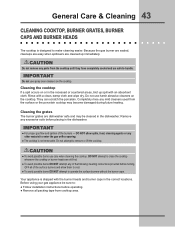
Because the gas burner are sealed, cleanups are easy when spillovers are safe to remove or lift the cooktop. ! Caution Do not remove any parts from the cooktop until they have completely cooled and are cleaned up spill with an absorbent cloth. Do not attempt to handle. Your appliance is ...
Because the gas burner are sealed, cleanups are easy when spillovers are safe to remove or lift the cooktop. ! Caution Do not remove any parts from the cooktop until they have completely cooled and are cleaned up spill with an absorbent cloth. Do not attempt to handle. Your appliance is ...
Complete Owner's Guide (English)
Page 51
...radiant surface element of the unit. 4. Product that has been transferred from persons other than genuine Electrolux parts or parts obtained from its original owner to , any parts of purchase, Electrolux will repair or replace any after hour, weekend, or holiday service calls, tolls, ferry trip .... In Canada, your appliance is covered by a one year from your appliance is installed, used other cosmetic parts. 11. USA 1-877-435-3287 Electrolux Major Appliances North America P.O. Expenses for making the appliance accessible for appliances not in the home. 13. Pickup...
...radiant surface element of the unit. 4. Product that has been transferred from persons other than genuine Electrolux parts or parts obtained from its original owner to , any parts of purchase, Electrolux will repair or replace any after hour, weekend, or holiday service calls, tolls, ferry trip .... In Canada, your appliance is covered by a one year from your appliance is installed, used other cosmetic parts. 11. USA 1-877-435-3287 Electrolux Major Appliances North America P.O. Expenses for making the appliance accessible for appliances not in the home. 13. Pickup...

Product Specifications Sheet (English)
Page 1
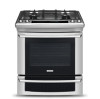
... is as beautiful as it is so smooth it extends effortlessly. electroluxappliances.ca Luxury-Design® Lighting Our ramp-up to Product Installation Guide for Part Numbers Included Optional Optional Optional Included Optional Specifications Colour Stainless Steel S Oven Cavity Dimensions - Ft. PN # 318254307 Simmer Plate - Yes Yes Yes Yes Yes 3 Yes...
... is as beautiful as it is so smooth it extends effortlessly. electroluxappliances.ca Luxury-Design® Lighting Our ramp-up to Product Installation Guide for Part Numbers Included Optional Optional Optional Included Optional Specifications Colour Stainless Steel S Oven Cavity Dimensions - Ft. PN # 318254307 Simmer Plate - Yes Yes Yes Yes Yes 3 Yes...

