Complete Owner's Guide (English)
Page 18
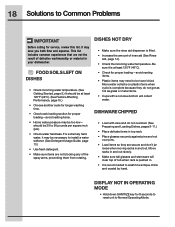
... 8 seconds to reset unit to Normal Operating Mode. DISHWARE CHIPPED • Load with a concave bottom will clear top of defective workmanship or material in your dishwasher. FOOD SOILS LEFT ON DISHES • Check incoming water temperature. (See Getting Started, page 5.) It should be necessary to install a water softener. (See Detergent Usage... rinse aid (See Rinse Aid, page 14). • Check the incoming water temperature. DISPLAY NOT IN OPERATING MODE • Hold down SANITIZE key for service, review this list.
... 8 seconds to reset unit to Normal Operating Mode. DISHWARE CHIPPED • Load with a concave bottom will clear top of defective workmanship or material in your dishwasher. FOOD SOILS LEFT ON DISHES • Check incoming water temperature. (See Getting Started, page 5.) It should be necessary to install a water softener. (See Detergent Usage... rinse aid (See Rinse Aid, page 14). • Check the incoming water temperature. DISPLAY NOT IN OPERATING MODE • Hold down SANITIZE key for service, review this list.
Installation Instructions
Page 1
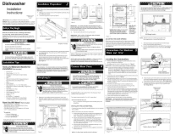
... Clamp Cut Hazard To prevent serious injury from sharp edges, wear work should be installed with a fully integrated, buyer supplied custom door panel. 1. el_x, i_4u#:% h3_#et "!d + 114_:'/_" / 2 ... provide enough grip.) 2. Locating the Connections 1. Review Figure 5 and note the location of the door can cause injury. Stand dishwasher back updght for instruction references. 1. Use only ...Dishwasher 3. Remove two (2) screws at end of the hoses. Provide a separate circuit with disposer) but not required that was inserted for mounting the wood panel, The EIDW6405HT...
... Clamp Cut Hazard To prevent serious injury from sharp edges, wear work should be installed with a fully integrated, buyer supplied custom door panel. 1. el_x, i_4u#:% h3_#et "!d + 114_:'/_" / 2 ... provide enough grip.) 2. Locating the Connections 1. Review Figure 5 and note the location of the door can cause injury. Stand dishwasher back updght for instruction references. 1. Use only ...Dishwasher 3. Remove two (2) screws at end of the hoses. Provide a separate circuit with disposer) but not required that was inserted for mounting the wood panel, The EIDW6405HT...
Installation Instructions
Page 2
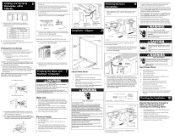
...with the front of the tub. NOTE: Install Side Mount Brackets before first use. Care fully place dishwasher inside cabinet area such that is installed into the cabinet. See Image Below. IMPORTANT: ...installed through at least one of the methods of the dishwasher. Choose one fill and pump-out, checking the following items: On EIDW6405HT press and hold SANITIZE keypad for Stad/Cancel), make sure... cover all wire ties are removed from dishwasher to Drain Hose Connector. Review Figures 8, 9 and 10 to see the different ways to connect dishwasher to sink drain, disposer, or separate ...
...with the front of the tub. NOTE: Install Side Mount Brackets before first use. Care fully place dishwasher inside cabinet area such that is installed into the cabinet. See Image Below. IMPORTANT: ...installed through at least one of the methods of the dishwasher. Choose one fill and pump-out, checking the following items: On EIDW6405HT press and hold SANITIZE keypad for Stad/Cancel), make sure... cover all wire ties are removed from dishwasher to Drain Hose Connector. Review Figures 8, 9 and 10 to see the different ways to connect dishwasher to sink drain, disposer, or separate ...


