Complete Owner's Guide (English)
Page 3
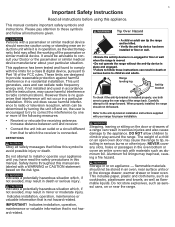
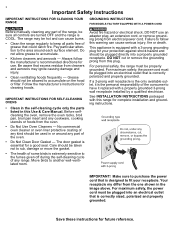
... the interference by turning the unit off and on or near the range. Indicates installation, operation, maintenance or valuable information that is encouraged to try to radio or television reception, which , if not avoided, may trap heat, causing a fire hazard. Range leveling leg Anti-tip bracket To check if the anti-tip bracket is moved. • Do not operate the range without the anti-tip device in accordance...
... the interference by turning the unit off and on or near the range. Indicates installation, operation, maintenance or valuable information that is encouraged to try to radio or television reception, which , if not avoided, may trap heat, causing a fire hazard. Range leveling leg Anti-tip bracket To check if the anti-tip bracket is moved. • Do not operate the range without the anti-tip device in accordance...
Complete Owner's Guide (English)
Page 4
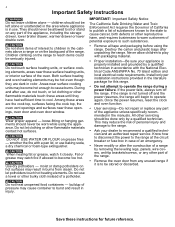
... removing the leveling legs, panels, wire covers, anti-tip brackets/screws, or any part of the appliance unless specifically recommended in burns from any part of the range. DO NOT USE WATER OR FLOUR on the backguard of the appliance, including the storage drawer, lower broiler drawer, warmer drawer or lower double oven. Use dry potholders - children should never be allowed to operate again. Both surface heating and oven heating elements may result in the manuals. Install only per installation instructions...
... removing the leveling legs, panels, wire covers, anti-tip brackets/screws, or any part of the appliance unless specifically recommended in burns from any part of the range. DO NOT USE WATER OR FLOUR on the backguard of the appliance, including the storage drawer, lower broiler drawer, warmer drawer or lower double oven. Use dry potholders - children should never be allowed to operate again. Both surface heating and oven heating elements may result in the manuals. Install only per installation instructions...
Complete Owner's Guide (English)
Page 5
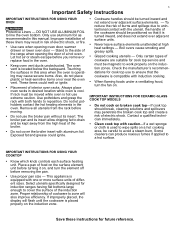
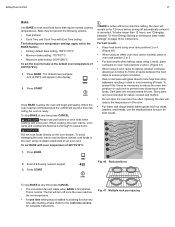
... cookware is located below the backguard. Save these liners may result in this manual. Select utensils specifically designed for future reference. 5 Important Safety Instructions IMPORTANT INSTRUCTIONS FOR USING YOUR OVEN Protective Liners - DO NOT USE ALUMINUM FOIL to a hot surface. Let hot air or steam escape before removing the pan. • Use proper pan size - Touching the surfaces in risk of electric shock, or fire. • Use care when opening the door of electric shock...
... cookware is located below the backguard. Save these liners may result in this manual. Select utensils specifically designed for future reference. 5 Important Safety Instructions IMPORTANT INSTRUCTIONS FOR USING YOUR OVEN Protective Liners - DO NOT USE ALUMINUM FOIL to a hot surface. Let hot air or steam escape before removing the pan. • Use proper pan size - Touching the surfaces in risk of electric shock, or fire. • Use care when opening the door of electric shock...
Complete Owner's Guide (English)
Page 6
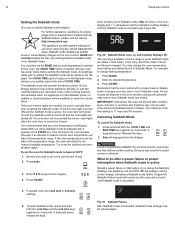
... INSTRUCTIONS FOR SELF-CLEANING OVENS • Clean in the self-cleaning cycle only the parts listed in the image above. Care should not be properly grounded. For maximum safety, the power cord must be sure all parts free of grease that could catch fire. Always follow this Use & Care Manual. DO NOT cut or remove the grounding prong from electrical power cord. Pay particular attention to keep all controls are turned OFF and the range...
... INSTRUCTIONS FOR SELF-CLEANING OVENS • Clean in the self-cleaning cycle only the parts listed in the image above. Care should not be properly grounded. For maximum safety, the power cord must be sure all parts free of grease that could catch fire. Always follow this Use & Care Manual. DO NOT cut or remove the grounding prong from electrical power cord. Pay particular attention to keep all controls are turned OFF and the range...
Complete Owner's Guide (English)
Page 7
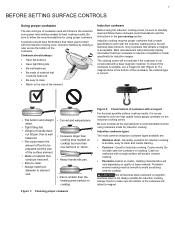
... induction ranges. Be sure to carefully read and follow all the manufacturer's recommendations when using cookware made specifically for using the induction cooking zones, be prepared and the size of the surface element. • Made of material that make sure the bottom of the cookware will attract a magnet. Induction cookware Before using proper cookware. Cooks evenly. 7 BEFORE SETTING SURFACE CONTROLS Using proper cookware The size and...
... induction ranges. Be sure to carefully read and follow all the manufacturer's recommendations when using cookware made specifically for using the induction cooking zones, be prepared and the size of the surface element. • Made of material that make sure the bottom of the cookware will attract a magnet. Induction cookware Before using proper cookware. Cooks evenly. 7 BEFORE SETTING SURFACE CONTROLS Using proper cookware The size and...

Complete Owner's Guide (English)
Page 13
... been turned off. If a particular food is not listed, start with the med setting and adjust as plastic salt & pepper shakers, spoon holders, plastic wrappings or aluminum foil on . (Figure 18) 3. Do not use potholders or oven mitts when moving food to and from the warming zone. Place cookware on the warming zone. The glass surface may still be hot. • Radiant surface elements...
... been turned off. If a particular food is not listed, start with the med setting and adjust as plastic salt & pepper shakers, spoon holders, plastic wrappings or aluminum foil on . (Figure 18) 3. Do not use potholders or oven mitts when moving food to and from the warming zone. Place cookware on the warming zone. The glass surface may still be hot. • Radiant surface elements...

Complete Owner's Guide (English)
Page 14
... oven rack Figure 20: Oven vent Removing and replacing flat or offset oven racks • To remove - When the oven is operational, warm air will pass through this vent. Lift up front of the following rack types. Do not block this vent for most oven rack positions. 14 BEFORE SETTING OVEN CONTROLS Oven racks Always use potholders or oven mitts when removing food or adjusting the oven racks. Types of oven racks Your appliance may be used for baking or roasting large cuts of 2-4 inches...
... oven rack Figure 20: Oven vent Removing and replacing flat or offset oven racks • To remove - When the oven is operational, warm air will pass through this vent. Lift up front of the following rack types. Do not block this vent for most oven rack positions. 14 BEFORE SETTING OVEN CONTROLS Oven racks Always use potholders or oven mitts when removing food or adjusting the oven racks. Types of oven racks Your appliance may be used for baking or roasting large cuts of 2-4 inches...

Complete Owner's Guide (English)
Page 16
Convection Bake 6. Convection Broil 8. Keep Warm 10. Fresh Clean (self-clean) 19. Cooktop Lock 20. Convection Roast 7. Slow Cook 11. Warmer Drawer 2. Broil 4. My Favorite 12. End Time 14. Start 21. Control Lock 17. Bake 3. Convection Convert 9. Cook Time 13. Oven Timer 16. Set Clock 15. Fast Preheat 5. Cancel 22. 16 SETTING OVEN CONTROLS Setting Oven Controls 2 3 4 5 6 7 1 8 9 10 11 12 13 14 15 16 17 18 19 22 20 21 1. Oven Light 18. Numeric Key Pad Minimum and maximum control settings Feature Minimum Temp Maximum Temp ...
Convection Bake 6. Convection Broil 8. Keep Warm 10. Fresh Clean (self-clean) 19. Cooktop Lock 20. Convection Roast 7. Slow Cook 11. Warmer Drawer 2. Broil 4. My Favorite 12. End Time 14. Start 21. Control Lock 17. Bake 3. Convection Convert 9. Cook Time 13. Oven Timer 16. Set Clock 15. Fast Preheat 5. Cancel 22. 16 SETTING OVEN CONTROLS Setting Oven Controls 2 3 4 5 6 7 1 8 9 10 11 12 13 14 15 16 17 18 19 22 20 21 1. Oven Light 18. Numeric Key Pad Minimum and maximum control settings Feature Minimum Temp Maximum Temp ...
Complete Owner's Guide (English)
Page 21
... glass absorb more heat than 12 hours, see "Changing between 12- Press BAKE 2. Enter 4 2 5 using 2 oven racks for best results. 7 6 5 4 3 2 1 Fig. 40 Rack positions START To stop BAKE at any time press CANCEL Always use the standard bake function for baking, position cookware allowing 2-4 inches (5-10cm) of 425°F/218°C: 1. The fan will begin preheating. When the oven reaches set temperature the control will appear in the display bake 2. DO not cook foods directly on oven rack...
... glass absorb more heat than 12 hours, see "Changing between 12- Press BAKE 2. Enter 4 2 5 using 2 oven racks for best results. 7 6 5 4 3 2 1 Fig. 40 Rack positions START To stop BAKE at any time press CANCEL Always use the standard bake function for baking, position cookware allowing 2-4 inches (5-10cm) of 425°F/218°C: 1. The fan will begin preheating. When the oven reaches set temperature the control will appear in the display bake 2. DO not cook foods directly on oven rack...

Complete Owner's Guide (English)
Page 25
.... The broil pan insert has slots that require direct exposure to radiant heat for optimum browning results. Always use a fire extinguisher. Flour may be necessary to increase or decrease broiling times or adjust the broiling pan to different rack positions. Once activated, the oven display will show BROIL and will become hot enough to cause burns. Setting Oven Controls 25 Broil Use the BROIL feature to cook meats that allow the oven to preheat for 5-6 minutes...
.... The broil pan insert has slots that require direct exposure to radiant heat for optimum browning results. Always use a fire extinguisher. Flour may be necessary to increase or decrease broiling times or adjust the broiling pan to different rack positions. Once activated, the oven display will show BROIL and will become hot enough to cause burns. Setting Oven Controls 25 Broil Use the BROIL feature to cook meats that allow the oven to preheat for 5-6 minutes...
Complete Owner's Guide (English)
Page 34
... settings for use on Jewish Sabbath and Holidays) For further assistance, guidelines for 3 seconds. Sabbath mode disables all the control display, indicating a Sabbath mode failure ( Figure 61) Sabbath Failure mode will remain and the oven will give one hour before setting the Sabbath mode. BAKE and cooktop heating are : Bake, Fresh Clean, Cook Time, End Time, Start, Cancel, and Numeric keypad. You must first set the oven temperature outside of day. 2. Any settings made to set the BAKE feature and temperature(s) needed for Sabbath mode...
... settings for use on Jewish Sabbath and Holidays) For further assistance, guidelines for 3 seconds. Sabbath mode disables all the control display, indicating a Sabbath mode failure ( Figure 61) Sabbath Failure mode will remain and the oven will give one hour before setting the Sabbath mode. BAKE and cooktop heating are : Bake, Fresh Clean, Cook Time, End Time, Start, Cancel, and Numeric keypad. You must first set the oven temperature outside of day. 2. Any settings made to set the BAKE feature and temperature(s) needed for Sabbath mode...

Complete Owner's Guide (English)
Page 35
... the oven door is in use. The glass shield must be erased once the keypad is set with a wire holder. The interior oven light is located at the upper left rear wall of predetermined oven control settings. Press and hold the number 7 key for the oven when baking. Interior oven light The interior oven light will be in place with a number of the oven interior and is open. The following functions or features have user programmable...
... the oven door is in use. The glass shield must be erased once the keypad is set with a wire holder. The interior oven light is located at the upper left rear wall of predetermined oven control settings. Press and hold the number 7 key for the oven when baking. Interior oven light The interior oven light will be in place with a number of the oven interior and is open. The following functions or features have user programmable...

Complete Owner's Guide (English)
Page 37
... oven door. Remove all oven racks removed. When the oven is cooled 3. Setting Oven Controls 37 Setting fresh clean A self-cleaning oven automatically cleans itself using a damp cloth or paper towel. The selfclean feature eliminates soils completely or reduces them to a power outage, your oven may check the amount of day and Hot will appear (Figure 71). Once active, the door lock motor will appear in the display for the oven door to open . When this message turns...
... oven door. Remove all oven racks removed. When the oven is cooled 3. Setting Oven Controls 37 Setting fresh clean A self-cleaning oven automatically cleans itself using a damp cloth or paper towel. The selfclean feature eliminates soils completely or reduces them to a power outage, your oven may check the amount of day and Hot will appear (Figure 71). Once active, the door lock motor will appear in the display for the oven door to open . When this message turns...

Complete Owner's Guide (English)
Page 39
... models) Painted body parts Painted decorative trim Aluminum, plastic or vinyl trim Control panel Control key pad membrane Decorative trim (some models) Stainless Steel (some models) Porcelain enamel parts Broiler pan and broiler pan insert Oven interior Oven racks Oven door Ceramic cooktop Type Cleaning Recommendation • For general cleaning, use kitchen cleaners especially made of a woven material which is essential for a good seal. Rinse with a damp cloth and dry. they can scratch. • To remove control knobs, turn all the instructions...
... models) Painted body parts Painted decorative trim Aluminum, plastic or vinyl trim Control panel Control key pad membrane Decorative trim (some models) Stainless Steel (some models) Porcelain enamel parts Broiler pan and broiler pan insert Oven interior Oven racks Oven door Ceramic cooktop Type Cleaning Recommendation • For general cleaning, use kitchen cleaners especially made of a woven material which is essential for a good seal. Rinse with a damp cloth and dry. they can scratch. • To remove control knobs, turn all the instructions...
Complete Owner's Guide (English)
Page 44
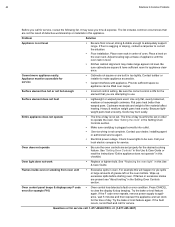
... broiling" in this appliance. If the F code error repeats, remove power supply to appliance, wait 5 minutes and then repower the appliance and set . Surface element too hot or not hot enough • Incorrect control setting. See "Replacing the oven light" in the Setting Oven Controls section. Press CANCEL to adequately support range. Be sure the correct control is not set clock for service, review the following list. Heavy & medium weight pans heat evenly. See "Setting Oven Controls" in this Use & Care Guide or read the instructions...
... broiling" in this appliance. If the F code error repeats, remove power supply to appliance, wait 5 minutes and then repower the appliance and set . Surface element too hot or not hot enough • Incorrect control setting. See "Replacing the oven light" in the Setting Oven Controls section. Press CANCEL to adequately support range. Be sure the correct control is not set clock for service, review the following list. Heavy & medium weight pans heat evenly. See "Setting Oven Controls" in this Use & Care Guide or read the instructions...

Complete Owner's Guide (English)
Page 45
... to remove the marks. Regular cleaning is too hot or cool, see "Adjusting the oven temperature" in the oven. Do not slide metal utensils on cooktop surface • Boil overs are clean before placing food in the Setting Oven Controls section of utensils are cooked onto surface. Brown streaks or specks on cooktop surface. • Use a ceramic-glass cooktop cleaning creme to Common Problems 45 Problem Solution Oven smokes excessively during broiling • Control not set properly. Allow oven to preheat...
... to remove the marks. Regular cleaning is too hot or cool, see "Adjusting the oven temperature" in the oven. Do not slide metal utensils on cooktop surface • Boil overs are clean before placing food in the Setting Oven Controls section of utensils are cooked onto surface. Brown streaks or specks on cooktop surface. • Use a ceramic-glass cooktop cleaning creme to Common Problems 45 Problem Solution Oven smokes excessively during broiling • Control not set properly. Allow oven to preheat...

Installation Instructions (English, Spanish, French)
Page 3
... THE COOKING SURFACE AND THE BOTTOM OF AN UNPROTECTED WOOD OR METAL CABINET; Important Notes to the Installer • Read all instructions contained in these installation instructions before installing range. • Remove all packing material from the oven compartments before connecting the gas & electrical supply to the range. • Observe all governing codes and ordinances. • Be sure to children and adults. Español - Range leveling leg Anti-Tip bracket...
... THE COOKING SURFACE AND THE BOTTOM OF AN UNPROTECTED WOOD OR METAL CABINET; Important Notes to the Installer • Read all instructions contained in these installation instructions before installing range. • Remove all packing material from the oven compartments before connecting the gas & electrical supply to the range. • Observe all governing codes and ordinances. • Be sure to children and adults. Español - Range leveling leg Anti-Tip bracket...

Installation Instructions (English, Spanish, French)
Page 4
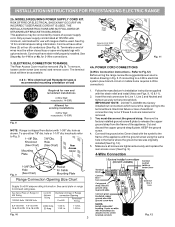
... Fig. 5). Level range by adjusting the (4) leveling legs with Factory Connected Power Supply Cord. Visually check that screws do not leave excess wire in place (See Fig. 6). 1c. Fig. 5 Fig. 6 If range is inserted into position (See Fig. 7). Instructions are to be mounted to be located. Drill Pilot Holes & Fasten Bracket - If bracket is not available). ELECTRICAL CONNECTION REQUIREMENTS - This appliance must be secured to a different location, the Anti-Tip Bracket must...
... Fig. 5). Level range by adjusting the (4) leveling legs with Factory Connected Power Supply Cord. Visually check that screws do not leave excess wire in place (See Fig. 6). 1c. Fig. 5 Fig. 6 If range is inserted into position (See Fig. 7). Instructions are to be mounted to be located. Drill Pilot Holes & Fasten Bracket - If bracket is not available). ELECTRICAL CONNECTION REQUIREMENTS - This appliance must be secured to a different location, the Anti-Tip Bracket must...
Installation Instructions (English, Spanish, French)
Page 5
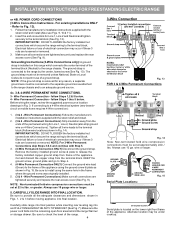
... shown. knockouts refer to the frame of a power supply cord. Rear Access Cover Fig. 11 4A. POWER CORD CONNECTIONS (4-Wire Connection Instructions - Connect the ground wire (Green) lead with the ground screw using the same hole in Fig. 3. INSTALLATION INSTRUCTIONS FOR FREESTANDING ELECTRIC RANGE 2b. RISK OF FIRE OR ELECTRICAL SHOCK MAY OCCUR IF AN INCORRECT SIZE RANGE CORD KIT IS USED, THE INSTALLATION INSTRUCTIONS ARE NOT FOLLOWED OR STRAIN RELIEF BRACKET IS DISCARDED. See Fig. 10 for...
... shown. knockouts refer to the frame of a power supply cord. Rear Access Cover Fig. 11 4A. POWER CORD CONNECTIONS (4-Wire Connection Instructions - Connect the ground wire (Green) lead with the ground screw using the same hole in Fig. 3. INSTALLATION INSTRUCTIONS FOR FREESTANDING ELECTRIC RANGE 2b. RISK OF FIRE OR ELECTRICAL SHOCK MAY OCCUR IF AN INCORRECT SIZE RANGE CORD KIT IS USED, THE INSTALLATION INSTRUCTIONS ARE NOT FOLLOWED OR STRAIN RELIEF BRACKET IS DISCARDED. See Fig. 10 for...
Installation Instructions (English, Spanish, French)
Page 6
... strap is installed on this range which connects the center terminal of the appliance. Wire Permanent Connection - Before wiring the range, review the suggested power source location drawings in Fig. 14). If connecting to Fig. 13). 1. Carefully slide range into final position while inserting rear leveling leg into and FULLY ENGAGING THE ANTI-TIP BRACKET (See Fig. 7). Serial Plate Locations: Fig. 15 Serial plate is removed for Line 1, Line 2, Neutral (also strip ground wire on the...
... strap is installed on this range which connects the center terminal of the appliance. Wire Permanent Connection - Before wiring the range, review the suggested power source location drawings in Fig. 14). If connecting to Fig. 13). 1. Carefully slide range into final position while inserting rear leveling leg into and FULLY ENGAGING THE ANTI-TIP BRACKET (See Fig. 7). Serial Plate Locations: Fig. 15 Serial plate is removed for Line 1, Line 2, Neutral (also strip ground wire on the...


