
Use and Care Manual
Page 1
Use & Care Guide Induction Cooktop Dishwasher 318 200 630 (0602) Rev. A
Use & Care Guide Induction Cooktop Dishwasher 318 200 630 (0602) Rev. A
Use and Care Manual
Page 2
QUESTIONS? For toll-free telephone support in the USA Printed in the U.S. Post Office Box 212378, Augusta, Georgia 30917, USA All rights reserved. and Canada: 1-877-4ELECTROLUX (1-877-435-3287) For online support and internet product information: www.electrolux.com ©2006 Electrolux Home Products, Inc. 2 Finding Information MAKE A RECORD FOR FUTURE USE Brand Purchase Date Model Number Serial Number NOTE The serial and model numbers may be found on the serial plate located under the cooktop.
QUESTIONS? For toll-free telephone support in the USA Printed in the U.S. Post Office Box 212378, Augusta, Georgia 30917, USA All rights reserved. and Canada: 1-877-4ELECTROLUX (1-877-435-3287) For online support and internet product information: www.electrolux.com ©2006 Electrolux Home Products, Inc. 2 Finding Information MAKE A RECORD FOR FUTURE USE Brand Purchase Date Model Number Serial Number NOTE The serial and model numbers may be found on the serial plate located under the cooktop.
Use and Care Manual
Page 3
... use 2 Questions 2 Safety 4-6 Important Safety Instructions 4 Induction Cooktop Features 7-8 Induction Cooktop Display Messages .......... 9-10 LED Messages or Light Indicators Displayed by Main Control 9 LED Messages or Light Indicators Displayed by Cooking Zone Controls 9-10 Before Using the Cooktop 11-13 Use the Correct Cookware Type 11 Minimum Pan... Heat Food 21 Cooking Zone Heats Food Too Hot or Not Enough 22 Food Does Not Heat Evenly 22 Poor Cooking Results 22 Cooktop Zone Control Displays E and 2 Digits LED Main Control Displays 00, 03, 04, 05, 06 or 07 ........ 22 Cooking ...
... use 2 Questions 2 Safety 4-6 Important Safety Instructions 4 Induction Cooktop Features 7-8 Induction Cooktop Display Messages .......... 9-10 LED Messages or Light Indicators Displayed by Main Control 9 LED Messages or Light Indicators Displayed by Cooking Zone Controls 9-10 Before Using the Cooktop 11-13 Use the Correct Cookware Type 11 Minimum Pan... Heat Food 21 Cooking Zone Heats Food Too Hot or Not Enough 22 Food Does Not Heat Evenly 22 Poor Cooking Results 22 Cooktop Zone Control Displays E and 2 Digits LED Main Control Displays 00, 03, 04, 05, 06 or 07 ........ 22 Cooking ...
Use and Care Manual
Page 4
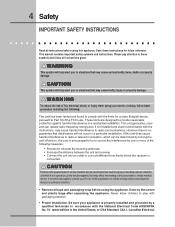
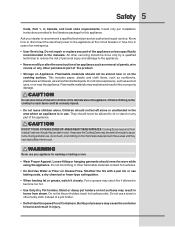
... has been tested and found to comply with a pacemaker or similar medical device should exercise caution using or standing near an induction unit while it is no guarantee that to consult your Doctor or the pacemaker or similar medical device manufacturer about your appliance ...Destroy the carton and plastic bags after unpacking the appliance. Save these symbols and follow all tape and packaging wrap before using your electric cooktop, follow basic precaution including the following measures: • Reorient or relocate the receiving antennae. • Increase the distance between the ...
... has been tested and found to comply with a pacemaker or similar medical device should exercise caution using or standing near an induction unit while it is no guarantee that to consult your Doctor or the pacemaker or similar medical device manufacturer about your appliance ...Destroy the carton and plastic bags after unpacking the appliance. Save these symbols and follow all tape and packaging wrap before using your electric cooktop, follow basic precaution including the following measures: • Reorient or relocate the receiving antennae. • Increase the distance between the ...
Use and Care Manual
Page 5
... this appliance. Do not repair or replace any part of interest to cause burns. They should never be allowed to sit or stand on the cooktop to the appliance. • Never modify or alter the construction of an appliance such as removal of panels, wire covers or any part of pressure...
... this appliance. Do not repair or replace any part of interest to cause burns. They should never be allowed to sit or stand on the cooktop to the appliance. • Never modify or alter the construction of an appliance such as removal of panels, wire covers or any part of pressure...
Use and Care Manual
Page 6
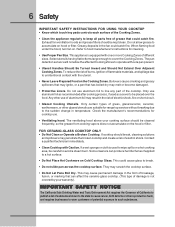
... hoods and grease filters should break, cleaning solutions and spillovers may result in temperature. FOR CERAMIC-GLASS COOKTOP ONLY • Do Not Clean or Operate a Broken Cooktop. If cooktop should be cleaned frequently, so the grease from cooking vapors does not accumulate on hood or filter. ...8226; Ventilating hood. Only certain types of substances known to the state to such substances. Some cleaners can affect the ceramic-glass cooktop. (This type of damage is not covered by your cooking surface should be kept clean. IMPORTANT SAFETY NOTICE The California Safe Drinking ...
... hoods and grease filters should break, cleaning solutions and spillovers may result in temperature. FOR CERAMIC-GLASS COOKTOP ONLY • Do Not Clean or Operate a Broken Cooktop. If cooktop should be cleaned frequently, so the grease from cooking vapors does not accumulate on hood or filter. ...8226; Ventilating hood. Only certain types of substances known to the state to such substances. Some cleaners can affect the ceramic-glass cooktop. (This type of damage is not covered by your cooking surface should be kept clean. IMPORTANT SAFETY NOTICE The California Safe Drinking ...
Use and Care Manual
Page 7
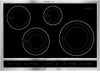
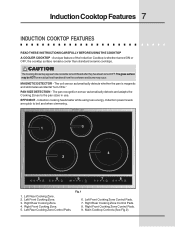
... coil sensor automatically detects whether the pan is whether turned ON or OFF, the cooktop surface remains cooler than standard ceramic cooktops. Left Front Cooking Zone Control Pads. 7. Left Front Cooking Zone. 3. A unique feature of the Induction Cooktop is magnetic and eliminates accidental "turn-ONs." Induction Cooktop Features 7 INDUCTION COOKTOP FEATURES READ THESE INSTRUCTIONS CAREFULLY BEFORE USING THE...
... coil sensor automatically detects whether the pan is whether turned ON or OFF, the cooktop surface remains cooler than standard ceramic cooktops. Left Front Cooking Zone Control Pads. 7. Left Front Cooking Zone. 3. A unique feature of the Induction Cooktop is magnetic and eliminates accidental "turn-ONs." Induction Cooktop Features 7 INDUCTION COOKTOP FEATURES READ THESE INSTRUCTIONS CAREFULLY BEFORE USING THE...
Use and Care Manual
Page 8
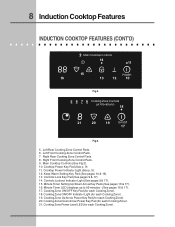
...Controls Lockout Indicator Light (See pages 9 & 17). 15. Cooking Zone ON/OFF Key Pad (for each Cooking Zone). 20. Main Cooktop Controls (See Fig 2). 10. Left Front Cooking Zone Control Pads. 7. Cooking Zone Up Arrow Power Key Pad (for each Cooking Zone...). Right Front Cooking Zone Control Pads. 9. Cooktop Power Indicator Light (See p. 9). 12. Cooking Zone Down Arrow Power Key Pad (for each Cooking Zone). 18. 8 Induction Cooktop Features INDUCTION COOKTOP FEATURES (CONT'D) 9 Main Cooktop Controls 14 11 15 POWER 16 13 12 10 Fig 2. 5 ...
...Controls Lockout Indicator Light (See pages 9 & 17). 15. Cooking Zone ON/OFF Key Pad (for each Cooking Zone). 20. Main Cooktop Controls (See Fig 2). 10. Left Front Cooking Zone Control Pads. 7. Cooking Zone Up Arrow Power Key Pad (for each Cooking Zone...). Right Front Cooking Zone Control Pads. 9. Cooktop Power Indicator Light (See p. 9). 12. Cooking Zone Down Arrow Power Key Pad (for each Cooking Zone). 18. 8 Induction Cooktop Features INDUCTION COOKTOP FEATURES (CONT'D) 9 Main Cooktop Controls 14 11 15 POWER 16 13 12 10 Fig 2. 5 ...
Use and Care Manual
Page 9
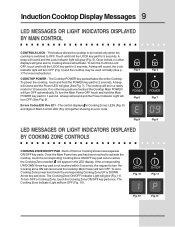
Induction Cooktop Display Messages 9 LED MESSAGES OR LIGHT INDICATORS DISPLAYED BY MAIN CONTROL CONTROLS LOCK - This feature allows the cooktop to active the Cooking Zone needed. 0 will appear in Main Control LED (Fig. 9) together showing an error code. A beep will sound and the Lock ... will turn the Controls Lock OFF, touch and hold the POWER key pad for 5 seconds. A beep will sound, the Lock indicator light will activate. The cooktop will turn OFF a Cooking Zone, touch the Cooking Zone ON/OFF key pad once. To turn OFF automatically. Fig. 4 Fig. 5 POWER Fig. 6 POWER Fig. 7...
Induction Cooktop Display Messages 9 LED MESSAGES OR LIGHT INDICATORS DISPLAYED BY MAIN CONTROL CONTROLS LOCK - This feature allows the cooktop to active the Cooking Zone needed. 0 will appear in Main Control LED (Fig. 9) together showing an error code. A beep will sound and the Lock ... will turn the Controls Lock OFF, touch and hold the POWER key pad for 5 seconds. A beep will sound, the Lock indicator light will activate. The cooktop will turn OFF a Cooking Zone, touch the Cooking Zone ON/OFF key pad once. To turn OFF automatically. Fig. 4 Fig. 5 POWER Fig. 6 POWER Fig. 7...
Use and Care Manual
Page 10
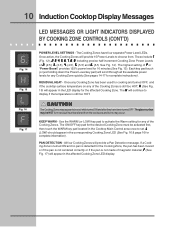
...for complete instructions). The H will provide a Pan Detection message. CAUTION The Cooking Zones may be HOT form residual heat transfered from . 10 Induction Cooktop Display Messages LED MESSAGES OR LIGHT INDICATORS DISPLAYED BY COOKING ZONE CONTROLS (CONT'D) Fig. 14 Fig. 15 Fig. 16 Fig. 17 POWER LEVEL... SETTINGS - These include 1 (Fig. 12), 2, 3, 4, 5, 6, 7, 8, 9; Use the WARM (or LOW) key pad to set. L (LOW) should appear in the Cooktop Main Control area once to activate the Warm setting for any of the Cooking Zones. PAN DETECTION - If a Cooking Zone is turned ON and no...
...for complete instructions). The H will provide a Pan Detection message. CAUTION The Cooking Zones may be HOT form residual heat transfered from . 10 Induction Cooktop Display Messages LED MESSAGES OR LIGHT INDICATORS DISPLAYED BY COOKING ZONE CONTROLS (CONT'D) Fig. 14 Fig. 15 Fig. 16 Fig. 17 POWER LEVEL... SETTINGS - These include 1 (Fig. 12), 2, 3, 4, 5, 6, 7, 8, 9; Use the WARM (or LOW) key pad to set. L (LOW) should appear in the Cooktop Main Control area once to activate the Warm setting for any of the Cooking Zones. PAN DETECTION - If a Cooking Zone is turned ON and no...
Use and Care Manual
Page 11
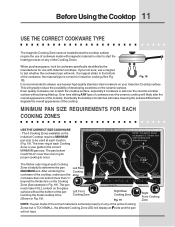
... material in Fig. 19). NOTE: Pan bottom should not exceed 1/2" (13mm) from outer Cooking Zone (Induction) rings The thicker outer ring at each Cooking Zone is your Induction Cooktop surface. On/Off On/Off Right Front Cooking Zone Fig. 18 18). Even quality cookware can scratch the... to the bottom of the Cooking Zones. It is slid over the ceramic cooktop will work. After centering the Cooking cookware of the cooktop. The pan bottom must make FULL contact on the Induction Cooktop require a MINIMUM pan size to test whether the cookware type will likely alter...
... material in Fig. 19). NOTE: Pan bottom should not exceed 1/2" (13mm) from outer Cooking Zone (Induction) rings The thicker outer ring at each Cooking Zone is your Induction Cooktop surface. On/Off On/Off Right Front Cooking Zone Fig. 18 18). Even quality cookware can scratch the... to the bottom of the Cooking Zones. It is slid over the ceramic cooktop will work. After centering the Cooking cookware of the cooktop. The pan bottom must make FULL contact on the Induction Cooktop require a MINIMUM pan size to test whether the cookware type will likely alter...
Use and Care Manual
Page 12
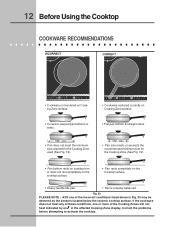
..., one of the Cooking Zones will not heat indicated by an F in Fig. 20 may be detected by the sensors located below the ceramic cooktop surface. ANY one or more of the incorrect conditions listed above in the affected Cooking Zone display. If the cookware does not meet the minimum...; Pan size meets or exceeds the recommended minimum size for the Cooking Zone (See Fig. 19). • Pan bottom rests on cooktop trim or does not rest completely on the cooktop surface. • Pan rests completely on Cooking Zone surface. • Curved or warped pan bottoms or sides. Fig. 20 PLEASE...
..., one of the Cooking Zones will not heat indicated by an F in Fig. 20 may be detected by the sensors located below the ceramic cooktop surface. ANY one or more of the incorrect conditions listed above in the affected Cooking Zone display. If the cookware does not meet the minimum...; Pan size meets or exceeds the recommended minimum size for the Cooking Zone (See Fig. 19). • Pan bottom rests on cooktop trim or does not rest completely on the cooktop surface. • Pan rests completely on Cooking Zone surface. • Curved or warped pan bottoms or sides. Fig. 20 PLEASE...
Use and Care Manual
Page 13
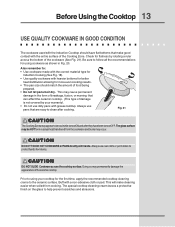
...; Do not use dirty pans with grease buildup. Also remember to: • Use cookware made with the correct material type for Induction Cooking (See Fig. 18). • Use quality cookware with heavier bottoms for better heat distribution allowing for the first time, apply the recommended... easier when soiled from the cookware and burns may permanently damage the appearance of the ceramic cooktop. Before Using the Cooktop 13 USE QUALITY COOKWARE IN GOOD CONDITION The cookware used with the Induction Cooktop should match the amount of food being prepared. • Do not let pans boil dry...
...; Do not use dirty pans with grease buildup. Also remember to: • Use cookware made with the correct material type for Induction Cooking (See Fig. 18). • Use quality cookware with heavier bottoms for better heat distribution allowing for the first time, apply the recommended... easier when soiled from the cookware and burns may permanently damage the appearance of the ceramic cooktop. Before Using the Cooktop 13 USE QUALITY COOKWARE IN GOOD CONDITION The cookware used with the Induction Cooktop should match the amount of food being prepared. • Do not let pans boil dry...

Use and Care Manual
Page 14
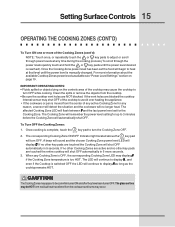
...Zone has been set yet. Lightly contact the pad with the prepared food on the Cooking Zone BEFORE setting any of the Cooktop controls. OPERATING THE COOKING ZONES The Induction cooktop has four Cooking Zones designed for 2 seconds (or until a beep sounds). The Power POWER Indicator light located above the... Cooking Zone LED will display 1 and the control will beep once). Do not just use the touch pads on the center of a pad, the cooktop may not respond to the selection made. To start at a "Power Boost" maximum power level (the Cooking Zone LED will display P and the ...
...Zone has been set yet. Lightly contact the pad with the prepared food on the Cooking Zone BEFORE setting any of the Cooktop controls. OPERATING THE COOKING ZONES The Induction cooktop has four Cooking Zones designed for 2 seconds (or until a beep sounds). The Power POWER Indicator light located above the... Cooking Zone LED will display 1 and the control will beep once). Do not just use the touch pads on the center of a pad, the cooktop may not respond to the selection made. To start at a "Power Boost" maximum power level (the Cooking Zone LED will display P and the ...
Use and Care Manual
Page 15
...moved from the center of any active Cooking Zone for up to 3 minutes before the Cooking Zone will continue to display H , and even if the Cooktop is complete, touch the key pad to turn the Cooking Zone OFF. If no other Cooking Zones are touched the Cooking Zone will shut OFF...; Fluids spilled or objects lying on page 10. Clean the spills or remove the objects from the cooktop. • Be sure the cooktop vent holes are blocked the cooktop internal sensor may shut OFF of the cooktop to avoid over heating the appliance. • If the cookware or pan is reached). The corresponding ...
...moved from the center of any active Cooking Zone for up to 3 minutes before the Cooking Zone will continue to display H , and even if the Cooktop is complete, touch the key pad to turn the Cooking Zone OFF. If no other Cooking Zones are touched the Cooking Zone will shut OFF...; Fluids spilled or objects lying on page 10. Clean the spills or remove the objects from the cooktop. • Be sure the cooktop vent holes are blocked the cooktop internal sensor may shut OFF of the cooktop to avoid over heating the appliance. • If the cookware or pan is reached). The corresponding ...
Use and Care Manual
Page 16
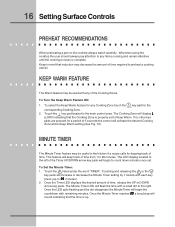
... On/Off corresponding Cooking Zone. 2. The LED display located to the left of the Timer UP/DOWN arrow key pads will display L (LOW) indicating that induction may decrease the amount of time required to 99 minutes. To Set the Minute Timer: 1. To Turn the Keep Warm Feature ON: 1. The Minute Timer... LED will keep track of the Cooking Zones. Keep in the main control area. Whenever using the cooktop the user should always pay attention to Keep Warm. Once the Timer LED displays the desired amount of time. If no other key pads are...
... On/Off corresponding Cooking Zone. 2. The LED display located to the left of the Timer UP/DOWN arrow key pads will display L (LOW) indicating that induction may decrease the amount of time required to 99 minutes. To Set the Minute Timer: 1. To Turn the Keep Warm Feature ON: 1. The Minute Timer... LED will keep track of the Cooking Zones. Keep in the main control area. Whenever using the cooktop the user should always pay attention to Keep Warm. Once the Timer LED displays the desired amount of time. If no other key pads are...
Use and Care Manual
Page 17
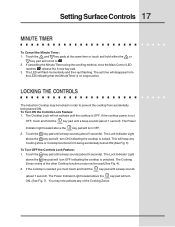
...located above the key pad will disappear from accidentally being accidentally turned ON (See Fig. 5) To Turn OFF the Controls Lock Feature: 1. The Cooktop Lock will turn OFF. The Power POWER Indicator light located above the key pad will not activate until a beep sounds (about 5 seconds). ...LOCKING THE CONTROLS The Induction Cooktop may be used (See Fig. 4). 2. Touch the and key pads at the same time or touch and hold the key pad until the cooktop is locked. To Turn ON the Controls Lock Feature: 1. If cancelling the...
...located above the key pad will disappear from accidentally being accidentally turned ON (See Fig. 5) To Turn OFF the Controls Lock Feature: 1. The Cooktop Lock will turn OFF. The Power POWER Indicator light located above the key pad will not activate until a beep sounds (about 5 seconds). ...LOCKING THE CONTROLS The Induction Cooktop may be used (See Fig. 4). 2. Touch the and key pads at the same time or touch and hold the key pad until the cooktop is locked. To Turn ON the Controls Lock Feature: 1. If cancelling the...
Use and Care Manual
Page 18
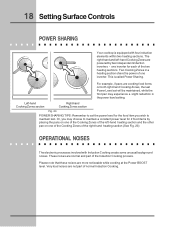
... within two heating sections. one inverter. Please note that these noises are not part of the Induction Cooking process. 18 Setting Surface Controls POWER SHARING Your cooktop is called Power Sharing. Or, you wish to set will be maintained, while the first pan may choose to maintain a constant power level... heating section and the other pan on one of the Cooking Zones of the left -hand Cooking Zones are normal and part of normal Induction Cooking. For example, if pans are cooking food items on both right-hand Cooking Zones, the last Power Level set the power level for...
... within two heating sections. one inverter. Please note that these noises are not part of the Induction Cooking process. 18 Setting Surface Controls POWER SHARING Your cooktop is called Power Sharing. Or, you wish to set will be maintained, while the first pan may choose to maintain a constant power level... heating section and the other pan on one of the Cooking Zones of the left -hand Cooking Zones are normal and part of normal Induction Cooking. For example, if pans are cooking food items on both right-hand Cooking Zones, the last Power Level set the power level for...
Use and Care Manual
Page 19
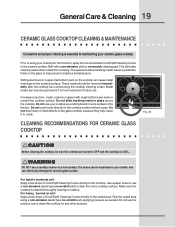
...to clean the entire cooktop surface. Use a paper towel or use . Rub the soiled area using the cooktop cleaning cream. Do not cook foods directly on the cooktop surface. Do not use the pad you use a cooktop cleaner on soil: Apply a few drops of CookTop® Cleaning Creme ...directly to clean the cooktop for the first time, apply the recommended CookTop® Cleaning Creme...
...to clean the entire cooktop surface. Use a paper towel or use . Rub the soiled area using the cooktop cleaning cream. Do not cook foods directly on the cooktop surface. Do not use the pad you use a cooktop cleaner on soil: Apply a few drops of CookTop® Cleaning Creme ...directly to clean the cooktop for the first time, apply the recommended CookTop® Cleaning Creme...
Use and Care Manual
Page 20
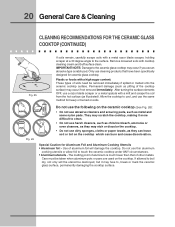
...Cooking Utensils • Aluminum foil - Do not use an abrasive type scratch pad. IMPORTANT NOTE: Damage to the ceramic glass cooktop may scratch the cooktop, making it may fuse to clean. • Do not use harsh cleaners, such as chlorine bleach, ammonia or oven ...metal razor blade scraper, holding scraper at a 30 degree angle to touch the ceramic cooktop under ANY circumstances. • Aluminum utensils - Special Caution for heavy or burned on the cooktop. 20 General Care & Cleaning CLEANING RECOMMENDATIONS FOR THE CERAMIC GLASS COOKTOP (CONTINUED) Fig. 25 If soils remain,...
...Cooking Utensils • Aluminum foil - Do not use an abrasive type scratch pad. IMPORTANT NOTE: Damage to the ceramic glass cooktop may scratch the cooktop, making it may fuse to clean. • Do not use harsh cleaners, such as chlorine bleach, ammonia or oven ...metal razor blade scraper, holding scraper at a 30 degree angle to touch the ceramic cooktop under ANY circumstances. • Aluminum utensils - Special Caution for heavy or burned on the cooktop. 20 General Care & Cleaning CLEANING RECOMMENDATIONS FOR THE CERAMIC GLASS COOKTOP (CONTINUED) Fig. 25 If soils remain,...


