Quick Install Guide
Page 2
...Should the programs prove defective following their respective holders. reserves the right to revise this publication and to time in this manual is sold or licensed as is. Edimax Technology Co., Ltd. For more information about this company, its distributor, or its dealer) assumes the entire cost of... such revision or changes. Edimax Technology Co., Ltd. makes no representations or warranties, either expressed or implied, with respect to the user manual on the CD-ROM. The product you have purchased and the setup screen may be...
...Should the programs prove defective following their respective holders. reserves the right to revise this publication and to time in this manual is sold or licensed as is. Edimax Technology Co., Ltd. For more information about this company, its distributor, or its dealer) assumes the entire cost of... such revision or changes. Edimax Technology Co., Ltd. makes no representations or warranties, either expressed or implied, with respect to the user manual on the CD-ROM. The product you have purchased and the setup screen may be...
Quick Install Guide
Page 4
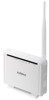
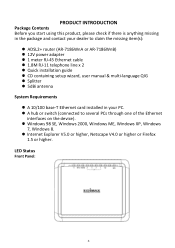
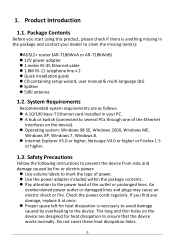
... contact your dealer to claim the missing item(s): ADSL2+ router (AR-7186WnA or AR-7186WnB) 12V power adapter 1 meter RJ-45 Ethernet cable 1.8M RJ-11 telephone line x 2 Quick installation guide CD containing setup wizard, user manual & multi-language QIG Splitter 5dBi antenna System Requirements ...
... contact your dealer to claim the missing item(s): ADSL2+ router (AR-7186WnA or AR-7186WnB) 12V power adapter 1 meter RJ-45 Ethernet cable 1.8M RJ-11 telephone line x 2 Quick installation guide CD containing setup wizard, user manual & multi-language QIG Splitter 5dBi antenna System Requirements ...

Quick Install Guide
Page 12
The Wizard page of the web-based interface allows fast configuration of the screen, click "Quick Start" and then "RUN WIZARD". In the navigation bar across the top of the Internet connection and other parameters. You will arrive at the system status page as shown below will appear. Enter the default username "admin" and default password "1234" and click "OK". 3. 2. Please refer to the user manual for detailed information on these parameters. 11 The login screen below . 4.
The Wizard page of the web-based interface allows fast configuration of the screen, click "Quick Start" and then "RUN WIZARD". In the navigation bar across the top of the Internet connection and other parameters. You will arrive at the system status page as shown below will appear. Enter the default username "admin" and default password "1234" and click "OK". 3. 2. Please refer to the user manual for detailed information on these parameters. 11 The login screen below . 4.

Quick Install Guide
Page 13
Follow the on the included CD-ROM for more detailed information regarding configuration and Internet connection type. 12 5. Note: Please refer to the User Manual on screen instructions until the wizard is complete.
Follow the on the included CD-ROM for more detailed information regarding configuration and Internet connection type. 12 5. Note: Please refer to the User Manual on screen instructions until the wizard is complete.
Manual
Page 2
... this product, please refer to notify any means, electronic, mechanical, magnetic, optical, chemical, manual or otherwise, without notice. Add: No. 3, Wu-Chuan 3rd Rd., Wu-Ku Industrial Park, New Taipei City, Taiwan Tel: +886-2-77396888 Email: sales@edimax.com.tw 2 The software and specifications are trademarks and/or registered trademarks of such...
... this product, please refer to notify any means, electronic, mechanical, magnetic, optical, chemical, manual or otherwise, without notice. Add: No. 3, Wu-Chuan 3rd Rd., Wu-Ku Industrial Park, New Taipei City, Taiwan Tel: +886-2-77396888 Email: sales@edimax.com.tw 2 The software and specifications are trademarks and/or registered trademarks of such...
Manual
Page 4
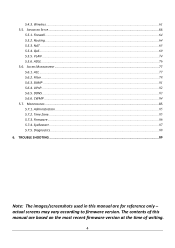
... to firmware version. SNMP ...81 5.6.4. Firmware ...86 5.7.4. SysRestart ...87 5.7.5. TROUBLE SHOOTING ...89 Note: The images/screenshots used in this manual are for reference only - ADSL ...76 5.6. DDNS ...83 5.6.6. ACL ...77 5.6.2. Time Zone...85 5.7.3. VLAN ...74 5.5.6. Firewall...64 ......78 5.6.3. UPnP...82 5.6.5. Administration ...85 5.7.2. QoS ...69 5.5.5. CWMP ...84 5.7. The contents of this manual are based on the most recent firmware version at the time of writing. 4 Routing...64 5.5.3. ADVANCED SETUP...64 5.5.1. Wireless...61 5.5. 5.4.3.
... to firmware version. SNMP ...81 5.6.4. Firmware ...86 5.7.4. SysRestart ...87 5.7.5. TROUBLE SHOOTING ...89 Note: The images/screenshots used in this manual are for reference only - ADSL ...76 5.6. DDNS ...83 5.6.6. ACL ...77 5.6.2. Time Zone...85 5.7.3. VLAN ...74 5.5.6. Firewall...64 ......78 5.6.3. UPnP...82 5.6.5. Administration ...85 5.7.2. QoS ...69 5.5.5. CWMP ...84 5.7. The contents of this manual are based on the most recent firmware version at the time of writing. 4 Routing...64 5.5.3. ADVANCED SETUP...64 5.5.1. Wireless...61 5.5. 5.4.3.
Manual
Page 5
... caused by overheating to claim the missing item(s): ADSL2+ router (AR-7186WnA or AR-7186WnB) 12V power adapter 1 meter RJ-45 Ethernet cable 1.8M RJ-11 telephone line x 2 Quick installation guide CD containing setup wizard, user manual & multi-language QIG Splitter 5dBi antenna 1.2. Check the power...
... caused by overheating to claim the missing item(s): ADSL2+ router (AR-7186WnA or AR-7186WnB) 12V power adapter 1 meter RJ-45 Ethernet cable 1.8M RJ-11 telephone line x 2 Quick installation guide CD containing setup wizard, user manual & multi-language QIG Splitter 5dBi antenna 1.2. Check the power...

Manual
Page 17
... be connected to the router either Windows 95/98/Me, 2000 or NT operating systems. For other operating systems (Macintosh, Sun, etc.), please follow the manual of the router is strongly recommended to desktop mode.
... be connected to the router either Windows 95/98/Me, 2000 or NT operating systems. For other operating systems (Macintosh, Sun, etc.), please follow the manual of the router is strongly recommended to desktop mode.
Manual
Page 55
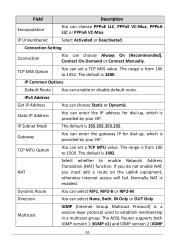
... set a TCP MTU value. The range is provided by your ISP. Field Description Encapsulation You can choose Always On (Recommended), Connect On-Demand or Connect Manually. IP Subnet Mask The default is enabled. Normally NAT is 255.255.255.255. Connection Setting Connection You can choose PPPoE LLC, PPPoE VC-Mux...
... set a TCP MTU value. The range is provided by your ISP. Field Description Encapsulation You can choose Always On (Recommended), Connect On-Demand or Connect Manually. IP Subnet Mask The default is enabled. Normally NAT is 255.255.255.255. Connection Setting Connection You can choose PPPoE LLC, PPPoE VC-Mux...
Manual
Page 59
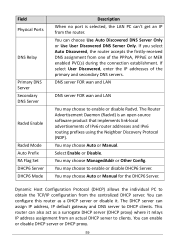
... using the Neighbor Discovery Protocol (NDP). DNS server FOR wan and LAN DNS server FOR wan and LAN You may choose Auto or Manual. You may choose Auto or Manual for the DHCP6 Server. You can enable or disable DHCP server or DHCP proxy. 59 If you select Auto Discovered, the router...
... using the Neighbor Discovery Protocol (NDP). DNS server FOR wan and LAN DNS server FOR wan and LAN You may choose Auto or Manual. You may choose Auto or Manual for the DHCP6 Server. You can enable or disable DHCP server or DHCP proxy. 59 If you select Auto Discovered, the router...

Manual
Page 85
...Password Enter the password to which you may also set new a password for scheduling services. You can access the WebManagement interface. If you manually set the time, you want to set the time or connect to a NTP (Network Time Protocol) server. Maintenance In the navigation ...bar, click Maintenance. The Maintenance page that can manually set the time zone. Administration Choose Maintenance > Administration, the page shown in the following figure appears. The default account is "admin" ...
...Password Enter the password to which you may also set new a password for scheduling services. You can access the WebManagement interface. If you manually set the time, you want to set the time or connect to a NTP (Network Time Protocol) server. Maintenance In the navigation ...bar, click Maintenance. The Maintenance page that can manually set the time zone. Administration Choose Maintenance > Administration, the page shown in the following figure appears. The default account is "admin" ...

Manual
Page 86
...can upgrade the firmware of the Router in this page: Field Description Synchronize You can choose NTP Server automatically, PC's Clock or time with Manually. Firmware Choose Maintenance > Firmware, the page shown in which area you want to use is on Browse to browse the local hard drive and... locate the firmware to be used for upgrade. 86 Saving NTP Server Set the NTP server manually. Address 5.7.3. You can enable the daylight saving time. Time Zone Choose the time zone in the following table describes the parameters of the...
...can upgrade the firmware of the Router in this page: Field Description Synchronize You can choose NTP Server automatically, PC's Clock or time with Manually. Firmware Choose Maintenance > Firmware, the page shown in which area you want to use is on Browse to browse the local hard drive and... locate the firmware to be used for upgrade. 86 Saving NTP Server Set the NTP server manually. Address 5.7.3. You can enable the daylight saving time. Time Zone Choose the time zone in the following table describes the parameters of the...