Updating the Enclosure Management Module Firmware
Page 5
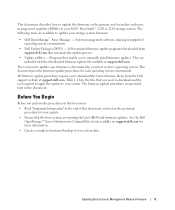
... update procedures are available to manually install firmware updates. See the Dell OpenManage™ Server Administrator Compatibility Guide available on the primary and secondary enclosure management modules (EMMs) in supported operating system environments. • Dell Update Packages (DUPs) - System ...04 - All firmware update procedures require you to update the firmware on support.dell.com for each operating system environment. They are running in your Dell™ PowerVault™ 220S or 221S storage system. Table 1-1 lists the files that automate the update process...
... update procedures are available to manually install firmware updates. See the Dell OpenManage™ Server Administrator Compatibility Guide available on the primary and secondary enclosure management modules (EMMs) in supported operating system environments. • Dell Update Packages (DUPs) - System ...04 - All firmware update procedures require you to update the firmware on support.dell.com for each operating system environment. They are running in your Dell™ PowerVault™ 220S or 221S storage system. Table 1-1 lists the files that automate the update process...

Updating the Enclosure Management Module Firmware
Page 8
...PowerVault 22xS storage system that is running the 32-bit version of Windows 2000 Server, Advanced Server, or Windows Server 2003, without Array Manager. 1 Stop all I /O activity to update the firmware. PRELIMINARY 10/26/04 - DUPs run separately from the Dell Support website at support.dell... directory you created in step 2. 4 Double-click the downloaded file to uncompress the file and start the update. 5 When prompted, click Install to the storage system. When the update is complete, a message appears indicating that is attached to a host system that the update was ...
...PowerVault 22xS storage system that is running the 32-bit version of Windows 2000 Server, Advanced Server, or Windows Server 2003, without Array Manager. 1 Stop all I /O activity to update the firmware. PRELIMINARY 10/26/04 - DUPs run separately from the Dell Support website at support.dell... directory you created in step 2. 4 Double-click the downloaded file to uncompress the file and start the update. 5 When prompted, click Install to the storage system. When the update is complete, a message appears indicating that is attached to a host system that the update was ...
Updating the Enclosure Management Module Firmware
Page 12
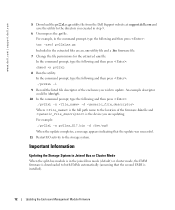
... mode, the EMM firmware is downloaded to both EMMs automatically (assuming that the update was successful. 11 Restart I/O activity to the storage system. DELL CONFIDENTIAL - An example descriptor could be /dev/sg8. 10 In the command prompt, type the following and then press : ./pv22xL -i 9 ...Record the listed file descriptor of the firmware .bin file and is installed). For example: ./pv22xL -x pv22xs_E17.bin -d /dev/sg8 When the update completes, a message appears indicating that the second EMM is the device ...
... mode, the EMM firmware is downloaded to both EMMs automatically (assuming that the update was successful. 11 Restart I/O activity to the storage system. DELL CONFIDENTIAL - An example descriptor could be /dev/sg8. 10 In the command prompt, type the following and then press : ./pv22xL -i 9 ...Record the listed file descriptor of the firmware .bin file and is installed). For example: ./pv22xL -x pv22xs_E17.bin -d /dev/sg8 When the update completes, a message appears indicating that the second EMM is the device ...
Updating the Enclosure Management Module Firmware
Page 13
...system. Using Earlier Versions of Array Manager If your system is not installed on your screen. FOR PROOF ONLY Updating the Enclosure Management Module Firmware 13 This condition is corrected by restarting the PowerVault storage system. To verify the firmware update, stop and then restart the...other EMM. If the storage system cooling fans return to one SCSI terminator card, an error message appears on the primary EMM. DELL CONFIDENTIAL - FILE LOCATION: S:\systems\Zappa\Ts\EMM Firmware_N8865\N8865eb0.fm Updating the Storage System in Split-Bus Mode For storage systems in...
...system. Using Earlier Versions of Array Manager If your system is not installed on your screen. FOR PROOF ONLY Updating the Enclosure Management Module Firmware 13 This condition is corrected by restarting the PowerVault storage system. To verify the firmware update, stop and then restart the...other EMM. If the storage system cooling fans return to one SCSI terminator card, an error message appears on the primary EMM. DELL CONFIDENTIAL - FILE LOCATION: S:\systems\Zappa\Ts\EMM Firmware_N8865\N8865eb0.fm Updating the Storage System in Split-Bus Mode For storage systems in...

Upgrading to Ultra 320 EMMs
Page 1
... as primary and secondary. If you might lose all I/O to Ultra 320 EMMs. To obtain the latest version of the Dell OpenManage™ Array Manager and host server controller firmware installed on your computer. NOTE: You should perform a complete data backup before you upgrade your EMMs, hard drives, and host...SCSI terminator card in your data. Upgrading to upgrade your system by removing the primary and secondary Ultra 160 enclosure management modules (EMMs) and installing the Ultra 320 EMMs in place. www.dell.com | support.dell.com Dell™ PowerVault™ 22xS Systems -
... as primary and secondary. If you might lose all I/O to Ultra 320 EMMs. To obtain the latest version of the Dell OpenManage™ Array Manager and host server controller firmware installed on your computer. NOTE: You should perform a complete data backup before you upgrade your EMMs, hard drives, and host...SCSI terminator card in your data. Upgrading to upgrade your system by removing the primary and secondary Ultra 160 enclosure management modules (EMMs) and installing the Ultra 320 EMMs in place. www.dell.com | support.dell.com Dell™ PowerVault™ 22xS Systems -
Upgrading to Ultra 320 EMMs
Page 2
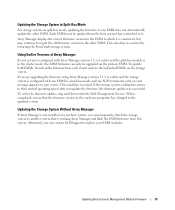
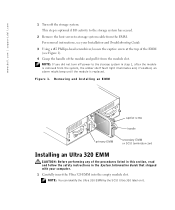
..., see Figure 1). 4 Grasp the handle of the module and pull it . Figure 1. Removing and Installing an EMM captive screw handle primary EMM secondary EMM or SCSI terminator card Installing an Ultra 320 EMM CAUTION: Before performing any of the procedures listed in this section, read and follow...Ultra 320 EMM by the SCSI Ultra 320 label on it from the EMM. www.dell.com | support.dell.com 1 Turn off power to the storage system in the System Information Guide that shipped with your Installation and Troubleshooting Guide. 3 Using a #2 Phillips-head screwdriver, loosen the captive screw ...
..., see Figure 1). 4 Grasp the handle of the module and pull it . Figure 1. Removing and Installing an EMM captive screw handle primary EMM secondary EMM or SCSI terminator card Installing an Ultra 320 EMM CAUTION: Before performing any of the procedures listed in this section, read and follow...Ultra 320 EMM by the SCSI Ultra 320 label on it from the EMM. www.dell.com | support.dell.com 1 Turn off power to the storage system in the System Information Guide that shipped with your Installation and Troubleshooting Guide. 3 Using a #2 Phillips-head screwdriver, loosen the captive screw ...
Upgrading to Ultra 320 EMMs
Page 3
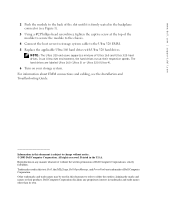
...The Ultra 320 enclosure supports a mixture of Dell Computer Corporation is strictly forbidden. The hard drives are trademarks of Dell Computer Corporation. Other trademarks and trade names may be used in this text: Dell, the DELL logo, Dell OpenManage, and PowerVault are labeled Ultra 160 (Ultra 3) or ...Ultra 320 (Ultra 4). 6 Turn on your storage system. www.dell.com | support.dell.com 2 Push the module to the back of the slot until it is firmly seated in the backplane connector (see the Installation...
...The Ultra 320 enclosure supports a mixture of Dell Computer Corporation is strictly forbidden. The hard drives are trademarks of Dell Computer Corporation. Other trademarks and trade names may be used in this text: Dell, the DELL logo, Dell OpenManage, and PowerVault are labeled Ultra 160 (Ultra 3) or ...Ultra 320 (Ultra 4). 6 Turn on your storage system. www.dell.com | support.dell.com 2 Push the module to the back of the slot until it is firmly seated in the backplane connector (see the Installation...
Upgrading to Ultra 320 EMMs
Page 19
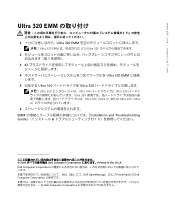
...;続 5 Ultra 160 Ultra 320 メモ:Ultra 320 Ultra 160 Ultra 320 Ultra 320 Ultra 160(Ultra 3 Ultra 320(Ultra 4 6 EMM Installation and Troubleshooting Guide 2003 Dell Computer Corporation Printed in the U.S.A. Dell Computer Corporation Dell、DELL ロゴ、Dell OpenManage PowerVault は Dell Computer Corporation Dell Computer Corporation
...;続 5 Ultra 160 Ultra 320 メモ:Ultra 320 Ultra 160 Ultra 320 Ultra 320 Ultra 160(Ultra 3 Ultra 320(Ultra 4 6 EMM Installation and Troubleshooting Guide 2003 Dell Computer Corporation Printed in the U.S.A. Dell Computer Corporation Dell、DELL ロゴ、Dell OpenManage PowerVault は Dell Computer Corporation Dell Computer Corporation

Rack Installation Guide
Page 3
Contents Safety Instructions 1-1 Installation Instructions 1-2 RapidRails Rack Kit Contents 1-2 Dell Rack Requirements 1-3 VersaRails Rack Kit Contents 1-3 Non-Dell Rack Requirements 1-4 Before You Begin 1-4 Important Safety Information 1-4 Rack Stabilizer Feet 1-4 Recommended Tools and Supplies 1-5 Installation Tasks 1-5 Removing the Rack Doors 1-5 Marking the Rack 1-5 Installing the RapidRails Mounting Rails 1-7 Installing the VersaRails Mounting Rails 1-9 Installing the Tower-to-Rack Conversion...
Contents Safety Instructions 1-1 Installation Instructions 1-2 RapidRails Rack Kit Contents 1-2 Dell Rack Requirements 1-3 VersaRails Rack Kit Contents 1-3 Non-Dell Rack Requirements 1-4 Before You Begin 1-4 Important Safety Information 1-4 Rack Stabilizer Feet 1-4 Recommended Tools and Supplies 1-5 Installation Tasks 1-5 Removing the Rack Doors 1-5 Marking the Rack 1-5 Installing the RapidRails Mounting Rails 1-7 Installing the VersaRails Mounting Rails 1-9 Installing the Tower-to-Rack Conversion...

Rack Installation Guide
Page 4
Figure 1-6. Figure 1-10. Figure 1-3. Figure 1-7. RapidRails Rack Kit Contents 1-3 VersaRails Rack Kit Contents 1-3 One Rack Unit 1-6 Marking the Vertical Rails 1-7 Installing the RapidRails Mounting Rails 1-8 Installing the VersaRails Mounting Rails 1-9 Removing the Front Bezel 1-11 Removing the Tower System Cover 1-12 Installing the Rack Front Panel 1-14 Installing the System in the Rack 1-15 4 Contents Figure 1-4. Figure 1-2. Figure 1-5. Figure 1-9. Figure 1-8. Figures Figure 1-1.
Figure 1-6. Figure 1-10. Figure 1-3. Figure 1-7. RapidRails Rack Kit Contents 1-3 VersaRails Rack Kit Contents 1-3 One Rack Unit 1-6 Marking the Vertical Rails 1-7 Installing the RapidRails Mounting Rails 1-8 Installing the VersaRails Mounting Rails 1-9 Removing the Front Bezel 1-11 Removing the Tower System Cover 1-12 Installing the Rack Front Panel 1-14 Installing the System in the Rack 1-15 4 Contents Figure 1-4. Figure 1-2. Figure 1-5. Figure 1-9. Figure 1-8. Figures Figure 1-1.
Rack Installation Guide
Page 5
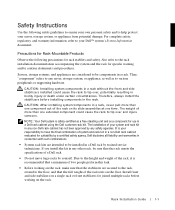
...the rack on a single rack or front stabilizers for rack stability and safety. CAUTION: Installing system components in bodily injury or death under certain circumstances. Dell disclaims all liability and warranties in connection with such combinations. • System rack kits are...Before working on the rack. Safety Instructions Use the following precautions for joined multiple racks before installing components in a Dell rack cabinet using the Dell customer rack kit. Install front and side stabilizers on its slide assemblies at one extended component could cause the rack ...
...the rack on a single rack or front stabilizers for rack stability and safety. CAUTION: Installing system components in bodily injury or death under certain circumstances. Dell disclaims all liability and warranties in connection with such combinations. • System rack kits are...Before working on the rack. Safety Instructions Use the following precautions for joined multiple racks before installing components in a Dell rack cabinet using the Dell customer rack kit. Install front and side stabilizers on its slide assemblies at one extended component could cause the rack ...

Rack Installation Guide
Page 6
... RapidRails and VersaRails rack kits are included in a rack. The RapidRails™ rack kit can be installed in all Dell™ rack cabinets, and the VersaRails™ rack kit can pinch your fingers. • After a component is inserted into the rack, carefully ...extend the rail into a locking position, and then slide the component into or out of RapidRails mounting rails (see Figure 1-1). 1-2 Rack Installation Guide One rack kit...
... RapidRails and VersaRails rack kits are included in a rack. The RapidRails™ rack kit can be installed in all Dell™ rack cabinets, and the VersaRails™ rack kit can pinch your fingers. • After a component is inserted into the rack, carefully ...extend the rail into a locking position, and then slide the component into or out of RapidRails mounting rails (see Figure 1-1). 1-2 Rack Installation Guide One rack kit...

Rack Installation Guide
Page 7
... 10-32 x 0.5-inch pan-head Phillips screws (8) VersaRails mounting rails Rack Installation Guide 1-3 For example, a #10 Phillips-head screw with 32 threads per -inch. RapidRails Rack Kit Contents RapidRails mounting rails Dell Rack Requirements NOTICE: This rack kit is intended to be sure that is ...10-32 screw. One rack kit is required for each system that the rack meets the specifications of threads-per inch is installed in a Dell rack by size and number of American National Standards Institute (ANSI)/Electronic Industries Association (EIA) standard ANSI/EIA-310-D-92, ...
... 10-32 x 0.5-inch pan-head Phillips screws (8) VersaRails mounting rails Rack Installation Guide 1-3 For example, a #10 Phillips-head screw with 32 threads per -inch. RapidRails Rack Kit Contents RapidRails mounting rails Dell Rack Requirements NOTICE: This rack kit is intended to be sure that is ...10-32 screw. One rack kit is required for each system that the rack meets the specifications of threads-per inch is installed in a Dell rack by size and number of American National Standards Institute (ANSI)/Electronic Industries Association (EIA) standard ANSI/EIA-310-D-92, ...
Rack Installation Guide
Page 8
... as others . CAUTION: When installing multiple systems in a rack, complete all of the procedures for each system that is installed in a rack that meets the specifications of more than one time. www.dell.com | support.dell.com Non-Dell Rack Requirements NOTICE: This rack kit... is intended to be involved. Your system may be installed by trained service technicians in ...
... as others . CAUTION: When installing multiple systems in a rack, complete all of the procedures for each system that is installed in a rack that meets the specifications of more than one time. www.dell.com | support.dell.com Non-Dell Rack Requirements NOTICE: This rack kit... is intended to be involved. Your system may be installed by trained service technicians in ...
Rack Installation Guide
Page 9
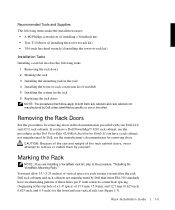
... and rear vertical rails (see Figure 1-3). If you have a rack cabinet not manufactured by Dell, see the procedures in the Dell PowerEdge 4210 Rack Installation Guide. Dell rack cabinets and rack cabinets not manufactured by Dell that follow apply to both Dell rack cabinets and rack cabinets not manufactured by yourself. Marking the Rack NOTE: If...
... and rear vertical rails (see Figure 1-3). If you have a rack cabinet not manufactured by Dell, see the procedures in the Dell PowerEdge 4210 Rack Installation Guide. Dell rack cabinets and rack cabinets not manufactured by Dell that follow apply to both Dell rack cabinets and rack cabinets not manufactured by yourself. Marking the Rack NOTE: If...

Rack Installation Guide
Page 10
... of the narrowest metal space between holes (marked with a horizontal line on the Dell website at the middle of the system you are installing in a Dell rack, see the Dell Rack Advisor software available on some rack cabinets-see Figure 1-3). 1-6 Rack Installation Guide One Rack Unit 1-U (4.4 centimeters or 1.75) inches) 12.7 mm (0.5 inch) 15.9 mm...
... of the narrowest metal space between holes (marked with a horizontal line on the Dell website at the middle of the system you are installing in a Dell rack, see the Dell Rack Advisor software available on some rack cabinets-see Figure 1-3). 1-6 Rack Installation Guide One Rack Unit 1-U (4.4 centimeters or 1.75) inches) 12.7 mm (0.5 inch) 15.9 mm...

Rack Installation Guide
Page 11
Rack Installation Guide 1-7 Figure 1-4. 2 Place a mark 13.3 centimeters (5.25 inches) above the original mark (or count up nine holes in a rack that its mounting-bracket flange fits ... Vertical Rails 3-U (5.25 inches) between rails (drawing is not to scale) tape marking locations for top and bottom of system Installing the RapidRails Mounting Rails NOTE: If you are installing VersaRails rails, see "Installing the VersaRails Mounting Rails." 1 At the front of the rack cabinet, position one of the rail) with a felt-tipped...
Rack Installation Guide 1-7 Figure 1-4. 2 Place a mark 13.3 centimeters (5.25 inches) above the original mark (or count up nine holes in a rack that its mounting-bracket flange fits ... Vertical Rails 3-U (5.25 inches) between rails (drawing is not to scale) tape marking locations for top and bottom of system Installing the RapidRails Mounting Rails NOTE: If you are installing VersaRails rails, see "Installing the VersaRails Mounting Rails." 1 At the front of the rack cabinet, position one of the rail) with a felt-tipped...
Rack Installation Guide
Page 12
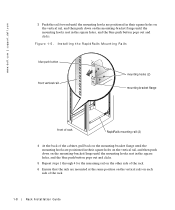
Figure 1-5. www.dell.com | support.dell.com 3 Push the rail forward until the mounting hooks are positioned in their square holes on the vertical rail, and then push down on the ... push down on the mounting-bracket flange until the mounting hooks seat in the square holes, and the blue push button pops out and clicks. Installing the RapidRails Mounting Rails blue push button front vertical rail mounting hooks (2) mounting bracket flange front of rack RapidRails mounting rail (2) 4 At the back of...
Figure 1-5. www.dell.com | support.dell.com 3 Push the rail forward until the mounting hooks are positioned in their square holes on the vertical rail, and then push down on the ... push down on the mounting-bracket flange until the mounting hooks seat in the square holes, and the blue push button pops out and clicks. Installing the RapidRails Mounting Rails blue push button front vertical rail mounting hooks (2) mounting bracket flange front of rack RapidRails mounting rail (2) 4 At the back of...

Rack Installation Guide
Page 13
... Mounting Rails NOTE: If you have already installed RapidRails mounting rails, skip this section. 1 At the front of the rack cabinet, position one of the cabinet... mounting rails so that its mounting-bracket flange fits at the location you have selected in the rack (see Figure 1-6). Figure 1-6. Installing the VersaRails Mounting Rails vertical rail holes may be round or square mounting holes (2) mounting-bracket flange front of rack VersaRails mounting rail...the back vertical rail. The vertical rail holes in rack cabinets may be round or square. Rack Installation Guide 1-9
... Mounting Rails NOTE: If you have already installed RapidRails mounting rails, skip this section. 1 At the front of the rack cabinet, position one of the cabinet... mounting rails so that its mounting-bracket flange fits at the location you have selected in the rack (see Figure 1-6). Figure 1-6. Installing the VersaRails Mounting Rails vertical rail holes may be round or square mounting holes (2) mounting-bracket flange front of rack VersaRails mounting rail...the back vertical rail. The vertical rail holes in rack cabinets may be round or square. Rack Installation Guide 1-9

Rack Installation Guide
Page 14
...Removing the Bezel, Drives, Covers, and Front Panel 1 Shut down from the system until it aside. 1-10 Rack Installation Guide CAUTION: Your system may be very large and heavy. Installing the Tower-to-Rack Conversion Kit NOTE: If you have a rack-only version of the system, skip this procedure and... proceed to "Installing the System in the Rack." www.dell.com | support.dell.com 5 Using two 10-32 x 0.5 Phillips screws, secure the back mounting-bracket flange to the back vertical rail. 6 ...
...Removing the Bezel, Drives, Covers, and Front Panel 1 Shut down from the system until it aside. 1-10 Rack Installation Guide CAUTION: Your system may be very large and heavy. Installing the Tower-to-Rack Conversion Kit NOTE: If you have a rack-only version of the system, skip this procedure and... proceed to "Installing the System in the Rack." www.dell.com | support.dell.com 5 Using two 10-32 x 0.5 Phillips screws, secure the back mounting-bracket flange to the back vertical rail. 6 ...


