User Guide
Page 3
...A Notes, Cautions, and Warnings 13 1 Dell™ C1760nw/C1660w Color Printer User's Guide . . . . . 15 Conventions 15 2 Finding Information 17 3 Product Features 19 4 About the Printer 21 Front View 21 Rear View 22 Space Requirements 23 Operator Panel 23 Securing the Printer 24 Ordering Supplies... 25 Printer Setup 27 5 Connecting Your Printer 29 Connecting Printer to Computer or Network 29 Direct Connection 29 Wireless Connection 30 Ethernet Connection (Dell C1760nw Color Printer only 34 ...
...A Notes, Cautions, and Warnings 13 1 Dell™ C1760nw/C1660w Color Printer User's Guide . . . . . 15 Conventions 15 2 Finding Information 17 3 Product Features 19 4 About the Printer 21 Front View 21 Rear View 22 Space Requirements 23 Operator Panel 23 Securing the Printer 24 Ordering Supplies... 25 Printer Setup 27 5 Connecting Your Printer 29 Connecting Printer to Computer or Network 29 Direct Connection 29 Wireless Connection 30 Ethernet Connection (Dell C1760nw Color Printer only 34 ...
User Guide
Page 4
... Up Your Printer 37 Setting Initial Settings on the Operator Panel (Dell™ C1660w Color Printer Only 37 Printer Setup Using the Software and Documentation Disc 38 7 Setting the IP Address 39 Assigning an IP Address 39 The Operator Panel 39 The Tool Box 40 Verifying the IP ...Settings 41 The Operator Panel 41 The System Settings Report 41 The Ping Command 41 8 Loading Paper 43 Loading Print Media in the Multipurpose Feeder (MPF 43 Loading Print Media in the Priority Sheet Inserter (PSI) (Dell C1760nw Color Printer only 48 9 Installing Printer Drivers ...
... Up Your Printer 37 Setting Initial Settings on the Operator Panel (Dell™ C1660w Color Printer Only 37 Printer Setup Using the Software and Documentation Disc 38 7 Setting the IP Address 39 Assigning an IP Address 39 The Operator Panel 39 The Tool Box 40 Verifying the IP ...Settings 41 The Operator Panel 41 The System Settings Report 41 The Ping Command 41 8 Loading Paper 43 Loading Print Media in the Multipurpose Feeder (MPF 43 Loading Print Media in the Priority Sheet Inserter (PSI) (Dell C1760nw Color Printer only 48 9 Installing Printer Drivers ...
User Guide
Page 5
... Wi-Fi | WPS Button Backlight 78 Using the Operator Panel to Change Printer Settings 79 Printing a Device Settings Page 79 Changing the Language 80 The Operator Panel 80 The Tool Box 80 Setting the PowerSaver Time Option 80 12 Dell™ Printer Configuration Web Tool 81 Overview 81 Setting... Up the Dell Printer Configuration Web Tool 81 Setting ...
... Wi-Fi | WPS Button Backlight 78 Using the Operator Panel to Change Printer Settings 79 Printing a Device Settings Page 79 Changing the Language 80 The Operator Panel 80 The Tool Box 80 Setting the PowerSaver Time Option 80 12 Dell™ Printer Configuration Web Tool 81 Overview 81 Setting... Up the Dell Printer Configuration Web Tool 81 Setting ...
User Guide
Page 7
Job History 125 Error History 125 Color Test Page 125 Printing a Report/List Using the Operator Panel 125 Printing a Report/List Using the Tool Box 126 Admin Menu 126 Network 126 USB Settings 131 System Settings 131 Maintenance 133 Secure Settings 138 Panel Language ...
Job History 125 Error History 125 Color Test Page 125 Printing a Report/List Using the Operator Panel 125 Printing a Report/List Using the Tool Box 126 Admin Menu 126 Network 126 USB Settings 131 System Settings 131 Maintenance 133 Secure Settings 138 Panel Language ...
User Guide
Page 8
... When Using the Priority Sheet Inserter (PSI) (Dell C1760nw Color Printer only 165 Using the Output Tray Extension 166 Printing 167 17 Printing 169 Tips for Successful Printing 169 Tips on Storing Print Media 169 Avoiding Paper Jams 169 Sending a Job to Print 169 Canceling a Print Job 170 Canceling From the Operator Panel 170 Canceling a Job From the Computer Running...
... When Using the Priority Sheet Inserter (PSI) (Dell C1760nw Color Printer only 165 Using the Output Tray Extension 166 Printing 167 17 Printing 169 Tips for Successful Printing 169 Tips on Storing Print Media 169 Avoiding Paper Jams 169 Sending a Job to Print 169 Canceling a Print Job 170 Canceling From the Operator Panel 170 Canceling a Job From the Computer Running...
User Guide
Page 9
Status Monitor Widget 174 19 Understanding Printer Messages 177 20 Specifications 181 Operating System Compatibility 181 Power Supply 181 Dimensions 181 Memory 181 Page Description Language (PDL)/Emulation, Operating System, and Interface . 182 MIB Compatibility 182 Environment 182 Cables... 188 Installing a Toner Cartridge 190 Cleaning Inside the Printer 192 Cleaning the Color Toner Density (CTD) Sensor 195 Adjusting Color Registration 196 Performing Auto Correct 196 Printing the Color Registration Chart 196 Determining Values 197 Entering Values 198 Template Last Updated - ...
Status Monitor Widget 174 19 Understanding Printer Messages 177 20 Specifications 181 Operating System Compatibility 181 Power Supply 181 Dimensions 181 Memory 181 Page Description Language (PDL)/Emulation, Operating System, and Interface . 182 MIB Compatibility 182 Environment 182 Cables... 188 Installing a Toner Cartridge 190 Cleaning Inside the Printer 192 Cleaning the Color Toner Density (CTD) Sensor 195 Adjusting Color Registration 196 Performing Auto Correct 196 Printing the Color Registration Chart 196 Determining Values 197 Entering Values 198 Template Last Updated - ...
User Guide
Page 17
... entered from the operator panel. • Messages displayed on the computer screen. Dell™ C1760nw/C1660w Color Printer User's Guide 15 Conventions The following describe the meaning of your Dell C1760nw/C1660w Color Printer, see "Finding Information" on page 17. Texts in this manual, Dell C1760nw/C1660w Color Printer is referred to as the "printer." 1 Dell™ C1760nw/C1660w Color Printer User's Guide...
... entered from the operator panel. • Messages displayed on the computer screen. Dell™ C1760nw/C1660w Color Printer User's Guide 15 Conventions The following describe the meaning of your Dell C1760nw/C1660w Color Printer, see "Finding Information" on page 17. Texts in this manual, Dell C1760nw/C1660w Color Printer is referred to as the "printer." 1 Dell™ C1760nw/C1660w Color Printer User's Guide...
User Guide
Page 19
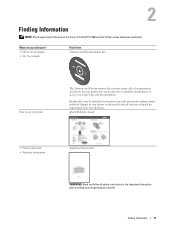
2 Finding Information NOTE: The images used in the Important Information prior to setting up and operating your printer. What are those of the Dell™ C1760nw Color Printer unless otherwise mentioned. You can use my printer The Software and Documentation disc contains setup video, documentation, and drivers for experienced users or technicians. ...
2 Finding Information NOTE: The images used in the Important Information prior to setting up and operating your printer. What are those of the Dell™ C1760nw Color Printer unless otherwise mentioned. You can use my printer The Software and Documentation disc contains setup video, documentation, and drivers for experienced users or technicians. ...
User Guide
Page 23
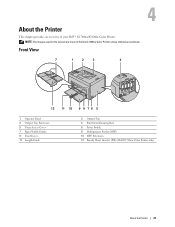
NOTE: The images used in this manual are those of your Dell™ C1760nw/C1660w Color Printer. Front View 7 1 2 3 4 12 11 10 9 8 7 6 5 1 Operator Panel 3 Output Tray Extension 5 Toner Access Cover 7 Paper Width Guides 9 Front Cover 11 Length Guide 2 Output Tray 4 Print Head Cleaning Rod 6 Power Switch 8 Multipurpose Feeder (MPF) 10 MPF Extension 12 Priority Sheet Inserter (PSI) (Dell C1760nw Color Printer only) About the Printer 21 4 About the Printer This chapter provides an overview of the Dell C1760nw Color Printer unless otherwise mentioned.
NOTE: The images used in this manual are those of your Dell™ C1760nw/C1660w Color Printer. Front View 7 1 2 3 4 12 11 10 9 8 7 6 5 1 Operator Panel 3 Output Tray Extension 5 Toner Access Cover 7 Paper Width Guides 9 Front Cover 11 Length Guide 2 Output Tray 4 Print Head Cleaning Rod 6 Power Switch 8 Multipurpose Feeder (MPF) 10 MPF Extension 12 Priority Sheet Inserter (PSI) (Dell C1760nw Color Printer only) About the Printer 21 4 About the Printer This chapter provides an overview of the Dell C1760nw Color Printer unless otherwise mentioned.
User Guide
Page 25
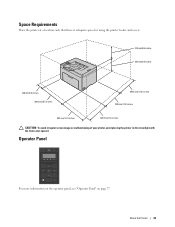
Operator Panel For more information on the operator panel, see "Operator Panel" on page 77. About the Printer 23 Space Requirements Place the printer at a location such that there is adequate space for using the printer feeder and covers. 218 mm/8.6 inches 225 mm/8.9 inches 100 mm/3.9 inches 394 mm/15.5 inches 295.5 mm/11.6 inches 300 mm/11.8 inches 307 mm/12.1 inches 329.5 mm/13 inches CAUTION: To avoid irregular screen image or malfunctioning of your printer, avoid placing the printer in direct sunlight with the front cover opened.
Operator Panel For more information on the operator panel, see "Operator Panel" on page 77. About the Printer 23 Space Requirements Place the printer at a location such that there is adequate space for using the printer feeder and covers. 218 mm/8.6 inches 225 mm/8.9 inches 100 mm/3.9 inches 394 mm/15.5 inches 295.5 mm/11.6 inches 300 mm/11.8 inches 307 mm/12.1 inches 329.5 mm/13 inches CAUTION: To avoid irregular screen image or malfunctioning of your printer, avoid placing the printer in direct sunlight with the front cover opened.
User Guide
Page 26
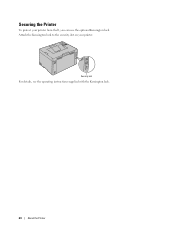
Security slot For details, see the operating instructions supplied with the Kensington lock. 24 About the Printer Securing the Printer To protect your printer. Attach the Kensington lock to the security slot on your printer from theft, you can use the optional Kensington lock.
Security slot For details, see the operating instructions supplied with the Kensington lock. 24 About the Printer Securing the Printer To protect your printer. Attach the Kensington lock to the security slot on your printer from theft, you can use the optional Kensington lock.

User Guide
Page 32
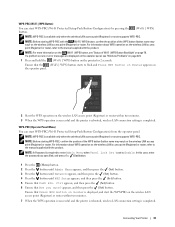
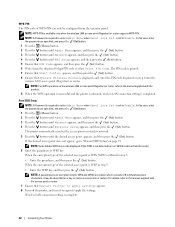
...available on the wireless LAN access point (Registrar) or router. WPS 2.0 works on access points with the (Wi-Fi | WPS) button or operator panel menu, and then pressing the button provided on the keyboard. This setting, performed through access point, is a method to authenticate and register ... Open (No Security) You can select a method to configure a wireless setting from the following: WPS-PBC (Wi-Fi | WPS Button)*1 WPS-PBC (Operator Panel Menu)*1 WPS-PIN*2 Auto SSID Setup Manual SSID Setup *1 WPS-PBC (Wi-Fi Protected Setup-Push Button Configuration) is a method to authenticate and...
...available on the wireless LAN access point (Registrar) or router. WPS 2.0 works on access points with the (Wi-Fi | WPS) button or operator panel menu, and then pressing the button provided on the keyboard. This setting, performed through access point, is a method to authenticate and register ... Open (No Security) You can select a method to configure a wireless setting from the following: WPS-PBC (Wi-Fi | WPS Button)*1 WPS-PBC (Operator Panel Menu)*1 WPS-PIN*2 Auto SSID Setup Manual SSID Setup *1 WPS-PBC (Wi-Fi Protected Setup-Push Button Configuration) is a method to authenticate and...
User Guide
Page 33
...the position of Wi-Fi | WPS Button Backlight" on the wireless LAN access point (Registrar) or router within two minutes. 3 When the WPS operation is successful and the printer is rebooted, wireless LAN connection setting is displayed, and start the WPS-PBC on page 78. NOTE: Before starting ... the WPS button (button name may vary) on the wireless LAN access point (Registrar) or router within two minutes. 7 When the WPS operation is successful and the printer is rebooted, wireless LAN connection setting is available only when the wireless LAN access point (Registrar) or router supports ...
...the position of Wi-Fi | WPS Button Backlight" on the wireless LAN access point (Registrar) or router within two minutes. 3 When the WPS operation is successful and the printer is rebooted, wireless LAN connection setting is displayed, and start the WPS-PBC on page 78. NOTE: Before starting ... the WPS button (button name may vary) on the wireless LAN access point (Registrar) or router within two minutes. 7 When the WPS operation is successful and the printer is rebooted, wireless LAN connection setting is available only when the wireless LAN access point (Registrar) or router supports ...
User Guide
Page 34
...point appears, and then press the (Set) button. If the desired access point does not appear, go to Enable. NOTE: A passphrase is printed. 7 Ensure that Restart Printer to Enable. The printer automatically searches the access points on some access points or routers. When the encryption type of... LAN access point (Registrar) or router supports WPS-PIN. For details, refer to the manual supplied with the product. 9 When the WPS operation is successful and the printer is rebooted, wireless LAN connection setting is set to "Manual SSID Setup" on the wireless LAN access point (Registrar...
...point appears, and then press the (Set) button. If the desired access point does not appear, go to Enable. NOTE: A passphrase is printed. 7 Ensure that Restart Printer to Enable. The printer automatically searches the access points on some access points or routers. When the encryption type of... LAN access point (Registrar) or router supports WPS-PIN. For details, refer to the manual supplied with the product. 9 When the WPS operation is successful and the printer is rebooted, wireless LAN connection setting is set to "Manual SSID Setup" on the wireless LAN access point (Registrar...
User Guide
Page 39
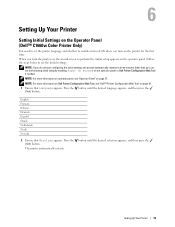
... setup by enabling Power On Wizard on the operator panel or Dell Printer Configuration Web Tool if needed. NOTE: For more information on Dell Printer Configuration Web Tool, see "Operator Panel" on page 77. 6 Setting Up Your Printer Setting Initial Settings on the Operator Panel (Dell™ C1660w Color Printer Only) You need to set the printer...
... setup by enabling Power On Wizard on the operator panel or Dell Printer Configuration Web Tool if needed. NOTE: For more information on Dell Printer Configuration Web Tool, see "Operator Panel" on page 77. 6 Setting Up Your Printer Setting Initial Settings on the Operator Panel (Dell™ C1660w Color Printer Only) You need to set the printer...
User Guide
Page 41
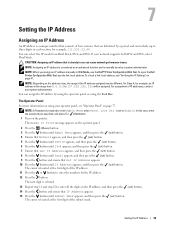
...include up to three digits in use can select the IP mode from 0.0.0.0 to Print message appears on page 77. NOTE: When you specified, and press the (Set) button. 1 Turn on the printer. The Operator Panel For more information on using the Tool Box. The Ready to 127.255....255.255 will be different. CAUTION: Assigning an IP address that is set ) button. To open the Dell Printer Configuration Web Tool, use the Dell™ Printer Configuration Web Tool. NOTE...
...include up to three digits in use can select the IP mode from 0.0.0.0 to Print message appears on page 77. NOTE: When you specified, and press the (Set) button. 1 Turn on the printer. The Operator Panel For more information on using the Tool Box. The Ready to 127.255....255.255 will be different. CAUTION: Assigning an IP address that is set ) button. To open the Dell Printer Configuration Web Tool, use the Dell™ Printer Configuration Web Tool. NOTE...

User Guide
Page 42
...side of the gateway address. 21 Press the or button to enter the numbers for network printing, the Tool Box cannot be used to the printer when installing the printer drivers with installer... of the page. You can set ) button. The next digit is set to AutoIP on the operator panel menu, you use IPv6 Mode for the gateway address. 22 Press the button. The Tool Box... address to assign an IP address. 1 Click Start → All Programs → Dell Printers → Dell C1760nw Color Printer or Dell C1660w Color Printer → Tool Box. 16 Press the or the button to the desired IP ...
...side of the gateway address. 21 Press the or button to enter the numbers for network printing, the Tool Box cannot be used to the printer when installing the printer drivers with installer... of the page. You can set ) button. The next digit is set to AutoIP on the operator panel menu, you use IPv6 Mode for the gateway address. 22 Press the button. The Tool Box... address to assign an IP address. 1 Click Start → All Programs → Dell Printers → Dell C1760nw Color Printer or Dell C1660w Color Printer → Tool Box. 16 Press the or the button to the desired IP ...
User Guide
Page 43
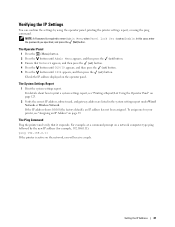
... the printer is set to enter Admin Menu when Panel Lock Set is active on a network computer, type ping followed by using the operator panel, printing the printer settings report, or using the ping command. The Ping Command Ping the printer and verify that Network appears, and then press ...IP Address 41 Verifying the IP Settings You can confirm the settings by the new IP address (for your printer, see "Printing a Report/List Using the Operator Panel" on the operator panel. Check the IP address displayed on page 125. 2 Verify the correct IP address, subnet mask, and gateway address ...
... the printer is set to enter Admin Menu when Panel Lock Set is active on a network computer, type ping followed by using the operator panel, printing the printer settings report, or using the ping command. The Ping Command Ping the printer and verify that Network appears, and then press ...IP Address 41 Verifying the IP Settings You can confirm the settings by the new IP address (for your printer, see "Printing a Report/List Using the Operator Panel" on the operator panel. Check the IP address displayed on page 125. 2 Verify the correct IP address, subnet mask, and gateway address ...
User Guide
Page 53
...drive letter of the optical drive) in "Verifying the IP Settings" on page 41. The following operating systems, you must change the firewall settings before installing your computer to start Dell Printer Setup. 2 Click Install Printer Driver and Software. 3 Select Personal Installation, and then click Next... uses Windows 7 as an example. 1 Insert the Software and Documentation disc into your printer If you are those of the Dell™ C1760nw Color Printer unless otherwise mentioned. 9 Installing Printer Drivers on Computers Running Windows® NOTE: The images used in this manual are ...
...drive letter of the optical drive) in "Verifying the IP Settings" on page 41. The following operating systems, you must change the firewall settings before installing your computer to start Dell Printer Setup. 2 Click Install Printer Driver and Software. 3 Select Personal Installation, and then click Next... uses Windows 7 as an example. 1 Insert the Software and Documentation disc into your printer If you are those of the Dell™ C1760nw Color Printer unless otherwise mentioned. 9 Installing Printer Drivers on Computers Running Windows® NOTE: The images used in this manual are ...
User Guide
Page 54
... driver NOTE: Download and install the XPS printer driver at support.dell.com. Click Next. If the User Account Control dialog box appears, click Continue. Personal Installation A personal printer is supported on the following operating systems: Windows Vista, Windows Vista 64-bit Edition, Windows 7, Windows...you downloaded to your computer, see "Network Connection Setup" on the computer, click Continue; screen appears. If your printer is completed, click Print a test page to display the Install From Disk dialog box. 7 Click Browse, and then select the extracted folder in step 1. 8 ...
... driver NOTE: Download and install the XPS printer driver at support.dell.com. Click Next. If the User Account Control dialog box appears, click Continue. Personal Installation A personal printer is supported on the following operating systems: Windows Vista, Windows Vista 64-bit Edition, Windows 7, Windows...you downloaded to your computer, see "Network Connection Setup" on the computer, click Continue; screen appears. If your printer is completed, click Print a test page to display the Install From Disk dialog box. 7 Click Browse, and then select the extracted folder in step 1. 8 ...


