User Guide
Page 37
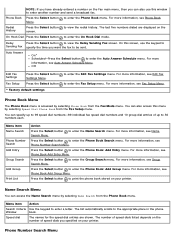
...to view the redial history. Phone Number Search Menu to the appropriate place in the phone Window book. to enter a letter. For more information, see Phone Book Add Entry Menu. Name Search Menu You... can also access this window to enter the Auto Answer Schedule menu. Phone Book Menu The Phone Book menu is accessed by .... to 99 speed dial numbers-89 individual fax speed dial numbers and 10 group dial entries of speed dials you want the fax to enter the Phone Book: Add Entry menu.
...to view the redial history. Phone Number Search Menu to the appropriate place in the phone Window book. to enter a letter. For more information, see Phone Book Add Entry Menu. Name Search Menu You... can also access this window to enter the Auto Answer Schedule menu. Phone Book Menu The Phone Book menu is accessed by .... to 99 speed dial numbers-89 individual fax speed dial numbers and 10 group dial entries of speed dials you want the fax to enter the Phone Book: Add Entry menu.
User Guide
Page 110
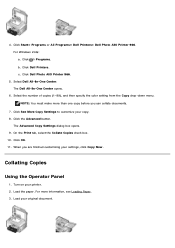
For Windows Vista: a. Click Dell Photo AIO Printer 966. 5. NOTE: You must make more information, see Loading Paper. 3. Load your copy. 8. Collating Copies Using the Operator Panel 1. Select Dell All-In-One Center. When you can collate documents. 7. Load the paper. For more than one ...Copies check box. 10. Turn on your settings, click Copy Now. Click Dell Printers. The Advanced Copy Settings dialog box opens. 9. The Dell All-In-One Center opens. 6. Click Start® Programs or All Programs® Dell Printers® Dell Photo AIO Printer 966. Click the Advanced ...
For Windows Vista: a. Click Dell Photo AIO Printer 966. 5. NOTE: You must make more information, see Loading Paper. 3. Load your copy. 8. Collating Copies Using the Operator Panel 1. Select Dell All-In-One Center. When you can collate documents. 7. Load the paper. For more than one ...Copies check box. 10. Turn on your settings, click Copy Now. Click Dell Printers. The Advanced Copy Settings dialog box opens. 9. The Dell All-In-One Center opens. 6. Click Start® Programs or All Programs® Dell Printers® Dell Photo AIO Printer 966. Click the Advanced ...
User Guide
Page 113
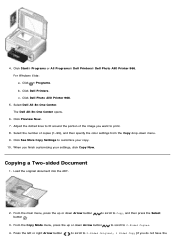
...From the Copy Mode menu, press the up or down Arrow button to scroll to customize your settings, click Copy Now. For Windows Vista: a. Click ® Programs. b. Select Dell All-In-One Center. Select the number of the image you want to 2-Sided Original, 1 Sided Copy (if you finish ...customizing your copy. 10. Click Dell Photo AIO Printer 966. 5. Click See More Copy Settings to 2-Sided Copies. 4. c. When you do not have the 4. From the main menu, press the...
...From the Copy Mode menu, press the up or down Arrow button to scroll to customize your settings, click Copy Now. For Windows Vista: a. Click ® Programs. b. Select Dell All-In-One Center. Select the number of the image you want to 2-Sided Original, 1 Sided Copy (if you finish ...customizing your copy. 10. Click Dell Photo AIO Printer 966. 5. Click See More Copy Settings to 2-Sided Copies. 4. c. When you do not have the 4. From the main menu, press the...

User Guide
Page 119
... For Windows Vista:...Programs or All Programs® Dell Printers® Dell Photo AIO Printer 966. Click Dell Printers. On the next screen..., click Add to use . The Advanced Scan Settings dialog box opens. 8. When you want to locate and add your computer and printer, and make sure they are connected. 2. 7. When you finish customizing your settings, click Scan Now. Click Dell Photo AIO Printer 966. 4. Select Dell... All-In-One Center. The Dell All-In-One Center opens. 5....
... For Windows Vista:...Programs or All Programs® Dell Printers® Dell Photo AIO Printer 966. Click Dell Printers. On the next screen..., click Add to use . The Advanced Scan Settings dialog box opens. 8. When you want to locate and add your computer and printer, and make sure they are connected. 2. 7. When you finish customizing your settings, click Scan Now. Click Dell Photo AIO Printer 966. 4. Select Dell... All-In-One Center. The Dell All-In-One Center opens. 5....
User Guide
Page 122
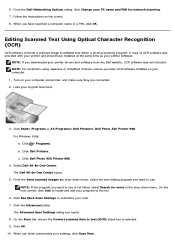
... to use is selected. 9. NOTE: If you want to use . Click ® Programs. b. Click Dell Photo AIO Printer 966. 4. Select Dell All-In-One Center. For Windows Vista: a. Click Dell Printers. On the next screen, click Add to locate and add your program to customize your settings, click ...Scan Now. Click OK. 10. From the Send scanned images to: drop-down menu. 6. Follow the ...
... to use is selected. 9. NOTE: If you want to use . Click ® Programs. b. Click Dell Photo AIO Printer 966. 4. Select Dell All-In-One Center. For Windows Vista: a. Click Dell Printers. On the next screen, click Add to locate and add your program to customize your settings, click ...Scan Now. Click OK. 10. From the Send scanned images to: drop-down menu. 6. Follow the ...


