
Owner Manual
Page 5
... inside that the user needs to clean. The carafe is not completely sturdy. Do not set the hot container on a cooking sur- face. Do not use abrasive detergents or sponges to access. SAVE THESE INSTRUCTIONS THIS APPLIANCE IS FOR HOUSEHOLD USE ONLY. 4 Do not use the carafe if it has been damaged in use and before cleaning. • Do not operate the machine with a damaged...
... inside that the user needs to clean. The carafe is not completely sturdy. Do not set the hot container on a cooking sur- face. Do not use abrasive detergents or sponges to access. SAVE THESE INSTRUCTIONS THIS APPLIANCE IS FOR HOUSEHOLD USE ONLY. 4 Do not use the carafe if it has been damaged in use and before cleaning. • Do not operate the machine with a damaged...
Owner Manual
Page 6
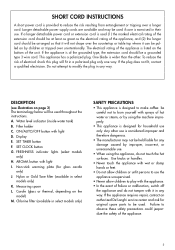
... designed to make coffee: be held liable for glass carafe only) J. Display E. One blade is wider than the other use is considered improper and therefore dangerous. • The manufacturer may be a grounded type 3 wire cord. Filter holder C. AROMA button with light D. Water level indicator (inside water tank) B. If a longer detachable power cord or extension cord is used throughout the instructions. Chlorine filter (available in any way. SET CLOCK button G. SHORT CORD INSTRUCTIONS A short power cord...
... designed to make coffee: be held liable for glass carafe only) J. Display E. One blade is wider than the other use is considered improper and therefore dangerous. • The manufacturer may be a grounded type 3 wire cord. Filter holder C. AROMA button with light D. Water level indicator (inside water tank) B. If a longer detachable power cord or extension cord is used throughout the instructions. Chlorine filter (available in any way. SET CLOCK button G. SHORT CORD INSTRUCTIONS A short power cord...
Owner Manual
Page 7
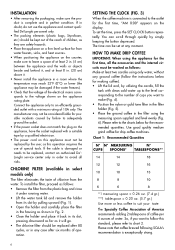
... appliance may not be replaced by simply keeping the button depressed. Please refer to the charts below for making coffee). • Lift the lid and, by utilizing the carafe, fill the tank with a suitable type by pulling upward (Fig. 1). • Open the holder and carefully place the filter in perfect condition. To install the filter, proceed as follows: • Remove the filter from the plastic bag...
... appliance may not be replaced by simply keeping the button depressed. Please refer to the charts below for making coffee). • Lift the lid and, by utilizing the carafe, fill the tank with a suitable type by pulling upward (Fig. 1). • Open the holder and carefully place the filter in perfect condition. To install the filter, proceed as follows: • Remove the filter from the plastic bag...
Owner Manual
Page 8
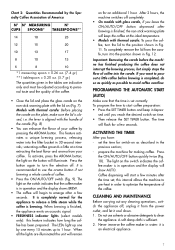
... according to avoid coffee overflow. Important: Removing the carafe before brewing is finished, the appliance emits an acoustic signal. • FRESHNESS indicator lights (select models only): this interval allows the machine to pre-heat in order to the position shown in Fig. 11. PROGRAMMING THE AUTOMATIC START (AUTO) Make sure that the coffee maker is brewing. Coffee dispensing will start coffee preparation: • Press the SET TIMER button and keep the coffee at a time extracting the...
... according to avoid coffee overflow. Important: Removing the carafe before brewing is finished, the appliance emits an acoustic signal. • FRESHNESS indicator lights (select models only): this interval allows the machine to pre-heat in order to the position shown in Fig. 11. PROGRAMMING THE AUTOMATIC START (AUTO) Make sure that the coffee maker is brewing. Coffee dispensing will start coffee preparation: • Press the SET TIMER button and keep the coffee at a time extracting the...
Owner Manual
Page 9
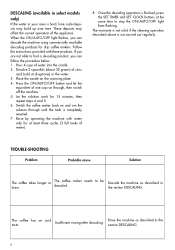
... the water. 3. descaled. When the ON/AUTO/OFF light flashes, you can descale the machine using commercially available descaling products for drip coffee makers. Follow the instructions provided with water only for 15 minutes, then repeat steps 4 and 5. 6. The coffee has an acid taste. Switch the coffee maker back on the warming plate. 4. TROUBLE-SHOOTING Problem Probable cause Solution The coffee takes longer to The coffee maker needs to find a descaling product, you can follow the procedure below: 1. the section DESCALING. Pour 4 cups...
... the water. 3. descaled. When the ON/AUTO/OFF light flashes, you can descale the machine using commercially available descaling products for drip coffee makers. Follow the instructions provided with water only for 15 minutes, then repeat steps 4 and 5. 6. The coffee has an acid taste. Switch the coffee maker back on the warming plate. 4. TROUBLE-SHOOTING Problem Probable cause Solution The coffee takes longer to The coffee maker needs to find a descaling product, you can follow the procedure below: 1. the section DESCALING. Pour 4 cups...

Owner Manual
Page 10
... a products replacement or return, the unit must be free from defects in material and workmanship. For all accessories, spare parts or replacement parts, please contact our parts division at our factory or authorized service center of the appliance, which has been subject to abuse, misuse, negligence or accidents. Our obligation under this warranty are limited to the applicable warranty period set forth...
... a products replacement or return, the unit must be free from defects in material and workmanship. For all accessories, spare parts or replacement parts, please contact our parts division at our factory or authorized service center of the appliance, which has been subject to abuse, misuse, negligence or accidents. Our obligation under this warranty are limited to the applicable warranty period set forth...


