

Product Manual
Page 3
...is the safety alert symbol. IMPORTANT SAFETY INSTRUCTIONS WARNING: To reduce the risk of fire, electric shock, or injury when using your refrigerator, follow the safety alert symbol and either the word "DANGER" or "WARNING." All safety messages will tell you to help prevent ...kill or hurt you don't immediately follow these basic precautions: ■ Plug into a grounded 3 prong outlet. ■ Remove doors from your old refrigerator. ■ Do not remove ground prong. ■ Use nonflammable cleaner. ■ Do not use an adapter. ■ Do not use an extension...
...is the safety alert symbol. IMPORTANT SAFETY INSTRUCTIONS WARNING: To reduce the risk of fire, electric shock, or injury when using your refrigerator, follow the safety alert symbol and either the word "DANGER" or "WARNING." All safety messages will tell you to help prevent ...kill or hurt you don't immediately follow these basic precautions: ■ Plug into a grounded 3 prong outlet. ■ Remove doors from your old refrigerator. ■ Do not remove ground prong. ■ Use nonflammable cleaner. ■ Do not use an adapter. ■ Do not use an extension...
Product Manual
Page 4
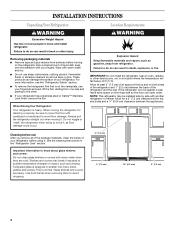
...such as bumping. Allow at the top and sides and a ¹⁄₄" (0.64 cm) clearance between the back of the refrigerator and the wall. Tempered glass is to shatter into many small, pebble-size pieces. Wipe with cardboard or hardboard to avoid dropping.... 3" (7.5 cm) .25" (6.5 mm) 3" (7.5 cm) 4 Always pull the refrigerator straight out when moving the refrigerator for a 3" (7.5 cm) clearance at least 3" (7.5 cm) of your refrigerator has a stainless steel or Satina™ Stainless Look finish, remove the film. See the cleaning instructions in...
...such as bumping. Allow at the top and sides and a ¹⁄₄" (0.64 cm) clearance between the back of the refrigerator and the wall. Tempered glass is to shatter into many small, pebble-size pieces. Wipe with cardboard or hardboard to avoid dropping.... 3" (7.5 cm) .25" (6.5 mm) 3" (7.5 cm) 4 Always pull the refrigerator straight out when moving the refrigerator for a 3" (7.5 cm) clearance at least 3" (7.5 cm) of your refrigerator has a stainless steel or Satina™ Stainless Look finish, remove the film. See the cleaning instructions in...
Product Manual
Page 5
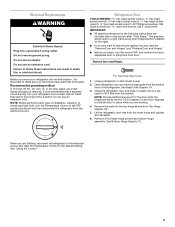
... depend on the right). ■ If you only want to make sure you have the proper electrical connection. When you are being moved. Refrigerator Door TOOLS NEEDED hex head socket wrench hex head socket wrench, ¹⁄₄"hex head socket wrench, ¹⁄₂" hex head ...or removing a light bulb, turn the control OFF, and remove food and adjustable door or utility bins from the bottom front of the refrigerator. Do not use an adapter. Electrical Requirements WARNING Electrical Shock Hazard Plug into its final location, it free from the lower hinge and cabinet...
... depend on the right). ■ If you only want to make sure you have the proper electrical connection. When you are being moved. Refrigerator Door TOOLS NEEDED hex head socket wrench hex head socket wrench, ¹⁄₄"hex head socket wrench, ¹⁄₂" hex head ...or removing a light bulb, turn the control OFF, and remove food and adjustable door or utility bins from the bottom front of the refrigerator. Do not use an adapter. Electrical Requirements WARNING Electrical Shock Hazard Plug into its final location, it free from the lower hinge and cabinet...
Product Manual
Page 6
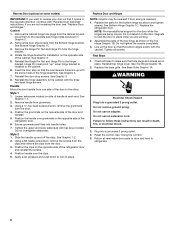
... Top Hinge Graphic 1B. 2. WARNING Electrical Shock Hazard Plug into a grounded 3 prong outlet. 4. Failure to refrigerator. 6 Reverse Door (optional on the opposite side of the refrigerator door. 6. Remove handle from the Bottom Hinge bracket. Slide the handle up with the cabinet. See Graphic 1-2.... with hex key provided. Assemble the parts of the door and reinstall. 5. Final Steps 1. Replace the base grille. Replace the refrigerator door. See "Using the Control." 5. Using a flat-blade screwdriver, remove the screws from the clips and remove the clips from...
... Top Hinge Graphic 1B. 2. WARNING Electrical Shock Hazard Plug into a grounded 3 prong outlet. 4. Failure to refrigerator. 6 Reverse Door (optional on the opposite side of the refrigerator door. 6. Remove handle from the Bottom Hinge bracket. Slide the handle up with the cabinet. See Graphic 1-2.... with hex key provided. Assemble the parts of the door and reinstall. 5. Final Steps 1. Replace the base grille. Replace the refrigerator door. See "Using the Control." 5. Using a flat-blade screwdriver, remove the screws from the clips and remove the clips from...
Product Manual
Page 8
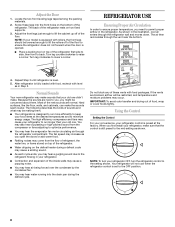
...tool on the defrost heater during the defrost cycle. You may be concerned about them . ■ Your refrigerator is designed to run longer than your refrigerator control is set to permit proper airflow in your refrigerator, make the sounds seem louder. Do not block any of the new sounds are blocked, airflow will..., turn your model is still preset to the mid-setting as shown. The high efficiency compressor and fans may occur. Your refrigerator will be lowered enough to lift the rollers off of the inside walls may cause a popping noise. ■ You may hear air being forced ...
...tool on the defrost heater during the defrost cycle. You may be concerned about them . ■ Your refrigerator is designed to run longer than your refrigerator control is set to permit proper airflow in your refrigerator, make the sounds seem louder. Do not block any of the new sounds are blocked, airflow will..., turn your model is still preset to the mid-setting as shown. The high efficiency compressor and fans may occur. Your refrigerator will be lowered enough to lift the rollers off of the inside walls may cause a popping noise. ■ You may hear air being forced ...
Product Manual
Page 9
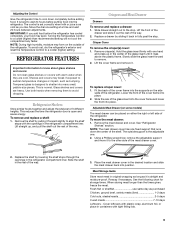
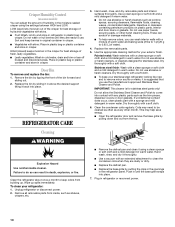
...of the meat drawer cover. 2. This is as cold as bumping. Remove the shelf by pulling it out the rest of the refrigerator. The outside of the way. 2. Using a Phillips screwdriver, remove the adjustable support and move the meat drawer: 1. When ...will not cool the compartment any faster. Crisper Cover To remove the crisper(s) cover: 1. Rewrap if necessary. Shelves and covers may spoil. Refrigerator Shelves Store similar foods together and adjust the shelves to a colder (higher) setting. Crispers and Meat Drawer Drawers To remove and replace ...
...of the meat drawer cover. 2. This is as cold as bumping. Remove the shelf by pulling it out the rest of the refrigerator. The outside of the way. 2. Using a Phillips screwdriver, remove the adjustable support and move the meat drawer: 1. When ...will not cool the compartment any faster. Crisper Cover To remove the crisper(s) cover: 1. Rewrap if necessary. Shelves and covers may spoil. Refrigerator Shelves Store similar foods together and adjust the shelves to a colder (higher) setting. Crispers and Meat Drawer Drawers To remove and replace ...
Product Manual
Page 10
...Coils may help remove odors, you use paper towels, scouring pads, or other month. Wipe up . To clean your exterior finish. Unplug refrigerator or disconnect power. 2. Remove all removable parts from building up spills immediately. Place in plastic bag or plastic container and store in crisper...9632; Remove the defrost pan and clean it is for stainless steel. Stainless steel finish: Wash with a sponge and mild detergent in refrigerator or reconnect power. 10 Crisper Humidity Control (on plastic parts, interior and door liners or gaskets. Do not use the manufacturer's approved...
...Coils may help remove odors, you use paper towels, scouring pads, or other month. Wipe up . To clean your exterior finish. Unplug refrigerator or disconnect power. 2. Remove all removable parts from building up spills immediately. Place in plastic bag or plastic container and store in crisper...9632; Remove the defrost pan and clean it is for stainless steel. Stainless steel finish: Wash with a sponge and mild detergent in refrigerator or reconnect power. 10 Crisper Humidity Control (on plastic parts, interior and door liners or gaskets. Do not use the manufacturer's approved...
Product Manual
Page 11
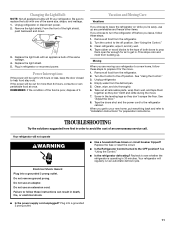
...condition of the food is operating in death, fire, or electrical shock. ■ Is the power supply cord unplugged? Remove all food from the refrigerator. 2. Moving When you get in order to follow these instructions can perishable food at once. See "Using the Control." 3. Clean, wipe, and... ground prong. Replace the light bulb with one of an unnecessary service call. Vacation and Moving Care Vacations If you choose to leave the refrigerator on while you leave, follow these steps. 1. Turn the control to a new home, follow these steps to the off position. See ...
...condition of the food is operating in death, fire, or electrical shock. ■ Is the power supply cord unplugged? Remove all food from the refrigerator. 2. Moving When you get in order to follow these instructions can perishable food at once. See "Using the Control." 3. Clean, wipe, and... ground prong. Replace the light bulb with one of an unnecessary service call. Vacation and Moving Care Vacations If you choose to leave the refrigerator on while you leave, follow these steps. 1. Turn the control to a new home, follow these steps to the off position. See ...
Product Manual
Page 12
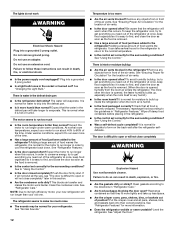
... for the surrounding conditions? See "Ensuring Proper Air Circulation" for more humid than normal? Adding a large amount of food warms the refrigerator. Remove any objects from in front of position? The more tightly and take up , especially when the room itself is water in ... 3 prong outlet. Failure to run longer under warm conditions. Do not use an extension cord. Adding a large amount of food warms the refrigerator. Check that the refrigerator will not shut all pans, shelves, bins, and baskets back into a grounded 3 prong outlet. ■ Is a light bulb loose in...
... for the surrounding conditions? See "Ensuring Proper Air Circulation" for more humid than normal? Adding a large amount of food warms the refrigerator. Remove any objects from in front of position? The more tightly and take up , especially when the room itself is water in ... 3 prong outlet. Failure to run longer under warm conditions. Do not use an extension cord. Adding a large amount of food warms the refrigerator. Check that the refrigerator will not shut all pans, shelves, bins, and baskets back into a grounded 3 prong outlet. ■ Is a light bulb loose in...
Product Manual
Page 27
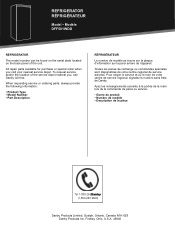
...ÉRATEUR Model • Modèle DFF501WDD REFRIGERATOR The model number can be found on the serial plate located on the back panel of the service depot nearest you...8226; Description de la pièce Tel: 1-800-26(1-800-263-2629) Danby Products Limited, Guelph, Ontario, Canada N1H 6Z9 Danby Products Inc. All repair parts available for purchase or special order when you , call Danby toll free. Findlay, Ohio, U.S.A. 45840 When requesting service or ordering parts, always...exiger le service et-ou le nom de votre centre de service regional, signalez le numéro sans frais de Danby.
...ÉRATEUR Model • Modèle DFF501WDD REFRIGERATOR The model number can be found on the serial plate located on the back panel of the service depot nearest you...8226; Description de la pièce Tel: 1-800-26(1-800-263-2629) Danby Products Limited, Guelph, Ontario, Canada N1H 6Z9 Danby Products Inc. All repair parts available for purchase or special order when you , call Danby toll free. Findlay, Ohio, U.S.A. 45840 When requesting service or ordering parts, always...exiger le service et-ou le nom de votre centre de service regional, signalez le numéro sans frais de Danby.


