User Manual - Dual-fuel Range
Page 8
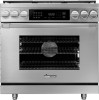
... the oven-door glass. • In disposing of the range, remove the power cord and door to avoid a safety hazard. • Cook meat to an internal temp of 160°F (71°C) and poultry to an internal temp of 180°F (82°C). • Do not manually ignite the cooktop burners during or immediately after cooking. • Learn where the gas-supply valve is missing parts. • Do Not Heat Unopened...
... the oven-door glass. • In disposing of the range, remove the power cord and door to avoid a safety hazard. • Cook meat to an internal temp of 160°F (71°C) and poultry to an internal temp of 180°F (82°C). • Do not manually ignite the cooktop burners during or immediately after cooking. • Learn where the gas-supply valve is missing parts. • Do Not Heat Unopened...

User Manual - Dual-fuel Range
Page 9
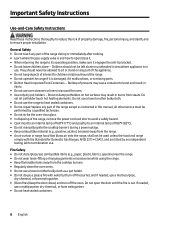
... plumbing/gas lines, or hot-water pipes. • Electrical service to check for leaks. English 9 Important Safety Instructions Use-and-Care Safety Instructions, cont. Gas Safety If you smell gas: • close the range's gas-supply valve and evacuate the building • do not use a flame or sparking device (e.g., match, butane lighter or clicker, arc lighter) • do not turn on any gas or electric appliances • do not plug in a power cord...
... plumbing/gas lines, or hot-water pipes. • Electrical service to check for leaks. English 9 Important Safety Instructions Use-and-Care Safety Instructions, cont. Gas Safety If you smell gas: • close the range's gas-supply valve and evacuate the building • do not use a flame or sparking device (e.g., match, butane lighter or clicker, arc lighter) • do not turn on any gas or electric appliances • do not plug in a power cord...

User Manual - Dual-fuel Range
Page 10
... direct contact and may result in ignition of the cooktop with a clean, dry cloth. -- if combining oils, mix them thoroughly before reassembly. • Use Proper Pan Size - Cooktop Safety • Burners should only be flamed under an active ventilation hood. • Do not let burner flames extend beyond the base of the cookware. • When finished cooking, turn the burner off, open flame. • Do not touch any part...
... direct contact and may result in ignition of the cooktop with a clean, dry cloth. -- if combining oils, mix them thoroughly before reassembly. • Use Proper Pan Size - Cooktop Safety • Burners should only be flamed under an active ventilation hood. • Do not let burner flames extend beyond the base of the cookware. • When finished cooking, turn the burner off, open flame. • Do not touch any part...

User Manual - Dual-fuel Range
Page 11
.../hot air escape safely. • Do not use the oven for non-cooking purposes (e.g., drying clothes, storage). • Do not spray water on the oven glass while the oven is on , stand to one side when opening the oven door to the broil element; English 11 Read these instructions thoroughly to use the oven during self-cleaning can harm/kill pet birds. trim excess fat before cooking. • Use cooking bags as directed...
.../hot air escape safely. • Do not use the oven for non-cooking purposes (e.g., drying clothes, storage). • Do not spray water on the oven glass while the oven is on , stand to one side when opening the oven door to the broil element; English 11 Read these instructions thoroughly to use the oven during self-cleaning can harm/kill pet birds. trim excess fat before cooking. • Use cooking bags as directed...

User Manual - Dual-fuel Range
Page 15
... HDPRS/HDERS Internal Features HDPRS model shown CONTROL-PANEL FEATURES Callout Name Description A Air Intake Grill B Broil Element Air is drawn through horizontal slot (not shown) below door and up within door, then out grill at top of door through this grill to turn lights on these supports; L Convection Element (From behind glass panel; H Oven-Floor Recess Water collects here during convection cooking. tap Light key (control panel) to cool internal cooktop parts; J Temp-Probe Outlet Insert temperature probe here; keep...
... HDPRS/HDERS Internal Features HDPRS model shown CONTROL-PANEL FEATURES Callout Name Description A Air Intake Grill B Broil Element Air is drawn through horizontal slot (not shown) below door and up within door, then out grill at top of door through this grill to turn lights on these supports; L Convection Element (From behind glass panel; H Oven-Floor Recess Water collects here during convection cooking. tap Light key (control panel) to cool internal cooktop parts; J Temp-Probe Outlet Insert temperature probe here; keep...

User Manual - Dual-fuel Range
Page 16
... Control Panel 30", 36" Single Oven (top), 48" Double Oven (bottom) Callout Name A Operation-Mode Keys B Time-Delay Cooking Keys C Clock/Timer Keys D Push to Tilt E Display F Numeric Keypad G START/CONTINUE H Oven-Light Key I Sabbath Mode Key J CANCEL/SECURE CONTROL-PANEL FEATURES Description Tap a key to select an operation mode (e.g., cooking, bread proofing, self-cleaning; double ovens: one key per oven with all above modes and temperature-probe mode. Clock: Sets clock (see Pg. 32). timers do not turn on/off automatically; 48" model: one set a cook time and resumes cook...
... Control Panel 30", 36" Single Oven (top), 48" Double Oven (bottom) Callout Name A Operation-Mode Keys B Time-Delay Cooking Keys C Clock/Timer Keys D Push to Tilt E Display F Numeric Keypad G START/CONTINUE H Oven-Light Key I Sabbath Mode Key J CANCEL/SECURE CONTROL-PANEL FEATURES Description Tap a key to select an operation mode (e.g., cooking, bread proofing, self-cleaning; double ovens: one key per oven with all above modes and temperature-probe mode. Clock: Sets clock (see Pg. 32). timers do not turn on/off automatically; 48" model: one set a cook time and resumes cook...

User Manual - Dual-fuel Range
Page 24
... ease cleaning, remove broiler pan and grill with a room-temp broil pan for whole roasted duck, lamb shoulder, and short leg of overcooking, use oven timers to set cook time. • Avoid opening oven door to turn/remove meat; for single-rack cooking of small amounts of food, smaller cuts of meat, or toasting bread. • To reduce risk of lamb. use rack Levels 1 - 4; Cook Mode Convection Bake Convection Broil Pure Convection HDPRS-HDERS OVEN COOK MODES Description • Convection fan with top and bottom heat sources...
... ease cleaning, remove broiler pan and grill with a room-temp broil pan for whole roasted duck, lamb shoulder, and short leg of overcooking, use oven timers to set cook time. • Avoid opening oven door to turn/remove meat; for single-rack cooking of small amounts of food, smaller cuts of meat, or toasting bread. • To reduce risk of lamb. use rack Levels 1 - 4; Cook Mode Convection Bake Convection Broil Pure Convection HDPRS-HDERS OVEN COOK MODES Description • Convection fan with top and bottom heat sources...

User Manual - Dual-fuel Range
Page 26
..., probe should emerge clean. • For best results, measure ingredients carefully and follow your recipes accordingly. cup, add %) 5 - 10 20 20 -25 26 English if needed, adjust one variable (e.g., cook time, rack level, temperature), and repeat the test; piercing meat lets juices escape, leading to ease carving. • Roast times vary with a room-temperature broil pan. by %) 5 - 10 Sugar (ea. Convection Bake • This mode cooks most...
..., probe should emerge clean. • For best results, measure ingredients carefully and follow your recipes accordingly. cup, add %) 5 - 10 20 20 -25 26 English if needed, adjust one variable (e.g., cook time, rack level, temperature), and repeat the test; piercing meat lets juices escape, leading to ease carving. • Roast times vary with a room-temperature broil pan. by %) 5 - 10 Sugar (ea. Convection Bake • This mode cooks most...

User Manual - Dual-fuel Range
Page 32
... can cancel Sabbath mode and turn on the oven light. 4. Using Sabbath Mode This mode complies with nonstick spray. 2. the probe icon blinks, indicating an error. • Time-delay cooking cannot be placed in the oven, and turn off the oven. (Double ovens: both CANCEL/SECURE keys are active.) • When the oven is cooking, tap 2 > START/CONTINUE to raise the oven temp 25°F (15°C); Tap START/CONTINUE. Per Jewish law, the bake elements are adjusted randomly...
... can cancel Sabbath mode and turn on the oven light. 4. Using Sabbath Mode This mode complies with nonstick spray. 2. the probe icon blinks, indicating an error. • Time-delay cooking cannot be placed in the oven, and turn off the oven. (Double ovens: both CANCEL/SECURE keys are active.) • When the oven is cooking, tap 2 > START/CONTINUE to raise the oven temp 25°F (15°C); Tap START/CONTINUE. Per Jewish law, the bake elements are adjusted randomly...

User Manual - Dual-fuel Range
Page 36
... probe icon blinks, re- The lock icon ( ) appears, indicating that the oven's heating elements are on the display. Shut the oven door, and tap SELF CLEAN. 3. Wipe the surfaces around the door gasket with a vinegar-water solution, then wipe the surfaces dry. (Clean heavily soiled areas with a damp cloth beforehand. • Exterior range surfaces will not work if the meat-temperature probe is connected. (If you try to start self-cleaning and the probe is connected, the control panel probe...
... probe icon blinks, re- The lock icon ( ) appears, indicating that the oven's heating elements are on the display. Shut the oven door, and tap SELF CLEAN. 3. Wipe the surfaces around the door gasket with a vinegar-water solution, then wipe the surfaces dry. (Clean heavily soiled areas with a damp cloth beforehand. • Exterior range surfaces will not work if the meat-temperature probe is connected. (If you try to start self-cleaning and the probe is connected, the control panel probe...

User Manual - Dual-fuel Range
Page 42
... Bake at 400°F for service if light stays off . Broken light switch. Tighten/replace light; Call for service. Lower the rack one level. check oven regularly for self-cleaning to broil element. Food not cooking properly Mispositioned/unlevel rack. Oven temp improperly set . Cook temp too hot/cold Adjust oven temperature. See Adjusting the Oven-Temperature Offset (Pg. 33). Water is loose/defective. let oven cool, then wipe with dry towel. Oven will open when oven cools sufficiently. See Using Self-Clean Mode (Pg. 36). Disable control...
... Bake at 400°F for service if light stays off . Broken light switch. Tighten/replace light; Call for service. Lower the rack one level. check oven regularly for self-cleaning to broil element. Food not cooking properly Mispositioned/unlevel rack. Oven temp improperly set . Cook temp too hot/cold Adjust oven temperature. See Adjusting the Oven-Temperature Offset (Pg. 33). Water is loose/defective. let oven cool, then wipe with dry towel. Oven will open when oven cools sufficiently. See Using Self-Clean Mode (Pg. 36). Disable control...

Installation Instruction - Dual-fuel Range
Page 3
...'s model/serial numbers inside of the rangetop. Before calling, have ready the range's model/serial numbers, which are on the rating label on the back of Operation: Mon - Fri, 5:00 a.m. Pacific Time Website: www.dacor.com/customer-care/contact-us Model Identification HDPR48S/NG/H; Service Technician The wiring diagram is not warrantied.) • Ensure the wall coverings near the range can withstand the heat it generates. • Keep this manual with any heat...
...'s model/serial numbers inside of the rangetop. Before calling, have ready the range's model/serial numbers, which are on the rating label on the back of Operation: Mon - Fri, 5:00 a.m. Pacific Time Website: www.dacor.com/customer-care/contact-us Model Identification HDPR48S/NG/H; Service Technician The wiring diagram is not warrantied.) • Ensure the wall coverings near the range can withstand the heat it generates. • Keep this manual with any heat...
Installation Instruction - Dual-fuel Range
Page 5
... current Natural Gas and Propane Installation Code, CAN/CGA-B149.1, or the current Propane Installation Code, CAN/CGA-B149.2, and local codes where applicable. For use-and-care-related safety instructions, including general use . For the range to cabinet bottom, or install a range hood that no parts came loose or were damaged during shipping. • Ensure the range is correctly installed/adjusted by a sheet of gas (natural or LP) you will use , electrical, cooktop, and oven safety, see the User Manual.
... current Natural Gas and Propane Installation Code, CAN/CGA-B149.1, or the current Propane Installation Code, CAN/CGA-B149.2, and local codes where applicable. For use-and-care-related safety instructions, including general use . For the range to cabinet bottom, or install a range hood that no parts came loose or were damaged during shipping. • Ensure the range is correctly installed/adjusted by a sheet of gas (natural or LP) you will use , electrical, cooktop, and oven safety, see the User Manual.

Installation Instruction - Dual-fuel Range
Page 6
...; If a power cord is out. Checking For Gas Leaks Do not use a flame to ensure proper installation. If there is a gas leak, small bubbles will appear in a grounded, 3- A time-delay fuse or circuit breaker should determine its path. Do not connect the ground wire to plastic plumbing/gas lines, or hot-water pipes. • Electrical service to the range must be used. Gas Safety If you smell gas: • close the range's gas-supply valve and...
...; If a power cord is out. Checking For Gas Leaks Do not use a flame to ensure proper installation. If there is a gas leak, small bubbles will appear in a grounded, 3- A time-delay fuse or circuit breaker should determine its path. Do not connect the ground wire to plastic plumbing/gas lines, or hot-water pipes. • Electrical service to the range must be used. Gas Safety If you smell gas: • close the range's gas-supply valve and...
Installation Instruction - Dual-fuel Range
Page 18
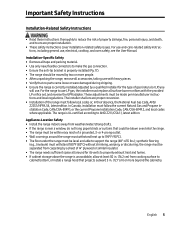
... pressure regulator at right are installed by the State of the cooktop *Gas-supply pressure for reference only. MINIMUM GAS-SUPPLY PRESSURE REQUIREMENTS* (See the rating label-rear top-right corner of water column for LP (propane)/LP at high altitude (NG-H) or 10 in series. 18 English for the provided gas service. Special Gas Requirements (gas models sold in Massachusetts) • Gas suppliers recommend installing a UL-approved gas detector per manufacturer specifications. • The range...
... pressure regulator at right are installed by the State of the cooktop *Gas-supply pressure for reference only. MINIMUM GAS-SUPPLY PRESSURE REQUIREMENTS* (See the rating label-rear top-right corner of water column for LP (propane)/LP at high altitude (NG-H) or 10 in series. 18 English for the provided gas service. Special Gas Requirements (gas models sold in Massachusetts) • Gas suppliers recommend installing a UL-approved gas detector per manufacturer specifications. • The range...
Installation Instruction - Dual-fuel Range
Page 29
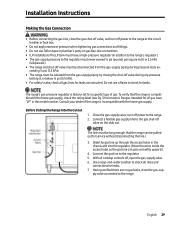
... disconnecting the line.) 3. Before Sliding the Range Into the Cutout 1. Use a soap-and-water solution to the regulator must never exceed 1/2 psi (pounds per square inch) or 3.5 kPa (kilopascals). • The range and shut-off valve must be pulled out for leaks as instructed. The range's gas-pressure regulator is factory-set for leaks. 7. turn off power to the range. 2. English 29 Ranges intended for LP gas have a high-pressure regulator (in the model number.
... disconnecting the line.) 3. Before Sliding the Range Into the Cutout 1. Use a soap-and-water solution to the regulator must never exceed 1/2 psi (pounds per square inch) or 3.5 kPa (kilopascals). • The range and shut-off valve must be pulled out for leaks as instructed. The range's gas-pressure regulator is factory-set for leaks. 7. turn off power to the range. 2. English 29 Ranges intended for LP gas have a high-pressure regulator (in the model number.

Installation Instruction - Dual-fuel Range
Page 31
... opening on the back of each knob with the D-shaped valve shaft of knobs come with the words "MAX GRIDDLE" on the other valve shafts. Install the burner ring so the ring's tabs fit into the slots in the burner base's keyed hole. 3. Exceeding the MAX GRIDDLE heat level may be used. b. Installation Instructions Final Installation, cont. Unpackage the burner components. 2. The knobs for HDERS Models Assembling Cooktop Components Do not operate...
... opening on the back of each knob with the D-shaped valve shaft of knobs come with the words "MAX GRIDDLE" on the other valve shafts. Install the burner ring so the ring's tabs fit into the slots in the burner base's keyed hole. 3. Exceeding the MAX GRIDDLE heat level may be used. b. Installation Instructions Final Installation, cont. Unpackage the burner components. 2. The knobs for HDERS Models Assembling Cooktop Components Do not operate...
Installation Instruction - Dual-fuel Range
Page 33
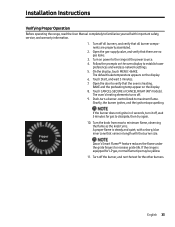
... flame tips may be yellow. 11. Shortly, the burner ignites, and the ignitor stops sparking. Proper Flame If the burner does not ignite in length with important safety, service, and warranty information. 1. Turn off . 9. Open the gas-supply valve, and verify that varies in 4 seconds, turn a burner-control knob to maximum flame. On the display, touch MENU > BAKE. Installation Instructions Verifying Proper Operation Before operating the range, read the User Manual completely to familiarize yourself with the burner size. Dacor's Smart Flame™ feature...
... flame tips may be yellow. 11. Shortly, the burner ignites, and the ignitor stops sparking. Proper Flame If the burner does not ignite in length with important safety, service, and warranty information. 1. Turn off . 9. Open the gas-supply valve, and verify that varies in 4 seconds, turn a burner-control knob to maximum flame. On the display, touch MENU > BAKE. Installation Instructions Verifying Proper Operation Before operating the range, read the User Manual completely to familiarize yourself with the burner size. Dacor's Smart Flame™ feature...

Installation Instruction - Dual-fuel Range
Page 34
... User Manual) completed and mailed? 34 English Open the gas-supply valve. FF Was the plastic coating been peeled off power to the range at the circuit breaker or fuse box. 6. Owner You are ultimately responsible for property damage or product failure due to the range at the circuit breaker or fuse box. 3. FF Were all packaging materials removed from the oven chamber? Installation Instructions Moving the Range For Service 1. Dacor...
... User Manual) completed and mailed? 34 English Open the gas-supply valve. FF Was the plastic coating been peeled off power to the range at the circuit breaker or fuse box. 6. Owner You are ultimately responsible for property damage or product failure due to the range at the circuit breaker or fuse box. 3. FF Were all packaging materials removed from the oven chamber? Installation Instructions Moving the Range For Service 1. Dacor...

Specification - 36" Pro Dual-Fuel Range
Page 1
... & HALOGEN GENERAL PROPERTI ES OVEN CAPACITY (CUBIC FEET) COOKING MODES O V E N PE R F O R M A N C E BAKE ELEMENT BROIL ELEMENT CONVECTION ELEMENT B U R N E R PE R F O R M A N C E TOTAL NUMBER OF COOKTOP BURNERS LEFT FRONT (BTU) LEFT REAR (BTU) CENTER FRONT (BTU) CENTER REAR (BTU) RIGHT FRONT (BTU) RIGHT REAR (BTU) SEALED BURNERS PERMA-FLAME™ (AUTO RE-IGNITION) A D D I T I O N A L MO D E S KEEP WARM PROOF TEMPERATURE PROBE DEHYDRATE SABBATH CONTROL FEATURES LED (WHITE) NUMBER OF KNOBS CONTROL METHOD ILLUMINA™ BURNER KNOBS HIGHLIGHTING COLOR CLOCK DELAY START KITCHEN TIMER TIME OF...
... & HALOGEN GENERAL PROPERTI ES OVEN CAPACITY (CUBIC FEET) COOKING MODES O V E N PE R F O R M A N C E BAKE ELEMENT BROIL ELEMENT CONVECTION ELEMENT B U R N E R PE R F O R M A N C E TOTAL NUMBER OF COOKTOP BURNERS LEFT FRONT (BTU) LEFT REAR (BTU) CENTER FRONT (BTU) CENTER REAR (BTU) RIGHT FRONT (BTU) RIGHT REAR (BTU) SEALED BURNERS PERMA-FLAME™ (AUTO RE-IGNITION) A D D I T I O N A L MO D E S KEEP WARM PROOF TEMPERATURE PROBE DEHYDRATE SABBATH CONTROL FEATURES LED (WHITE) NUMBER OF KNOBS CONTROL METHOD ILLUMINA™ BURNER KNOBS HIGHLIGHTING COLOR CLOCK DELAY START KITCHEN TIMER TIME OF...


