

Planning Guides
Page 1
... bullnose Front panel Rear of front panel /oven door Rear of front panel to back of chassis Self rimming Model ER30Dsr side dimensions with standard trim 1 5/16" (33 mm) to cooking surface (top of grates) from bottom of trim 35 3/4" (908 mm) to change without notice. Use model ER30DSR for reference only refer to the range rating label Specifications subject to 37 7/8" (962 mm) ELECTRIC CIRCUIT REQUIREMENTS Range Model Circuit Required Total Connected Load ER30D/ER30DSR 240 Vac, 4-wire* 60...
... bullnose Front panel Rear of front panel /oven door Rear of front panel to back of chassis Self rimming Model ER30Dsr side dimensions with standard trim 1 5/16" (33 mm) to cooking surface (top of grates) from bottom of trim 35 3/4" (908 mm) to change without notice. Use model ER30DSR for reference only refer to the range rating label Specifications subject to 37 7/8" (962 mm) ELECTRIC CIRCUIT REQUIREMENTS Range Model Circuit Required Total Connected Load ER30D/ER30DSR 240 Vac, 4-wire* 60...

Planning Guides
Page 2
.... Gas and Electrical Service ■■ The shaded area (diagram bottom left) denotes the location of 10" (254 mm) from range grate level; GAS SUPPLY PRESSURE REQUIREMENTS* Gas Type Manifold Pressure Minimum Gas Supply Pressure Natural Gas 5" Water Column 6" Water Column Petroleum (LP) 10" Water Column 11" Water Column * Maximum input gas supply pressure for cabinets more than rear of front panel, see product dimensions. 3 Consult local code for exact location requirements. 4 Not applicable for all models is...
.... Gas and Electrical Service ■■ The shaded area (diagram bottom left) denotes the location of 10" (254 mm) from range grate level; GAS SUPPLY PRESSURE REQUIREMENTS* Gas Type Manifold Pressure Minimum Gas Supply Pressure Natural Gas 5" Water Column 6" Water Column Petroleum (LP) 10" Water Column 11" Water Column * Maximum input gas supply pressure for cabinets more than rear of front panel, see product dimensions. 3 Consult local code for exact location requirements. 4 Not applicable for all models is...

Installation Instructions
Page 3
... the power cable plug and discard them. • Cut the power cable off the door. • Leave the racks in the vicinity of this unit according to the use and care manual, ensuring you provide good ventilation when cooking with the customer. • Customer: Keep these installation instructions for Installation 8 Electrical Connection 12 Gas Connection 17 Final Installation 18 Installing the Burner Knobs 18 Cooktop Assembly 19 Verifying Proper Operation 20 Installation Checklist 20 IMPORTANT: • Installer...
... the power cable plug and discard them. • Cut the power cable off the door. • Leave the racks in the vicinity of this unit according to the use and care manual, ensuring you provide good ventilation when cooking with the customer. • Customer: Keep these installation instructions for Installation 8 Electrical Connection 12 Gas Connection 17 Final Installation 18 Installing the Burner Knobs 18 Cooktop Assembly 19 Verifying Proper Operation 20 Installation Checklist 20 IMPORTANT: • Installer...

Installation Instructions
Page 4
...; Read the accompanying use and care manual completely before operating this appliance unattended when in use a damaged appliance. • This range must be properly installed by a qualified installer according to these instructions. • Clean the cooktop thoroughly before lighting a burner. • Turn the knobs to the OFF position prior to removing them . • Do not touch the outside of the range or cover an oven rack with the interior of...
...; Read the accompanying use and care manual completely before operating this appliance unattended when in use a damaged appliance. • This range must be properly installed by a qualified installer according to these instructions. • Clean the cooktop thoroughly before lighting a burner. • Turn the knobs to the OFF position prior to removing them . • Do not touch the outside of the range or cover an oven rack with the interior of...

Installation Instructions
Page 5
.../H SIZE (inches) TRIM TYPE SR = Self-rimming option No character = Free standing COUNTRY CODE* C = Equipped for use in Canada No character = Equipped for repairs under warranty, call , have questions or problems with installation, contact your Dacor dealer or the Dacor Customer Service Team. The serial number and rating labels can melt or burn up No character = Equipped for low altitude operation * Applies only to 5:00 p.m. to free standing models. GAS TYPE NG = Natural gas...
.../H SIZE (inches) TRIM TYPE SR = Self-rimming option No character = Free standing COUNTRY CODE* C = Equipped for use in Canada No character = Equipped for repairs under warranty, call , have questions or problems with installation, contact your Dacor dealer or the Dacor Customer Service Team. The serial number and rating labels can melt or burn up No character = Equipped for low altitude operation * Applies only to 5:00 p.m. to free standing models. GAS TYPE NG = Natural gas...

Installation Instructions
Page 6
... above specifications. It is installed by a licensed electrician. The electrical installation, including minimum supply wire size and grounding, must be installed in accordance with a 4 wire appliance cord and NEMA 14-50P plug. • Do not modify the factory wiring. ER30D/ER30DSR ELECTRICAL SPECIFICATIONS Circuit Required Total Connected Load 240 Vac, 60 Hz, 30 Amp. 5.6 kW (24.2 Amp.) The ratings above are for reference only - Electrical Requirements Freestanding Units for the gas service provided (natural gas...
... above specifications. It is installed by a licensed electrician. The electrical installation, including minimum supply wire size and grounding, must be installed in accordance with a 4 wire appliance cord and NEMA 14-50P plug. • Do not modify the factory wiring. ER30D/ER30DSR ELECTRICAL SPECIFICATIONS Circuit Required Total Connected Load 240 Vac, 60 Hz, 30 Amp. 5.6 kW (24.2 Amp.) The ratings above are for reference only - Electrical Requirements Freestanding Units for the gas service provided (natural gas...

Installation Instructions
Page 8
... mm) Front of open door Front of handle Front edge of bullnose Front panel Rear of front panel /oven door Rear of front panel to back of chassis 1 5/16" (33 mm) to cooking surface (top of grates) from bottom of trim 35 3/4" (908 mm) to 37 7/8" (962 mm) 1 9/16" (40 mm) Width at front panel: 29 7/8" (758 mm) Self-Rimming Model ER30DSR with Standard Trim 46 1/8" (1172 mm...
... mm) Front of open door Front of handle Front edge of bullnose Front panel Rear of front panel /oven door Rear of front panel to back of chassis 1 5/16" (33 mm) to cooking surface (top of grates) from bottom of trim 35 3/4" (908 mm) to 37 7/8" (962 mm) 1 9/16" (40 mm) Width at front panel: 29 7/8" (758 mm) Self-Rimming Model ER30DSR with Standard Trim 46 1/8" (1172 mm...

Installation Instructions
Page 9
... openings in place. • The gas supply piping, gas shut-off valve must be located so that may be installed between the gas inlet and the range for the purpose of turning on page 8 (as applicable) must be caused by doors, windows and heating and air conditioning outlets. • To reduce the risk of utilities 3 1 Vertical to the rear wall. Planning the Installation Cabinet Layout • Carefully...
... openings in place. • The gas supply piping, gas shut-off valve must be located so that may be installed between the gas inlet and the range for the purpose of turning on page 8 (as applicable) must be caused by doors, windows and heating and air conditioning outlets. • To reduce the risk of utilities 3 1 Vertical to the rear wall. Planning the Installation Cabinet Layout • Carefully...

Installation Instructions
Page 10
... • 1 crown burner cap • 1 crown burner ring • 1 crown burner head • 1 GlideRack™ oven rack • 2 standard size racks • 4 knobs • Anti-tip bracket w/screws • Meat probe • Griddle • Wok ring • Stainless steel cleaner • Literature kit • Broiler pan/grill See the use and care manual for a list of the countertop. NOTE: When installing a backguard, always install it will stop when the rear of the control panel contacts the...
... • 1 crown burner cap • 1 crown burner ring • 1 crown burner head • 1 GlideRack™ oven rack • 2 standard size racks • 4 knobs • Anti-tip bracket w/screws • Meat probe • Griddle • Wok ring • Stainless steel cleaner • Literature kit • Broiler pan/grill See the use and care manual for a list of the countertop. NOTE: When installing a backguard, always install it will stop when the rear of the control panel contacts the...

Installation Instructions
Page 19
... instructed below 1/2 p.s.i. (3.5 kPa). • Be careful not to check for leaks. • For LP installations, the LP gas tank must be isolated from catching on gas flex line connections. • Check for gas leaks as a part of the model number. off valve previously installed on the gas supply and check all cooktop control valves to the regulator must never exceed 1/2 pound per square inch (p.s.i.) or 3.5kPa. • The range and shut-off valve...
... instructed below 1/2 p.s.i. (3.5 kPa). • Be careful not to check for leaks. • For LP installations, the LP gas tank must be isolated from catching on gas flex line connections. • Check for gas leaks as a part of the model number. off valve previously installed on the gas supply and check all cooktop control valves to the regulator must never exceed 1/2 pound per square inch (p.s.i.) or 3.5kPa. • The range and shut-off valve...

Installation Instructions
Page 20
... not tilt front to back or side to hold it is properly installed. 5. The rear anti-tip leg should engage the anti-tip bracket. 3. Remove any packaging from it stops. • Put the knobs with the maximum griddle settings. Carefully slide the range into the hinge openings, resting the bottom of the oven. Use a level to make sure that the notch on the bottom of each hinge rests...
... not tilt front to back or side to hold it is properly installed. 5. The rear anti-tip leg should engage the anti-tip bracket. 3. Remove any packaging from it stops. • Put the knobs with the maximum griddle settings. Carefully slide the range into the hinge openings, resting the bottom of the oven. Use a level to make sure that the notch on the bottom of each hinge rests...

Installation Instructions
Page 22
... positions? Set the time of day: Press the clock key. Enter the temperature of 350°F on power to the range at the circuit breaker or fuse box. 3. After ignition, rotate the control knob counterclockwise from inside the oven? □□ Are all burner rings, burner caps and grates are supplied to make contact with the floor? Check the electrical connections and gas supply to ensure that all cooktop control valves are...
... positions? Set the time of day: Press the clock key. Enter the temperature of 350°F on power to the range at the circuit breaker or fuse box. 3. After ignition, rotate the control knob counterclockwise from inside the oven? □□ Are all burner rings, burner caps and grates are supplied to make contact with the floor? Check the electrical connections and gas supply to ensure that all cooktop control valves are...
Use & Care Manuals
Page 3
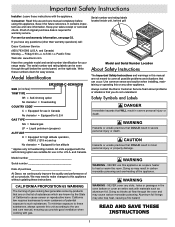
... blocks air flow through the grill below the control panel, on the list of the appliance. Important Safety Instructions Installer: Leave these substances, always operate this unit according to the use and care manual, ensuring you do not understand. Always contact the Dacor Customer Service Team about problems or situations that WILL result in Canada No character = Equipped for U.S.A GAS TYPE NG = Natural gas LP = Liquid petroleum (propane...
... blocks air flow through the grill below the control panel, on the list of the appliance. Important Safety Instructions Installer: Leave these substances, always operate this unit according to the use and care manual, ensuring you do not understand. Always contact the Dacor Customer Service Team about problems or situations that WILL result in Canada No character = Equipped for U.S.A GAS TYPE NG = Natural gas LP = Liquid petroleum (propane...
Use & Care Manuals
Page 4
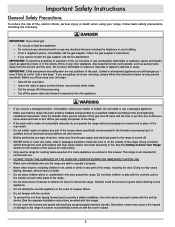
... with the controls. • To prevent the unit from the burners and the oven. IMPORTANT: Child entrapment and suffocation are able to operate it . Junked or abandoned appliances are getting rid of the range, including the door. If you smell gas: ▪▪ Do not use or light any appliance. ▪▪ Do not touch any electrical switch or use any part of...
... with the controls. • To prevent the unit from the burners and the oven. IMPORTANT: Child entrapment and suffocation are able to operate it . Junked or abandoned appliances are getting rid of the range, including the door. If you smell gas: ▪▪ Do not use or light any appliance. ▪▪ Do not touch any electrical switch or use any part of...

Use & Care Manuals
Page 5
... range hoods free of the oven during and immediately after cooking. Be careful to extinguish flaming grease. The curtains could catch fire. • Do not touch the burner assembly, grates and surrounding surfaces (including the backguard) or the interior surfaces of grease that could blow over the range. • If the range is near a window, do not leave the range unattended when using pans that the pan...
... range hoods free of the oven during and immediately after cooking. Be careful to extinguish flaming grease. The curtains could catch fire. • Do not touch the burner assembly, grates and surrounding surfaces (including the backguard) or the interior surfaces of grease that could blow over the range. • If the range is near a window, do not leave the range unattended when using pans that the pan...

Use & Care Manuals
Page 6
... self-clean latch automatically locks the oven door during the convection cooking process. CONVECTION ELEMENT: The convection element heats the air that the light fixture lens covers are two oven lights inside through the window when the door is hidden above the glass panel on the control panel. The control panel can easily see inside the oven chamber so that you use the cooktop surface as a cutting board. • Do not try to remove heavy spills with chrome-plated adjustable oven racks. CONVECTION FILTER...
... self-clean latch automatically locks the oven door during the convection cooking process. CONVECTION ELEMENT: The convection element heats the air that the light fixture lens covers are two oven lights inside through the window when the door is hidden above the glass panel on the control panel. The control panel can easily see inside the oven chamber so that you use the cooktop surface as a cutting board. • Do not try to remove heavy spills with chrome-plated adjustable oven racks. CONVECTION FILTER...

Use & Care Manuals
Page 24
... atmospheric pressure at higher altitudes, foods tend to take longer to allow air circulation around the food. Follow the package recommendations. In general, no recipe adjustment is necessary for best results. • If you put a baking stone on rack position #1. • When using glass bake ware, reduce the recipe temperature by : 10-25% 10% 20% Liquid, for specific recommendations. Dacor's roasting pan works particularly...
... atmospheric pressure at higher altitudes, foods tend to take longer to allow air circulation around the food. Follow the package recommendations. In general, no recipe adjustment is necessary for best results. • If you put a baking stone on rack position #1. • When using glass bake ware, reduce the recipe temperature by : 10-25% 10% 20% Liquid, for specific recommendations. Dacor's roasting pan works particularly...

Use & Care Manuals
Page 25
... Oven's Self-Clean Feature About the Self-Clean Cycle • The oven will still need for instructions on kitchen fans or vents to remove and clean the filter. 2. The self-clean process takes about 400°F) at the time the door lock is properly closed, start the self-clean process again. They will be hot. • Items left in process. • "LOCK" indicates that the door is not shut, "DOOR" will release when the inside of the range listed...
... Oven's Self-Clean Feature About the Self-Clean Cycle • The oven will still need for instructions on kitchen fans or vents to remove and clean the filter. 2. The self-clean process takes about 400°F) at the time the door lock is properly closed, start the self-clean process again. They will be hot. • Items left in process. • "LOCK" indicates that the door is not shut, "DOOR" will release when the inside of the range listed...

Use & Care Manuals
Page 26
... position to remove them to prevent excessive soil build-up spills that remain on hot burner parts will appear on . Be careful not to self-clean at a Later Time To set the oven to undergo a change in appearance over time. Dacor recommends hand dishwashing liquid. • Turn the knobs to the off of the valve shaft. • Clean the outside edges of the self-clean process, the door will start time. Make...
... position to remove them to prevent excessive soil build-up spills that remain on hot burner parts will appear on . Be careful not to self-clean at a Later Time To set the oven to undergo a change in appearance over time. Dacor recommends hand dishwashing liquid. • Turn the knobs to the off of the valve shaft. • Clean the outside edges of the self-clean process, the door will start time. Make...

Use & Care Manuals
Page 32
... control panel. Follow instructions in self-clean mode. Oven will not heat. section. If "LOCK" appears on display not correct. Oven NOTE: See Common Problems When Using the Bake Mode in self-clean mode. Oven lights will unlock once oven has cooled. 30 Cooling fan continues to run for a while after it has been on for delay timed cleaning. Oven set for 12 hours. See page 14. See Setting Up Your Range sec- Close door tightly. Oven set for oven to properly wired electrical connection. Oven is set properly. Door...
... control panel. Follow instructions in self-clean mode. Oven will not heat. section. If "LOCK" appears on display not correct. Oven NOTE: See Common Problems When Using the Bake Mode in self-clean mode. Oven lights will unlock once oven has cooled. 30 Cooling fan continues to run for a while after it has been on for delay timed cleaning. Oven set for 12 hours. See page 14. See Setting Up Your Range sec- Close door tightly. Oven set for oven to properly wired electrical connection. Oven is set properly. Door...


