Operation Manual
Page 2
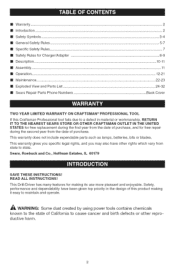
...[] Introduction ... 2 [] Safety Symbols ... 3-4 [] General Safety Rules ... 5-7 [] Specific Safety Rules ... 7 [] Safety Rules for Charger/Adapter 8-9 [] Description ... 10-11 [] Assembly ... 11 [] Operation ...[] Maintenance ... 12-21 22-23 [] Exploded View and Parts List 24-32 [] Sears Repair Parts Phone Numbers Back Cover TWO YEAR LIMITED WARRANTY ON CRAFTSMAN ® PROFESSIONAL TOOL If this product making its use more pleasant and enjoyable. This warranty does not include expendable parts such as lamps, batteries, bits or blades. This warranty gives you specific legal...
...[] Introduction ... 2 [] Safety Symbols ... 3-4 [] General Safety Rules ... 5-7 [] Specific Safety Rules ... 7 [] Safety Rules for Charger/Adapter 8-9 [] Description ... 10-11 [] Assembly ... 11 [] Operation ...[] Maintenance ... 12-21 22-23 [] Exploded View and Parts List 24-32 [] Sears Repair Parts Phone Numbers Back Cover TWO YEAR LIMITED WARRANTY ON CRAFTSMAN ® PROFESSIONAL TOOL If this product making its use more pleasant and enjoyable. This warranty does not include expendable parts such as lamps, batteries, bits or blades. This warranty gives you specific legal...

Operation Manual
Page 3
... I beginning power tool operation, always wear safety goggles or safety glasses with ANSI Z87.1. We recommend Wide I Vision Safety Mask for use eye protection which can result in severe eye damage. symbwolarninDgsONOTbythemselveelisminaatenydangeTrh. SAVE THESE iNSTRUCTiONS Failure to follow instructions may result in property damage. _,WABN|NG: To ensure safety and reliability, all repairs should be performed by a ] qualified service technician at Sears Service Center...
... I beginning power tool operation, always wear safety goggles or safety glasses with ANSI Z87.1. We recommend Wide I Vision Safety Mask for use eye protection which can result in severe eye damage. symbwolarninDgsONOTbythemselveelisminaatenydangeTrh. SAVE THESE iNSTRUCTiONS Failure to follow instructions may result in property damage. _,WABN|NG: To ensure safety and reliability, all repairs should be performed by a ] qualified service technician at Sears Service Center...
Operation Manual
Page 5
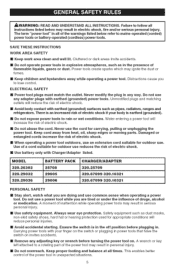
... off position before turning the power tool on the switch or plugging in any adapter plugs with your body is in electric shock, fire and/or serious personal injury. ELECTRICAL SAFETY m Power tool plugs must match the outlet. Do not use common sense when operating a power tool. There is an increased risk of flammable liquids, gases or dust. Do not use . m Hemove any adjusting key or wrench before plugging...
... off position before turning the power tool on the switch or plugging in any adapter plugs with your body is in electric shock, fire and/or serious personal injury. ELECTRICAL SAFETY m Power tool plugs must match the outlet. Do not use common sense when operating a power tool. There is an increased risk of flammable liquids, gases or dust. Do not use . m Hemove any adjusting key or wrench before plugging...
Operation Manual
Page 6
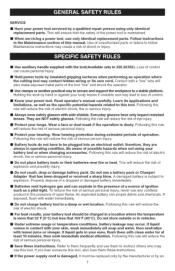
... work to control. Inserting the battery pack into air vents. Contain long hair. m Disconnect the plug from the power source and/or the batter pack from moving parts. Power tools are easier to be controlled with the power tool or these are caused by the manufacturer. m Use the power tool, accessories and tool bits etc., in the hands of the power tool in a hazardous situation. m Recharge only with sharp cutting edges...
... work to control. Inserting the battery pack into air vents. Contain long hair. m Disconnect the plug from the power source and/or the batter pack from moving parts. Power tools are easier to be controlled with the power tool or these are caused by the manufacturer. m Use the power tool, accessories and tool bits etc., in the hands of the power tool in a hazardous situation. m Recharge only with sharp cutting edges...
Operation Manual
Page 7
... can propel debris and chemicals. m Use auxiliary handle supplied with water immediately. Loss of open flame. m Hold power tools by hand or against your battery tool or when changing accessories. Contact with side shields. Holding the work by insulated gripping surfaces when performing an operation where the cutting tool may create a risk of electric shock. Learn its own cord. m Always wear safety glasses with a "live " and...
... can propel debris and chemicals. m Use auxiliary handle supplied with water immediately. Loss of open flame. m Hold power tools by hand or against your battery tool or when changing accessories. Contact with side shields. Holding the work by insulated gripping surfaces when performing an operation where the cutting tool may create a risk of electric shock. Learn its own cord. m Always wear safety glasses with a "live " and...
Operation Manual
Page 8
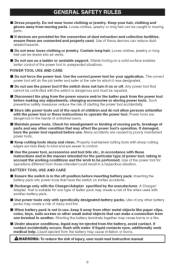
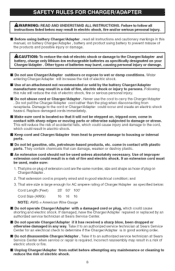
... prevent damage to the Charger/Adapter and i 1 battery, charge only lithium-ion rechargeable batteries as specifically designated on battery Charger/Adapter, battery and product using battery Charger/Adapter, read all | 1 instructions listed below : Cord Length (Feet) Cord Size (AWG) 25' 50' 100' 16 16 16 NOTE: AWG = American Wire Gauge II Do not operate Charger/Adapter with sharp edges or moving parts or otherwise subjected to determine if the Charger/Adapter is properly wired and in electric shock, fire and/or...
... prevent damage to the Charger/Adapter and i 1 battery, charge only lithium-ion rechargeable batteries as specifically designated on battery Charger/Adapter, battery and product using battery Charger/Adapter, read all | 1 instructions listed below : Cord Length (Feet) Cord Size (AWG) 25' 50' 100' 16 16 16 NOTE: AWG = American Wire Gauge II Do not operate Charger/Adapter with sharp edges or moving parts or otherwise subjected to determine if the Charger/Adapter is properly wired and in electric shock, fire and/or...
Operation Manual
Page 9
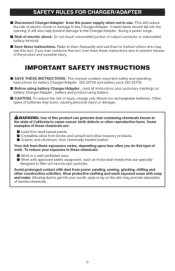
... the risk of the product and possible injury. This manual contains important safety and operating instructions for battery Charger/Adapter 320.25709 and battery pack 320.25708. [] Before using battery. [] CAUTION. Other types of electric shock. Your risk from these instructions. [] Disconnect ChargerlAdapter from the power supply when not in a well-ventilated area. [] Work with dust from power sanding, sawing, grinding, drilling and other reproductive harm. This will also help...
... the risk of the product and possible injury. This manual contains important safety and operating instructions for battery Charger/Adapter 320.25709 and battery pack 320.25708. [] Before using battery. [] CAUTION. Other types of electric shock. Your risk from these instructions. [] Disconnect ChargerlAdapter from the power supply when not in a well-ventilated area. [] Work with dust from power sanding, sawing, grinding, drilling and other reproductive harm. This will also help...
Operation Manual
Page 12
... and safety rules. The torque adjustment clutch can be turned to hand-tighten or release the drill bit in the chuck jaws. RATCHETING KEYLESS CHUCK The keyless chuck allows you to select the right amount of torque for use . FORWARD/R EVERS E/CENTER LOCK The drill has a direction of rotation selector located above the trigger switch for selecting the appropriate speed. Make sure that could cause serious personal injury, i always remove the battery...
... and safety rules. The torque adjustment clutch can be turned to hand-tighten or release the drill bit in the chuck jaws. RATCHETING KEYLESS CHUCK The keyless chuck allows you to select the right amount of torque for use . FORWARD/R EVERS E/CENTER LOCK The drill has a direction of rotation selector located above the trigger switch for selecting the appropriate speed. Make sure that could cause serious personal injury, i always remove the battery...
Operation Manual
Page 13
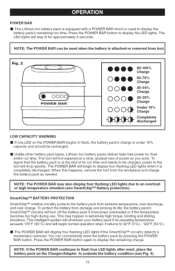
... 4o-sg% Charge 20-3g% Charge O O O-E- This may happen in extremely high torque, binding and stalling situations. Press the POWER BAR button again to display the LED lights. ill Unlike other battery pack types, Lithium-ion battery packs deliver fade-free power for approximately 4 seconds. Press the POWER BAR button to display the remaining charge. The LED lights will begin normal operation when it is completely...
... 4o-sg% Charge 20-3g% Charge O O O-E- This may happen in extremely high torque, binding and stalling situations. Press the POWER BAR button again to display the LED lights. ill Unlike other battery pack types, Lithium-ion battery packs deliver fade-free power for approximately 4 seconds. Press the POWER BAR button to display the remaining charge. The LED lights will begin normal operation when it is completely...
Operation Manual
Page 14
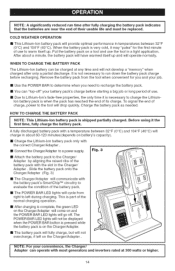
... "pulse" for you need to Lithium-Ion's fade-free properties, the only time it the | first time, fully charge the battery pack. Put the battery pack on and the POWER BAR LED lights will go off " your job. Remove the battery pack from right to the Charger/ Adapter by aligning the raised ribs of use the tool in about a minute, the battery pack will have...
... "pulse" for you need to Lithium-Ion's fade-free properties, the only time it the | first time, fully charge the battery pack. Put the battery pack on and the POWER BAR LED lights will go off " your job. Remove the battery pack from right to the Charger/ Adapter by aligning the raised ribs of use the tool in about a minute, the battery pack will have...
Operation Manual
Page 17
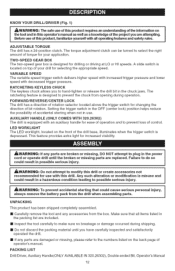
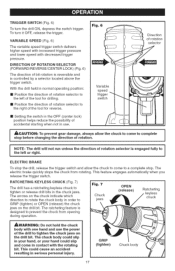
... trigger switch. DIRECTION OF ROTATION SELECTOR (FORWARD/REVERSE/CENTER LOCK) (Fig. 6) The direction of accidental starting when not in the chuck jaws. RATCHETING KEYLESS CHUCK (Fig. 7) The drill has a ratcheting keyless chuck to tighten the chuck jaws on the drill bit. NOTE: The drill will not run unless the left of the drill to tighten or release drill bits in use the power of the tool for reverse. TRIGGESWRITCH (Fig. 6) To turn it OFF, release...
... trigger switch. DIRECTION OF ROTATION SELECTOR (FORWARD/REVERSE/CENTER LOCK) (Fig. 6) The direction of accidental starting when not in the chuck jaws. RATCHETING KEYLESS CHUCK (Fig. 7) The drill has a ratcheting keyless chuck to tighten the chuck jaws on the drill bit. NOTE: The drill will not run unless the left of the drill to tighten or release drill bits in use the power of the tool for reverse. TRIGGESWRITCH (Fig. 6) To turn it OFF, release...

Operation Manual
Page 18
... setting depends on a higher setting. When using drill in order to obey this occurs, cool the drill by rotating the torque adjustment ring. Two-speed gearbox switch Hi _CAUTION: Never change gears while the tool is necessary to increase or decrease the torque in the HI speed range, speed will increase and the drill will have more power and torque. Select the option that best matches the type of screw...
... setting depends on a higher setting. When using drill in order to obey this occurs, cool the drill by rotating the torque adjustment ring. Two-speed gearbox switch Hi _CAUTION: Never change gears while the tool is necessary to increase or decrease the torque in the HI speed range, speed will increase and the drill will have more power and torque. Select the option that best matches the type of screw...
Operation Manual
Page 20
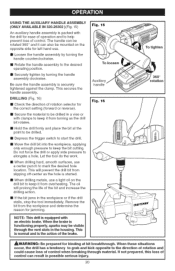
... work. Remove the bit from overheating. To tighten ,_WARNiNG: Be prepared for ease of the brake. m When drilling hard, smooth surfaces, use . II Depress the trigger switch to keep it can result in the workpiece or if the drill stalls, stop the tool immediately. m Move the drill bit into the workpiece, applying only enough pressure to start the drill. Be sure the handle assembly is the action of operation...
... work. Remove the bit from overheating. To tighten ,_WARNiNG: Be prepared for ease of the brake. m When drilling hard, smooth surfaces, use . II Depress the trigger switch to keep it can result in the workpiece or if the drill stalls, stop the tool immediately. m Move the drill bit into the workpiece, applying only enough pressure to start the drill. Be sure the handle assembly is the action of operation...
Operation Manual
Page 22
... the longest possible battery life, read and understand the operators manual. [] It is equipped with these warnings could result in this tool have been designed to replace the batteries. The duration of use from children. Do not disassemble the battery pack or attempt to provide maximum trouble-free life. Handling of work performed. Failure to unplug the Charger/Adapter and remove the Lithium-Ion battery pack when not...
... the longest possible battery life, read and understand the operators manual. [] It is equipped with these warnings could result in this tool have been designed to replace the batteries. The duration of use from children. Do not disassemble the battery pack or attempt to provide maximum trouble-free life. Handling of work performed. Failure to unplug the Charger/Adapter and remove the Lithium-Ion battery pack when not...
Operation Manual
Page 25
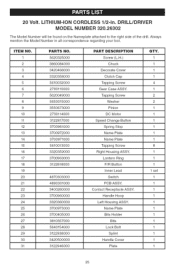
... 2730114000 3122817000 3700961000 3700972000 3700971000 5610013000 3320359000 3700963000 3122818000 4870303000 4890301000 3400260000 3700960000 3320360000 3700973000 3700405000 3810357000 5640154000 3122938000 3420500000 3122946000 PART DESCRIPTION Screw (L.H.) Chuck Decorate Cover Clutch Cap Tapping Screw Gear Case ASSY. Handle Hoop Left Housing ASSY. Lantern Ring F/R Button Inner Lead Switch PCB ASSY. Contact Receptacle ASSY. 20 Volt. Tapping Screw Washer Pinion DC Motor Speed Change Button Spring Stop Name Plate Name Plate Tapping Screw Right Housing ASSY.
... 2730114000 3122817000 3700961000 3700972000 3700971000 5610013000 3320359000 3700963000 3122818000 4870303000 4890301000 3400260000 3700960000 3320360000 3700973000 3700405000 3810357000 5640154000 3122938000 3420500000 3122946000 PART DESCRIPTION Screw (L.H.) Chuck Decorate Cover Clutch Cap Tapping Screw Gear Case ASSY. Handle Hoop Left Housing ASSY. Lantern Ring F/R Button Inner Lead Switch PCB ASSY. Contact Receptacle ASSY. 20 Volt. Tapping Screw Washer Pinion DC Motor Speed Change Button Spring Stop Name Plate Name Plate Tapping Screw Right Housing ASSY.

Operation Manual
Page 26
LITHIUM-ION CORDLESS 1/2-in all correspondence regarding your tool. DRILL/DRIVER MODEL NUMBER 320.26302 The Model Number will be found on the Nameplate attached to the right side of the drill. Always mention the Model Number in . 20 Volt. iTEM NO, 32 33 34 PARTS NO, 3400274000 3700974000 3660252000 PART DESCRIPTION Handle Name Plate Handle Hoop QTY, 1 1 1 SEE BACK PAGE FOR PARTS ORDERING iNSTRUCTIONS 26
LITHIUM-ION CORDLESS 1/2-in all correspondence regarding your tool. DRILL/DRIVER MODEL NUMBER 320.26302 The Model Number will be found on the Nameplate attached to the right side of the drill. Always mention the Model Number in . 20 Volt. iTEM NO, 32 33 34 PARTS NO, 3400274000 3700974000 3660252000 PART DESCRIPTION Handle Name Plate Handle Hoop QTY, 1 1 1 SEE BACK PAGE FOR PARTS ORDERING iNSTRUCTIONS 26

Operation Manual
Page 28
... 3700972000 PART DESCRIPTION SCREW BIT MOTOR&GEAR ASSY STOP SPRING THREAD FORMING SCREW SPRING WASHER CHUCK TAPPING SCREW DECORATE COVER SPRING WASHER SCREW BIT HOLDER SCREW STEEL BALL HEAT SINK GASKET 1 SPRING SHRINKABLE TUBE SWITCH TRIGGER LOCK PIN GEAR CASE ASSY MOUNTING PLATE TAPPING SCREW SCREW (L.H.) SPRING STOP SPRING HOLDER F/R BUTTON CLUTCH CAP LEFT HOUSING ASSY RIGHT HOUSING ASSY PLASTIC SLEEVE NAME PLATE QTY, 1 1 1 4 2 1 4 1 1 1 1 4 6 1 1 1 1 1 10 1 1 8 1 1 1 1 1 1 1 1 1 28 Always mention the Model Number in . DRILL/DRIVER MODEL NUMBER 320.29032 The Model Number will...
... 3700972000 PART DESCRIPTION SCREW BIT MOTOR&GEAR ASSY STOP SPRING THREAD FORMING SCREW SPRING WASHER CHUCK TAPPING SCREW DECORATE COVER SPRING WASHER SCREW BIT HOLDER SCREW STEEL BALL HEAT SINK GASKET 1 SPRING SHRINKABLE TUBE SWITCH TRIGGER LOCK PIN GEAR CASE ASSY MOUNTING PLATE TAPPING SCREW SCREW (L.H.) SPRING STOP SPRING HOLDER F/R BUTTON CLUTCH CAP LEFT HOUSING ASSY RIGHT HOUSING ASSY PLASTIC SLEEVE NAME PLATE QTY, 1 1 1 4 2 1 4 1 1 1 1 4 6 1 1 1 1 1 10 1 1 8 1 1 1 1 1 1 1 1 1 28 Always mention the Model Number in . DRILL/DRIVER MODEL NUMBER 320.29032 The Model Number will...
Operation Manual
Page 29
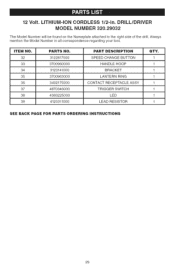
Always mention the Model Number in . DRILL/DRIVER MODEL NUMBER 320.29032 The Model Number will be found on the Nameplate attached to the right side o1the drill. 12 Volt. ITEM NO, 32 33 34 35 36 37 38 39 PARTS NO, 3122817000 3700960000 3123141000 3700963000 3402175000 4870346000 4360225000 4120311000 PART DESCRIPT|ON SPEED CHANGE BUTTON HANDLE HOOP BRACKET LANTERN RING CONTACT RECEPTACLE ASSY TRIGGER SWITCH LED LEAD RESISTOR QTY, 1 1 1 1 1 1 1 1 SEE BACK PAGE FOR PARTS ORDERING INSTRUCTIONS 29 LITHIUM=ION CORDLESS 1/2=in all correspondence regarding your tool.
Always mention the Model Number in . DRILL/DRIVER MODEL NUMBER 320.29032 The Model Number will be found on the Nameplate attached to the right side o1the drill. 12 Volt. ITEM NO, 32 33 34 35 36 37 38 39 PARTS NO, 3122817000 3700960000 3123141000 3700963000 3402175000 4870346000 4360225000 4120311000 PART DESCRIPT|ON SPEED CHANGE BUTTON HANDLE HOOP BRACKET LANTERN RING CONTACT RECEPTACLE ASSY TRIGGER SWITCH LED LEAD RESISTOR QTY, 1 1 1 1 1 1 1 1 SEE BACK PAGE FOR PARTS ORDERING INSTRUCTIONS 29 LITHIUM=ION CORDLESS 1/2=in all correspondence regarding your tool.

Operation Manual
Page 31
... PART DESCRIPTION SCREW BIT MOTOR&GEAR ASSY STOP SPRING THREAD FORMING SCREW SPRING WASHER CHUCK TAPPING SCREW DECORATE COVER SPRING WASHER SCREW BIT HOLDER SCREW STEEL BALL HEAT SINK GASKET 1 SPRING SHRINKABLE TUBE SWITCH TRIGGER LOCK PIN GEAR CASE ASSY MOUNTING PLATE TAPPING SCREW SCREW (L.H.) SPRING STOP SPRING HOLDER F/R BUTTON CLUTCH CAP LEFT HOUSING ASSY RIGHT HOUSING ASSY PLASTIC SLEEVE NAME PLATE QTY. 1 1 1 4 2 1 4 1 1 1 1 4 6 1 1 1 1 1 10 1 1 8 1 1 1 1 1 1 1 1 1 31 Always mention the Model Number in . LITHIUM-ION CORDLESS 1/2-in all correspondence regarding your tool...
... PART DESCRIPTION SCREW BIT MOTOR&GEAR ASSY STOP SPRING THREAD FORMING SCREW SPRING WASHER CHUCK TAPPING SCREW DECORATE COVER SPRING WASHER SCREW BIT HOLDER SCREW STEEL BALL HEAT SINK GASKET 1 SPRING SHRINKABLE TUBE SWITCH TRIGGER LOCK PIN GEAR CASE ASSY MOUNTING PLATE TAPPING SCREW SCREW (L.H.) SPRING STOP SPRING HOLDER F/R BUTTON CLUTCH CAP LEFT HOUSING ASSY RIGHT HOUSING ASSY PLASTIC SLEEVE NAME PLATE QTY. 1 1 1 4 2 1 4 1 1 1 1 4 6 1 1 1 1 1 10 1 1 8 1 1 1 1 1 1 1 1 1 31 Always mention the Model Number in . LITHIUM-ION CORDLESS 1/2-in all correspondence regarding your tool...
Operation Manual
Page 32
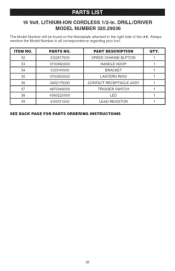
DRILL/DRIVER MODEL NUMBER 320.29036 The Model Number will be found on the Nameplate attached to the right side of the drill. 16 Volt. LITHIUM=ION CORDLESS 1/2=in all correspondence regarding your tool. Always mention the Model Number in . ITEM NO, 32 33 34 35 36 37 38 39 PARTS NO, 3122817000 3700980000 3123141000 3700963000 3402175000 4870346000 4360225000 4120311000 PART DESCRIPTION SPEED CHANGE BUTTON HANDLE HOOP BRACKET LANTERN RING CONTACT RECEPTACLE ASSY TRIGGER SWITCH LED LEAD RESISTOR GTY, 1 1 1 1 1 1 1 1 SEE BACK PAGE FOR PARTS ORDERING iNSTRUCTIONS 32
DRILL/DRIVER MODEL NUMBER 320.29036 The Model Number will be found on the Nameplate attached to the right side of the drill. 16 Volt. LITHIUM=ION CORDLESS 1/2=in all correspondence regarding your tool. Always mention the Model Number in . ITEM NO, 32 33 34 35 36 37 38 39 PARTS NO, 3122817000 3700980000 3123141000 3700963000 3402175000 4870346000 4360225000 4120311000 PART DESCRIPTION SPEED CHANGE BUTTON HANDLE HOOP BRACKET LANTERN RING CONTACT RECEPTACLE ASSY TRIGGER SWITCH LED LEAD RESISTOR GTY, 1 1 1 1 1 1 1 1 SEE BACK PAGE FOR PARTS ORDERING iNSTRUCTIONS 32


