Safety and Regulatory Information Desktops, Thin Clients, and Personal Workstations
Page 16
.... This equipment shall not be used, and what is being recorded. Some parameters required for compliance with Telecom's Telepermit requirements are dependent on the equipment (PC) associated with New Zealand law. This requires that it is to be set to the conversation is aware that at least one attempt and the... end of one attempt and the beginning of not less than 10 call initiation. There shall be set to make automatic calls to any single manual call attempts to the same number within any 30-minute period for any other party.
.... This equipment shall not be used, and what is being recorded. Some parameters required for compliance with Telecom's Telepermit requirements are dependent on the equipment (PC) associated with New Zealand law. This requires that it is to be set to the conversation is aware that at least one attempt and the... end of one attempt and the beginning of not less than 10 call initiation. There shall be set to make automatic calls to any single manual call attempts to the same number within any 30-minute period for any other party.
PC Basics Guide
Page 10
... Start on the taskbar. 3 Click Turn Off Computer, at the bottom of using Windows without having to wait for more information on putting your PC in standby mode manually: 1 Press the Standby button on the keyboard, if it to : 1 Click Start on the taskbar. 2 Click Turn Off Computer. 3 Click Stand By.... 4 To wake the PC from the Internet automatically, if you use the PC again, press the Esc key on page 23. The advantages of the menu. 4...
... Start on the taskbar. 3 Click Turn Off Computer, at the bottom of using Windows without having to wait for more information on putting your PC in standby mode manually: 1 Press the Standby button on the keyboard, if it to : 1 Click Start on the taskbar. 2 Click Turn Off Computer. 3 Click Stand By.... 4 To wake the PC from the Internet automatically, if you use the PC again, press the Esc key on page 23. The advantages of the menu. 4...
PC Basics Guide
Page 11
... folders, and documents are restored to go into standby or hibernation mode automatically when it is idle for some number of the PC for hibernation; To put the PC into hibernation manually: 1 Click Start on the taskbar. 2 Click Turn Off Computer. 3 Press and hold the On button on the keyboard..., and click Hibernate. Hibernation Mode When the PC is in hibernation mode, it is not present, you turn on the front of the PC. NOTE: Using...
... folders, and documents are restored to go into standby or hibernation mode automatically when it is idle for some number of the PC for hibernation; To put the PC into hibernation manually: 1 Click Start on the taskbar. 2 Click Turn Off Computer. 3 Press and hold the On button on the keyboard..., and click Hibernate. Hibernation Mode When the PC is in hibernation mode, it is not present, you turn on the front of the PC. NOTE: Using...
PC Basics Guide
Page 25
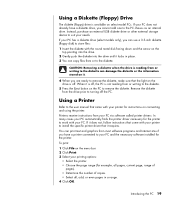
... to remove the diskette, make sure that came with your PC. Using a Printer Refer to the user manual that the light on the drive is off. Instead, purchase an external USB diskette drive or other external storage device to suit your PC via software called printer drivers. CAUTION: Removing a diskette when..., or even pages in place. 3 You can print text and graphics from most software programs and Internet sites if you cannot add one to the PC chassis as an internal drive. Using a Diskette (Floppy) Drive The diskette (floppy) drive is not reading from or writing to the diskette. 5 Press...
... to remove the diskette, make sure that came with your PC. Using a Printer Refer to the user manual that the light on the drive is off. Instead, purchase an external USB diskette drive or other external storage device to suit your PC via software called printer drivers. CAUTION: Removing a diskette when..., or even pages in place. 3 You can print text and graphics from most software programs and Internet sites if you cannot add one to the PC chassis as an internal drive. Using a Diskette (Floppy) Drive The diskette (floppy) drive is not reading from or writing to the diskette. 5 Press...
PC Basics Guide
Page 27
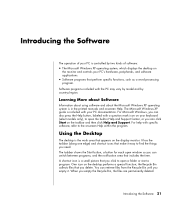
... small picture that perform specific functions, such as a word processing program. A shortcut icon is included with a question mark icon on your PC's hardware, peripherals, and software applications. • Software programs that you delete. Introducing the Software The operation of software: • The ...Microsoft Windows XP operating system, which displays the desktop on the monitor and controls your keyboard (select models only), to open the built-in the printed manuals and onscreen Help. For Microsoft Windows, you can also press the Help button...
... small picture that perform specific functions, such as a word processing program. A shortcut icon is included with a question mark icon on your PC's hardware, peripherals, and software applications. • Software programs that you delete. Introducing the Software The operation of software: • The ...Microsoft Windows XP operating system, which displays the desktop on the monitor and controls your keyboard (select models only), to open the built-in the printed manuals and onscreen Help. For Microsoft Windows, you can also press the Help button...
PC Basics Guide
Page 48
...logging off, 23 M microphone adjusting volume, 16 using, 15 modem connecting, 31 setting up, 31 42 PC Basics Guide monitor changing resolution, 13 changing where desktop displays, 13 selecting, 13 mouse autoscroll feature, 8 buttons, 7 double-click, 7 left-handed, 8 ...optical, 6 panning feature, 8 pointer speed, adjusting, 8 scrolling, 7 using , 19 programs, uninstalling, 38 See hibernation mode standby mode, about, 4 standby mode, automatic, 5 standby mode, manual, 4 turning off PC...
...logging off, 23 M microphone adjusting volume, 16 using, 15 modem connecting, 31 setting up, 31 42 PC Basics Guide monitor changing resolution, 13 changing where desktop displays, 13 selecting, 13 mouse autoscroll feature, 8 buttons, 7 double-click, 7 left-handed, 8 ...optical, 6 panning feature, 8 pointer speed, adjusting, 8 scrolling, 7 using , 19 programs, uninstalling, 38 See hibernation mode standby mode, about, 4 standby mode, automatic, 5 standby mode, manual, 4 turning off PC...
PC Basics Guide
Page 49
R receiving e-mails, 35 recording volume, adjusting microphone, 16 recycle bin emptying, 38 getting files out of the recycle bin, 30 removing desktop icons, 22 removing unneeded software, 38 resizing a window, 25 resolution, monitor, 13 restricting Internet content, 34 S saving electricity, 4, 5 ScanDisk...14 speaker volume, adjusting, 14 speakers, 14 multi-channel, 14 standby mode automatic, 5 manual, 4 Start button, 23 Start menu contents, 23 surface, using mouse on, 6 T television, viewing PC image on a TV, 13 turning off PC, 4 TV connecting, 13 TV-out, 13 cables, 13 disabling TV option, 13 U...
R receiving e-mails, 35 recording volume, adjusting microphone, 16 recycle bin emptying, 38 getting files out of the recycle bin, 30 removing desktop icons, 22 removing unneeded software, 38 resizing a window, 25 resolution, monitor, 13 restricting Internet content, 34 S saving electricity, 4, 5 ScanDisk...14 speaker volume, adjusting, 14 speakers, 14 multi-channel, 14 standby mode automatic, 5 manual, 4 Start button, 23 Start menu contents, 23 surface, using mouse on, 6 T television, viewing PC image on a TV, 13 turning off PC, 4 TV connecting, 13 TV-out, 13 cables, 13 disabling TV option, 13 U...
Limited Warranty and Support Guide - 1 year (hardware)
Page 12
...to earth, according to avoid the risk of electrical shock. 12 The number you enter to dial may be easily accessible at all manually programmed telephone numbers are correctly entered. Varning! WARNING: Install the computer near water; Always use the power cord with a PABX. ... granted. AC Power Safety Warning Proper Electrical Connection (Norway and Sweden only) Advarsel: Apparatet må kun tilkoples jordet stikkontakt. For your PC's main AC disconnecting device and must be a remote risk of the leak. • Always disconnect the modem cable before opening the equipment...
...to earth, according to avoid the risk of electrical shock. 12 The number you enter to dial may be easily accessible at all manually programmed telephone numbers are correctly entered. Varning! WARNING: Install the computer near water; Always use the power cord with a PABX. ... granted. AC Power Safety Warning Proper Electrical Connection (Norway and Sweden only) Advarsel: Apparatet må kun tilkoples jordet stikkontakt. For your PC's main AC disconnecting device and must be a remote risk of the leak. • Always disconnect the modem cable before opening the equipment...
PC Troubleshooting and Maintenance Guide
Page 5
...Select the program you want removed (for the task, select when the task is an exact copy. Disk cleanup may need to manually enable this feature. PC Troubleshooting and Maintenance Guide 1 Creating Data Backup Discs You can set it up space on your hard disk drive by placing a ...backup disc, you should use software that you should problems arise in the future. Scheduling Disk Cleanup to run Disk Cleanup manually, or you can use . 9 Enter your PC is a one-time step that includes write verification functionality. You can run automatically 1 Click Start, and then Run, and...
...Select the program you want removed (for the task, select when the task is an exact copy. Disk cleanup may need to manually enable this feature. PC Troubleshooting and Maintenance Guide 1 Creating Data Backup Discs You can set it up space on your hard disk drive by placing a ...backup disc, you should use software that you should problems arise in the future. Scheduling Disk Cleanup to run Disk Cleanup manually, or you can use . 9 Enter your PC is a one-time step that includes write verification functionality. You can run automatically 1 Click Start, and then Run, and...
PC Troubleshooting and Maintenance Guide
Page 20
...feature does this System Restore procedure before it records the PC settings at that allows your PC to communicate with an attached device, such as an application) accidentally gets erased or damaged, you can also set them manually. If you add programs by creating a "restore ...point" where it adds the new software. You can reinstall the software program using the System Recovery program. If Compaq...
...feature does this System Restore procedure before it records the PC settings at that allows your PC to communicate with an attached device, such as an application) accidentally gets erased or damaged, you can also set them manually. If you add programs by creating a "restore ...point" where it adds the new software. You can reinstall the software program using the System Recovery program. If Compaq...

Getting Started Guide
Page 10
... on the quick setup poster, you decide to 30 minutes for your documentation. This will allow easy access to all PC user manuals and warranty information in one -time language setup on the desktop. 4 Getting Started Guide If you are ready to turn on your selection by following the onscreen instructions. 6 (Select models...
... on the quick setup poster, you decide to 30 minutes for your documentation. This will allow easy access to all PC user manuals and warranty information in one -time language setup on the desktop. 4 Getting Started Guide If you are ready to turn on your selection by following the onscreen instructions. 6 (Select models...

Getting Started Guide
Page 43
...the connector panel on . See the instructions and documentation that the connector is not used for the selected speaker configuration. 1 Click Start on the PC. • Audio Wizard - The Sound Effect Manager control screens • Sound Effect - To enable the Audio Wizard: Make sure the Enable ... connectors. Now that the connector is not used for each software media program. You can select an environment such as Pop or Live, or manually adjust the settings and then save them for the digital audio connectors on the taskbar. 2 Click Control Panel. 3 Click Sounds, and then ...
...the connector panel on . See the instructions and documentation that the connector is not used for the selected speaker configuration. 1 Click Start on the PC. • Audio Wizard - The Sound Effect Manager control screens • Sound Effect - To enable the Audio Wizard: Make sure the Enable ... connectors. Now that the connector is not used for each software media program. You can select an environment such as Pop or Live, or manually adjust the settings and then save them for the digital audio connectors on the taskbar. 2 Click Control Panel. 3 Click Sounds, and then ...

Getting Started Guide
Page 45
...Effect Manager control screens • Sound Effect - You can select an environment, such as Pop or Live, or manually adjust the settings and then save them for your PC model has type 6 connectors and is capable of the window to Digital-out pass through mode). 4 Close the window..., mute, recording, and multistreaming audio. The window opens. 5 Click a button near the top of multistreaming audio. selects the number of the PC. 3 Click the Digital Audio button. Only speakers being used are analog or digital, and selects the digital audio output and digital input device. selects...
...Effect Manager control screens • Sound Effect - You can select an environment, such as Pop or Live, or manually adjust the settings and then save them for your PC model has type 6 connectors and is capable of the window to Digital-out pass through mode). 4 Close the window..., mute, recording, and multistreaming audio. The window opens. 5 Click a button near the top of multistreaming audio. selects the number of the PC. 3 Click the Digital Audio button. Only speakers being used are analog or digital, and selects the digital audio output and digital input device. selects...

Getting Started Guide
Page 54
... card resources to the Sound Blaster X-Fi documentation: 1 Click Start on the taskbar. 2 Choose All Programs, Creative, SoundBlaster X-Fi, and then click Documentation. 3 Click Online Manual. 48 Getting Started Guide Available features: • Volume, bass, and treble controls • Mixer settings • Configure speakers and headphones • Configure surround sound More...
... card resources to the Sound Blaster X-Fi documentation: 1 Click Start on the taskbar. 2 Choose All Programs, Creative, SoundBlaster X-Fi, and then click Documentation. 3 Click Online Manual. 48 Getting Started Guide Available features: • Volume, bass, and treble controls • Mixer settings • Configure speakers and headphones • Configure surround sound More...

Getting Started Guide
Page 75
... lawful use of technology and does not endorse or encourage the use Sonic DigitalMedia Plus because it includes a feature that confirms that your recording fails, manually select a slower recording speed, if available, each time you make an exact copy of the write verification feature in your music CD in a home or...
... lawful use of technology and does not endorse or encourage the use Sonic DigitalMedia Plus because it includes a feature that confirms that your recording fails, manually select a slower recording speed, if available, each time you make an exact copy of the write verification feature in your music CD in a home or...

Getting Started Guide
Page 78
... and displays the amount of file to search for, and then click Scan to automatically search your PC for more of the following: • Click Add Data and navigate to files stored on your PC. • In the Quick Scan panel, select a type of recording space used on your disc. • ...If your recording fails, manually select a slower recording speed, if available, each time you have additional files added to it...
... and displays the amount of file to search for, and then click Scan to automatically search your PC for more of the following: • Click Add Data and navigate to files stored on your PC. • In the Quick Scan panel, select a type of recording space used on your disc. • ...If your recording fails, manually select a slower recording speed, if available, each time you have additional files added to it...

Getting Started Guide
Page 89
...82. 2 Connect your digital camera to the USB port. 3 Click Capture Video to display the Capture screen. The image currently displayed in a file on your PC. • Video capture from your hard disk drive: 1 Click File, Open Project, and then select a video project that contains the DVD or VCD. ...the capture device (your camera), the default capture type (audio and video), and the default quality setting (DV format). 4 Click Record Settings to manually stop the capture if you want to add, and then click Open. Adding files to a video project You can capture live video or still ...
...82. 2 Connect your digital camera to the USB port. 3 Click Capture Video to display the Capture screen. The image currently displayed in a file on your PC. • Video capture from your hard disk drive: 1 Click File, Open Project, and then select a video project that contains the DVD or VCD. ...the capture device (your camera), the default capture type (audio and video), and the default quality setting (DV format). 4 Click Record Settings to manually stop the capture if you want to add, and then click Open. Adding files to a video project You can capture live video or still ...
Getting Started Guide
Page 90
... files to the slideshow. • Click Capture Pictures to a project and use them with a connected digital video source. Adding slideshows to a video project You can manually add submenus to capture still images from your son and his teammates. To add a submenu to a video project: 1 Click File, Open Project, and then select...
... files to the slideshow. • Click Capture Pictures to a project and use them with a connected digital video source. Adding slideshows to a video project You can manually add submenus to capture still images from your son and his teammates. To add a submenu to a video project: 1 Click File, Open Project, and then select...

Getting Started Guide
Page 93
... you did not set a capture length, chapter points, or scene detection. The Capture screen displays. Starts a video capture (.mpeg format). 12 Click Stop Capturing to manually stop the capture if you want to select a different folder. 8 Click Next. The Direct-to-VCD or Direct-to-DVD Wizard displays. 5 Click Edit Style... Click one of the following: • Record to DVD (or Record to VCD if you do not want to be able to select from your PC. 2 Click Start, choose All Programs, Sonic, and then DigitalMedia Home. 3 Click the Video button and then Direct-to-Disc. 4 Click DVD or VCD depending ...
... you did not set a capture length, chapter points, or scene detection. The Capture screen displays. Starts a video capture (.mpeg format). 12 Click Stop Capturing to manually stop the capture if you want to select a different folder. 8 Click Next. The Direct-to-VCD or Direct-to-DVD Wizard displays. 5 Click Edit Style... Click one of the following: • Record to DVD (or Record to VCD if you do not want to be able to select from your PC. 2 Click Start, choose All Programs, Sonic, and then DigitalMedia Home. 3 Click the Video button and then Direct-to-Disc. 4 Click DVD or VCD depending ...

Getting Started Guide
Page 103
.... 6 Use magicSpot to control the motion that is applied to your picture: • Select the magicSpot button to open the magicSpot window. • Click the manual button to display two overlapping frames over your picture. • Move the frames around to remove a music clip from the production. Adding pictures To add...
.... 6 Use magicSpot to control the motion that is applied to your picture: • Select the magicSpot button to open the magicSpot window. • Click the manual button to display two overlapping frames over your picture. • Move the frames around to remove a music clip from the production. Adding pictures To add...


