
User Manual
Page 3
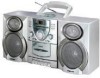
DIAL POINTER 17. PROGRAM INDICATOR 21. CD STOP BUTTON 23. POWER INDICATOR 26. SPEAKER JACK (LEFT) 38. 110V/220V AC VOLTAGE SELECTOR HEADPHONE JACK 29. CD FORWARD SKIP/SEARCH BUTTON 13. VOLUME CONTROL 15. REMOTE SENSOR ... BUTTON 14. LED DISPLAY 19. AC/DC VOLTAGE SELECTOR 36. SPAEKER BOX 30. RADIO DIAL SCALE 16. SPEAKER JACK (RIGHT) 37. STOP/EJECT BUTTON 3. AC POWER CORD 35. CD OPEN/CLOSE CONTROL DOOR 31. ROD ANTENNA 33. REPEAT BUTTON 12. POWER SWITCH 27. FAST FORWARD BUTTON 4. BATTERY COMPARTMENT 34. LOCATION OF CONTROLS (Cont.) 1.
DIAL POINTER 17. PROGRAM INDICATOR 21. CD STOP BUTTON 23. POWER INDICATOR 26. SPEAKER JACK (LEFT) 38. 110V/220V AC VOLTAGE SELECTOR HEADPHONE JACK 29. CD FORWARD SKIP/SEARCH BUTTON 13. VOLUME CONTROL 15. REMOTE SENSOR ... BUTTON 14. LED DISPLAY 19. AC/DC VOLTAGE SELECTOR 36. SPAEKER BOX 30. RADIO DIAL SCALE 16. SPEAKER JACK (RIGHT) 37. STOP/EJECT BUTTON 3. AC POWER CORD 35. CD OPEN/CLOSE CONTROL DOOR 31. ROD ANTENNA 33. REPEAT BUTTON 12. POWER SWITCH 27. FAST FORWARD BUTTON 4. BATTERY COMPARTMENT 34. LOCATION OF CONTROLS (Cont.) 1.

User Manual
Page 4
Note: The AC cord must be carried to any location desired. Turn the tuning knob to your local power supply. Open the Battery Compartment Door and insert 8 UM-1 D size batteries, making sure that the operating voltage of the Unit is identical with the voltage ... Before connecting the Unit to an AC outlet, check that the indicated battery polarity is observed. Connect the supplied AC power cord to the desired length. 3 Insert the speaker wire plug into the SPEAKER JACK. TO ATTACH THE SPEAKER ENCLOSURES 1 Attach the speaker enclosure to the main ...
Note: The AC cord must be carried to any location desired. Turn the tuning knob to your local power supply. Open the Battery Compartment Door and insert 8 UM-1 D size batteries, making sure that the operating voltage of the Unit is identical with the voltage ... Before connecting the Unit to an AC outlet, check that the indicated battery polarity is observed. Connect the supplied AC power cord to the desired length. 3 Insert the speaker wire plug into the SPEAKER JACK. TO ATTACH THE SPEAKER ENCLOSURES 1 Attach the speaker enclosure to the main ...


