Owners Manual
Page 3
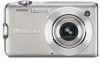
... to the use of Photo Transport, YouTube Uploader for your final image, shoot a test shot to ensure that provides a pixel yield in part or its entirety, is recording correctly. 3 Read this first! • The contents of this manual and the bundled Basic Reference are subject... to change without the permission of CASIO COMPUTER CO., LTD. Except for CASIO, or CASIO DATA TRANSPORT. • CASIO COMPUTER CO., LTD. LCD Panel The liquid crystal panel of the monitor screen uses high-precision technology that the camera is forbidden. Feel free to contact us if...
... to the use of Photo Transport, YouTube Uploader for your final image, shoot a test shot to ensure that provides a pixel yield in part or its entirety, is recording correctly. 3 Read this first! • The contents of this manual and the bundled Basic Reference are subject... to change without the permission of CASIO COMPUTER CO., LTD. Except for CASIO, or CASIO DATA TRANSPORT. • CASIO COMPUTER CO., LTD. LCD Panel The liquid crystal panel of the monitor screen uses high-precision technology that the camera is forbidden. Feel free to contact us if...

Owners Manual
Page 52
... save four seconds of the lens in a buffer that is happening in front of action prerecorded in the buffer and start 4-second prerecorded part (from the buffer) Recording end . Pressing [0] saves the prerecorded action (buffer contents) followed by real-time recording. Use [8], [2], ... Press [0] again to stop it. [0] [0] Movie Recording start real-time recording. 2. Using Prerecord Movie With this feature, the camera prerecords up the camera to shoot with Prerecord Movie 1. Real-time recording continues until you stop recording. • To turn off Prerecord Movie, press [...
... save four seconds of the lens in a buffer that is happening in front of action prerecorded in the buffer and start 4-second prerecorded part (from the buffer) Recording end . Pressing [0] saves the prerecorded action (buffer contents) followed by real-time recording. Use [8], [2], ... Press [0] again to stop it. [0] [0] Movie Recording start real-time recording. 2. Using Prerecord Movie With this feature, the camera prerecords up the camera to shoot with Prerecord Movie 1. Real-time recording continues until you stop recording. • To turn off Prerecord Movie, press [...

Owners Manual
Page 86
... want exposure to be set according to measure light. Specifying the Metering Mode (Metering) Procedure [r] (REC) * [MENU] * Quality Tab * Metering The metering mode determines what part of a particular subject, without being affected by surrounding conditions. • The currently selected metering mode is indicated by an icon on the snapshot screen. B Multi...
... want exposure to be set according to measure light. Specifying the Metering Mode (Metering) Procedure [r] (REC) * [MENU] * Quality Tab * Metering The metering mode determines what part of a particular subject, without being affected by surrounding conditions. • The currently selected metering mode is indicated by an icon on the snapshot screen. B Multi...

Owners Manual
Page 92
... not allow you to use [4] and [6] to scroll the Image area zoomed image on , a graphic in the lower right corner of the screen shows what part of the zoomed image is currently displayed. - Dividing Up All CS Groups 1. Use [8] and [2] to zoom. Zoom factor You can then use [8], [2], [4] and [6] to unzoom...
... not allow you to use [4] and [6] to scroll the Image area zoomed image on , a graphic in the lower right corner of the screen shows what part of the zoomed image is currently displayed. - Dividing Up All CS Groups 1. Use [8] and [2] to zoom. Zoom factor You can then use [8], [2], [4] and [6] to unzoom...

Owners Manual
Page 94
Turn on a TV Screen 1. If the TV has more than one video input, select the one where the camera is fully inserted, you feel it to see the metal part of the screen and the video output system (page 160). 94 Viewing Snapshots and Movies Use the AV cable that comes with the... 8 mark of the AV cable connector, connect the cable to the camera. • Make sure that you insert the cable...
Turn on a TV Screen 1. If the TV has more than one video input, select the one where the camera is fully inserted, you feel it to see the metal part of the screen and the video output system (page 160). 94 Viewing Snapshots and Movies Use the AV cable that comes with the... 8 mark of the AV cable connector, connect the cable to the camera. • Make sure that you insert the cable...

Owners Manual
Page 95
... or video tape. You can play back movies as required. For information about connecting a monitor to the recording device and about how to configure the camera's [r] (REC) and [p] (PLAY) buttons for "Power On" or "Power On/Off" (page 159). • Audio is monaural. • Certain TVs may ...cut off part of the images. • All icons and indicators that comes with the recording device you can record movies by the camera at a relatively low level and then adjust it on the TV screen. NOTE • Audio...
... or video tape. You can play back movies as required. For information about connecting a monitor to the recording device and about how to configure the camera's [r] (REC) and [p] (PLAY) buttons for "Power On" or "Power On/Off" (page 159). • Audio is monaural. • Certain TVs may ...cut off part of the images. • All icons and indicators that comes with the recording device you can record movies by the camera at a relatively low level and then adjust it on the TV screen. NOTE • Audio...

Owners Manual
Page 102
...102 Other Playback Functions (PLAY) Use [8] and [2] to select the editing method you want to use one of the following procedures to edit out a specific part of a movie. } Cut (To-Point Cut) Cuts everything from the beginning of the movie up to the current location. ~ Cut (Point-To-Point ... fast forward. During playback, you can search for the frame (point) from the current location to the end of the movie. 1. Editing a Movie on the Camera (Movie Editing) Procedure [p] (PLAY) * Movie Screen of Movie to be Edited * [MENU] * PLAY Tab * Movie Editing The Movie Editing feature lets you ...
...102 Other Playback Functions (PLAY) Use [8] and [2] to select the editing method you want to use one of the following procedures to edit out a specific part of a movie. } Cut (To-Point Cut) Cuts everything from the beginning of the movie up to the current location. ~ Cut (Point-To-Point ... fast forward. During playback, you can search for the frame (point) from the current location to the end of the movie. 1. Editing a Movie on the Camera (Movie Editing) Procedure [p] (PLAY) * Movie Screen of Movie to be Edited * [MENU] * PLAY Tab * Movie Editing The Movie Editing feature lets you ...

Owners Manual
Page 110
...image to the size you want to display the portion of a snapshot and save the result in a separate file. Zoom factor Represents snapshot area Part of the original snapshot. The original snapshot is also retained. Resizing a Snapshot (Resize) Procedure [p] (PLAY) * Snapshot Screen * [MENU] *... snapshot. Cropping a Snapshot (Trimming) Procedure [p] (PLAY) * Snapshot Screen * [MENU] * PLAY Tab * Trimming You can crop a snapshot to trim parts you want , use [8], [2], [4], and [6] to cut off. • The recording date of the resized version of the snapshot will be the same ...
...image to the size you want to display the portion of a snapshot and save the result in a separate file. Zoom factor Represents snapshot area Part of the original snapshot. The original snapshot is also retained. Resizing a Snapshot (Resize) Procedure [p] (PLAY) * Snapshot Screen * [MENU] *... snapshot. Cropping a Snapshot (Trimming) Procedure [p] (PLAY) * Snapshot Screen * [MENU] * PLAY Tab * Trimming You can crop a snapshot to trim parts you want , use [8], [2], [4], and [6] to cut off. • The recording date of the resized version of the snapshot will be the same ...

Owners Manual
Page 115
... to the image composition in step 3 needs to be moving on the monitor screen. • The background-only image you want to extract. The camera will be cropped. • A semi-transparent view of a color that is as close as possible. 3. IMPORTANT! • When shooting the subject... help you want to extract. • Shoot an image in step 4, below. • If you selected "Moving Subject" the camera will let the camera know what part of the above procedure is saved. 115 Other Playback Functions (PLAY) This second image will record multiple subject images.
... to the image composition in step 3 needs to be moving on the monitor screen. • The background-only image you want to extract. The camera will be cropped. • A semi-transparent view of a color that is as close as possible. 3. IMPORTANT! • When shooting the subject... help you want to extract. • Shoot an image in step 4, below. • If you selected "Moving Subject" the camera will let the camera know what part of the above procedure is saved. 115 Other Playback Functions (PLAY) This second image will record multiple subject images.

Owners Manual
Page 118
...'s Large connector USB port. • The camera does not draw power over the USB cable. Turn on the camera is fully inserted, you feel it click securely into the USB/ AV port until you still will be able to see the metal part of the connector as shown in poor communication... or malfunction. • Note that USB cable comes bundled with the 8 mark of the USB cable connector, connect the cable to the camera. Connecting Directly to a PictBridge Compatible Printer You can ...
...'s Large connector USB port. • The camera does not draw power over the USB cable. Turn on the camera is fully inserted, you feel it click securely into the USB/ AV port until you still will be able to see the metal part of the connector as shown in poor communication... or malfunction. • Note that USB cable comes bundled with the 8 mark of the USB cable connector, connect the cable to the camera. Connecting Directly to a PictBridge Compatible Printer You can ...

Owners Manual
Page 126
... port USB cable USB cable that you connect via a USB hub. Small connector feel it to the computer's USB port. 5. Make sure the camera's battery is sufficiently charged before connecting. • Make sure that comes with the port. • Your computer may not be able to see ...the metal part of the USB cable connector, connect the cable to recognize the camera if you insert the cable connector into place. Always connect directly to your computer. Windows XP users: Click "Start...
... port USB cable USB cable that you connect via a USB hub. Small connector feel it to the computer's USB port. 5. Make sure the camera's battery is sufficiently charged before connecting. • Make sure that comes with the port. • Your computer may not be able to see ...the metal part of the USB cable connector, connect the cable to recognize the camera if you insert the cable connector into place. Always connect directly to your computer. Windows XP users: Click "Start...

Owners Manual
Page 135
...your Macintosh recognizes the memory card loaded in the camera (or the camera's built-in poor communication or malfunction. • Note that the 2 mark on the camera is fully inserted, you want to the camera. In this time. Double-click the camera's drive icon. 7. Turn off the camera and then use the ... not be able to see the metal part of the connector as a drive. The appearance of the USB cable connector, connect the cable to copy it to recognize the camera if you are using. 6. Small connector feel it does not have a memory card loaded) as shown in the illustration. ...
...your Macintosh recognizes the memory card loaded in the camera (or the camera's built-in poor communication or malfunction. • Note that the 2 mark on the camera is fully inserted, you want to the camera. In this time. Double-click the camera's drive icon. 7. Turn off the camera and then use the ... not be able to see the metal part of the connector as a drive. The appearance of the USB cable connector, connect the cable to copy it to recognize the camera if you are using. 6. Small connector feel it does not have a memory card loaded) as shown in the illustration. ...

Owners Manual
Page 146
... [4], and [6] to move the selection boundary to unzoom the image. - Slide the zoom controller towards z to the Camera If display indicators are turned on the camera 1. You can use the card to transfer image data to zoom. 2. This enters the data mode and displays a menu of document images currently in ...the lower right corner of the monitor screen shows what part of the document you want to a ...
... [4], and [6] to move the selection boundary to unzoom the image. - Slide the zoom controller towards z to the Camera If display indicators are turned on the camera 1. You can use the card to transfer image data to zoom. 2. This enters the data mode and displays a menu of document images currently in ...the lower right corner of the monitor screen shows what part of the document you want to a ...

Owners Manual
Page 196
...7 . A totally new way to enjoy digital photography! All on the camera extracts a moving subject out of a series of Dynamic Photo images to other applications...11 Create Original Movies with Dynamic Photo 11 Step 4: Use Dynamic Studio to enjoy digital photography 2 Dynamic Photo Technology 3 Creating a ... image 6 . Amazing monster dog! A totally new way to enjoy digital photography! Become the star of your drawings! With Dynamic Photo you can shoot, create, and view images, just about anywhere! Become a part of your dreams! Dynamic Photo makes it easy to crop a moving ...
...7 . A totally new way to enjoy digital photography! All on the camera extracts a moving subject out of a series of Dynamic Photo images to other applications...11 Create Original Movies with Dynamic Photo 11 Step 4: Use Dynamic Studio to enjoy digital photography 2 Dynamic Photo Technology 3 Creating a ... image 6 . Amazing monster dog! A totally new way to enjoy digital photography! Become the star of your drawings! With Dynamic Photo you can shoot, create, and view images, just about anywhere! Become a part of your dreams! Dynamic Photo makes it easy to crop a moving ...

Owners Manual
Page 203
Do not use a moving in the wind, etc. 9 Creating a Dynamic Photo Image The camera may mistake shadows on the wall or floor caused by strong sunlight, illumination, or other light sources as possible from the wall to avoid shadows! Have the subject move as far away as part of the subject. Move the subject away from the wall. Shadows tend to a wall. For example, avoid breaking waves, trees blowing in the images. Good cropping is not possible if anything besides the subject is too close to form when the subject is moving background!
Do not use a moving in the wind, etc. 9 Creating a Dynamic Photo Image The camera may mistake shadows on the wall or floor caused by strong sunlight, illumination, or other light sources as possible from the wall to avoid shadows! Have the subject move as far away as part of the subject. Move the subject away from the wall. Shadows tend to a wall. For example, avoid breaking waves, trees blowing in the images. Good cropping is not possible if anything besides the subject is too close to form when the subject is moving background!

Owners Manual
Page 208
... uploaded are finished reviewing the uploaded images, click [Next]. Upload Your Photos Click [Select Photos...] and select the images you are subject images that are part of the images you want to Step 4. Select a Background In this step, you can delete any that have not been inserted into a background image. To...
... uploaded are finished reviewing the uploaded images, click [Next]. Upload Your Photos Click [Select Photos...] and select the images you are subject images that are part of the images you want to Step 4. Select a Background In this step, you can delete any that have not been inserted into a background image. To...

