User Manual
Page 3
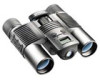
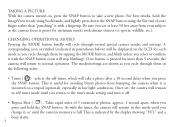
Rotate the right eyepiece (diopter adjustment) to change the setting if the image does not appear as sharp to your left and right sides of the binocular closer together or farther apart until it when you see a single circular image. QUICK GUIDE: BUSHNELL IMAGEVIEW 11-8200 INSTALL BATTERIES Insert 2 AAA alkaline batteries as it does to your right eye as indicated inside the battery compartment on the...
Rotate the right eyepiece (diopter adjustment) to change the setting if the image does not appear as sharp to your left and right sides of the binocular closer together or farther apart until it when you see a single circular image. QUICK GUIDE: BUSHNELL IMAGEVIEW 11-8200 INSTALL BATTERIES Insert 2 AAA alkaline batteries as it does to your right eye as indicated inside the battery compartment on the...
User Manual
Page 4
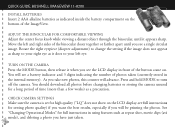
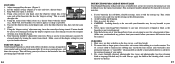
... the binocular, lightly press down to about 15 ft.), the camera focus is preset and is designed only for detailed instructions on -screen instructions (if you do not already have photo software you take the photo. USING THE IMAGEVIEW WITH YOUR COMPUTER BEFORE CONNECTING THE IMAGEVIEW TO A COMPUTER, first install the driver from your computer, using PhotoSuite. Connect the supplied USB cable between the ImageView...
... the binocular, lightly press down to about 15 ft.), the camera focus is preset and is designed only for detailed instructions on -screen instructions (if you do not already have photo software you take the photo. USING THE IMAGEVIEW WITH YOUR COMPUTER BEFORE CONNECTING THE IMAGEVIEW TO A COMPUTER, first install the driver from your computer, using PhotoSuite. Connect the supplied USB cable between the ImageView...
User Manual
Page 5
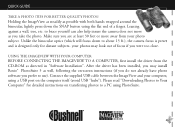
... the camera beeps. Binocular Focus ON/OFF (Power) SNAP (Shutter Release) 1 Before using the product, please read these instructions and take time to save batteries if none of a Bushnell ImageView binocular. BINOCULAR INSTRUCTIONS TURNING THE CAMERA ON AND OFF Insert 2 AAA alkaline batteries as indicated on the inside of the battery compartment, located on the bottom of the product. The camera will turn the unit off automatically to...
... the camera beeps. Binocular Focus ON/OFF (Power) SNAP (Shutter Release) 1 Before using the product, please read these instructions and take time to save batteries if none of a Bushnell ImageView binocular. BINOCULAR INSTRUCTIONS TURNING THE CAMERA ON AND OFF Insert 2 AAA alkaline batteries as indicated on the inside of the battery compartment, located on the bottom of the product. The camera will turn the unit off automatically to...
User Manual
Page 6
...operation. This is indicated by tapping the MODE button, and blink unless you select or confirm it with the timer, the camera...camera will cycle through several special camera modes and settings. As with the SNAP button (icon will stop blinking). For best results, hold the ImageView steady using both hands, and lightly press down the SNAP button using... new photo. Be sure you are shown as you press the SNAP button. A corresponding icon or symbol (indicated in self timer mode until the camera's...alarm. 2 Once set, the camera will remain in parentheses below) will be displayed on , press...
...operation. This is indicated by tapping the MODE button, and blink unless you select or confirm it with the timer, the camera...camera will cycle through several special camera modes and settings. As with the SNAP button (icon will stop blinking). For best results, hold the ImageView steady using both hands, and lightly press down the SNAP button using... new photo. Be sure you are shown as you press the SNAP button. A corresponding icon or symbol (indicated in self timer mode until the camera's...alarm. 2 Once set, the camera will remain in parentheses below) will be displayed on , press...
User Manual
Page 8
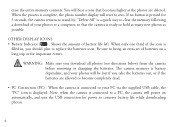
...battery life while downloading photos. 4 WARNING: Make sure you take the batteries out, or if the batteries are deleted. Note: when the camera is displayed. When the process is complete, the photo number display will power on automatically, and uses the USB connection for power to bring an extra set ...the camera returns to hold as many new photos as the photos are allowed to become completely dead. • PC Connection (PC) : When the camera is connected to your PC via the supplied USB cable, the "PC" icon is connected to a PC, the camera will reset to replace the batteries ...
...battery life while downloading photos. 4 WARNING: Make sure you take the batteries out, or if the batteries are deleted. Note: when the camera is displayed. When the process is complete, the photo number display will power on automatically, and uses the USB connection for power to bring an extra set ...the camera returns to hold as many new photos as the photos are allowed to become completely dead. • PC Connection (PC) : When the camera is connected to your PC via the supplied USB cable, the "PC" icon is connected to a PC, the camera will reset to replace the batteries ...

User Manual
Page 9
... X CD-ROM driver Super VGA monitor and video card SOFTWARE INSTALLATION DO NOT CONNECT THE IMAGEVIEW CAMERA TO THE COMPUTER BEFORE INSTALLING THE DRIVER SOFTWARE To load software, insert the supplied CD into your CD-ROM drive and it will self-start. USING THE IMAGEVIEW WITH YOUR COMPUTER System Requirements: Pentium 166MMX or equivalent minimum (Recommended Pentium II 266) Windows 98/ME/2000...
... X CD-ROM driver Super VGA monitor and video card SOFTWARE INSTALLATION DO NOT CONNECT THE IMAGEVIEW CAMERA TO THE COMPUTER BEFORE INSTALLING THE DRIVER SOFTWARE To load software, insert the supplied CD into your CD-ROM drive and it will self-start. USING THE IMAGEVIEW WITH YOUR COMPUTER System Requirements: Pentium 166MMX or equivalent minimum (Recommended Pentium II 266) Windows 98/ME/2000...

User Manual
Page 10
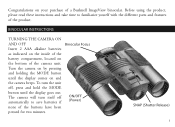
... PhotoSuite software technical support, go to the Roxio website at: www.roxio.com and click "Support", then select your ImageView, including the downloading process, help is available at www.bushnell. Select "Transfer from the list", click "DaulCamera", then click "Next" at (800) 423-3537. After drivers are successfully installed first, return to the CD install screen, and click on screen instructions...
... PhotoSuite software technical support, go to the Roxio website at: www.roxio.com and click "Support", then select your ImageView, including the downloading process, help is available at www.bushnell. Select "Transfer from the list", click "DaulCamera", then click "Next" at (800) 423-3537. After drivers are successfully installed first, return to the CD install screen, and click on screen instructions...

User Manual
Page 11
... photos. For detailed instructions for using these and other PhotoSuite features, please refer to edit (click Edit & Create, then Edit), or print (click Print & Share, then Print) your screen. Note: to download and view avi movie clips, refer to the section "Downloading AVI Movie Clips" at...) to start the download from the right at the bottom of the driver window. After several seconds, the driver screen will appear. Next, click the second button from the ImageView to the PhotoSuite transfer screen, and should see all photos in the driver window. 11. You are then returned...
... photos. For detailed instructions for using these and other PhotoSuite features, please refer to edit (click Edit & Create, then Edit), or print (click Print & Share, then Print) your screen. Note: to download and view avi movie clips, refer to the section "Downloading AVI Movie Clips" at...) to start the download from the right at the bottom of the driver window. After several seconds, the driver screen will appear. Next, click the second button from the ImageView to the PhotoSuite transfer screen, and should see all photos in the driver window. 11. You are then returned...

User Manual
Page 12
... the normal viewing position. 2. Follow the focusing instructions below for this position before using . Always re-set your vision. BINOCULAR INSTRUCTIONS Your Bushnell binocular is a precision instrument designed to this instrument. Read the instructions carefully before using your binocular. 8 EYE ADJUSTMENTS (Figure 1) How to Adjust For Distance Between Your Eyes Fig. 1 The distance between the eyes, called "interpupillary distance," varies from one person to another, Bushnell binoculars have a diopter setting feature which...
... the normal viewing position. 2. Follow the focusing instructions below for this position before using . Always re-set your vision. BINOCULAR INSTRUCTIONS Your Bushnell binocular is a precision instrument designed to this instrument. Read the instructions carefully before using your binocular. 8 EYE ADJUSTMENTS (Figure 1) How to Adjust For Distance Between Your Eyes Fig. 1 The distance between the eyes, called "interpupillary distance," varies from one person to another, Bushnell binoculars have a diopter setting feature which...
User Manual
Page 13
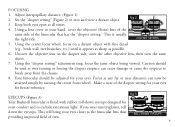
... a distant object with rubber roll-down the eyecups. Using a lens cover or your eyes. Using the center focus wheel, focus on the diopter side, cover the other objective lens, then view the same object. 7. This will bring your comfort and to zero and view a distant object. Adjust interpupillary distance. (Figure 1) 2. Your binocular should be used as possible. 6. FOCUSING 1. If you wear sun/eyeglasses, roll down eyecups designed...
... a distant object with rubber roll-down the eyecups. Using a lens cover or your eyes. Using the center focus wheel, focus on the diopter side, cover the other objective lens, then view the same object. 7. This will bring your comfort and to zero and view a distant object. Adjust interpupillary distance. (Figure 1) 2. Your binocular should be used as possible. 6. FOCUSING 1. If you wear sun/eyeglasses, roll down eyecups designed...
User Manual
Page 14
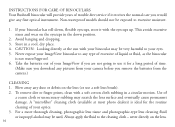
... not water/fogproof. 6. INSTRUCTIONS FOR CARE OF BINOCULARS Your Bushnell binocular will provide years of trouble-free service if it with the eyecups up. Never expose your ImageView binocular to your eyes. 5. A "microfiber" cleaning cloth (available at the sun with a soft cotton cloth rubbing in a cool, dry place. 4. For a more thorough cleaning, photographic lens tissue and photographic-type lens cleaning fluid or isopropyl alcohol...
... not water/fogproof. 6. INSTRUCTIONS FOR CARE OF BINOCULARS Your Bushnell binocular will provide years of trouble-free service if it with the eyecups up. Never expose your ImageView binocular to your eyes. 5. A "microfiber" cleaning cloth (available at the sun with a soft cotton cloth rubbing in a cool, dry place. 4. For a more thorough cleaning, photographic lens tissue and photographic-type lens cleaning fluid or isopropyl alcohol...

User Manual
Page 15
... a Bushnell Authorized Service Department. Any return made under this warranty must be accompanied by someone other rights which vary from country to country. ©2004 Bushnell Performance Optics 11 You may also contact Bushnell at our option, repair or replace the product, provided that you specific legal rights. WARRANTY / REPAIR TWO-YEAR LIMITED WARRANTY Your Bushnell® product is warranted to be free...
... a Bushnell Authorized Service Department. Any return made under this warranty must be accompanied by someone other rights which vary from country to country. ©2004 Bushnell Performance Optics 11 You may also contact Bushnell at our option, repair or replace the product, provided that you specific legal rights. WARRANTY / REPAIR TWO-YEAR LIMITED WARRANTY Your Bushnell® product is warranted to be free...
User Manual
Page 16
... clips. Instruction Manual Addendum: DOWNLOADING AVI MOVIE CLIPS WITH THE BUSHNELL IMAGEVIEW 11-8200 1) Follow the instructions included with the ImageView to set the camera to exit the driver window. 5) Open Windows Media Player (included with the supplied USB cable, then click the red "camera" icon in the center of the driver window to give the movie a name and save it to open the camera driver. The driver will not download the movie...
... clips. Instruction Manual Addendum: DOWNLOADING AVI MOVIE CLIPS WITH THE BUSHNELL IMAGEVIEW 11-8200 1) Follow the instructions included with the ImageView to set the camera to exit the driver window. 5) Open Windows Media Player (included with the supplied USB cable, then click the red "camera" icon in the center of the driver window to give the movie a name and save it to open the camera driver. The driver will not download the movie...

User Guide
Page 3
...-see the LCD display in using features such as repeat shot, video clips (avi mode), and deleting a photo you see full instructions for full instructions in front of photos taken (currently stored in the internal memory). CHECK CAMERA SETTINGS Make sure the camera is set for a long period of the ImageView. QUICK GUIDE: BUSHNELL IMAGEVIEW 11-8200 INSTALL BATTERIES Insert 2 AAA batteries (alkaline, lithium, or NiMh) as...
...-see the LCD display in using features such as repeat shot, video clips (avi mode), and deleting a photo you see full instructions for full instructions in front of photos taken (currently stored in the internal memory). CHECK CAMERA SETTINGS Make sure the camera is set for a long period of the ImageView. QUICK GUIDE: BUSHNELL IMAGEVIEW 11-8200 INSTALL BATTERIES Insert 2 AAA batteries (alkaline, lithium, or NiMh) as...

User Guide
Page 4
... driver has been installed, you may look out of focus if you take a new photo. Please read these instructions and take time to take the photo. USING THE IMAGEVIEW WITH YOUR COMPUTER BEFORE CONNECTING THE IMAGEVIEW TO A COMPUTER, first install the driver from your subject as the camera focus is designed only for optimum results with distant objects (sports, wildlife, etc.). 7 QUICK GUIDE: BUSHNELL IMAGEVIEW 11-8200...
... driver has been installed, you may look out of focus if you take a new photo. Please read these instructions and take time to take the photo. USING THE IMAGEVIEW WITH YOUR COMPUTER BEFORE CONNECTING THE IMAGEVIEW TO A COMPUTER, first install the driver from your subject as the camera focus is designed only for optimum results with distant objects (sports, wildlife, etc.). 7 QUICK GUIDE: BUSHNELL IMAGEVIEW 11-8200...
User Guide
Page 5
...8226; Video Mode: ( ) : This mode sets the camera to normal operation. After a photo is taken via the timer, the camera automatically returns to normal operation (timer is pressed for Low Resolution (320x240 pixels). Use the MODE button to stop shooting the video. The modes/settings are ...camera will allow the camera to shoot a greater quantity of photos before downloading, and quality is not a high priority. • Quality (Hq or Lq) : Select "Hq" for normal use , as the camera has a fixed focus preset for each mode or setting as a live "PC camera" with a USB cable...
...8226; Video Mode: ( ) : This mode sets the camera to normal operation. After a photo is taken via the timer, the camera automatically returns to normal operation (timer is pressed for Low Resolution (320x240 pixels). Use the MODE button to stop shooting the video. The modes/settings are ...camera will allow the camera to shoot a greater quantity of photos before downloading, and quality is not a high priority. • Quality (Hq or Lq) : Select "Hq" for normal use , as the camera has a fixed focus preset for each mode or setting as a live "PC camera" with a USB cable...
User Guide
Page 6
... 65MB for downloading. Windows 98 users must install the driver (click "Install Driver") prior to replace the batteries soon. Windows 2000, ME, and XP do not connect the camera through a USB hub) Minimum 200 MB of manual) from the camera before removing the batteries for important events. The camera memory is filled in next section of hard drive space, with Windows 98/98SE/2000/ME/XP). 11 Unless...
... 65MB for downloading. Windows 98 users must install the driver (click "Install Driver") prior to replace the batteries soon. Windows 2000, ME, and XP do not connect the camera through a USB hub) Minimum 200 MB of manual) from the camera before removing the batteries for important events. The camera memory is filled in next section of hard drive space, with Windows 98/98SE/2000/ME/XP). 11 Unless...
User Guide
Page 7
... and remove the USB device. Refer to the photo software's instruction manual or Help menu for this ) and follow these simple steps. 1. QuickTime, pre-installed on an individual photo file, or use "Edit>Select All" if you want to download all versions of Microsoft Windows) and open and play the avi movie clips. 12 BINOCULAR INSTRUCTIONS Your Bushnell binocular is connected to...
... and remove the USB device. Refer to the photo software's instruction manual or Help menu for this ) and follow these simple steps. 1. QuickTime, pre-installed on an individual photo file, or use "Edit>Select All" if you want to download all versions of Microsoft Windows) and open and play the avi movie clips. 12 BINOCULAR INSTRUCTIONS Your Bushnell binocular is connected to...
User Guide
Page 8
... or finger prints, clean with your optics. 3. Adjust interpupillary distance. (Figure 1) 2. Your binocular should not be used . Non-waterproof models should be attained simply by turning the center focus wheel. Avoid banging and dropping. 3. If you remove the batteries from the chassis. 8. Always apply the fluid to zero and view a distant object. FOCUSING 1. Using the "diopter setting" adjustment ring, focus the same object being viewed. never directly on...
... or finger prints, clean with your optics. 3. Adjust interpupillary distance. (Figure 1) 2. Your binocular should not be used . Non-waterproof models should be attained simply by turning the center focus wheel. Avoid banging and dropping. 3. If you remove the batteries from the chassis. 8. Always apply the fluid to zero and view a distant object. FOCUSING 1. Using the "diopter setting" adjustment ring, focus the same object being viewed. never directly on...
User Guide
Page 9
... turning the equipment off and on, the user is encouraged to try to correct the interference by the items listed below : IN U.S.A. WARRANTY / REPAIR TWO-YEAR LIMITED WARRANTY Your Bushnell® product is warranted to be free of defects in accordance with the instructions, may have other than a Bushnell Authorized Service Department. Any return made under this warranty, we...
... turning the equipment off and on, the user is encouraged to try to correct the interference by the items listed below : IN U.S.A. WARRANTY / REPAIR TWO-YEAR LIMITED WARRANTY Your Bushnell® product is warranted to be free of defects in accordance with the instructions, may have other than a Bushnell Authorized Service Department. Any return made under this warranty, we...


