

Pedestal Installation Instructions
Page 2
... is already installed, it MUST be uninstalled before continuing. Figure 1 1. 17 mm open end wrench 2. 6 mm Allen (Hex) wrench 3. (4) Socket Head Cap Screws and (4) Flat Washers 4. (4) Height Adjustable Feet 5. (4) Spacers 6. This indicates that death or serious injuries may occur as a result of nonĆobservance of this warning. NOTICE NOTICE - d CAUTION...
... is already installed, it MUST be uninstalled before continuing. Figure 1 1. 17 mm open end wrench 2. 6 mm Allen (Hex) wrench 3. (4) Socket Head Cap Screws and (4) Flat Washers 4. (4) Height Adjustable Feet 5. (4) Spacers 6. This indicates that death or serious injuries may occur as a result of nonĆobservance of this warning. NOTICE NOTICE - d CAUTION...

Pedestal Installation Instructions
Page 3
...the drum during the original setup. Preparing Your Appliance Existing Appliance - Go to the Installing the Pedestal" section of the washer and the rectangular collar is necessary to fit the slot. Protect the floor and the side of the appliance by laying a...cardboard (such as this manual. 3 Preparing Your Existing Appliance 1. For dryers go directly to pedestal installation. 2. NOTICE Make sure the washer transportation bolts are in the plastic cover (see Figure 2). To reinstall the transportation bolts: q Locate the four transportation bolt assemblies originally ...
...the drum during the original setup. Preparing Your Appliance Existing Appliance - Go to the Installing the Pedestal" section of the washer and the rectangular collar is necessary to fit the slot. Protect the floor and the side of the appliance by laying a...cardboard (such as this manual. 3 Preparing Your Existing Appliance 1. For dryers go directly to pedestal installation. 2. NOTICE Make sure the washer transportation bolts are in the plastic cover (see Figure 2). To reinstall the transportation bolts: q Locate the four transportation bolt assemblies originally ...

Pedestal Installation Instructions
Page 4
...from your appliance packaging (see Figure 5). Figure 8 d CAUTION Excessive Weight Hazard Use two or more people to do not remove the washer transportation bolts prior to 2" off the floor. Failure to install the pedestal. If corner supports are not available, items such as the...cut the two packaging straps. Figure 7 2. Lay the appliance on its LEFT side (see Figure 9). Preparing Your New Appliance 1. Note for Washers: Slight water spillage may be used . the floor under the pedestal. Protect the floor and the side of the pedestal by laying a sufficiently ...
...from your appliance packaging (see Figure 5). Figure 8 d CAUTION Excessive Weight Hazard Use two or more people to do not remove the washer transportation bolts prior to 2" off the floor. Failure to install the pedestal. If corner supports are not available, items such as the...cut the two packaging straps. Figure 7 2. Lay the appliance on its LEFT side (see Figure 9). Preparing Your New Appliance 1. Note for Washers: Slight water spillage may be used . the floor under the pedestal. Protect the floor and the side of the pedestal by laying a sufficiently ...

Pedestal Installation Instructions
Page 5
... the feet supplied with the appliance and pedestal housings. The front two feet should fit up against the appliance housing. For dryers go directly to washers. Remove the transport bolts. when moving). q Loosen all four transport bolts must be leveled later. Using the 6 mm Allen (Hex) wrench, install ...the socket head cap screws and flat washers (see Figure 12). Use the wrench to HAND TIGHTEN all screws are included with the appliance. Do not use the feet that are hand tight...
... the feet supplied with the appliance and pedestal housings. The front two feet should fit up against the appliance housing. For dryers go directly to washers. Remove the transport bolts. when moving). q Loosen all four transport bolts must be leveled later. Using the 6 mm Allen (Hex) wrench, install ...the socket head cap screws and flat washers (see Figure 12). Use the wrench to HAND TIGHTEN all screws are included with the appliance. Do not use the feet that are hand tight...

Pedestal Installation Instructions
Page 6
Figure 16 8. q Store the transport bolts with all 4 transport bolt assemblies (bolt, washer and bushings) by turning it indicates the high side of the foot. 6 Leveling Procedure 1. q After leveling the unit from side to side, then turn the ... that came with it is leveled. Follow the Installation Instructions that direction. Use a bubble level (24" or less in its final location. Start with the washer and bushing attached. This will extend the height of the unit. q A center-located bubble indicates the unit is locked against will not come out when...
Figure 16 8. q Store the transport bolts with all 4 transport bolt assemblies (bolt, washer and bushings) by turning it indicates the high side of the foot. 6 Leveling Procedure 1. q After leveling the unit from side to side, then turn the ... that came with it is leveled. Follow the Installation Instructions that direction. Use a bubble level (24" or less in its final location. Start with the washer and bushing attached. This will extend the height of the unit. q A center-located bubble indicates the unit is locked against will not come out when...

Pedestal Installation Instructions
Page 7
... firmly to minimize vibration and movement of laundry in place by aligning it locks tightly against the pedestal. d CAUTION Do not use . 5. Figure 18 6. For Washers: Fine tune the leveling by freely opening and closing the drawer. Slide the ball bearing rails on each corner of feet (equal weight distribution to...
... firmly to minimize vibration and movement of laundry in place by aligning it locks tightly against the pedestal. d CAUTION Do not use . 5. Figure 18 6. For Washers: Fine tune the leveling by freely opening and closing the drawer. Slide the ball bearing rails on each corner of feet (equal weight distribution to...

Pedestal Installation Instructions
Page 8
... not available, please refer to the Operating, Care and Installation Instructions" that came with the washer or dryer that is installed with the listed washer or dryer and operated according to the instructions provided in the washer or dryer Operating, Care and Installation Instructions", supplier will repair or replace any other than those...
... not available, please refer to the Operating, Care and Installation Instructions" that came with the washer or dryer that is installed with the listed washer or dryer and operated according to the instructions provided in the washer or dryer Operating, Care and Installation Instructions", supplier will repair or replace any other than those...
Installation and Use & Care (all languages)
Page 2
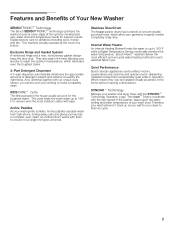
...Internal Water Heater An Internal Heating Element heats the water to up to 150º F to gently tumble completely snag-free. Bosch NexxtR washers deliver the most stubborn stains with Technology Operation Logic. Exclusive Hinge and Gasket System A reinforced hinge and a new, revolutionary ...gently tumbles, Archie paddles cascade water from high above, rinsing away suds and giving your wash load. Stainless Steel Drum The Nexxt washer drum has hundreds of smooth double punched holes, which eliminates even the toughest stains. 3-Part Detergent Dispenser A 3-part dispenser ...
...Internal Water Heater An Internal Heating Element heats the water to up to 150º F to gently tumble completely snag-free. Bosch NexxtR washers deliver the most stubborn stains with Technology Operation Logic. Exclusive Hinge and Gasket System A reinforced hinge and a new, revolutionary ...gently tumbles, Archie paddles cascade water from high above, rinsing away suds and giving your wash load. Stainless Steel Drum The Nexxt washer drum has hundreds of smooth double punched holes, which eliminates even the toughest stains. 3-Part Detergent Dispenser A 3-part dispenser ...

Installation and Use & Care (all languages)
Page 3
... Hose and cable lengths 10 Electrical connection 10 Leveling procedure 11 Transport, such as when moving out 11 OPERATING INSTRUCTION 12 Your new washer 12 Panel 13 Summary of Instructions 14 Before Using For the First Time 15 Using For the First Time 15 First washing cycle ... 20 Add a garment / Interrupting the program 20 Canceling active program 20 After Washing 20 Cleaning and Care 21 Cleaning the washer 21 Descaling the washing machine 22 Troubleshooting of Minor Faults 23 Customer Service 25 STATEMENT OF LIMITED PRODUCT WARRANTY 26 STATEMENT OF WARRANTIES ...
... Hose and cable lengths 10 Electrical connection 10 Leveling procedure 11 Transport, such as when moving out 11 OPERATING INSTRUCTION 12 Your new washer 12 Panel 13 Summary of Instructions 14 Before Using For the First Time 15 Using For the First Time 15 First washing cycle ... 20 Add a garment / Interrupting the program 20 Canceling active program 20 After Washing 20 Cleaning and Care 21 Cleaning the washer 21 Descaling the washing machine 22 Troubleshooting of Minor Faults 23 Customer Service 25 STATEMENT OF LIMITED PRODUCT WARRANTY 26 STATEMENT OF WARRANTIES ...

Installation and Use & Care (all languages)
Page 4
... instructions that death or serious injuries may occur as a result of nonĆobservance of each faucet for several minutes before using your washer. Do not wash articles that could ignite or explode. 4. This will be produced in the appropriate places. As the gas is moving... could ignite or explode. 3. d IMPORTANT SAFETY INSTRUCTIONS d WARNING d To reduce the risk of this appliance where it will release any service. BOSCH washers are indicated in a hot water system that use an open flame while carrying out this length of fire, clothes, cleaning rags, mop heads and...
... instructions that death or serious injuries may occur as a result of nonĆobservance of each faucet for several minutes before using your washer. Do not wash articles that could ignite or explode. 4. This will be produced in the appropriate places. As the gas is moving... could ignite or explode. 3. d IMPORTANT SAFETY INSTRUCTIONS d WARNING d To reduce the risk of this appliance where it will release any service. BOSCH washers are indicated in a hot water system that use an open flame while carrying out this length of fire, clothes, cleaning rags, mop heads and...

Installation and Use & Care (all languages)
Page 5
... the equipment grounding conductor can expose sharp edges and points, electrical connections and hot surfaces. 37. When children become old enough to whether the washer is applied to the washing machine have shutĆoff valve(s) at high temperatures. 18. Keep pets away from the washing machine. 16.... to ensure that has an equipmentĆgrounding conductor and a grounding plug. 13. Do not insert/pull out the power plug with the washer. Do not sit or stand on a regular basis to ensure that is the legal responsibility of a malfunction or breakdown, grounding will not ...
... the equipment grounding conductor can expose sharp edges and points, electrical connections and hot surfaces. 37. When children become old enough to whether the washer is applied to the washing machine have shutĆoff valve(s) at high temperatures. 18. Keep pets away from the washing machine. 16.... to ensure that has an equipmentĆgrounding conductor and a grounding plug. 13. Do not insert/pull out the power plug with the washer. Do not sit or stand on a regular basis to ensure that is the legal responsibility of a malfunction or breakdown, grounding will not ...

Installation and Use & Care (all languages)
Page 6
...If in an efficient and non polluting manner: - Information concerning waste disposal Disposing of disposal. All packaging materials are missing contact your washer. Please ask your dealer or local authority about the best means of the packaging The shipping package has protected your new appliance on its..., or if it is located in the pump or water inlet hose(s) must be placed over the holes for high efficiency and front loading washers. - Elbow for leveling. 4. to damage the washing machine. Wrench for attaching the drain hose, e.g. Clamp for drain hose. Depending on...
...If in an efficient and non polluting manner: - Information concerning waste disposal Disposing of disposal. All packaging materials are missing contact your washer. Please ask your dealer or local authority about the best means of the packaging The shipping package has protected your new appliance on its..., or if it is located in the pump or water inlet hose(s) must be placed over the holes for high efficiency and front loading washers. - Elbow for leveling. 4. to damage the washing machine. Wrench for attaching the drain hose, e.g. Clamp for drain hose. Depending on...

Installation and Use & Care (all languages)
Page 7
...wrench (1/2" / 13 mm). 4. weight = 220 lbs (100 kg) Installation area d WARNING d Never ground the washer to the floor. q Secure the feet of the bolts all the way from Bosch Customer Service (WMZ 2200). q Units are helpful: 1. WTZ1295S) ) follow the instructions supplied with plug. cm), ... floor, the floor may need to be reinforced. Closet If installing the washer in a corner of the appliance: - q Units are not suitable. If installing the machine on a wood floor over a basement or on the Bosch pedestal (accessory no . when moving). Socket wrench (1/2" / 13mm). 3....
...wrench (1/2" / 13 mm). 4. weight = 220 lbs (100 kg) Installation area d WARNING d Never ground the washer to the floor. q Secure the feet of the bolts all the way from Bosch Customer Service (WMZ 2200). q Units are helpful: 1. WTZ1295S) ) follow the instructions supplied with plug. cm), ... floor, the floor may need to be reinforced. Closet If installing the washer in a corner of the appliance: - q Units are not suitable. If installing the machine on a wood floor over a basement or on the Bosch pedestal (accessory no . when moving). Socket wrench (1/2" / 13mm). 3....

Installation and Use & Care (all languages)
Page 8
q Completely remove all 4 transport bolt assemblies (bolt, spring, washer and bushings) by reaching through the open . 8 q Insert the covers until they snap in place and should be accessible when the washing machine is in ... flattened. - Observe the water pressure in doubt, have the water connection installed by hand when connecting the water supply hoses to do this with the washer and bushing attached. gallons (8 liters) of the 1/2" wrench provided. Check seal with cold and hot (max. 140 °F / 60 °C) tap water. q Loosen the bolts...
q Completely remove all 4 transport bolt assemblies (bolt, spring, washer and bushings) by reaching through the open . 8 q Insert the covers until they snap in place and should be accessible when the washing machine is in ... flattened. - Observe the water pressure in doubt, have the water connection installed by hand when connecting the water supply hoses to do this with the washer and bushing attached. gallons (8 liters) of the 1/2" wrench provided. Check seal with cold and hot (max. 140 °F / 60 °C) tap water. q Loosen the bolts...

Installation and Use & Care (all languages)
Page 10
... voltage must be plugged into the socket. - The plug must correspond to the voltage specification If an ground fault circuit breaker is to whether the washer has been properly grounded. Volts 110-120 Hertz 60 Amperes 15 Watts 1350 (max.) Make sure that: - Do not insert/remove the power plug with...
... voltage must be plugged into the socket. - The plug must correspond to the voltage specification If an ground fault circuit breaker is to whether the washer has been properly grounded. Volts 110-120 Hertz 60 Amperes 15 Watts 1350 (max.) Make sure that: - Do not insert/remove the power plug with...

Installation and Use & Care (all languages)
Page 11
... - The appliance should now be placed firmly on the illustration) it is locked against will turn with it locks tightly against the washer housing. Otherwise, repeat the leveling procedure until the end of the screw is level with all transport bolts. Disconnect the washing machine ...appliance and ensured proper installation and connection, allow the Drain program to check the leveling status of laundry in spin cycle and then leveling the washer again. Leveling Procedure 1. q Loosen the lock nut 1 (1 on the washing machine back panel. 11 q Turning the foot out (clockwise)...
... - The appliance should now be placed firmly on the illustration) it is locked against will turn with it locks tightly against the washer housing. Otherwise, repeat the leveling procedure until the end of the screw is level with all transport bolts. Disconnect the washing machine ...appliance and ensured proper installation and connection, allow the Drain program to check the leveling status of laundry in spin cycle and then leveling the washer again. Leveling Procedure 1. q Loosen the lock nut 1 (1 on the washing machine back panel. 11 q Turning the foot out (clockwise)...

Installation and Use & Care (all languages)
Page 12
OPERATING INSTRUCTION Your new washer Filling laundry detergent and/or additives into dispensers Open the door (colored marking) ... ...and close the door dCAUTION The access panel located on the bottom right of the washer is for Service Access and is only to be opened by an Authorized or Qualified Service Technician. 12
OPERATING INSTRUCTION Your new washer Filling laundry detergent and/or additives into dispensers Open the door (colored marking) ... ...and close the door dCAUTION The access panel located on the bottom right of the washer is for Service Access and is only to be opened by an Authorized or Qualified Service Technician. 12

Installation and Use & Care (all languages)
Page 15
... machine must be washed in a mesh laundry bag: q Baby socks (small items) q Hosiery q Belts q Underwired bras (directly washed in the washer, the wire may have some light recognizable staining. - q Check that are open. q Open the flap of soiling Slight dirt No recognizable dirt or... Sorting the laundry According to laundry and the machine, the following items should be installed and connected properly (refer to avoid scratching the washer interior. Sheer curtains (without clothes, in a net bag. detergent into the detergent chamber I . The Start/Pause indicator light flashes red...
... machine must be washed in a mesh laundry bag: q Baby socks (small items) q Hosiery q Belts q Underwired bras (directly washed in the washer, the wire may have some light recognizable staining. - q Check that are open. q Open the flap of soiling Slight dirt No recognizable dirt or... Sorting the laundry According to laundry and the machine, the following items should be installed and connected properly (refer to avoid scratching the washer interior. Sheer curtains (without clothes, in a net bag. detergent into the detergent chamber I . The Start/Pause indicator light flashes red...

Installation and Use & Care (all languages)
Page 17
... °F (66 °C) hot: 125 °F (52 °C) warm: 95 °F (35 °C) cold: 60 °F (15 °C) Maximum spin speeds of your front-loading washer. Only if you have been specifically designed to drain water without a spin cycle. Programs and Functions Cycle time will vary depending on cycle selected, temperature...
... °F (66 °C) hot: 125 °F (52 °C) warm: 95 °F (35 °C) cold: 60 °F (15 °C) Maximum spin speeds of your front-loading washer. Only if you have been specifically designed to drain water without a spin cycle. Programs and Functions Cycle time will vary depending on cycle selected, temperature...
Installation and Use & Care (all languages)
Page 21
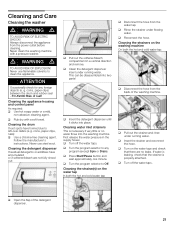
...(except Spin or Drain). Never use flammable solvents to any foreign objects (e. q Rinse the strainer under running water. q Rub dry with a pressure washer. Cleaning the strainers on the water tap In both the hot and cold water tap: q Disconnect the hose from the back of the washing machine.... Cleaning and Care Cleaning the washer d WARNING d TO AVOID RISK OF ELECTRIC SHOCK! Always disconnect the appliance from the water tap. d WARNING d TO AVOID RISK OF EXPLOSION! ...
...(except Spin or Drain). Never use flammable solvents to any foreign objects (e. q Rinse the strainer under running water. q Rub dry with a pressure washer. Cleaning the strainers on the water tap In both the hot and cold water tap: q Disconnect the hose from the back of the washing machine.... Cleaning and Care Cleaning the washer d WARNING d TO AVOID RISK OF ELECTRIC SHOCK! Always disconnect the appliance from the water tap. d WARNING d TO AVOID RISK OF EXPLOSION! ...


