Installation Instructions
Page 4
... electrical circuit with national and local codes. All plumbing should perform plumbing work is properly installed. Before installing the "L"-shaped supplied countertop mounting brackets (select models), decide which method will damage the dishwasher's base and water inlet valve. Avoiding Electrical Shock/Fire Hazards Do not allow the electrical and water supply...
... electrical circuit with national and local codes. All plumbing should perform plumbing work is properly installed. Before installing the "L"-shaped supplied countertop mounting brackets (select models), decide which method will damage the dishwasher's base and water inlet valve. Avoiding Electrical Shock/Fire Hazards Do not allow the electrical and water supply...
Installation Instructions
Page 7
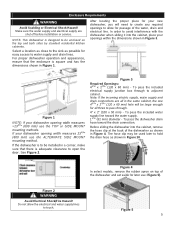
...: 43/4Ǝ x 23/8Ǝ (120 x 60 mm) - To pass the dishwasher drain hose toward the water supply. 11/4Ǝ (32 mm) diameter - Figure 4 In select models, remove the rubber apron on the top and both sides by standard residential kitchen cabinetry. Do not allow for easy access to the sink as...
...: 43/4Ǝ x 23/8Ǝ (120 x 60 mm) - To pass the dishwasher drain hose toward the water supply. 11/4Ǝ (32 mm) diameter - Figure 4 In select models, remove the rubber apron on the top and both sides by standard residential kitchen cabinetry. Do not allow for easy access to the sink as...
Installation Instructions
Page 13
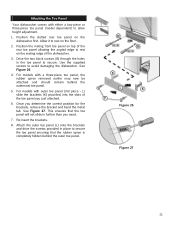
...panel (L) onto the brackets and drive the screws provided in place to allow height adjustment. 1. Allow it to secure. See Figure 27. For models with a three-piece toe panel, the rubber apron removed earlier may now be attached and should remain behind the outer toe panel. Once you just... attached. 6. Re-insert the brackets. 8. Attaching the Toe Panel Your dishwasher comes with either a two-piece or three-piece toe panel (model dependent) to secure the toe panel ensuring that the toe panel will not slide in further than you need. 7. Position the slotted rear toe panel...
...panel (L) onto the brackets and drive the screws provided in place to allow height adjustment. 1. Allow it to secure. See Figure 27. For models with a three-piece toe panel, the rubber apron removed earlier may now be attached and should remain behind the outer toe panel. Once you just... attached. 6. Re-insert the brackets. 8. Attaching the Toe Panel Your dishwasher comes with either a two-piece or three-piece toe panel (model dependent) to secure the toe panel ensuring that the toe panel will not slide in further than you need. 7. Position the slotted rear toe panel...
Installation Instructions
Page 14
... service. 12 If you are having a problem with the service you have available (if you are writing), or have received, please take the following information: x Model number x Serial number x Date of original purchase x Date the problem originated x Explanation of purchase to repair the appliance yourself. If you can be sure to...
... service. 12 If you are having a problem with the service you have available (if you are writing), or have received, please take the following information: x Model number x Serial number x Date of original purchase x Date the problem originated x Explanation of purchase to repair the appliance yourself. If you can be sure to...
Instructions for Use
Page 6
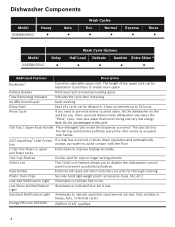
... Cup Shelves Can be delayed in this cycle. Low Rinse Aid Notification Illuminates to indicate sanitation requirements are met. Dishwasher Components Model SGE68U55UC Heavy Auto Wash Cycles Eco Normal Express Rinse Model SGE68U55UC Delay Wash Cycle Options Half Load Delicate Sanitize Extra Shine ® Additional Features Description Rackmatic® 3 position adjustable upper rack. Delay...
... Cup Shelves Can be delayed in this cycle. Low Rinse Aid Notification Illuminates to indicate sanitation requirements are met. Dishwasher Components Model SGE68U55UC Heavy Auto Wash Cycles Eco Normal Express Rinse Model SGE68U55UC Delay Wash Cycle Options Half Load Delicate Sanitize Extra Shine ® Additional Features Description Rackmatic® 3 position adjustable upper rack. Delay...
Instructions for Use
Page 25
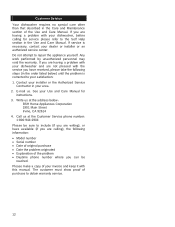
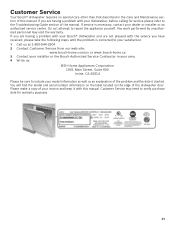
...: 1 Call us at 1-800-944-2904 2 Contact Customer Service from our web site: www.bosch-home.com/us : BSH Home Appliances Corporation 1901 Main Street, Suite 600 Irvine, CA 92614 Please be sure to include your model information as well as an explanation of the manual. You will find the... model and serial number information on the label located on the edge of this manual. If you have received...
...: 1 Call us at 1-800-944-2904 2 Contact Customer Service from our web site: www.bosch-home.com/us : BSH Home Appliances Corporation 1901 Main Street, Suite 600 Irvine, CA 92614 Please be sure to include your model information as well as an explanation of the manual. You will find the... model and serial number information on the label located on the edge of this manual. If you have received...

Instructions for Use
Page 26
... walls, floors, shelving, etc.); Authorized service providers are not agents, partners, affiliates or representatives of Bosch). Out of Warranty Product: Bosch is reasonably inaccessible, hazardous, threatening, or treacherous locale, surroundings, or environment; Also excluded from an authorized...repairs, prorates, or Product replacement, once this warranty has expired. Bosch will repair your Product (upgraded models may be extended with a defect in materials or workmanship. Notwithstanding the foregoing, Bosch will replace your Product without limitation, rain, wind, sand, floods...
... walls, floors, shelving, etc.); Authorized service providers are not agents, partners, affiliates or representatives of Bosch). Out of Warranty Product: Bosch is reasonably inaccessible, hazardous, threatening, or treacherous locale, surroundings, or environment; Also excluded from an authorized...repairs, prorates, or Product replacement, once this warranty has expired. Bosch will repair your Product (upgraded models may be extended with a defect in materials or workmanship. Notwithstanding the foregoing, Bosch will replace your Product without limitation, rain, wind, sand, floods...


