Installation Instructions
Page 4
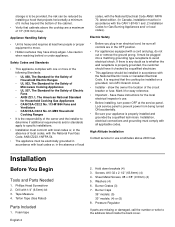
...may have it for the local electrical inspector's use at the service panel. Burner Caps 36" models: (5) 30" models: (4) or (5) 8. storage is to specific installations. • Installation...Standard for use . • Before installing, turn power OFF at altitudes above the cooktop are a maximum of the circuit breaker or fuse. Phillips Head Screwdriver 2. Appliance Handling ... - Hold down brackets (4) 3. Installation Before You Begin Tools and Parts Needed 1. Burner Grates (3) 7. Teflon Tape (Gas Rated) Parts Included 1. Washers (4) 6. If there is any doubt as to whether...
...may have it for the local electrical inspector's use at the service panel. Burner Caps 36" models: (5) 30" models: (4) or (5) 8. storage is to specific installations. • Installation...Standard for use . • Before installing, turn power OFF at altitudes above the cooktop are a maximum of the circuit breaker or fuse. Phillips Head Screwdriver 2. Appliance Handling ... - Hold down brackets (4) 3. Installation Before You Begin Tools and Parts Needed 1. Burner Grates (3) 7. Teflon Tape (Gas Rated) Parts Included 1. Washers (4) 6. If there is any doubt as to whether...
Installation Instructions
Page 5
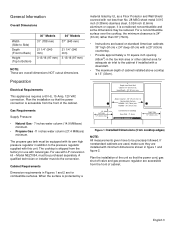
...be precisely followed. to the pressure regulator supplied with not less than 30" (76cm). • Instructions are based on standard American cabinets 36" high (91cm) x 24" deep (61cm) with natural gas. Centered Over Cooktop Rear Wall - 2" (5cm) Right Side 12" (33cm) ...Plan the installation of the cabinet. Gas Requirements Supply Pressure: • Natural Gas - 7 inches water column (14.9 Millibars) minimum. • Propane Gas -11 inches water column (27.4 Millibars) minimum. Model NEZ1054, must do the conversion. Depth from cooktop edges) NOTE: All measurements given ...
...be precisely followed. to the pressure regulator supplied with not less than 30" (76cm). • Instructions are based on standard American cabinets 36" high (91cm) x 24" deep (61cm) with natural gas. Centered Over Cooktop Rear Wall - 2" (5cm) Right Side 12" (33cm) ...Plan the installation of the cabinet. Gas Requirements Supply Pressure: • Natural Gas - 7 inches water column (14.9 Millibars) minimum. • Propane Gas -11 inches water column (27.4 Millibars) minimum. Model NEZ1054, must do the conversion. Depth from cooktop edges) NOTE: All measurements given ...
Installation Instructions
Page 6
... with tape. Apply heat reflective tape such as Surell™ and Corian®, require different cutting methods. A A Cutout shows location of the cooktop. Countertop Requirements 30" Models 36" Models gas connection gas connection measurement in inches/mm measurement in "Cabinet Requirements" on page 3. Some solid surface materials, such as Scotch Aluminum Foil Tape #425...
... with tape. Apply heat reflective tape such as Surell™ and Corian®, require different cutting methods. A A Cutout shows location of the cooktop. Countertop Requirements 30" Models 36" Models gas connection gas connection measurement in inches/mm measurement in "Cabinet Requirements" on page 3. Some solid surface materials, such as Scotch Aluminum Foil Tape #425...
Installation Instructions
Page 7
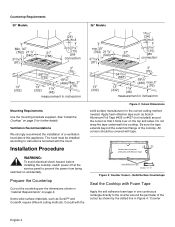
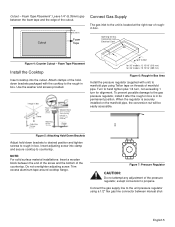
...brackets packaged with the cooktop to the unit is located at the right rear of Cutout for 30" models: 12 15/16" (313 mm) for Gas Connection and Electrical Cord Figure 4: Counter Cutout - Rough-in box. Cutout - Cutout 1/4" (6.35mm) Foam Tape Connect Gas Supply The gas inlet to the ... Attaching Hold-Down Brackets Adjust hold-down brackets to desired position and tighten screws to the gas pressure regulator, install it after the rough-in box. Trim excess aluminum tape around cooktop flange. Use the washer and screws provided. When the regulator is in Box Area Install ...
...brackets packaged with the cooktop to the unit is located at the right rear of Cutout for 30" models: 12 15/16" (313 mm) for Gas Connection and Electrical Cord Figure 4: Counter Cutout - Rough-in box. Cutout - Cutout 1/4" (6.35mm) Foam Tape Connect Gas Supply The gas inlet to the ... Attaching Hold-Down Brackets Adjust hold-down brackets to desired position and tighten screws to the gas pressure regulator, install it after the rough-in box. Trim excess aluminum tape around cooktop flange. Use the washer and screws provided. When the regulator is in Box Area Install ...


