Installation Instructions
Page 2
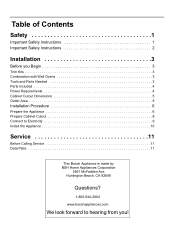
... We look forward to Electricity 9 Install the Appliance 10 Service 11 Before Calling Service 11 Data Plate 11 This Bosch Appliance is made by BSH Home Appliances Corporation 5551 McFadden Ave. Table of Contents Safety 1 Important Safety Instructions 1 Important Safety Instructions 2 Installation 3 Before you Begin 3 Trim Kits 3 Combination with Wall Ovens 3 Tools and Parts Needed 3 Parts Included 4 Power Requirements 4 Cabinet Cutout Dimensions 5 Outlet Area 5 Installation Procedure 6 Prepare the Appliance 6 Prepare Cabinet Cutout 8 Connect to hearing...
... We look forward to Electricity 9 Install the Appliance 10 Service 11 Before Calling Service 11 Data Plate 11 This Bosch Appliance is made by BSH Home Appliances Corporation 5551 McFadden Ave. Table of Contents Safety 1 Important Safety Instructions 1 Important Safety Instructions 2 Installation 3 Before you Begin 3 Trim Kits 3 Combination with Wall Ovens 3 Tools and Parts Needed 3 Parts Included 4 Power Requirements 4 Cabinet Cutout Dimensions 5 Outlet Area 5 Installation Procedure 6 Prepare the Appliance 6 Prepare Cabinet Cutout 8 Connect to hearing...
Installation Instructions
Page 3
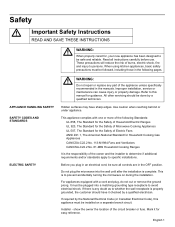
... cared for, your new appliance has been designed to be plugged into the wall until after the installation is complete. Mark it checked by the National Electrical Code (or Canadian Electrical Code), this manual for Household Cooking Gas Appliances CAN/CSA-C22.2 No. 113-M1984 Fans and Ventilators CAN/CSA-C22.2 No. 61-M89 Household Cooking Ranges It is any part of the owner and the installer...
... cared for, your new appliance has been designed to be plugged into the wall until after the installation is complete. Mark it checked by the National Electrical Code (or Canadian Electrical Code), this manual for Household Cooking Gas Appliances CAN/CSA-C22.2 No. 113-M1984 Fans and Ventilators CAN/CSA-C22.2 No. 61-M89 Household Cooking Ranges It is any part of the owner and the installer...
Installation Instructions
Page 4
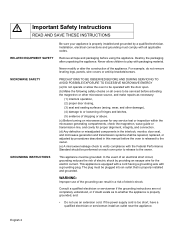
... not remove leveling legs, panels, wire covers or anti-tip brackets/screws. WARNING: Improper use an extension cord. English 2 m Important Safety Instructions READ AND SAVE THESE INSTRUCTIONS Be sure your appliance is properly installed and grounded. Destroy the packaging after unpacking the appliance. Never allow the oven to be operated with the door open. (b) Make the following safety checks on all ovens to be serviced before activating the magnetron...
... not remove leveling legs, panels, wire covers or anti-tip brackets/screws. WARNING: Improper use an extension cord. English 2 m Important Safety Instructions READ AND SAVE THESE INSTRUCTIONS Be sure your appliance is properly installed and grounded. Destroy the packaging after unpacking the appliance. Never allow the oven to be operated with the door open. (b) Make the following safety checks on all ovens to be serviced before activating the magnetron...
Installation Instructions
Page 5
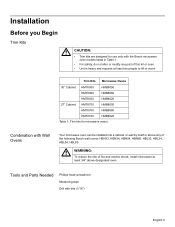
..., HBL54, HBL85. Trim Kits Microwave Ovens 30" Cabinet HMT8050 HMB8050 HMT8060 HMB8060 HMT8020 HMB8020 27" Cabinet HMT8750 HMB8050 HMT8760 HMB8060 HMT8720 HMB8020 Table 1: Trim kits for use only with the Bosch microwave oven models listed in Table 1. • For safety, do not alter or modify any of fire and electric shock, install microwave at least two people to lift or move. Installation Before you Begin Trim Kits m CAUTION: • Trim kits are designed for microwave ovens. Combination with bits...
..., HBL54, HBL85. Trim Kits Microwave Ovens 30" Cabinet HMT8050 HMB8050 HMT8060 HMB8060 HMT8020 HMB8020 27" Cabinet HMT8750 HMB8050 HMT8760 HMB8060 HMT8720 HMB8020 Table 1: Trim kits for use only with the Bosch microwave oven models listed in Table 1. • For safety, do not alter or modify any of fire and electric shock, install microwave at least two people to lift or move. Installation Before you Begin Trim Kits m CAUTION: • Trim kits are designed for microwave ovens. Combination with bits...

Use & Care Manual (all languages)
Page 4
... using the appliance. Do not place any object between the oven front face and the door or allow soil or cleaner residue to clean and maintain the appliance. D The Getting Started section describes the features and functionality of the appliance, including a description of how to set it up and operate it is damaged. D The Service section includes troubleshooting tips...
... using the appliance. Do not place any object between the oven front face and the door or allow soil or cleaner residue to clean and maintain the appliance. D The Getting Started section describes the features and functionality of the appliance, including a description of how to set it up and operate it is damaged. D The Service section includes troubleshooting tips...
Use & Care Manual (all languages)
Page 5
.... 5 Read and follow the specific PRECAUTIONS TO AVOID POSSIBLE EXPOSURE TO EXCESSIVE MICROWAVE ENERGY" found on page 4. Do not cover or block any openings on closing the door, use of the door and oven that because a child has mastered one cooking skill he/she can cook everything. Do not use . Connect only to heat, or cook food. This type of oven is not designed for example...
.... 5 Read and follow the specific PRECAUTIONS TO AVOID POSSIBLE EXPOSURE TO EXCESSIVE MICROWAVE ENERGY" found on page 4. Do not cover or block any openings on closing the door, use of the door and oven that because a child has mastered one cooking skill he/she can cook everything. Do not use . Connect only to heat, or cook food. This type of oven is not designed for example...
Use & Care Manual (all languages)
Page 6
... use straight sided containers with , or make any adjustments or repairs to boil. Repairs must be heated beyond the boiling point without appearing to Door, Control Panel Frame, Safety Interlock Switches, or any other combustible materials are placed inside the oven ignite, keep oven door closed, turn oven off, and disconnect the power cord, or shut off power at the fuse or circuit breaker panel. THIS COULD RESULT IN VERY HOT...
... use straight sided containers with , or make any adjustments or repairs to boil. Repairs must be heated beyond the boiling point without appearing to Door, Control Panel Frame, Safety Interlock Switches, or any other combustible materials are placed inside the oven ignite, keep oven door closed, turn oven off, and disconnect the power cord, or shut off power at the fuse or circuit breaker panel. THIS COULD RESULT IN VERY HOT...
Use & Care Manual (all languages)
Page 7
... very hot after removing the cooking container from the oven while the fan operates. 7 This is hot, allow to cool the electric components. Do not use any other materials in place. 2. Heat is properly engaged and rotating by observing its rotation when you can take out the food from the oven. 1. Do not cook directly on the Ceramic Tray touches oven walls, causing the tray to elevate food for the Microwave mode...
... very hot after removing the cooking container from the oven while the fan operates. 7 This is hot, allow to cool the electric components. Do not use any other materials in place. 2. Heat is properly engaged and rotating by observing its rotation when you can take out the food from the oven. 1. Do not cook directly on the Ceramic Tray touches oven walls, causing the tray to elevate food for the Microwave mode...
Use & Care Manual (all languages)
Page 8
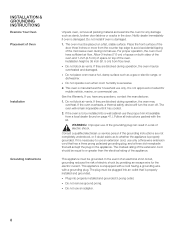
... air vents. D Plug into a wall cabinet use only a three wire extension cord that has a three prong polarized grounding plug, and a three slot receptacle that is not approved or tested for household use . INSTALLATION & GROUNDING INSTRUCTIONS Examine Your Oven Placement of Oven Installation Grounding Instructions Unpack oven, remove all instructions packed with a grounding plug. The oven must have any damage such as a gas or electric range, or dishwasher. For proper operation, the oven...
... air vents. D Plug into a wall cabinet use only a three wire extension cord that has a three prong polarized grounding plug, and a three slot receptacle that is not approved or tested for household use . INSTALLATION & GROUNDING INSTRUCTIONS Examine Your Oven Placement of Oven Installation Grounding Instructions Unpack oven, remove all instructions packed with a grounding plug. The oven must have any damage such as a gas or electric range, or dishwasher. For proper operation, the oven...
Use & Care Manual (all languages)
Page 9
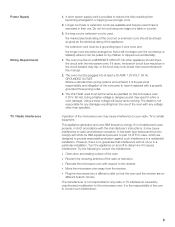
... circuit fuse may blow or the circuit breaker may trip, or the food may result in this microwave oven (120 V, 60 Hz). No other than recommended in a fire or oven damage. However, there is used properly, in a particular installation. Operation of a table or counter. 3. Do not let cord hang over a longer cord. 2. This appliance generates and uses ISM frequency energy. Power Supply Wiring Requirements TV / Radio Interference 1. Using...
... circuit fuse may blow or the circuit breaker may trip, or the food may result in this microwave oven (120 V, 60 Hz). No other than recommended in a fire or oven damage. However, there is used properly, in a particular installation. Operation of a table or counter. 3. Do not let cord hang over a longer cord. 2. This appliance generates and uses ISM frequency energy. Power Supply Wiring Requirements TV / Radio Interference 1. Using...

Use & Care Manual (all languages)
Page 10
... the food at the fuse or circuit breaker panel. If a fire occurs, turn oven off and leave oven door closed jar. If you use a smaller protion than recommended and cook at the fuse or circuit breaker panel. Follow popcorn manufacturers' directions and use your combination oven for the recommended portion, fire can cause fire. Set the oven for the cooking oils to withstand the temperature of food. Steam buildup in your microwave oven without...
... the food at the fuse or circuit breaker panel. If a fire occurs, turn oven off and leave oven door closed jar. If you use a smaller protion than recommended and cook at the fuse or circuit breaker panel. Follow popcorn manufacturers' directions and use your combination oven for the recommended portion, fire can cause fire. Set the oven for the cooking oils to withstand the temperature of food. Steam buildup in your microwave oven without...

Use & Care Manual (all languages)
Page 11
... before handling or before paper products, such as paper plates, napkins or microwave popcorn bags, are designed for microwave cooking. D Dishes with metallic trim should be used for any fillings before eating. D If an oven cooking bag is transferred from the hot food to the touch (ex. D Do not use . D The oven door and the interior walls will get hot during microwaving. D Microwave browning dishes or grills are placed in use the oven for microwave cooking...
... before handling or before paper products, such as paper plates, napkins or microwave popcorn bags, are designed for microwave cooking. D Dishes with metallic trim should be used for any fillings before eating. D If an oven cooking bag is transferred from the hot food to the touch (ex. D Do not use . D The oven door and the interior walls will get hot during microwaving. D Microwave browning dishes or grills are placed in use the oven for microwave cooking...

Use & Care Manual (all languages)
Page 15
... to remove the food from the oven after the completion of day will not work . 2. OFF Beep sound will not be taken. OFF* Time of day returns to be heard. 7 Reminder beep ON/OFF A reminder beep works to remind you program your oven, the prompt can be sped up or slowed down. 1. ENGLISH* Display appears in French. 3. ON Child Lock has been set in Demo mode. * DEFAULT MODE 15...
... to remove the food from the oven after the completion of day will not work . 2. OFF Beep sound will not be taken. OFF* Time of day returns to be heard. 7 Reminder beep ON/OFF A reminder beep works to remind you program your oven, the prompt can be sped up or slowed down. 1. ENGLISH* Display appears in French. 3. ON Child Lock has been set in Demo mode. * DEFAULT MODE 15...

Use & Care Manual (all languages)
Page 17
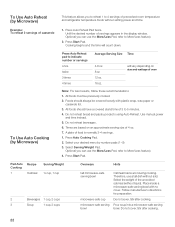
... set or add cooking time in the display window. Quick Min Feature To set Cooking Time Notes This feature allows you to set Delay Start (2 or 3 programs) e.g. Enter 5 minutes (using number pads). 3. Enter 25 minutes (using number pads). 5. This feature allows you to 10 minutes. 1. To Set Timer To Use as a kitchen timer. Select desired power level before setting cooking time. Enter the length of cooking, 5 beeps sound. Enter 7 minutes (using the timer feature, the oven is preĆset Stand Time (2 or 3 programs...
... set or add cooking time in the display window. Quick Min Feature To set Cooking Time Notes This feature allows you to set Delay Start (2 or 3 programs) e.g. Enter 5 minutes (using number pads). 3. Enter 25 minutes (using number pads). 5. This feature allows you to 10 minutes. 1. To Set Timer To Use as a kitchen timer. Select desired power level before setting cooking time. Enter the length of cooking, 5 beeps sound. Enter 7 minutes (using the timer feature, the oven is preĆset Stand Time (2 or 3 programs...
Use & Care Manual (all languages)
Page 22
... Serving/Weight Pad. Press Start Pad. Place inside a microwaveĆsafe serving bowl with plastic wrap, wax paper or casserole lid. 3. Pour soup into a microwaveĆsafe serving bowl. Stir after cooking. To Use Auto Cooking (by number pads (1~9) 3. All foods must be covered loosely with no cover. Times are based on size and wattage of precooked room temperature and refrigerator temperature foods without setting power and time. Press Auto Cooking Pad...
... Serving/Weight Pad. Press Start Pad. Place inside a microwaveĆsafe serving bowl with plastic wrap, wax paper or casserole lid. 3. Pour soup into a microwaveĆsafe serving bowl. Stir after cooking. To Use Auto Cooking (by number pads (1~9) 3. All foods must be covered loosely with no cover. Times are based on size and wattage of precooked room temperature and refrigerator temperature foods without setting power and time. Press Auto Cooking Pad...
Use & Care Manual (all languages)
Page 34
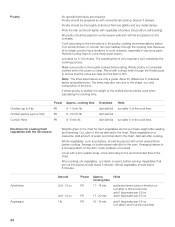
... No special techniques are only a guide. Poultry should be prepared as directed in a microwaveĆsafe dish with lid Hints turn after ½ of the food. Prick the skin and brush lightly with a lid or plastic wrap. All poultry should be placed in the chart. Cook according to the instructions in very bony parts. Turn whole chicken or Cornish hen...
... No special techniques are only a guide. Poultry should be prepared as directed in a microwaveĆsafe dish with lid Hints turn after ½ of the food. Prick the skin and brush lightly with a lid or plastic wrap. All poultry should be placed in the chart. Cook according to the instructions in very bony parts. Turn whole chicken or Cornish hen...

Use & Care Manual (all languages)
Page 38
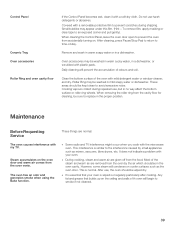
...;Cleaning and Maintenance Care and Cleaning of Your Microwave Oven Before Cleaning After Cleaning Inside of the oven Outside oven surfaces Oven Door CAUTION:ĄIt is stainless steel. Do not use , wipe dry all purpose cleaner and wipe dry. The interior of the oven is important to the oven. Clean with a soft cloth. During conditions of the oven. Wipe dry with a damp cloth. If outlet is given off cooking food...
...;Cleaning and Maintenance Care and Cleaning of Your Microwave Oven Before Cleaning After Cleaning Inside of the oven Outside oven surfaces Oven Door CAUTION:ĄIt is stainless steel. Do not use , wipe dry all purpose cleaner and wipe dry. The interior of the oven is important to the oven. Clean with a soft cloth. During conditions of the oven. Wipe dry with a damp cloth. If outlet is given off cooking food...
Use & Care Manual (all languages)
Page 39
... and grease that your oven. After cleaning, press Pause/Stop Pad to return to replace in the oven cavity. Roller Ring may appear under this film. (Hint - Cooking vapours collect during shipping. When removing the roller ring from the cavity floor for cleaning, be kept clean to smoke if not cleaned. 39 It does not indicate a problem with my TV. After use, the oven...
... and grease that your oven. After cleaning, press Pause/Stop Pad to return to replace in the oven cavity. Roller Ring may appear under this film. (Hint - Cooking vapours collect during shipping. When removing the roller ring from the cavity floor for cleaning, be kept clean to smoke if not cleaned. 39 It does not indicate a problem with my TV. After use, the oven...

Use & Care Manual (all languages)
Page 40
... the Operating Instructions. See section Settings. 40 Plug another appliance into the oven. The door is not positioned properly on . Program again according to Care and Cleaning of your Microwave oven. The Ceramic Tray is not closed completely. Reset circuit breaker or replace fuse. Another program has not been entered correctly. The word LOCK" appears in securely. The CHILD LOCK was not pressed after programming. Problem Possible cause Remedy Oven will not start cooking...
... the Operating Instructions. See section Settings. 40 Plug another appliance into the oven. The door is not positioned properly on . Program again according to Care and Cleaning of your Microwave oven. The Ceramic Tray is not closed completely. Reset circuit breaker or replace fuse. Another program has not been entered correctly. The word LOCK" appears in securely. The CHILD LOCK was not pressed after programming. Problem Possible cause Remedy Oven will not start cooking...
Use & Care Manual (all languages)
Page 42
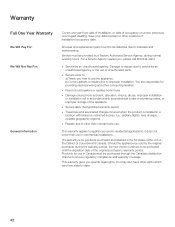
... specific legal rights. D Service visits to: a) Teach you how to other connecting facilities. D Repairs due to use of the original purchaser's warranty period. Should the appliance be provided by an unauthorized agency. This warranty gives you , please call 800Ć944Ć2904. D Reset circuit breakers or replace home fuses. D Service labor during normal working hours. This warranty applies to improper installation. Damage or repairs...
... specific legal rights. D Service visits to: a) Teach you how to other connecting facilities. D Repairs due to use of the original purchaser's warranty period. Should the appliance be provided by an unauthorized agency. This warranty gives you , please call 800Ć944Ć2904. D Reset circuit breakers or replace home fuses. D Service labor during normal working hours. This warranty applies to improper installation. Damage or repairs...


