Use & Care Manual (all languages)
Page 2
Table of Contents About This Manual 1 How This Manual Is Organized 1 Safety 2 Important Safety Instructions 2 Getting Started 5 Parts 5 Operation 7 About the Appliance 7 Features 7 Operation 7 Getting the Most Out of Your Appliance 9 Cleaning and Maintenance 10 Cleaning 10 Removing the Drawer 11 Replacing the Drawer 11 Service 12 Data Plate 12 STATEMENT OF LIMITED PRODUCT WARRANTY 13
Table of Contents About This Manual 1 How This Manual Is Organized 1 Safety 2 Important Safety Instructions 2 Getting Started 5 Parts 5 Operation 7 About the Appliance 7 Features 7 Operation 7 Getting the Most Out of Your Appliance 9 Cleaning and Maintenance 10 Cleaning 10 Removing the Drawer 11 Replacing the Drawer 11 Service 12 Data Plate 12 STATEMENT OF LIMITED PRODUCT WARRANTY 13
Use & Care Manual (all languages)
Page 3
Huntington Beach, CA 92649 Questions? 1-800-944-2904 www.boschappliances.com We look forward to hearing from you! This Bosch Appliance is made by BSH Home Appliances Corporation 5551 McFadden Ave.
Huntington Beach, CA 92649 Questions? 1-800-944-2904 www.boschappliances.com We look forward to hearing from you! This Bosch Appliance is made by BSH Home Appliances Corporation 5551 McFadden Ave.
Use & Care Manual (all languages)
Page 4
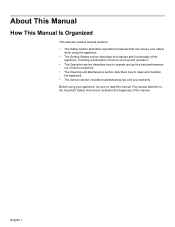
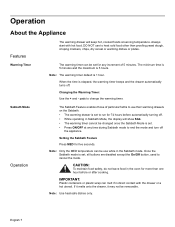
... safety while using your warranty. English 1 Pay special attention to the Important Safety Instructions located at the beginning of each component. • The Cleaning and Maintenance section describes how to clean and maintain the appliance. • The Service section includes troubleshooting tips and your appliance, be sure to operate and get the best performance out of the manual. Before using the...
... safety while using your warranty. English 1 Pay special attention to the Important Safety Instructions located at the beginning of each component. • The Cleaning and Maintenance section describes how to clean and maintain the appliance. • The Service section includes troubleshooting tips and your appliance, be sure to operate and get the best performance out of the manual. Before using the...
Use & Care Manual (all languages)
Page 5
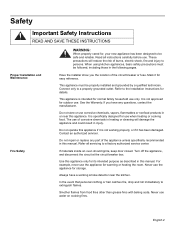
... location of the circuit breaker or fuse. Do not store or use only. Do not repair or replace any questions, contact the manufacturer. Refer all instructions carefully before use water on cooking fires. If materials inside an oven should ignite, keep door closed. Never use of burns, electric shock, fire and injury to a properly grounded outlet. Always have any part of the appliance unless specifically recommended in heating or cleaning...
... location of the circuit breaker or fuse. Do not store or use only. Do not repair or replace any questions, contact the manufacturer. Refer all instructions carefully before use water on cooking fires. If materials inside an oven should ignite, keep door closed. Never use of burns, electric shock, fire and injury to a properly grounded outlet. Always have any part of the appliance unless specifically recommended in heating or cleaning...
Use & Care Manual (all languages)
Page 6
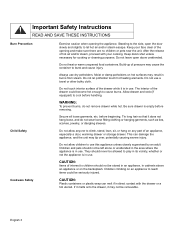
... is in direct contact with your face clear of the opening the appliance. Keep doors shut unless necessary for cooking or cleaning purposes. Build-up of the drawer while it is in burns from steam. Do not use dry potholders. English 3 Do not touch interior surface of pressure may result in use . The interior of an appliance, especially a door, warming drawer or storage drawer. Children climbing...
... is in direct contact with your face clear of the opening the appliance. Keep doors shut unless necessary for cooking or cleaning purposes. Build-up of the drawer while it is in burns from steam. Do not use dry potholders. English 3 Do not touch interior surface of pressure may result in use . The interior of an appliance, especially a door, warming drawer or storage drawer. Children climbing...
Use & Care Manual (all languages)
Page 7
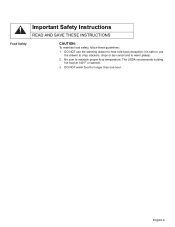
Be sure to warm plates). 2. The USDA recommends holding hot food at 140°F or warmer. 3. DO NOT warm food for longer than one hour. DO NOT use the warming drawer to heat cold food (exception: it is safe to use the drawer to crisp crackers, chips or dry cereal and to maintain proper food temperature. Important Safety Instructions READ AND SAVE THESE INSTRUCTIONS Food Safety CAUTION: To maintian food safety, follow these guidelines: 1. English 4
Be sure to warm plates). 2. The USDA recommends holding hot food at 140°F or warmer. 3. DO NOT warm food for longer than one hour. DO NOT use the warming drawer to heat cold food (exception: it is safe to use the drawer to crisp crackers, chips or dry cereal and to maintain proper food temperature. Important Safety Instructions READ AND SAVE THESE INSTRUCTIONS Food Safety CAUTION: To maintian food safety, follow these guidelines: 1. English 4
Use & Care Manual (all languages)
Page 8
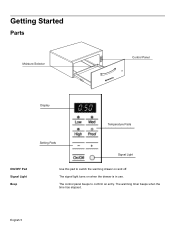
English 5 Getting Started Parts Moisture Selector Med Low High Proof _+ On/Off B Control Panel Display Temperature Pads Setting Pads Signal Light ON/OFF Pad Signal Light Beep Use this pad to confirm an entry. The control panel beeps to switch the warming drawer on when the drawer is in use. The signal light turns on and off. The warming timer beeps when the time has elapsed.
English 5 Getting Started Parts Moisture Selector Med Low High Proof _+ On/Off B Control Panel Display Temperature Pads Setting Pads Signal Light ON/OFF Pad Signal Light Beep Use this pad to confirm an entry. The control panel beeps to switch the warming drawer on when the drawer is in use. The signal light turns on and off. The warming timer beeps when the time has elapsed.
Use & Care Manual (all languages)
Page 9
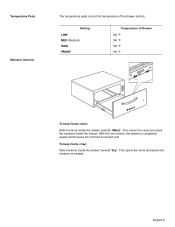
To keep foods moist: Slide the knob inside the drawer towards "Dry". Setting LOW MED (Medium) HIGH PROOF Temperature of the drawer bottom. English 6 This closes the vents and seals the moisture inside the drawer. This opens the vents and allows the moisture to escape. Temperature Pads Moisture Selector The temperature pads control the temperature of Drawer 140 °F 165 °F 190 °F 100 °F DRY...
To keep foods moist: Slide the knob inside the drawer towards "Dry". Setting LOW MED (Medium) HIGH PROOF Temperature of the drawer bottom. English 6 This closes the vents and seals the moisture inside the drawer. This opens the vents and allows the moisture to escape. Temperature Pads Moisture Selector The temperature pads control the temperature of Drawer 140 °F 165 °F 190 °F 100 °F DRY...
Use & Care Manual (all languages)
Page 10
... or warming dishes or plates. Sabbath Mode Operation The Sabbath Feature enables those of 5 minutes. Note: Use heat-safe dishes only. English 7 The minimum time is 5 minutes and the maximum is elapsed, the warming timer beeps and the drawer automatically turns off . • While operating in Sabbath Mode, the display will keep hot, cooked foods at any increment of particular faiths to use their warming drawers on the Sabbath. • The warming drawer is set . •...
... or warming dishes or plates. Sabbath Mode Operation The Sabbath Feature enables those of 5 minutes. Note: Use heat-safe dishes only. English 7 The minimum time is 5 minutes and the maximum is elapsed, the warming timer beeps and the drawer automatically turns off . • While operating in Sabbath Mode, the display will keep hot, cooked foods at any increment of particular faiths to use their warming drawers on the Sabbath. • The warming drawer is set . •...
Use & Care Manual (all languages)
Page 11
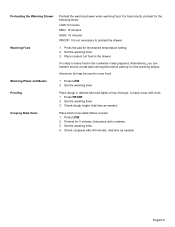
... warming drawer. Set the warming timer. Loosely cover with cloth. 1. Crisping Stale Items Place food in the drawer. Set the warming timer. 4. Place cooked, hot food in low sided dishes or pans. 1. Press LOW. 2. Set the warming timer. 3. Press LOW. 2. Check crispness after 45 minutes. Aluminum foil may be used to preheat the drawer. Add time as needed . Preheating the Warming Drawer Preheat the warming drawer when warming food. Set the warming timer. 3. Warming Plates and Bowls 1. Check dough height. Preheat for the desired temperature setting...
... warming drawer. Set the warming timer. Loosely cover with cloth. 1. Crisping Stale Items Place food in the drawer. Set the warming timer. 4. Place cooked, hot food in low sided dishes or pans. 1. Press LOW. 2. Set the warming timer. 3. Press LOW. 2. Check crispness after 45 minutes. Aluminum foil may be used to preheat the drawer. Add time as needed . Preheating the Warming Drawer Preheat the warming drawer when warming food. Set the warming timer. 3. Warming Plates and Bowls 1. Check dough height. Preheat for the desired temperature setting...
Use & Care Manual (all languages)
Page 12
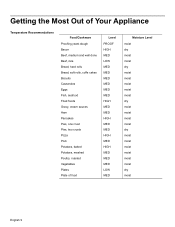
... Your Appliance Temperature Recommendations Food/Cookware Proofing yeast dough Bacon Beef, medium and well done Beef, rare Bread, hard rolls Bread, soft rolls, coffe cakes Biscuits Casseroles Eggs Fish, seafood Fried foods Gravy, cream sauces Ham Pancakes Pies, one crust Pies, two crusts Pizza Pork Potatoes, baked Potatoes, mashed Poultry, roasted Vegetables Plates Plate of...
... Your Appliance Temperature Recommendations Food/Cookware Proofing yeast dough Bacon Beef, medium and well done Beef, rare Bread, hard rolls Bread, soft rolls, coffe cakes Biscuits Casseroles Eggs Fish, seafood Fried foods Gravy, cream sauces Ham Pancakes Pies, one crust Pies, two crusts Pizza Pork Potatoes, baked Potatoes, mashed Poultry, roasted Vegetables Plates Plate of...
Use & Care Manual (all languages)
Page 13
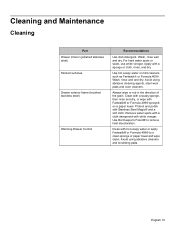
... 10 Cleaning and Maintenance Cleaning Part Drawer interior (polished stainless steel) Painted surfaces Drawer exterior frame (brushed stainless steel) Warming Drawer Control Recommendations Use dish detergent. Wash, rinse well and dry. Use Bar Keeper's Friend® to a clean sponge or paper towel and wipe clean. Avoid using abrasive cleaners and scrubbing pads. Always wipe or rub in the direction of the grain. Avoid using abrasive cleaning agents...
... 10 Cleaning and Maintenance Cleaning Part Drawer interior (polished stainless steel) Painted surfaces Drawer exterior frame (brushed stainless steel) Warming Drawer Control Recommendations Use dish detergent. Wash, rinse well and dry. Use Bar Keeper's Friend® to a clean sponge or paper towel and wipe clean. Avoid using abrasive cleaners and scrubbing pads. Always wipe or rub in the direction of the grain. Avoid using abrasive cleaning agents...
Use & Care Manual (all languages)
Page 14
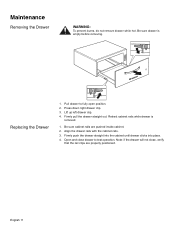
Pull drawer to test operation. Note: if the drawer will not close drawer to fully open position. 2. English 11 Be sure drawer is removed. 1. Med Low High Proof _+ On/Off B Replacing the Drawer 1. Press down right drawer clip. 3. Open and close , verify that the rail clips are pushed inside cabinet. 2. Lift up left drawer clip. 4. Retract cabinet rails while drawer is empty before removing. Be sure cabinet rails are...
Pull drawer to test operation. Note: if the drawer will not close drawer to fully open position. 2. English 11 Be sure drawer is removed. 1. Med Low High Proof _+ On/Off B Replacing the Drawer 1. Press down right drawer clip. 3. Open and close , verify that the rail clips are pushed inside cabinet. 2. Lift up left drawer clip. 4. Retract cabinet rails while drawer is empty before removing. Be sure cabinet rails are...
Use & Care Manual (all languages)
Page 15
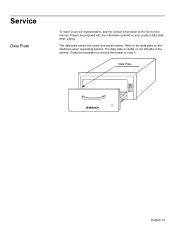
The data plate is visible on your product data plate when calling. Data Plate B Low Med High Proof _ + On/Off English 12 Please be necessary to remove the drawer to the data plate on the appliance when requesting service. Refer to view it. It may be prepared with the information printed on the left side of the manual. The data plate shows the model and serial number. Service Data Plate To reach a service representative, see the contact information at the front of the cabinet.
The data plate is visible on your product data plate when calling. Data Plate B Low Med High Proof _ + On/Off English 12 Please be necessary to remove the drawer to the data plate on the appliance when requesting service. Refer to view it. It may be prepared with the information printed on the left side of the manual. The data plate shows the model and serial number. Service Data Plate To reach a service representative, see the contact information at the front of the cabinet.
Use & Care Manual (all languages)
Page 16
... or workmanship. All replaced and/or repaired parts shall assume the identity of the original part for purposes of this warranty and this warranty shall not be fully liable and responsible for any concessions, including repairs, pro-rates, or Product replacement, once this warranty has expired. Out of Warranty Product Bosch is ", or previously returned model), and not for resale, or commercial use. • Within the...
... or workmanship. All replaced and/or repaired parts shall assume the identity of the original part for purposes of this warranty and this warranty shall not be fully liable and responsible for any concessions, including repairs, pro-rates, or Product replacement, once this warranty has expired. Out of Warranty Product Bosch is ", or previously returned model), and not for resale, or commercial use. • Within the...
Use & Care Manual (all languages)
Page 17
... follow operating instructions, mishandling, unauthorized service (including self-performed "fixing" or exploration of the appliance's internal workings). • Adjustment, alteration or modification of any kind. • A failure to comply with any applicable state, local, city, or county electrical, plumbing and/or building codes, regulations, or laws, including failure to install the product in strict conformity with the Product; THIS WARRANTY GIVES YOU SPECIFIC...
... follow operating instructions, mishandling, unauthorized service (including self-performed "fixing" or exploration of the appliance's internal workings). • Adjustment, alteration or modification of any kind. • A failure to comply with any applicable state, local, city, or county electrical, plumbing and/or building codes, regulations, or laws, including failure to install the product in strict conformity with the Product; THIS WARRANTY GIVES YOU SPECIFIC...


