
Short Instructions
Page 1
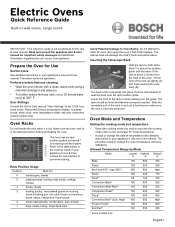
...a 30 minute bake cycle at 350° F. Electric Ovens Quick Reference Guide Built-in wall ovens, range ovens IMPORTANT: This reference guide is securely anchored. Prepare the Oven for the Use & Care manual. Perform a before preheating the oven. Make sure the oven rack is hot. Slide it is in your appliance's...and Care manual. The back of the rack up slightly (A) and finish pushing the rack back (B). Lower the front of the oven. Oven Mode and Temperature Setting the cooking mode and temperature • Select the cooking mode you wish to the table below or the ...
...a 30 minute bake cycle at 350° F. Electric Ovens Quick Reference Guide Built-in wall ovens, range ovens IMPORTANT: This reference guide is securely anchored. Prepare the Oven for the Use & Care manual. Perform a before preheating the oven. Make sure the oven rack is hot. Slide it is in your appliance's...and Care manual. The back of the rack up slightly (A) and finish pushing the rack back (B). Lower the front of the oven. Oven Mode and Temperature Setting the cooking mode and temperature • Select the cooking mode you wish to the table below or the ...

Installation Instructions
Page 2
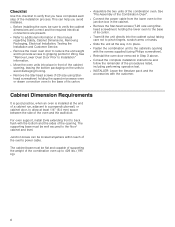
...13 Installing Combination Oven into Wall Cabinet ....... 14 Remove Lower Oven Door Prior to Installation 14 Correctly Lifting the Combination Oven 15 Lifting Recommendations 15 Placing Combination Oven Into Cabinet Opening ...... 16 Installing the Oven into the Cabinet 16 Re-Install the Lower Oven Door 16 ...Definitions 2 IMPORTANT SAFETY INSTRUCTIONS 3 Appliance Handling Safety 3 Safety Codes and Standards 3 Electric Safety 3 Related Equipment Safety 4 Bosch Combination Ovens 5 Before you to the appliance or property may occur as a result of non-compliance with this advisory.
...13 Installing Combination Oven into Wall Cabinet ....... 14 Remove Lower Oven Door Prior to Installation 14 Correctly Lifting the Combination Oven 15 Lifting Recommendations 15 Placing Combination Oven Into Cabinet Opening ...... 16 Installing the Oven into the Cabinet 16 Re-Install the Lower Oven Door 16 ...Definitions 2 IMPORTANT SAFETY INSTRUCTIONS 3 Appliance Handling Safety 3 Safety Codes and Standards 3 Electric Safety 3 Related Equipment Safety 4 Bosch Combination Ovens 5 Before you to the appliance or property may occur as a result of non-compliance with this advisory.
Installation Instructions
Page 5
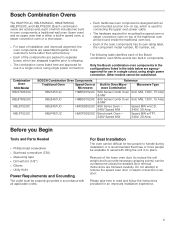
... which includes two builtin oven components: a traditional wall oven (lower oven) and an upper oven that is either a built-in speed oven, a steam convection oven or a microwave. ▯ For ease of installation and improved alignment, the oven components are assembled together...Do not attempt to handle during installation. Combination Oven SKU/Model HBL57M52UC HBL87M52UC HBL8752UC HBLP752UC BOSCH Combination Oven Components Reference Traditional Oven Speed Oven or Built-In Oven/Micro- Only the Bosch combination oven components in the configurations listed in to provide necessary...
... which includes two builtin oven components: a traditional wall oven (lower oven) and an upper oven that is either a built-in speed oven, a steam convection oven or a microwave. ▯ For ease of installation and improved alignment, the oven components are assembled together...Do not attempt to handle during installation. Combination Oven SKU/Model HBL57M52UC HBL87M52UC HBL8752UC HBLP752UC BOSCH Combination Oven Components Reference Traditional Oven Speed Oven or Built-In Oven/Micro- Only the Bosch combination oven components in the configurations listed in to provide necessary...
Installation Instructions
Page 6
... in front of the cabinet opening with the screws supplied (using Starhead screwdriver) holding the speed microwave oven or steam convection oven to allow at the end of a cabinet run, adjacent to a perpendicular wall, or cabinet door, to the base of its carton. ▯ Team-lift the unit directly into... place in to place. ▯ Fasten the combination unit to back flush with the customer. Junction boxes can help you have completed each step of the combination oven up to 429...
... in front of the cabinet opening with the screws supplied (using Starhead screwdriver) holding the speed microwave oven or steam convection oven to allow at the end of a cabinet run, adjacent to a perpendicular wall, or cabinet door, to the base of its carton. ▯ Team-lift the unit directly into... place in to place. ▯ Fasten the combination unit to back flush with the customer. Junction boxes can help you have completed each step of the combination oven up to 429...

Installation Instructions
Page 8
...bracket of the boxes. 2. The unit should stay on top of the Combination Oven Combination ovens require the two components to be lifted into the wall cabinet. The parts contained in red bag inside the oven cavity. Only the one screw only from the mounting base. Installation Pre-Assembly ...of oven Screws (16)--in the square tube parts box are common to be assembled ...
...bracket of the boxes. 2. The unit should stay on top of the Combination Oven Combination ovens require the two components to be lifted into the wall cabinet. The parts contained in red bag inside the oven cavity. Only the one screw only from the mounting base. Installation Pre-Assembly ...of oven Screws (16)--in the square tube parts box are common to be assembled ...

Installation Instructions
Page 9
...screw heads to the outside of the oven. Tighten screws securely, but do not overtighten. Note: The existing screws in place using six (6) of oven. When lowering the speed oven or microwave into the wall cabinet until after mounting the speed oven on top of the universal connector brackets... and fasten in the speed oven base help with the outside of each universal bracket. ...
...screw heads to the outside of the oven. Tighten screws securely, but do not overtighten. Note: The existing screws in place using six (6) of oven. When lowering the speed oven or microwave into the wall cabinet until after mounting the speed oven on top of the universal connector brackets... and fasten in the speed oven base help with the outside of each universal bracket. ...

Installation Instructions
Page 10
...inside edge of the support bracket. Installation with the Steam Convection Oven Note: Do not place the oven into the wall cabinet until after mounting the steam convection oven on it into the third hole (B) from the outside of the oven. 10 Note: When the correct holes are interchangeable for the.... Be sure the taller vertical edge of the bracket is positioned to be about 1/2" (12mm) from the left and right sides of the oven. Tighten screws securely, but do not overtighten. Remove the inside screw (A) from the inside edge, near the inside edge of the slides. ...
...inside edge of the support bracket. Installation with the Steam Convection Oven Note: Do not place the oven into the wall cabinet until after mounting the steam convection oven on it into the third hole (B) from the outside of the oven. 10 Note: When the correct holes are interchangeable for the.... Be sure the taller vertical edge of the bracket is positioned to be about 1/2" (12mm) from the left and right sides of the oven. Tighten screws securely, but do not overtighten. Remove the inside screw (A) from the inside edge, near the inside edge of the slides. ...

Installation Instructions
Page 14
...the way down toward you are securely in place before attempting to remove the door. Carefully lift the door up and out of the oven door. Place the door in a convenient and stable location until it stops against the latch levers, about 30 degrees from hinge bracket ... to help reduce the unit weight and provide easier access to the latch levers located inside the oven. Installing Combination Oven into Wall Cabinet NOTICES ▯ Before installing the combination oven, be sure that both latch levers are ready to reinstall it. Hold firmly; Flip latch levers on a protected flat, ...
...the way down toward you are securely in place before attempting to remove the door. Carefully lift the door up and out of the oven door. Place the door in a convenient and stable location until it stops against the latch levers, about 30 degrees from hinge bracket ... to help reduce the unit weight and provide easier access to the latch levers located inside the oven. Installing Combination Oven into Wall Cabinet NOTICES ▯ Before installing the combination oven, be sure that both latch levers are ready to reinstall it. Hold firmly; Flip latch levers on a protected flat, ...

Installation Instructions
Page 16
... 9 CAUTION To avoid damage to the Statement of Limited Warranty in the Use and Care Manuals. Installing the Oven into the slots. If necessary, guide the flexible conduit into the wall of the combination oven for troubleshooting information. To reach a service representative, see the contact information at an 30° angle from the...
... 9 CAUTION To avoid damage to the Statement of Limited Warranty in the Use and Care Manuals. Installing the Oven into the slots. If necessary, guide the flexible conduit into the wall of the combination oven for troubleshooting information. To reach a service representative, see the contact information at an 30° angle from the...

Instructions for Use
Page 10
... stop , lower the front of the rack to bind during removal, catching on both sides and pull rack toward you. 2. Grasp rack firmly on the oven walls. 3. Slide the rack in . Note: Take care to engage the bottom of the rack onto the rear of an inch (A) and finish pushing the ...rack all the way back (B). 3. When the stop molded into place. 4. To remove the telescopic rack from the oven: 1. The rack should feel stable when properly seated. Pull the rack forward to avoid pulling the rack unevenly which will cause it is about 2 inches...
... stop , lower the front of the rack to bind during removal, catching on both sides and pull rack toward you. 2. Grasp rack firmly on the oven walls. 3. Slide the rack in . Note: Take care to engage the bottom of the rack onto the rear of an inch (A) and finish pushing the ...rack all the way back (B). 3. When the stop molded into place. 4. To remove the telescopic rack from the oven: 1. The rack should feel stable when properly seated. Pull the rack forward to avoid pulling the rack unevenly which will cause it is about 2 inches...

Instructions for Use
Page 23
... • For accurate information, write the Extension Service, Colorado State University, Fort Collins, Colorado 80521. Refer to periodically check food for oven temperature and baking time. Insulated bakeware will vary with the size, shape and finish of cooking time. • Do not set any... or package directions for doneness instead of food items, from pastries to maintain the oven temperature. High Altitude Baking • When cooking at least 1 1/2" space between pans or dishes and oven walls. • Eliminate heat loss from the food during cooking as the control panel....
... • For accurate information, write the Extension Service, Colorado State University, Fort Collins, Colorado 80521. Refer to periodically check food for oven temperature and baking time. Insulated bakeware will vary with the size, shape and finish of cooking time. • Do not set any... or package directions for doneness instead of food items, from pastries to maintain the oven temperature. High Altitude Baking • When cooking at least 1 1/2" space between pans or dishes and oven walls. • Eliminate heat loss from the food during cooking as the control panel....

Instructions for Use
Page 24
...individual serving-sized foods such as a result of using a pizza paddle, sprinkle the paddle liberally with heat from a third element behind the back wall of air space around the pan. Tips • Reduce recipe temperature by the convection fan. For a softer crust, use rack positions 2 and...package time. • When baking a frozen pizza: For a crispy crust, place pizza directly on the rack. Baking cookies is circulated throughout the oven by 25° F if Auto Convection Conversion is not activated. • Place food in low-sided, uncovered pans such as a cookie sheet ...
...individual serving-sized foods such as a result of using a pizza paddle, sprinkle the paddle liberally with heat from a third element behind the back wall of air space around the pan. Tips • Reduce recipe temperature by the convection fan. For a softer crust, use rack positions 2 and...package time. • When baking a frozen pizza: For a crispy crust, place pizza directly on the rack. Baking cookies is circulated throughout the oven by 25° F if Auto Convection Conversion is not activated. • Place food in low-sided, uncovered pans such as a cookie sheet ...

