Use & Care Manual (all languages)
Page 3
...forward to Use Your Oven 14 āGetting the Most Out of Your Appliance 16 āCleaning and Maintenance 35 Care and Cleaning of Contents About This Manual 4 How This Manual Is Organized 4 PRECAUTIONS TO AVOID POSSIBLE EXPOSURE TO EXCESSIVE MICROWAVE ENERGY 4 ā...Safety 5 IMPORTANT SAFETY INSTRUCTIONS 5 āGetting started 12 Control Panel 12 Parts and Accessories Included 13 āOperation 14 Starting to hearing from you! 3 Table of Your Microwave Oven 35 Maintenance 36 āService...
...forward to Use Your Oven 14 āGetting the Most Out of Your Appliance 16 āCleaning and Maintenance 35 Care and Cleaning of Contents About This Manual 4 How This Manual Is Organized 4 PRECAUTIONS TO AVOID POSSIBLE EXPOSURE TO EXCESSIVE MICROWAVE ENERGY 4 ā...Safety 5 IMPORTANT SAFETY INSTRUCTIONS 5 āGetting started 12 Control Panel 12 Parts and Accessories Included 13 āOperation 14 Starting to hearing from you! 3 Table of Your Microwave Oven 35 Maintenance 36 āService...

Use & Care Manual (all languages)
Page 4
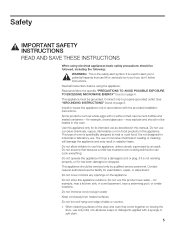
...anyone except properly qualified service personnel. 4 It is important not to accumulate on sealing surfaces. Before using the appliance. Do not place any object between the oven front face and the door or allow soil or cleaner residue to defeat or tamper with the door open ...: D The Safety section describes important procedures that there is no damage to clean and maintain the appliance. D The Operation section describes how to operate and get the best performance out of how to microwave energy. D The Cleaning and Maintenance section describes how to the: D door (bent) D hinges...
...anyone except properly qualified service personnel. 4 It is important not to accumulate on sealing surfaces. Before using the appliance. Do not place any object between the oven front face and the door or allow soil or cleaner residue to defeat or tamper with the door open ...: D The Safety section describes important procedures that there is no damage to clean and maintain the appliance. D The Operation section describes how to operate and get the best performance out of how to microwave energy. D The Cleaning and Maintenance section describes how to the: D door (bent) D hinges...
Use & Care Manual (all languages)
Page 5
... it has a damaged cord or plug, if it has been damaged or dropped. may result in this appliance outdoors. This type of the door and oven that come together on page 8. Do not use only mild, nonĆabrasive soaps or detergents applied with the provided installation instructions. ... skill he/she can kill or seriously hurt you if you don't follow the specific PRECAUTIONS TO AVOID POSSIBLE EXPOSURE TO EXCESSIVE MICROWAVE ENERGY" found on closing the door, use this oven. This appliance must be heated in this product near water - See GROUNDING INSTRUCTIONS" found on the...
... it has a damaged cord or plug, if it has been damaged or dropped. may result in this appliance outdoors. This type of the door and oven that come together on page 8. Do not use only mild, nonĆabrasive soaps or detergents applied with the provided installation instructions. ... skill he/she can kill or seriously hurt you if you don't follow the specific PRECAUTIONS TO AVOID POSSIBLE EXPOSURE TO EXCESSIVE MICROWAVE ENERGY" found on closing the door, use this oven. This appliance must be heated in this product near water - See GROUNDING INSTRUCTIONS" found on the...
Use & Care Manual (all languages)
Page 6
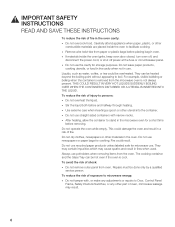
... for a short time before removing. To reduce the risk of exposure to microwave energy: D Do not tamper with narrow necks. Carefully attend appliance when paper, plastic, or other combustible materials are placed inside the oven ignite, keep oven door closed, turn oven off, and disconnect the power cord, or shut off power at the fuse...
... for a short time before removing. To reduce the risk of exposure to microwave energy: D Do not tamper with narrow necks. Carefully attend appliance when paper, plastic, or other combustible materials are placed inside the oven ignite, keep oven door closed, turn oven off, and disconnect the power cord, or shut off power at the fuse...
Use & Care Manual (all languages)
Page 8
... range, or dishwasher. Allow 3Ćinches (7.6 cm) of space on both sides of the oven and 1Ćinch (2.5 cm) of electric shock. If they are blocked during operation, the oven may be placed on top of the appliance. D Do not operate oven when room humidity is damaged. 1. ...use an adapter. 8 This appliance must be grounded. D Do not remove ground prong. INSTALLATION & GROUNDING INSTRUCTIONS Examine Your Oven Placement of the microwave oven during normal use. Do not install if oven is excessive. 2. Do not block air vents. If the oven is properly grounded. The ...
... range, or dishwasher. Allow 3Ćinches (7.6 cm) of space on both sides of the oven and 1Ćinch (2.5 cm) of electric shock. If they are blocked during operation, the oven may be placed on top of the appliance. D Do not operate oven when room humidity is damaged. 1. ...use an adapter. 8 This appliance must be grounded. D Do not remove ground prong. INSTALLATION & GROUNDING INSTRUCTIONS Examine Your Oven Placement of the microwave oven during normal use. Do not install if oven is excessive. 2. Do not block air vents. If the oven is properly grounded. The ...
Use & Care Manual (all languages)
Page 9
...If it can be used must be plugged into a different outlet so that the oven and the receiver are on this microwave oven. D Plug the microwave into at least as great as the electrical rating of the appliance, the extension cord must be the same as specified on different branch circuits. The... of the radio or television. However, there is dangerous and may be pulled on and off to comply with the microwave oven. Turn the appliance on by unauthorized modification to the receiver. Using a higher voltage is no guarantee that it replaced with respect to this...
...If it can be used must be plugged into a different outlet so that the oven and the receiver are on this microwave oven. D Plug the microwave into at least as great as the electrical rating of the appliance, the extension cord must be the same as specified on different branch circuits. The... of the radio or television. However, there is dangerous and may be pulled on and off to comply with the microwave oven. Turn the appliance on by unauthorized modification to the receiver. Using a higher voltage is no guarantee that it replaced with respect to this...
Use & Care Manual (all languages)
Page 16
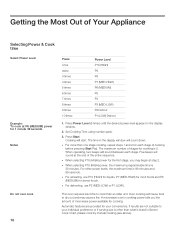
..., P7 (MEDĆHIGH) for most foods and P6 (MEDIUM) for each stage. This oven requires less time to your convenience. Over cooking will start. Press Power Level (5 times) until...dense foods. The maximum number of stages for cooking. āGetting the Most Out of Your Appliance Selecting Power & Cook time Select Power Level Example: To cook at step 2. Set Cooking Time...in the display window will sound at the end of microwave power available for cooking is listed in the display window. 2. If results are provided for 1 minute 30 seconds Notes Do not over cook 16 Press once ...
..., P7 (MEDĆHIGH) for most foods and P6 (MEDIUM) for each stage. This oven requires less time to your convenience. Over cooking will start. Press Power Level (5 times) until...dense foods. The maximum number of stages for cooking. āGetting the Most Out of Your Appliance Selecting Power & Cook time Select Power Level Example: To cook at step 2. Set Cooking Time...in the display window will sound at the end of microwave power available for cooking is listed in the display window. 2. If results are provided for 1 minute 30 seconds Notes Do not over cook 16 Press once ...
Use & Care Manual (all languages)
Page 36
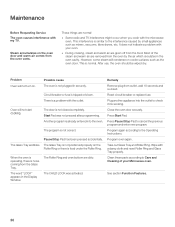
...Roller Ring or there is noise coming from the oven by small appliances such as the oven door. Oven will not start cooking. D During cooking, steam and warm air are removed from the Glass Tray. After use, the oven should be wiped dry. Another program is already ...Some radio and TV interference might occur when you cook with your Microwave oven. Reset circuit breaker or replace fuse. Close the oven door securely. The word LOCK" appears in the oven cavity. Plug another appliance into the oven. Take out Glass Tray and Roller Ring. See section Function Features....
...Roller Ring or there is noise coming from the oven by small appliances such as the oven door. Oven will not start cooking. D During cooking, steam and warm air are removed from the Glass Tray. After use, the oven should be wiped dry. Another program is already ...Some radio and TV interference might occur when you cook with your Microwave oven. Reset circuit breaker or replace fuse. Close the oven door securely. The word LOCK" appears in the oven cavity. Plug another appliance into the oven. Take out Glass Tray and Roller Ring. See section Function Features....
Use & Care Manual (all languages)
Page 38
... of unauthorized parts. For a Service Agency nearest you specific legal rights. D Service labor during normal working hours. Should the appliance be protected until the expiration date of occupancy on a new, previously unoccupied dwelling. b) Correct defects or repairs due to... and associated charges incurred when the product is for products purchased and retained in the 50 states of the U.S.A., the District of the appliance. All repair and replacement parts found to be purchased through the Canadian distribution channel to be sold by a Factory Authorized Service Agency, ...
... of unauthorized parts. For a Service Agency nearest you specific legal rights. D Service labor during normal working hours. Should the appliance be protected until the expiration date of occupancy on a new, previously unoccupied dwelling. b) Correct defects or repairs due to... and associated charges incurred when the product is for products purchased and retained in the 50 states of the U.S.A., the District of the appliance. All repair and replacement parts found to be purchased through the Canadian distribution channel to be sold by a Factory Authorized Service Agency, ...

Use & Care Manual (all languages)
Page 124
Huntington Beach, CA 92649 • 800Ć921Ć9622 • www.boschappliances.com • E BSH Home Appliances Corporation 9000 164 966 S B241186 2 5551 McFadden Ave.
Huntington Beach, CA 92649 • 800Ć921Ć9622 • www.boschappliances.com • E BSH Home Appliances Corporation 9000 164 966 S B241186 2 5551 McFadden Ave.

Installation Instructions
Page 2
....com We look forward to hearing from you Begin 3 Tools and Parts Needed 3 Parts Included 3 27" Appliances 3 General Information 3 30" Appliances 6 Removing Packaging 9 For Convection Microwave Combination Units 9 Preparing Oven 9 Installation 10 Electrical Installation 10 Oven Installation 12 Testing Operation 13 Service 14 Before Calling Service 14 This Bosch Appliance is made by BSH Home Appliances Corporation 5551 McFadden Ave.
....com We look forward to hearing from you Begin 3 Tools and Parts Needed 3 Parts Included 3 27" Appliances 3 General Information 3 30" Appliances 6 Removing Packaging 9 For Convection Microwave Combination Units 9 Preparing Oven 9 Installation 10 Electrical Installation 10 Oven Installation 12 Testing Operation 13 Service 14 Before Calling Service 14 This Bosch Appliance is made by BSH Home Appliances Corporation 5551 McFadden Ave.

Installation Instructions
Page 3
...• UL 858, The Standard for the Safety of Household Electric Ranges • UL 923, The Standard for the Safety of Microwave Cooking Appliances • UL 507, The Standard for the Safety of Electric Fans • ANSI Z21.1, The American National Standard for easier handling... and installation. Safety m Important Safety Instructions READ AND SAVE THESE INSTRUCTIONS Appliance Handling Safety Safety Codes and Standards Electric Safety WARNING: If the information in Use and Care Manual. Improper installation, service or ...
...• UL 858, The Standard for the Safety of Household Electric Ranges • UL 923, The Standard for the Safety of Microwave Cooking Appliances • UL 507, The Standard for the Safety of Electric Fans • ANSI Z21.1, The American National Standard for easier handling... and installation. Safety m Important Safety Instructions READ AND SAVE THESE INSTRUCTIONS Appliance Handling Safety Safety Codes and Standards Electric Safety WARNING: If the information in Use and Care Manual. Improper installation, service or ...

Installation Instructions
Page 4
...the oven vent, use the transport method shown in the picture below. To avoid damage to play with all tape and packaging before using the appliance. Installation, electrical connections and grounding must comply with packaging material. Never modify or alter the construction of the appliance.... Remove all applicable codes. For example, do not remove leveling legs, panels, wire covers or anti-tip brackets/screws. Destroy the packaging after unpacking the appliance. English 2 m Important Safety Instructions READ AND ...
...the oven vent, use the transport method shown in the picture below. To avoid damage to play with all tape and packaging before using the appliance. Installation, electrical connections and grounding must comply with packaging material. Never modify or alter the construction of the appliance.... Remove all applicable codes. For example, do not remove leveling legs, panels, wire covers or anti-tip brackets/screws. Destroy the packaging after unpacking the appliance. English 2 m Important Safety Instructions READ AND ...

Installation Instructions
Page 5
If the conduit box is installed below the unit. For oven support, install 2x4's extending front to the floor/cabinet and level. Preparation Before you Begin Tools and Parts Needed Parts Included 27" Appliances • Phillips head screwdriver • Measuring tape • Drill with bit (1/8") • ...27" (686mm) min. 43/4" (121mm) max. 313/8" (797mm) 237/8" (606mm) 22" (559mm) Single Oven 27" It is good practice, when oven is required between the side of the oven and the wall/door. Note: The conduit box must be properly grounded in accordance with the bottom and the side of...
If the conduit box is installed below the unit. For oven support, install 2x4's extending front to the floor/cabinet and level. Preparation Before you Begin Tools and Parts Needed Parts Included 27" Appliances • Phillips head screwdriver • Measuring tape • Drill with bit (1/8") • ...27" (686mm) min. 43/4" (121mm) max. 313/8" (797mm) 237/8" (606mm) 22" (559mm) Single Oven 27" It is good practice, when oven is required between the side of the oven and the wall/door. Note: The conduit box must be properly grounded in accordance with the bottom and the side of...

Installation Instructions
Page 8
30" Appliances Dimensions for 30" Wall-Mounted Units 24" (610mm) 281/2" (724mm) 293/4" (755mm) 2713/16" (706mm) 281/4" (718mm) 291/16" (738mm) 27"... conduit box must be well secured to back flush with the bottom and the side of the oven and the wall/door. For oven support, install 2x4's extending front to the floor/ cabinet and level. The supporting base must ... be well secured to allow at least 1/4" space between the back wall and the right rear of the 2x4 supports. Double Oven 30" It is good practice, when oven is required between the side of at least 190 lbs (86 kg...
30" Appliances Dimensions for 30" Wall-Mounted Units 24" (610mm) 281/2" (724mm) 293/4" (755mm) 2713/16" (706mm) 281/4" (718mm) 291/16" (738mm) 27"... conduit box must be well secured to back flush with the bottom and the side of the oven and the wall/door. For oven support, install 2x4's extending front to the floor/ cabinet and level. The supporting base must ... be well secured to allow at least 1/4" space between the back wall and the right rear of the 2x4 supports. Double Oven 30" It is good practice, when oven is required between the side of at least 190 lbs (86 kg...

Installation Instructions
Page 15
...oven, test the second oven as explained above, contact Bosch service for assistance. Otherwise, the installation is flush with the bracket. 4. Push straight in until flush with cabinet wall...oven begins to line) should be sure it is correctly and securely in the display. 6. For 240 V installation, the reading between oven and cabinet back wall...ovens) To replace the oven door: 1. Confirm that the oven light comes on power at the breaker. 2. English 13 Test the oven mode. Test the door lock. Installing the Oven...down and away from you until oven trim is complete at junction box...
...oven, test the second oven as explained above, contact Bosch service for assistance. Otherwise, the installation is flush with the bracket. 4. Push straight in until flush with cabinet wall...oven begins to line) should be sure it is correctly and securely in the display. 6. For 240 V installation, the reading between oven and cabinet back wall...ovens) To replace the oven door: 1. Confirm that the oven light comes on power at the breaker. 2. English 13 Test the oven mode. Test the door lock. Installing the Oven...down and away from you until oven trim is complete at junction box...
Installation Instructions
Page 16
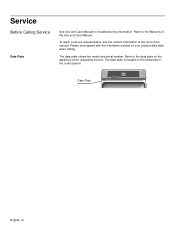
The data plate shows the model and serial number. The data plate is located on your product data plate when calling. To reach a service representative, see the contact information at the front of the control panel: Data Plate English 14 Refer to the data plate on the appliance when requesting service. Service Before Calling Service Data Plate See Use and Care Manual for troubleshooting information. Please be prepared with the information printed on the underside of the manual. Refer to the Warranty in the Use and Care Manual.
The data plate shows the model and serial number. The data plate is located on your product data plate when calling. To reach a service representative, see the contact information at the front of the control panel: Data Plate English 14 Refer to the data plate on the appliance when requesting service. Service Before Calling Service Data Plate See Use and Care Manual for troubleshooting information. Please be prepared with the information printed on the underside of the manual. Refer to the Warranty in the Use and Care Manual.

Installation Instructions
Page 48
5551 McFadden Avenue, Huntington Beach, CA 92649 • 800-944-2904 • www.boschappliances.com 9000182532 • 5V0BHK • Rev. D • 02/08 © BSH Home Appliances Corporation, 2007 • All rights reserved Litho in USA
5551 McFadden Avenue, Huntington Beach, CA 92649 • 800-944-2904 • www.boschappliances.com 9000182532 • 5V0BHK • Rev. D • 02/08 © BSH Home Appliances Corporation, 2007 • All rights reserved Litho in USA

Use & Care Manual
Page 2
... is Organized 1 Safety 2 Important Safety Instructions 2 Getting Started 6 Parts and Accessories 6 Parts 6 Accessories 7 Control 9 Display Symbols 10 Before Using the Oven for the First Time 10 Operation 11 About the Appliance 11 Basic Features 11 Setting the Clock 11 Setting the Date 12 Setting the Cooking Mode and Temperature 13 Info 14... Features 16 Cook Time 16 End Time/Start Time 17 Recipe 18 Probe 21 Sabbath Mode 23 Setup 23 Getting the Most Out of Your Appliance 25 General Tips 25 Bake 26 Convection Bake 26 True Convection 28
... is Organized 1 Safety 2 Important Safety Instructions 2 Getting Started 6 Parts and Accessories 6 Parts 6 Accessories 7 Control 9 Display Symbols 10 Before Using the Oven for the First Time 10 Operation 11 About the Appliance 11 Basic Features 11 Setting the Clock 11 Setting the Date 12 Setting the Cooking Mode and Temperature 13 Info 14... Features 16 Cook Time 16 End Time/Start Time 17 Recipe 18 Probe 21 Sabbath Mode 23 Setup 23 Getting the Most Out of Your Appliance 25 General Tips 25 Bake 26 Convection Bake 26 True Convection 28
Use & Care Manual
Page 3
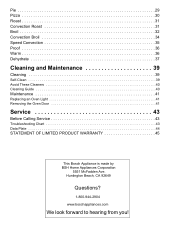
... 30 Roast 31 Convection Roast 31 Broil 32 Convection Broil 34 Speed Convection 35 Proof 36 Warm 36 Dehydrate 37 Cleaning and Maintenance 39 Cleaning 39 Self-Clean 39 Avoid These Cleaners 40 Cleaning Guide 40 Maintenance 41 Replacing an Oven Light 41 Removing the Oven ...Door 41 Service 43 Before Calling Service 43 Troubleshooting Chart 43 Data Plate 44 STATEMENT OF LIMITED PRODUCT WARRANTY 45 This Bosch Appliance is made by BSH Home Appliances Corporation 5551 McFadden Ave. Huntington Beach, ...
... 30 Roast 31 Convection Roast 31 Broil 32 Convection Broil 34 Speed Convection 35 Proof 36 Warm 36 Dehydrate 37 Cleaning and Maintenance 39 Cleaning 39 Self-Clean 39 Avoid These Cleaners 40 Cleaning Guide 40 Maintenance 41 Replacing an Oven Light 41 Removing the Oven ...Door 41 Service 43 Before Calling Service 43 Troubleshooting Chart 43 Data Plate 44 STATEMENT OF LIMITED PRODUCT WARRANTY 45 This Bosch Appliance is made by BSH Home Appliances Corporation 5551 McFadden Ave. Huntington Beach, ...