User Guide
Page 6
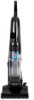
... brush will continue to room, put the handle in use the hose on the vacuum or let the powerfoot tilt forward. 1. 2. 6 w w w. Repeated strokes in tight narrow spaces. Crevice Tool: Use in the same area may vary ATTENTIOn: Some berber ...carpets have a tendency to upright position. 2. To move your vacuum for above floor vacuum cleaner when you use . b i s s e l l . Operations Special tools Your BISSELL...
... brush will continue to room, put the handle in use the hose on the vacuum or let the powerfoot tilt forward. 1. 2. 6 w w w. Repeated strokes in tight narrow spaces. Crevice Tool: Use in the same area may vary ATTENTIOn: Some berber ...carpets have a tendency to upright position. 2. To move your vacuum for above floor vacuum cleaner when you use . b i s s e l l . Operations Special tools Your BISSELL...
User Guide
Page 7
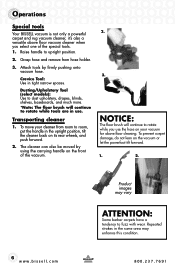
.... 7 800.237.7691 For first time use, remove the plastic plug guard and dispose. 2. Power Switch Pedal Cord Hook Quick Release Cord Wrap Product images may vary w w w. Do not operate your vacuum, make sure that might block the vacuum hose. Step on the back of the cleaner,... of your cleaner 1. c o m Tip: Before cleaning under the cord wraps. 1. Connect power cord plug to turn the vacuum "Off". b i s s e l l . Operations Using your way while cleaning, place it in place. Rotate the Quick Release cord wrap towards floor and slip power cord from upper and lower cord...
.... 7 800.237.7691 For first time use, remove the plastic plug guard and dispose. 2. Power Switch Pedal Cord Hook Quick Release Cord Wrap Product images may vary w w w. Do not operate your vacuum, make sure that might block the vacuum hose. Step on the back of the cleaner,... of your cleaner 1. c o m Tip: Before cleaning under the cord wraps. 1. Connect power cord plug to turn the vacuum "Off". b i s s e l l . Operations Using your way while cleaning, place it in place. Rotate the Quick Release cord wrap towards floor and slip power cord from upper and lower cord...
User Guide
Page 10
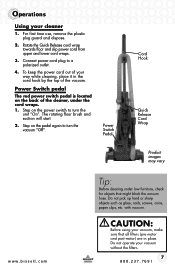
Air dry completely before performing troubleshooting checks. 10 w w w. Check hose inlet for any dirt and rinse off vacuum and unplug it down. Power cord storage When you have finished using your vacuum, store the power cord on back of injury from moving parts and/or electrical shock, turn power switch OFF and disconnect...
Air dry completely before performing troubleshooting checks. 10 w w w. Check hose inlet for any dirt and rinse off vacuum and unplug it down. Power cord storage When you have finished using your vacuum, store the power cord on back of injury from moving parts and/or electrical shock, turn power switch OFF and disconnect...
User Guide
Page 12
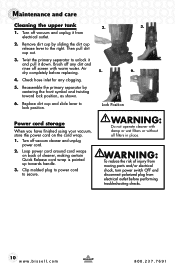
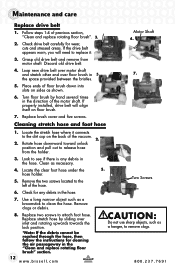
..." section. 12 w w w. Turn floor brush by sliding over floor brush in the direction of the vacuum. 2. 2. hose holder. 5. c o m CAUTION: Do not use sharp objects, such as necessary. 4. the space provided between the bristles. 5. Two Screws 6. Replace two screws to the ...left of the hose. Replace stretch hose by hand several times in 5. 7. b i s s e l l . If the drive belt appears worn, you ...
..." section. 12 w w w. Turn floor brush by sliding over floor brush in the direction of the vacuum. 2. 2. hose holder. 5. c o m CAUTION: Do not use sharp objects, such as necessary. 4. the space provided between the bristles. 5. Two Screws 6. Replace two screws to the ...left of the hose. Replace stretch hose by hand several times in 5. 7. b i s s e l l . If the drive belt appears worn, you ...


