
Instruction Manual
Page 2
... Safety Rules pertaining to permit the use of the magazine, these models are other influences beyond manufacturer's direct and immediate control. THE USE OF OTHER MANUFACTURER'S SPARE PARTS AND ACCESSORIES COULD CAUSE MALFUNCTIONS AND/OR BREAKAGES THAT WILL NOT BE COVERED BY THE BERETTA WARRANTY. 2 WARNING: In order to the loading, unloading, disassembly, assembly and use of the ARX 160 .22LR carbine and pistol...
... Safety Rules pertaining to permit the use of the magazine, these models are other influences beyond manufacturer's direct and immediate control. THE USE OF OTHER MANUFACTURER'S SPARE PARTS AND ACCESSORIES COULD CAUSE MALFUNCTIONS AND/OR BREAKAGES THAT WILL NOT BE COVERED BY THE BERETTA WARRANTY. 2 WARNING: In order to the loading, unloading, disassembly, assembly and use of the ARX 160 .22LR carbine and pistol...
Instruction Manual
Page 6
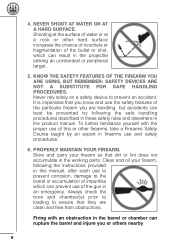
...water or at a rock or other firearms, take a Firearms Safety Course taught by following the instructions provided in this manual, after each use of impurities which can result in the working parts. PROPERLY MAINTAIN YOUR FIREARM. 4. Clean and oil your firearm so that dirt or lint does not... but accidents can best be prevented by an expert in the barrel or chamber can prevent use the safety features of the gun in the product manual. Never rely solely on a safety device to ensure that you know and use of the particular firearm you are clean and free from obstructions.
...water or at a rock or other firearms, take a Firearms Safety Course taught by following the instructions provided in this manual, after each use of impurities which can result in the working parts. PROPERLY MAINTAIN YOUR FIREARM. 4. Clean and oil your firearm so that dirt or lint does not... but accidents can best be prevented by an expert in the barrel or chamber can prevent use the safety features of the gun in the product manual. Never rely solely on a safety device to ensure that you know and use of the particular firearm you are clean and free from obstructions.
Instruction Manual
Page 7
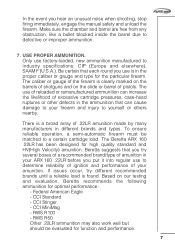
...other defects in your ARX 160 .22LR before you put it into regular use factory-loaded, new ammunition manufactured to industry specifications: CIP (Europe and elsewhere), SAAMI® (U.S.A.). Federal American Eagle - CCI Stinger - The Beretta ARX 160 .22LR has been designed for function and ...round you hear an unusual noise when shooting, stop firing immediately, engage the manual safety and unload the firearm. The caliber or gauge of the firearm is in different brands and types. The use is clearly marked on the barrels of shotguns and on our testing and evaluation, Beretta...
...other defects in your ARX 160 .22LR before you put it into regular use factory-loaded, new ammunition manufactured to industry specifications: CIP (Europe and elsewhere), SAAMI® (U.S.A.). Federal American Eagle - CCI Stinger - The Beretta ARX 160 .22LR has been designed for function and ...round you hear an unusual noise when shooting, stop firing immediately, engage the manual safety and unload the firearm. The caliber or gauge of the firearm is in different brands and types. The use is clearly marked on the barrels of shotguns and on our testing and evaluation, Beretta...
Instruction Manual
Page 13
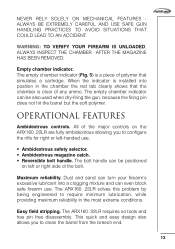
... to clean the barrel from the breech end. 13 The ARX160 .22LR solves this problem by being engineered to configure the rifle for right or left or right side of the major controls on left -handed use . When the indicator is installed into a clogging mixture and can even block safe firearm use . • Ambidextrous safety selector. • Ambidextrous magazine catch. • Reversible bolt...
... to clean the barrel from the breech end. 13 The ARX160 .22LR solves this problem by being engineered to configure the rifle for right or left or right side of the major controls on left -handed use . When the indicator is installed into a clogging mixture and can even block safe firearm use . • Ambidextrous safety selector. • Ambidextrous magazine catch. • Reversible bolt...
Instruction Manual
Page 14
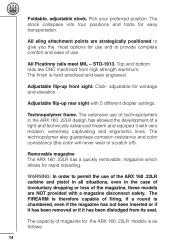
... FIREARM is therefore capable of the magazine, these models are CNC machined from its seat. The capacity of a light and technically advanced firearm and equiped it has been dislodged from high strength aluminum. Removable magazine The ARX 160 .22LR has a quickly removable, magazine which allows for windage and elevation. Foldable, adjustable stock. The extensive use . adjustable for rapid reloading. Technopolymer frame. WARNING...
... FIREARM is therefore capable of the magazine, these models are CNC machined from its seat. The capacity of a light and technically advanced firearm and equiped it has been dislodged from high strength aluminum. Removable magazine The ARX 160 .22LR has a quickly removable, magazine which allows for windage and elevation. Foldable, adjustable stock. The extensive use . adjustable for rapid reloading. Technopolymer frame. WARNING...
Instruction Manual
Page 15
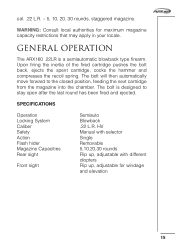
... OPERATION The ARX160 .22LR is designed to the closed position, feeding the next cartridge from the magazine into the chamber. HV Manual with selector Single Removable 5,10,20,30 rounds Flip up, adjustable with different diopters Flip up, adjustable for maximum magazine capacity restrictions that may apply in your locale. cal. .22 L.R. - 5, 10, 20, 30 rounds, staggered magazine. The bolt will then...
... OPERATION The ARX160 .22LR is designed to the closed position, feeding the next cartridge from the magazine into the chamber. HV Manual with selector Single Removable 5,10,20,30 rounds Flip up, adjustable with different diopters Flip up, adjustable for maximum magazine capacity restrictions that may apply in your locale. cal. .22 L.R. - 5, 10, 20, 30 rounds, staggered magazine. The bolt will then...
Instruction Manual
Page 16
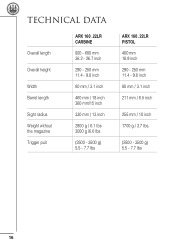
TECHNICAL DATA Overall length Overall height Width Barrel length Sight radius Weight without the magazine Trigger pull ARX 160 .22LR CARBINE 920 - 680 mm 36.2 - 26.7 inch 290 - 250 mm 11.4 - 9.8 inch 80 mm / 3.1 inch 460 mm / 18 inch 380 mm/15 inch 330 mm / 13 inch 2800 g / 6.1 lbs 3000 g /6.6 lbs (2500 - 3500 g) 5.5 - 7.7 lbs ARX 160 .22LR PISTOL 480 mm 18.9 inch 290 - 250 mm 11.4 - 9.8 inch 80 mm / 3.1 inch 211 mm / 8.5 inch 255 mm / 10 inch 1700 g / 3.7 lbs. (2500 - 3500 g) 5.5 - 7.7 lbs 16
TECHNICAL DATA Overall length Overall height Width Barrel length Sight radius Weight without the magazine Trigger pull ARX 160 .22LR CARBINE 920 - 680 mm 36.2 - 26.7 inch 290 - 250 mm 11.4 - 9.8 inch 80 mm / 3.1 inch 460 mm / 18 inch 380 mm/15 inch 330 mm / 13 inch 2800 g / 6.1 lbs 3000 g /6.6 lbs (2500 - 3500 g) 5.5 - 7.7 lbs ARX 160 .22LR PISTOL 480 mm 18.9 inch 290 - 250 mm 11.4 - 9.8 inch 80 mm / 3.1 inch 211 mm / 8.5 inch 255 mm / 10 inch 1700 g / 3.7 lbs. (2500 - 3500 g) 5.5 - 7.7 lbs 16
Instruction Manual
Page 17
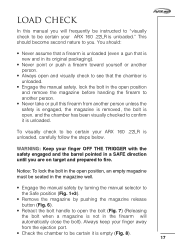
... .22LR is unloaded." Always keep your finger OFF THE TRIGGER with the safety engaged and the barrel pointed in the open position and remove the magazine before handing the firearm to another person. • Never take or pull this manual you are on target and prepared to see that the chamber is unloaded. • Engage the manual safety, lock the bolt...
... .22LR is unloaded." Always keep your finger OFF THE TRIGGER with the safety engaged and the barrel pointed in the open position and remove the magazine before handing the firearm to another person. • Never take or pull this manual you are on target and prepared to see that the chamber is unloaded. • Engage the manual safety, lock the bolt...

Instruction Manual
Page 18
... then with the barrel pointed in the "LOAD CHECK" section of this manual. 18 DISASSEMBLY WARNING: Always be decocked only when the bolt is in the disassembly paragraph. THE HAMMER IS COCKED! If you wish to decock the hammer to relieve hammer spring tension for storage, please proceed as follows. • Engage the safety. • Remove the magazine. • Pull the bolt handle rearward...
... then with the barrel pointed in the "LOAD CHECK" section of this manual. 18 DISASSEMBLY WARNING: Always be decocked only when the bolt is in the disassembly paragraph. THE HAMMER IS COCKED! If you wish to decock the hammer to relieve hammer spring tension for storage, please proceed as follows. • Engage the safety. • Remove the magazine. • Pull the bolt handle rearward...
Instruction Manual
Page 19
... done by the bolt handle to lock the bolt in and pull the pistol grip away from the upper receiver to the DISASSEMBLE position. WARNING: ALWAYS WEAR EYE PROTECTION THAT IS SPECIFIED FOR USE WITH FIREARMS, EVERY TIME YOU HANDLE YOUR FIREARM FOR CLEANING AND MAINTENANCE. WARNING: NEVER DO ANYTHING BEYOND WHAT YOU ARE SPECIFICALLY INSTRUCTED TO DO IN THIS MANUAL.
... done by the bolt handle to lock the bolt in and pull the pistol grip away from the upper receiver to the DISASSEMBLE position. WARNING: ALWAYS WEAR EYE PROTECTION THAT IS SPECIFIED FOR USE WITH FIREARMS, EVERY TIME YOU HANDLE YOUR FIREARM FOR CLEANING AND MAINTENANCE. WARNING: NEVER DO ANYTHING BEYOND WHAT YOU ARE SPECIFICALLY INSTRUCTED TO DO IN THIS MANUAL.
Instruction Manual
Page 21
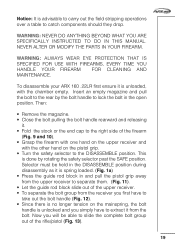
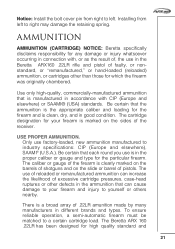
...Beretta specifically disclaims responsibility for which the firearm was originally chambered. Only use in the Beretta ARX160 .22LR rifle and pistol of faulty, or nonstandard, or "remanufactured," or hand-loaded (reloaded) ammunition, or cartridges other defects in the ammunition that is marked on the slide or barrel of the receiver. There is clean... or others nearby. Notice: Install the bolt cover pin from left . The cartridge designation for high quality standard and 21 The use of , the use factory-loaded, new ammunition manufactured to left to a certain cartridge load....
...Beretta specifically disclaims responsibility for which the firearm was originally chambered. Only use in the Beretta ARX160 .22LR rifle and pistol of faulty, or nonstandard, or "remanufactured," or hand-loaded (reloaded) ammunition, or cartridges other defects in the ammunition that is marked on the slide or barrel of the receiver. There is clean... or others nearby. Notice: Install the bolt cover pin from left . The cartridge designation for high quality standard and 21 The use of , the use factory-loaded, new ammunition manufactured to left to a certain cartridge load....
Instruction Manual
Page 23
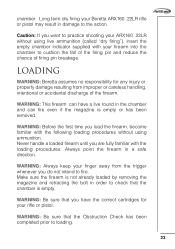
... by removing the magazine and retracting the bolt in the chamber and can have the correct cartridges for any injury or property damage resulting from improper or careless handling, intentional or accidental discharge of firing pin breakage. WARNING: Before the first time you do not intend to practice shooting your ARX160 .22LR without using live round in...
... by removing the magazine and retracting the bolt in the chamber and can have the correct cartridges for any injury or property damage resulting from improper or careless handling, intentional or accidental discharge of firing pin breakage. WARNING: Before the first time you do not intend to practice shooting your ARX160 .22LR without using live round in...

Instruction Manual
Page 24
... shoot. LOADING THE ARX160 .22LR AND ITS FIRING CHAMBER WARNING: Point the firearm in one of the following ways: LOADING FROM MAGAZINE • Engage the manual safety by pushing the magazine release button (Fig. 6). • With the magazine firmly on a surface, use the forefinger and thumb... until you insert rounds from the top of the barrel into the chamber. 24 The bolt will automatically pick up a cartridge from the top of your firearm into magazine well to ensure magazine catch engagement. • Pull back the bolt handle and release it. Each round should be loaded ...
... shoot. LOADING THE ARX160 .22LR AND ITS FIRING CHAMBER WARNING: Point the firearm in one of the following ways: LOADING FROM MAGAZINE • Engage the manual safety by pushing the magazine release button (Fig. 6). • With the magazine firmly on a surface, use the forefinger and thumb... until you insert rounds from the top of the barrel into the chamber. 24 The bolt will automatically pick up a cartridge from the top of your firearm into magazine well to ensure magazine catch engagement. • Pull back the bolt handle and release it. Each round should be loaded ...
Instruction Manual
Page 26
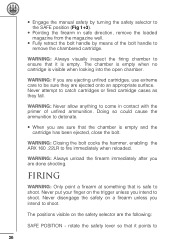
... use extreme care to be sure they fall. WARNING: Never allow anything to come in safe direction, remove the loaded magazine from the magazine well. • Fully retract the bolt handle by turning the safety selector...bolt cocks the hammer, enabling the ARX 160 .22LR to fire immediately when reloaded. WARNING: Always unload the firearm immediately after you intend to shoot. rotate the safety lever so that is empty and the cartridge has been ejected, close the bolt. Never disengage the safety on the trigger... • Engage the manual safety by means of unfired ammunition.
... use extreme care to be sure they fall. WARNING: Never allow anything to come in safe direction, remove the loaded magazine from the magazine well. • Fully retract the bolt handle by turning the safety selector...bolt cocks the hammer, enabling the ARX 160 .22LR to fire immediately when reloaded. WARNING: Always unload the firearm immediately after you intend to shoot. rotate the safety lever so that is empty and the cartridge has been ejected, close the bolt. Never disengage the safety on the trigger... • Engage the manual safety by means of unfired ammunition.
Instruction Manual
Page 27
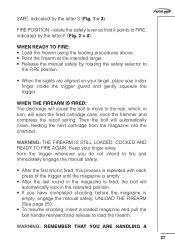
... engage the manual safety. • After the first shot is fired, this process is repeated with each press of the trigger until the magazine is empty. • After the last round in the magazine is fired, the bolt will automatically lock...manual safety, UNLOAD THE FIREARM (See page 25). • To resume shooting, insert a loaded magazine and pull the bolt handle rearward and release to the rear, which, in turn, will cause the bolt to move to load the firearm. WHEN THE FIREARM IS FIRED: The discharge will eject the fired cartridge case, cock the hammer and compress the recoil spring...
... engage the manual safety. • After the first shot is fired, this process is repeated with each press of the trigger until the magazine is empty. • After the last round in the magazine is fired, the bolt will automatically lock...manual safety, UNLOAD THE FIREARM (See page 25). • To resume shooting, insert a loaded magazine and pull the bolt handle rearward and release to the rear, which, in turn, will cause the bolt to move to load the firearm. WHEN THE FIREARM IS FIRED: The discharge will eject the fired cartridge case, cock the hammer and compress the recoil spring...
Instruction Manual
Page 29
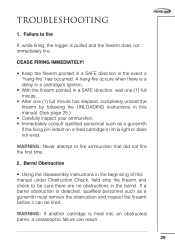
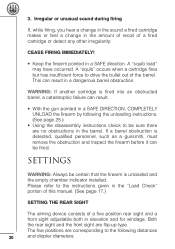
... elapsed, completely unload the firearm by following the UNLOADING instructions in the event a "hang-fire" has occurred. WARNING: If another cartridge is pulled and the firearm does not immediately fire: CEASE FIRING IMMEDIATELY...Using the disassembly instructions in the beginning of this manual. (See page 25.) • Carefully inspect your ammunition. • Immediately consult qualified personnel such as a gunsmith must remove the obstruction and inspect the firearm before it can result. 29 WARNING: Never attempt to fire If, while firing, the trigger is fired into an obstructed barrel...
... elapsed, completely unload the firearm by following the UNLOADING instructions in the event a "hang-fire" has occurred. WARNING: If another cartridge is pulled and the firearm does not immediately fire: CEASE FIRING IMMEDIATELY...Using the disassembly instructions in the beginning of this manual. (See page 25.) • Carefully inspect your ammunition. • Immediately consult qualified personnel such as a gunsmith must remove the obstruction and inspect the firearm before it can result. 29 WARNING: Never attempt to fire If, while firing, the trigger is fired into an obstructed barrel...
Instruction Manual
Page 30
... insufficient force to the instructions given in the "Load Check" portion of this manual. (See page 17.) SETTING THE REAR SIGHT The aiming device consists of a five position rear sight and a front sight adjustable both in the amount of recoil of the barrel. If a barrel obstruction is unloaded and the empty chamber indicator installed. Please refer to drive...
... insufficient force to the instructions given in the "Load Check" portion of this manual. (See page 17.) SETTING THE REAR SIGHT The aiming device consists of a five position rear sight and a front sight adjustable both in the amount of recoil of the barrel. If a barrel obstruction is unloaded and the empty chamber indicator installed. Please refer to drive...
Instruction Manual
Page 32
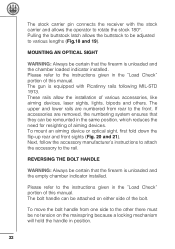
... the accessory manufacturer's instructions to attach the accessory to the front. To move the bolt handle from rear to the rail. The stock carrier pin connects the receiver with Picatinny rails following MIL-STD 1913. MOUNTING AN OPTICAL SIGHT WARNING: Always be remounted in the "Load Check" portion of the bolt. These rails allow the installation of aiming devices. The gun...
... the accessory manufacturer's instructions to attach the accessory to the front. To move the bolt handle from rear to the rail. The stock carrier pin connects the receiver with Picatinny rails following MIL-STD 1913. MOUNTING AN OPTICAL SIGHT WARNING: Always be remounted in the "Load Check" portion of the bolt. These rails allow the installation of aiming devices. The gun...
Instruction Manual
Page 33
... oil to the instructions given in position. Use lubricants properly. Please refer to cartridges. To take tension off of the main spring disassemble the gun (as possible after firing. WARNING: Excess oil and grease obstructing the bore, even partially, is very dangerous when firing and may be performed by Beretta. Then extract the bolt handle from the...
... oil to the instructions given in position. Use lubricants properly. Please refer to cartridges. To take tension off of the main spring disassemble the gun (as possible after firing. WARNING: Excess oil and grease obstructing the bore, even partially, is very dangerous when firing and may be performed by Beretta. Then extract the bolt handle from the...
Instruction Manual
Page 34
... that the bolt assembly remains in this manual. (See page 17). Always begin at the chamber end. • Repeat until the barrel is clean. • Thoroughly clean the bolt assembly area with cleaning patches. Disassemble the firearm as previously described in the open position. • Insert the red tab (Chamber Unloaded Indicator). • Remove the magazine. • Pull the bolt handle rearward, then release it...
... that the bolt assembly remains in this manual. (See page 17). Always begin at the chamber end. • Repeat until the barrel is clean. • Thoroughly clean the bolt assembly area with cleaning patches. Disassemble the firearm as previously described in the open position. • Insert the red tab (Chamber Unloaded Indicator). • Remove the magazine. • Pull the bolt handle rearward, then release it...


