User Manual
Page 8
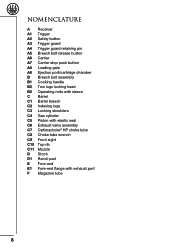
... seal C6 Exhaust valve assembly C7 Optimachoke® HP choke tube C8 Choke tube wrench C9 Front sight C10 Top rib C11 Muzzle D Stock D1 Recoil pad E Fore-end E1 Fore-end flange with exhaust port F Magazine tube 8
... seal C6 Exhaust valve assembly C7 Optimachoke® HP choke tube C8 Choke tube wrench C9 Front sight C10 Top rib C11 Muzzle D Stock D1 Recoil pad E Fore-end E1 Fore-end flange with exhaust port F Magazine tube 8
User Manual
Page 10
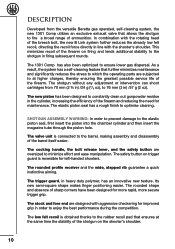
...any adjustment or intervention can shoot cartridges from the versatile Beretta gas operated, self-cleaning system, the new 1301 Comp utilizes an exclusive exhaust valve that allows the ...the shotgun on trigger guard is reversible for more rapid, more secure trigger grip. This minimizes recoil of the firearm. The cocking handle, the bolt release lever, and the safety button are...optimise cleaning. In combination with the shooter's shoulder. The 1301 Comp has also been optimized to enjoy the best performance during the competition. The new piston has been designed to constantly clean out...
...any adjustment or intervention can shoot cartridges from the versatile Beretta gas operated, self-cleaning system, the new 1301 Comp utilizes an exclusive exhaust valve that allows the ...the shotgun on trigger guard is reversible for more rapid, more secure trigger grip. This minimizes recoil of the firearm. The cocking handle, the bolt release lever, and the safety button are...optimise cleaning. In combination with the shooter's shoulder. The 1301 Comp has also been optimized to enjoy the best performance during the competition. The new piston has been designed to constantly clean out...
User Manual
Page 20
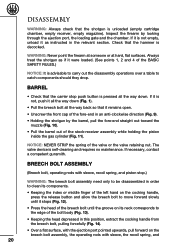
... bolt body (Fig. 13). • Keeping the head depressed in the relevant section. BREECH BOLT ASSEMBLY (Breech bolt, operating rods with sleeve, recoil spring, and piston stop push button is pressed all the way back so that the carrier stop .) WARNING: The breech bolt assembly need only to... were loaded. (See points 1, 2 and 4 of the breech bolt until the groove on the breech bolt assembly, the operating rods with sleeve, the recoil spring, and Always treat the shotgun as if it as instructed in this position, extract the cocking handle from the breech bolt, pulling forcefully (Fig...
... bolt body (Fig. 13). • Keeping the head depressed in the relevant section. BREECH BOLT ASSEMBLY (Breech bolt, operating rods with sleeve, recoil spring, and piston stop push button is pressed all the way back so that the carrier stop .) WARNING: The breech bolt assembly need only to... were loaded. (See points 1, 2 and 4 of the breech bolt until the groove on the breech bolt assembly, the operating rods with sleeve, the recoil spring, and Always treat the shotgun as if it as instructed in this position, extract the cocking handle from the breech bolt, pulling forcefully (Fig...
User Manual
Page 27
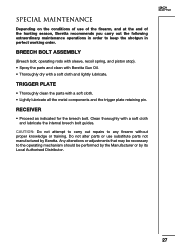
... Lightly lubricate all the metal components and the trigger plate retaining pin. SPECIAL MAINTENANCE Depending on the conditions of the hunting season, Beretta recommends you carry out the following extraordinary maintenance operations in order to keep the shotgun in perfect working order. BREECH BOLT ASSEMBLY ...(Breech bolt, operating rods with sleeve, recoil spring, and piston stop). • Spray the parts and clean with Beretta Gun Oil. • Thoroughly dry with a soft cloth and lightly lubricate. Any alterations or ...
... Lightly lubricate all the metal components and the trigger plate retaining pin. SPECIAL MAINTENANCE Depending on the conditions of the hunting season, Beretta recommends you carry out the following extraordinary maintenance operations in order to keep the shotgun in perfect working order. BREECH BOLT ASSEMBLY ...(Breech bolt, operating rods with sleeve, recoil spring, and piston stop). • Spray the parts and clean with Beretta Gun Oil. • Thoroughly dry with a soft cloth and lightly lubricate. Any alterations or ...
User Manual
Page 28
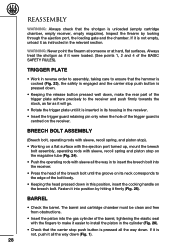
... retaining pin only when the hole of the trigger guard is centred on the breech bolt. BREECH BOLT ASSEMBLY (Breech bolt, operating rods with sleeve, recoil spring, and piston stop). • Working on a flat surface with the ejection port turned up, mount the breech bolt assembly, operating rods with sleeve..., recoil spring and piston stop on the magazine tube (Fig. 24). • Push the operating rods with the fingers to make the rear part of the ...
... retaining pin only when the hole of the trigger guard is centred on the breech bolt. BREECH BOLT ASSEMBLY (Breech bolt, operating rods with sleeve, recoil spring, and piston stop). • Working on a flat surface with the ejection port turned up, mount the breech bolt assembly, operating rods with sleeve..., recoil spring and piston stop on the magazine tube (Fig. 24). • Push the operating rods with the fingers to make the rear part of the ...
User Manual
Page 29
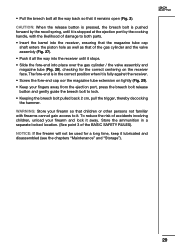
... release button and gently guide the breech bolt to it. CAUTION: When the release button is pressed, the breech bolt is pushed forward by the recoil spring, until it stops. • Slide the fore-end into the receiver, ensuring that the magazine tube cap shaft enters the piston hole as well...
... release button and gently guide the breech bolt to it. CAUTION: When the release button is pressed, the breech bolt is pushed forward by the recoil spring, until it stops. • Slide the fore-end into the receiver, ensuring that the magazine tube cap shaft enters the piston hole as well...
User Manual
Page 31
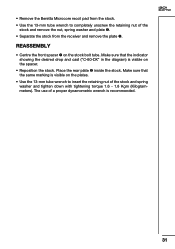
• Remove the Beretta Microcore recoil pad from the receiver and remove the plate . Place the rear plate inside the stock. Make sure that the indicator showing the desired ...
• Remove the Beretta Microcore recoil pad from the receiver and remove the plate . Place the rear plate inside the stock. Make sure that the indicator showing the desired ...