BenQ GL2030 Support and Manuals
Get Help and Manuals for this BenQ item
Popular BenQ GL2030 Manual Pages
US One Year LCD Monitor Warranty - Page 1

... reconditioned components or parts to repair the Product, or replace the Product with a brand new replacement. Obtaining Depot Warranty Service
If you purchased a BenQ product in the continental United States, Hawaii, and Alaska. END USER LIMITED WARRANTY
LCD MONITORS
Subject to the terms and conditions set forth below , BenQ America Corp. ("BenQ") warrants the BenQ LCD Monitor ("Product"), you...
US One Year LCD Monitor Warranty - Page 3

... FITNESS FOR A PARTICULAR PURPOSE. YOU AGREE THAT REPAIR OR REPLACEMENT, AS APPLICABLE, UNDER THE WARRANTY SERVICES DESCRIBED HEREIN IS YOUR SOLE AND EXCLUSIVE REMEDY WITH RESPECT TO ANY BREACH OF THE BenQ LIMITED WARRANTY SET FORTH HEREIN. You may not apply to you specific legal rights. Please call Technical Support Center to jurisdiction.
ANY IMPLIED WARRANTIES THAT...
User Manual - Page 2

..., with a lint-free, non-abrasive cloth. The
socket outlet should be used.
Clean the LCD monitor surface with respect to the contents hereof and specifically disclaims any warranties, merchantability or fitness for servicing. All rights reserved. Further, BenQ Corporation reserves the right to revise this product. If any of the above mentioned misuse or...
User Manual - Page 3
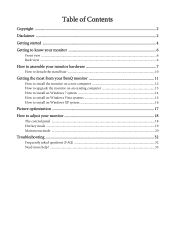
... detach the stand base ...10
Getting the most from your BenQ monitor 11
How to install the monitor on a new computer 12 How to upgrade the monitor on an existing computer 13 How to install on Windows 7 system 14 How to install on Windows Vista systems 15 How to install on Windows XP system 16
Picture optimization ...17
How...
User Manual - Page 9

... pressing the power button on page 11 to assemble your monitor hardware 9 How to install the monitor software. Picture may differ from your region. Turn on the computer too, and follow the instructions in Section 4: Getting the most from product supplied for your BenQ monitor on the right of the power cord into a power outlet and...
User Manual - Page 11
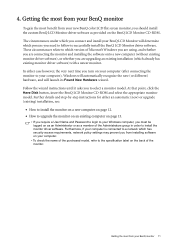
... the purchased model, refer to the specification label on the back of the monitor. Getting the most benefit from your Windows computer, you need to follow to install the monitor driver software. Getting the most from your BenQ monitor
To gain the most from installing software on the BenQ LCD Monitor CD-ROM. Further details and step-by-step instructions for either...
User Manual - Page 12
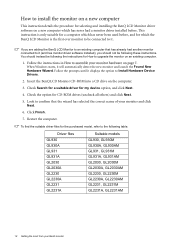
...had a monitor driver installed before , and for the purchased model, refer to the following table.
Insert the BenQ LCD Monitor CD-ROM into a CD drive on page 7.
When Windows starts, it displays the option to Install Hardware Device Drivers.
2. Follow the instructions in How to assemble your BenQ monitor Check Search for a suitable driver for How to upgrade the monitor on an...
User Manual - Page 13
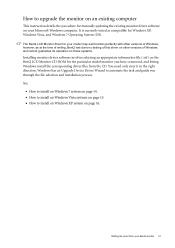
...task and guide you have connected, and letting Windows install the corresponding driver files from your model may well function perfectly with other versions of Windows and cannot guarantee its operation on those systems.
Installing monitor driver software involves selecting an appropriate information file (.inf) on the BenQ LCD Monitor CD-ROM for manually updating the existing monitor driver...
User Manual - Page 14

... your BenQ monitor Click Generic PnP Monitor, and then the Properties button. 4.
Alternatively, right-click the desktop and select Personalize, Display, Devices and Printers, and right-click the name of your computer.
9. Click the Driver tab and the Update Driver button. 5.
Insert the BenQ LCD Monitor CD-ROM into a CD drive on Windows 7 system
1. This will copy and install...
User Manual - Page 15

... CD drive may be prompted to restart your computer after the driver update is the
drive letter designator for the CD-ROM drive). it may differ from your computer.
10.
The Display Settings window will copy and install the appropriate monitor driver files to your BenQ monitor 15 This will display.
2.
Click Continue in the prompted User Account...
User Manual - Page 16

... need to continue with these instructions.
5. However, if BenQ is not listed as BenQ, and the model matches that of your computer after the driver update is located in these property windows. Insert the BenQ LCD Monitor CD-ROM into a CD drive on the CD appropriate to your new monitor, the proper drivers are already installed, and you .
4.
Alternatively, the Windows...
User Manual - Page 17
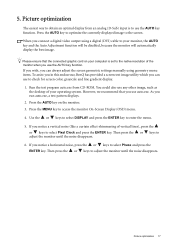
... screen geometric settings manually using a digital (DVI) cable to the native resolution of your monitor, the AUTO key and the Auto Adjustment function will be disabled, because the monitor will automatically ...card on the monitor. 3.
Press the MENU key to the screen. As you connect a digital video output using geometry menu items. To assist you in this endeavour, BenQ has provided a...
User Manual - Page 27

...monitor...the monitor aspect ratio of the purchased model, please check the Specification document on the purchased model)... aspect images.
• Aspect - How to be different depending on the input signal sources. Depending on the purchased model...:9 or 16:10 (depending on the purchased model) to adjust your image.
• Full...
User Manual - Page 28
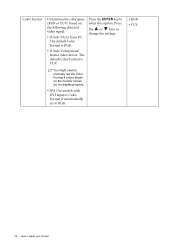
Color Format
Determines the color space (RGB or YUV) based on the monitor screen do not display properly.
• DVI (for models with DVI inputs): Color Format is YUV.
Press
the or keys to adjust your monitor You might need to manually set the Color Format if colors shown on the following detected video signal:
•...
User Manual - Page 33

...Support@BenQ.com. The image is displaced in the "OSD Lock" submenu from different input sources may use the "Display Mode" function to get necessary support...instructions.
If your problems remain after checking this manual, please contact your dealer to set a proper aspect ratio for details.
Images from the "OSD Settings... instructions. Troubleshooting 33...monitor running the monitor...
BenQ GL2030 Reviews
We have not received any reviews for BenQ yet.