User Manual
Page 5
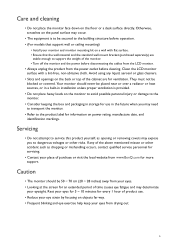
...monitor. • Turn off the monitor and the power before disconnecting the cables from the LCD monitor. • Always unplug the product from www.BenQ.com for an extended period of purchase or visit the local website from the power outlet before operation. • (For models that support wall ..., manufacture date, and identification markings. Avoid using any of the above mentioned misuse or other risks. They must not be 50 ~ 70 cm (20 ~ 28 inches) away from drying out. 5 Care and cleaning • Do not place the monitor face down on a wall with a lint-free, non-abrasive cloth...
...monitor. • Turn off the monitor and the power before disconnecting the cables from the LCD monitor. • Always unplug the product from www.BenQ.com for an extended period of purchase or visit the local website from the power outlet before operation. • (For models that support wall ..., manufacture date, and identification markings. Avoid using any of the above mentioned misuse or other risks. They must not be 50 ~ 70 cm (20 ~ 28 inches) away from drying out. 5 Care and cleaning • Do not place the monitor face down on a wall with a lint-free, non-abrasive cloth...
User Manual
Page 7
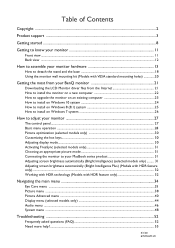
...the stand and the base 18 Using the monitor wall mounting kit (Models with VESA standard mounting holes 20 Getting the most from your BenQ monitor 21 Downloading the LCD Monitor driver files from the Internet 21 How to install the monitor on a new computer 22 How to ... 8 (8.1) system 25 How to install on Windows 7 system 26 How to adjust your monitor 27 The control panel ...27 Basic menu operation ...28 Picture optimization (selected models only 30 Customizing the hot keys...30 Adjusting display mode...30 Activating FreeSync (selected models only 31 Choosing an appropriate picture...
...the stand and the base 18 Using the monitor wall mounting kit (Models with VESA standard mounting holes 20 Getting the most from your BenQ monitor 21 Downloading the LCD Monitor driver files from the Internet 21 How to install the monitor on a new computer 22 How to ... 8 (8.1) system 25 How to install on Windows 7 system 26 How to adjust your monitor 27 The control panel ...27 Basic menu operation ...28 Picture optimization (selected models only 30 Customizing the hot keys...30 Adjusting display mode...30 Activating FreeSync (selected models only 31 Choosing an appropriate picture...

User Manual
Page 28
Some of the control keys. 2. The hot key menu is displayed. In the main menu, follow the icons next to the control keys to access the main menu. 4. See Navigating the main menu on your monitor Press any of the controls are custom keys and are designated for details on the menu options. 28 How to adjust your monitor. 1 2 4 3 1. Select (Menu) to make adjustments or selection. You can be accessed by the control keys. Basic menu operation All OSD (On Screen Display) menus can use the OSD menu to adjust all the settings on page 34 for particular functions. 3.
Some of the control keys. 2. The hot key menu is displayed. In the main menu, follow the icons next to the control keys to access the main menu. 4. See Navigating the main menu on your monitor Press any of the controls are custom keys and are designated for details on the menu options. 28 How to adjust your monitor. 1 2 4 3 1. Select (Menu) to make adjustments or selection. You can be accessed by the control keys. Basic menu operation All OSD (On Screen Display) menus can use the OSD menu to adjust all the settings on page 34 for particular functions. 3.

User Manual
Page 34
Menu options that are not available will not appear on the menu. See Basic menu operation on page 28 for details. (Menu) to access Available menu options may differ from the product supplied to your monitor. Press any of the control keys to bring ...
Menu options that are not available will not appear on the menu. See Basic menu operation on page 28 for details. (Menu) to access Available menu options may differ from the product supplied to your monitor. Press any of the control keys to bring ...
