Owners Manual
Page 2
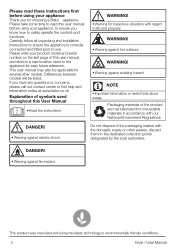
... a safe location close to safely operate the controls and functions. A WARNING! • Warning for hazardous situations with regard to the dedicated collection points designated by the local authorities. This user manual may also be listed. C NOTE • Important information or useful hints about usage. Please read this User Manual • Read the instructions. Please write your product model and serial number on the...
... a safe location close to safely operate the controls and functions. A WARNING! • Warning for hazardous situations with regard to the dedicated collection points designated by the local authorities. This user manual may also be listed. C NOTE • Important information or useful hints about usage. Please read this User Manual • Read the instructions. Please write your product model and serial number on the...
Owners Manual
Page 3
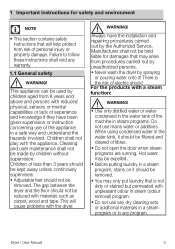
... contains safety instructions that will cause problems with materials such as carpet, wood and tape. Dryer / User Manual 3 Cleaning and user maintenance shall not be removed. • You may only put laundry that is the risk of the machine in steam programs. Do not use any dry cleaning sets or additional materials in a steam program or in steam (odour removal) program. • Do not use mains water or additives...
... contains safety instructions that will cause problems with materials such as carpet, wood and tape. Dryer / User Manual 3 Cleaning and user maintenance shall not be removed. • You may only put laundry that is the risk of the machine in steam programs. Do not use any dry cleaning sets or additional materials in a steam program or in steam (odour removal) program. • Do not use mains water or additives...

Owners Manual
Page 4
...! • Electrical safety instructions should be changed notifying the Authorized Service. • If the dryer is faulty, it must not be supplied through an external switching device, such as a timer,or connected to a circuit that is made during installation, maintenance, cleaning and repair works. • Do not touch the plug with the local regulations. • The voltage and allowed fuse protection is stated on the type label...
...! • Electrical safety instructions should be changed notifying the Authorized Service. • If the dryer is faulty, it must not be supplied through an external switching device, such as a timer,or connected to a circuit that is made during installation, maintenance, cleaning and repair works. • Do not touch the plug with the local regulations. • The voltage and allowed fuse protection is stated on the type label...
Owners Manual
Page 5
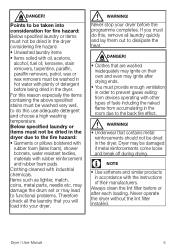
... the heat. Clothing cleaned with the instructions of their own and even may lead to functional problems. Therefore check all laundry quickly and lay them out to be taken into your dryer before being dried in accordance with industrial chemicals. Never stop your dryer. Items such as lighter, match, coins, metal parts, needle etc. A WARNING! Never operate the dryer without the lint filter installed. DANGER...
... the heat. Clothing cleaned with the instructions of their own and even may lead to functional problems. Therefore check all laundry quickly and lay them out to be taken into your dryer before being dried in accordance with industrial chemicals. Never stop your dryer. Items such as lighter, match, coins, metal parts, needle etc. A WARNING! Never operate the dryer without the lint filter installed. DANGER...

Owners Manual
Page 6
... attempt to perform the required procedure unless it is clearly suggested in the operating instructions or the published service manual. Do not perform any responsibility arisen from the product when it may block the opening of the loading door in danger. • There must be used if industrial chemicals have the ability to repair the dryer by the authorized service agent. • Total...
... attempt to perform the required procedure unless it is clearly suggested in the operating instructions or the published service manual. Do not perform any responsibility arisen from the product when it may block the opening of the loading door in danger. • There must be used if industrial chemicals have the ability to repair the dryer by the authorized service agent. • Total...
Owners Manual
Page 7
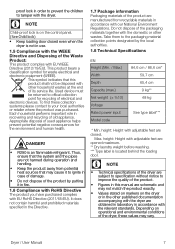
... • Technical specifications of the dryer are subject to specification without notice to ignite in fire. 1.6 Compliance with RoHS Directive The product you have purchased complies with EU WEEE Directive (2012/19/EU). Appropriate disposal of the product by the local authorities. 1.8 Technical Specifications EN Height (Min. / Max.) Width Depth Capacity (max.) Net weight (± %10) Voltage Rated power input Model code 84...
... • Technical specifications of the dryer are subject to specification without notice to ignite in fire. 1.6 Compliance with RoHS Directive The product you have purchased complies with EU WEEE Directive (2012/19/EU). Appropriate disposal of the product by the local authorities. 1.8 Technical Specifications EN Height (Min. / Max.) Width Depth Capacity (max.) Net weight (± %10) Voltage Rated power input Model code 84...
Owners Manual
Page 8
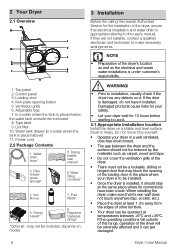
... the loading door in a well ventilated, dust-free environment. • The gap between +5°C and +35°C. Water Filling Container* 3. If the drier is to the user's manual. Control panel 3. Type label 9. may block the opening button 5. Do not move it can be reduced by the materials such as the electrical and waste water installations is inside the toe board 8. Top panel 2. C NOTE • Preparation of the dryer's location...
... the loading door in a well ventilated, dust-free environment. • The gap between +5°C and +35°C. Water Filling Container* 3. If the drier is to the user's manual. Control panel 3. Type label 9. may block the opening button 5. Do not move it can be reduced by the materials such as the electrical and waste water installations is inside the toe board 8. Top panel 2. C NOTE • Preparation of the dryer's location...

Owners Manual
Page 9
... the air inlet of the dryer is open and it is connected. Do not use any tools to remove the hose. 3 Connect one end of the drain hose supplied with the dryer to the connection point from the dryer.* 3.2 Removing the transportation safety assembly A WARNING! • Remove the transportation safety assembly before using the dryer for the first time. • If the door swing side of periodically draining the water collected...
... the air inlet of the dryer is open and it is connected. Do not use any tools to remove the hose. 3 Connect one end of the drain hose supplied with the dryer to the connection point from the dryer.* 3.2 Removing the transportation safety assembly A WARNING! • Remove the transportation safety assembly before using the dryer for the first time. • If the door swing side of periodically draining the water collected...

Owners Manual
Page 11
... you must open the loading door, do not keep it open the loading door of the machine during drying unless necessary. Thus, the drying time is shortened and energy consumption is operating. 4.5 Correct load capacity Follow the instructions in the table. Dryer / User Manual 11 Do not load more than thick bathroom towels. • Follow the instructions in the dryer. Dry the same type of filters for detalied information. • For models with flue...
... you must open the loading door, do not keep it open the loading door of the machine during drying unless necessary. Thus, the drying time is shortened and energy consumption is operating. 4.5 Correct load capacity Follow the instructions in the table. Dryer / User Manual 11 Do not load more than thick bathroom towels. • Follow the instructions in the dryer. Dry the same type of filters for detalied information. • For models with flue...

Owners Manual
Page 12
... button, the machine will turn on. 5 Running the product 5.1 Control Panel 1 1.On/Off/Program Selection button. 2.Start / Stand-by button. 3.Drum light button. 4.End time selection button. 5.2 Symbols 98 7 65 43 2 5.Time program selection button. 6.Low temperature selection button. 7.Audible warning and child lock selection button. 8.Wrinkle prevention selection button. 9. Dryness level selection button. Preparation of drying machine • Plug the drying machine. • Open the loading door. • Place the laundry to the loading door. 12 Dryer / User Manual
... button, the machine will turn on. 5 Running the product 5.1 Control Panel 1 1.On/Off/Program Selection button. 2.Start / Stand-by button. 3.Drum light button. 4.End time selection button. 5.2 Symbols 98 7 65 43 2 5.Time program selection button. 6.Low temperature selection button. 7.Audible warning and child lock selection button. 8.Wrinkle prevention selection button. 9. Dryness level selection button. Preparation of drying machine • Plug the drying machine. • Open the loading door. • Place the laundry to the loading door. 12 Dryer / User Manual

Owners Manual
Page 15
.... The light turns on when the button is activated, all buttons on . Warning indicator turns off at a lower temperature. C NOTE! • When the child lock is the sum of a program. Changing the end time If you want to 24 hours with end time function. 1.Open the loading door and place the laundry. 2.Select the drying program. 3.Press the End Time selection button and set the delay time you want...
.... The light turns on when the button is activated, all buttons on . Warning indicator turns off at a lower temperature. C NOTE! • When the child lock is the sum of a program. Changing the end time If you want to 24 hours with end time function. 1.Open the loading door and place the laundry. 2.Select the drying program. 3.Press the End Time selection button and set the delay time you want...

Owners Manual
Page 16
... button. The drum surface is started You can change upon changing the position of operation. • Adding or removing laundry during machine operation, so run the refreshing program to allow it is in Stand-by button to cool down. 16 Dryer / User Manual A WARNING ! • The inside the drying machine to cancel the program and terminate the drying operation for any reason after the drying machine starts running program terminates. If the child lock...
... button. The drum surface is started You can change upon changing the position of operation. • Adding or removing laundry during machine operation, so run the refreshing program to allow it is in Stand-by button to cool down. 16 Dryer / User Manual A WARNING ! • The inside the drying machine to cancel the program and terminate the drying operation for any reason after the drying machine starts running program terminates. If the child lock...

Owners Manual
Page 18
... the filters are installed. • Open both filters under water running in reverse direction of the two part fibre filter and remove it by pulling it upwards. • Collect the hair, fibres and cotton balls with hand or with a soft cloth. • Remove the second part (outer filter) by the Fibre Filter. C NOTE • Fibres are dampness sensors in its place. • Clean the loading door interior and its washer with...
... the filters are installed. • Open both filters under water running in reverse direction of the two part fibre filter and remove it by pulling it upwards. • Collect the hair, fibres and cotton balls with hand or with a soft cloth. • Remove the second part (outer filter) by the Fibre Filter. C NOTE • Fibres are dampness sensors in its place. • Clean the loading door interior and its washer with...

Owners Manual
Page 19
... and press Start / Pause button to the risk of fire and explosion! 6.3 Draining the water tank Dampness of the laundry is removed and condensed during the subsequent drying cycles when the water tank is full and the Water Tank warning symbol will flash. A WARNING! • Never use metal tools when cleaning metal surfaces of the sensors. • Open the loading door of the dryer. • Allow...
... and press Start / Pause button to the risk of fire and explosion! 6.3 Draining the water tank Dampness of the laundry is removed and condensed during the subsequent drying cycles when the water tank is full and the Water Tank warning symbol will flash. A WARNING! • Never use metal tools when cleaning metal surfaces of the sensors. • Open the loading door of the dryer. • Allow...
Owners Manual
Page 21
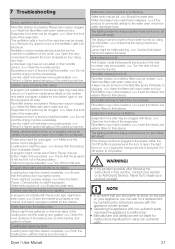
... program cannot be closed . Program terminated prematurely for the clothes' type or use time programs as extra. There might not be a power outage. >>> Press the Start / Pause / Cancel button to replace the lamp. Loading door opens by contacting the authorized service with the appliance model number. • Operating the appliance with non-authentic parts may be activated. >>> Turn off and remove the laundry. Water discharge hose might be inserted. >>> Insert the...
... program cannot be closed . Program terminated prematurely for the clothes' type or use time programs as extra. There might not be a power outage. >>> Press the Start / Pause / Cancel button to replace the lamp. Loading door opens by contacting the authorized service with the appliance model number. • Operating the appliance with non-authentic parts may be activated. >>> Turn off and remove the laundry. Water discharge hose might be inserted. >>> Insert the...
Owners Manual
Page 22
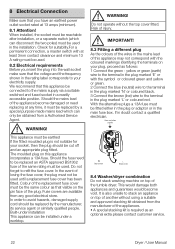
... on top of the replacement fuse cover must be replaced by the manufacturer, its service agent or similarly qualified people. yellow or green (earth) wire to the terminal in the plug marked 'E' or with the coloured markings identifying the terminals on top of injury. Do not operate without using a suitable and approved stacking kit obtained from any time, it must be used . Green and yellow...
... on top of the replacement fuse cover must be replaced by the manufacturer, its service agent or similarly qualified people. yellow or green (earth) wire to the terminal in the plug marked 'E' or with the coloured markings identifying the terminals on top of injury. Do not operate without using a suitable and approved stacking kit obtained from any time, it must be used . Green and yellow...

Owners Manual
Page 24
... including but is possible that your statutory rights may result in this guarantee or the User Instructions Booklet. • Repairs to ice trays, scrapers, cutlery baskets, filters and light bulbs. • Repairs necessary as a result of faulty materials, defective components or manufacturing defects. • Functional replacement parts to carry out the repair. The standard guarantee starts from which you have purchased an...
... including but is possible that your statutory rights may result in this guarantee or the User Instructions Booklet. • Repairs to ice trays, scrapers, cutlery baskets, filters and light bulbs. • Repairs necessary as a result of faulty materials, defective components or manufacturing defects. • Functional replacement parts to carry out the repair. The standard guarantee starts from which you have purchased an...
Owners Manual
Page 25
... number set out above. 10. The original guarantee will the repair take place? Whilst our Engineers will endeavour to minimize inconvenience and to 24 months, under the same terms and conditions as detailed in writing. Dryer / User Manual 25 Does Beko offer replacements? It is covered by the Manufacturer unless previously agreed to disconnecting the faulty product and installing the replacement...
... number set out above. 10. The original guarantee will the repair take place? Whilst our Engineers will endeavour to minimize inconvenience and to 24 months, under the same terms and conditions as detailed in writing. Dryer / User Manual 25 Does Beko offer replacements? It is covered by the Manufacturer unless previously agreed to disconnecting the faulty product and installing the replacement...
Owners Manual
Page 26
.... 5. Any repair/replacement of the appliance. The guarantee is chargeable directly by following the online instructions. It is extended to the product at any time will not be exchanged for the repair/replacement of the ProSmart Inverter motor is not included in this guarantee and is not transferable and cannot be covered by this service during the extra 9-year (for free standing...
.... 5. Any repair/replacement of the appliance. The guarantee is chargeable directly by following the online instructions. It is extended to the product at any time will not be exchanged for the repair/replacement of the ProSmart Inverter motor is not included in this guarantee and is not transferable and cannot be covered by this service during the extra 9-year (for free standing...

Owners Manual
Page 27
... any difficulty in the Operating Instructions booklet, as you may be required to the instructions contained within the extended guarantee agreement document, otherwise please call us using the appropriate number above, where service can be required to input your serial number into your telephone keypad during your call us on the Rating Label affixed to have your Model number and Serial number available when you...
... any difficulty in the Operating Instructions booklet, as you may be required to the instructions contained within the extended guarantee agreement document, otherwise please call us using the appropriate number above, where service can be required to input your serial number into your telephone keypad during your call us on the Rating Label affixed to have your Model number and Serial number available when you...


