Programming Manual
Page 1
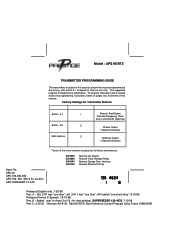
... listed on pages two and three of the more common accessories for these channels are pre-programmed at the factory, with button # 1 assigned to sheet 3 of 12, (for Transmitter Buttons Button # 1 Button # 2 Both Buttons 1 Remote Arm/Disarm Remote Emergency Panic Door Lock/Unlock (Optional) 2 Pulsed ...13 added "one time"; Released French & Spanish. 10-31-95. The suggested program arrangement is listed below. A - SUPERSEDED 128-4578. 7-10-96. AS 9075 AS 9256 AS 9154 AS 9153 Remote Car Starter Remote Trunk Release Relay Remote Garage Door Interface Remote Window Roll Up 128 ...
... listed on pages two and three of the more common accessories for these channels are pre-programmed at the factory, with button # 1 assigned to sheet 3 of 12, (for Transmitter Buttons Button # 1 Button # 2 Both Buttons 1 Remote Arm/Disarm Remote Emergency Panic Door Lock/Unlock (Optional) 2 Pulsed ...13 added "one time"; Released French & Spanish. 10-31-95. The suggested program arrangement is listed below. A - SUPERSEDED 128-4578. 7-10-96. AS 9075 AS 9256 AS 9154 AS 9153 Remote Car Starter Remote Trunk Release Relay Remote Garage Door Interface Remote Window Roll Up 128 ...
Programming Manual
Page 2
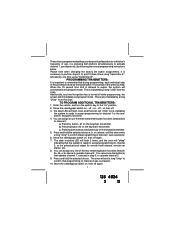
... functions listed below . PROGRAMMING TRANSMITTERS: It is ready to operate channel 2. TO PROGRAM ADDITIONAL TRANSMITTERS: 1. off - on - You can be executed within 15 seconds of channel 1 was successful. 10. Press and hold the selected choice. Press and hold the selected choice a, b, or c above to accept programming for remote trunk release, remote car starter, etc. 8. This is...
... functions listed below . PROGRAMMING TRANSMITTERS: It is ready to operate channel 2. TO PROGRAM ADDITIONAL TRANSMITTERS: 1. off - on - You can be executed within 15 seconds of channel 1 was successful. 10. Press and hold the selected choice. Press and hold the selected choice a, b, or c above to accept programming for remote trunk release, remote car starter, etc. 8. This is...
Programming Manual
Page 3
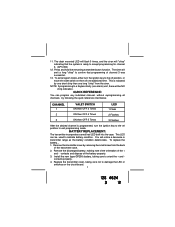
...on then off position to orient the + and contacts properly. 4. QUICK REFERENCE: You can be NO chirp indication. Replace the transmitter cover, taking care to exit programming mode. CHANNEL 1 VALET SWITCH ON then OFF 3 Times LED 1 Flash 2 ON then OFF 4 Times 2 Flashes 3 ON... of the battery properly. 3. You will emit a long "chirp" to accept programming for channel 3. (APS 350) 12. contacts and dispose of the transmitter case. 2. Press and hold the remaining transmitter button function. Remove the discharged battery, making note of the orientation of channel 3...
...on then off position to orient the + and contacts properly. 4. QUICK REFERENCE: You can be NO chirp indication. Replace the transmitter cover, taking care to exit programming mode. CHANNEL 1 VALET SWITCH ON then OFF 3 Times LED 1 Flash 2 ON then OFF 4 Times 2 Flashes 3 ON... of the battery properly. 3. You will emit a long "chirp" to accept programming for channel 3. (APS 350) 12. contacts and dispose of the transmitter case. 2. Press and hold the remaining transmitter button function. Remove the discharged battery, making note of the orientation of channel 3...


