
User Guide
Page 6
... 4.2 Support DVD information 4-1 4.2.1 Running the support DVD 4-1 4.2.2 Drivers menu 4-2 4.2.3 Utilities menu 4-3 4.2.4 Make disk menu 4-5 4.2.5 Manual menu 4-5 4.2.6 Video menu 4-6 4.2.7 ASUS Contact information 4-6 4.2.8 Other information 4-7 4.3 Software information 4-9 4.3.1 ASUS MyLogo3 4-9 4.3.2 Sound Blaster X-Fi audio utility 4-11 4.3.3 ASUS PC Probe II 4-15 vi Contents 3.5.5 PCI PnP 3-27 3.5.6 LCD Poster and ... 3.7 Boot menu 3-35 3.7.1 Boot Device Priority 3-35 3.7.2 Boot Settings Configuration 3-36 3.7.3 Security 3-37 3.8 Tools menu 3-39 3.8.1 ASUS EZ Flash 2 3-39...
... 4.2 Support DVD information 4-1 4.2.1 Running the support DVD 4-1 4.2.2 Drivers menu 4-2 4.2.3 Utilities menu 4-3 4.2.4 Make disk menu 4-5 4.2.5 Manual menu 4-5 4.2.6 Video menu 4-6 4.2.7 ASUS Contact information 4-6 4.2.8 Other information 4-7 4.3 Software information 4-9 4.3.1 ASUS MyLogo3 4-9 4.3.2 Sound Blaster X-Fi audio utility 4-11 4.3.3 ASUS PC Probe II 4-15 vi Contents 3.5.5 PCI PnP 3-27 3.5.6 LCD Poster and ... 3.7 Boot menu 3-35 3.7.1 Boot Device Priority 3-35 3.7.2 Boot Settings Configuration 3-36 3.7.3 Security 3-37 3.8 Tools menu 3-39 3.8.1 ASUS EZ Flash 2 3-39...
User Guide
Page 7
Contents 4.3.4 ASUS AI Suite 4-21 4.3.5 ASUS AI Nap 4-23 4.3.6 ASUS Fan Xpert 4-24 4.3.7 CPU Level Up 4-26 4.3.8 ASUS EPU-6 Engine 4-27 4.3.9 ASUS TurboV 4-31 4.4 RAID configurations 4-33 4.4.1 RAID definitions 4-33 4.4.2 Installing Serial ATA hard disks 4-34 4.4.3 Setting the RAID item in BIOS 4-34 4.4.4 Intel® Matrix Storage Manager option ROM utility......... 4-35 4.5 Creating a RAID driver disk 4-40...
Contents 4.3.4 ASUS AI Suite 4-21 4.3.5 ASUS AI Nap 4-23 4.3.6 ASUS Fan Xpert 4-24 4.3.7 CPU Level Up 4-26 4.3.8 ASUS EPU-6 Engine 4-27 4.3.9 ASUS TurboV 4-31 4.4 RAID configurations 4-33 4.4.1 RAID definitions 4-33 4.4.2 Installing Serial ATA hard disks 4-34 4.4.3 Setting the RAID item in BIOS 4-34 4.4.4 Intel® Matrix Storage Manager option ROM utility......... 4-35 4.5 Creating a RAID driver disk 4-40...
User Guide
Page 14
Rampage II GENE specifications summary Internal I/O Connectors 3 x USB connectors support additional 6 USB ports 1 x IDE connector for two devices 7 x SATA connectors 5 x Fan connectors: 1 x CPU / 2 x Chassis / 2 x Optional 2 x...CD audio in 1 x System panel connector 1 x SPDIF_OUT connector Software Support DVD: - xiv Drivers and applications Sound Blaster X-Fi utility Futuremark® 3DMark® 06 Advanced Edition Kaspersky® Anti-virus software ASUS TurboV utility ASUS PC Probe II ASUS Update ASUS AI Suite Form Factor microATX Form Factor, 9.6"x 9.6" (24.4 cm x 24.4 cm) *...
Rampage II GENE specifications summary Internal I/O Connectors 3 x USB connectors support additional 6 USB ports 1 x IDE connector for two devices 7 x SATA connectors 5 x Fan connectors: 1 x CPU / 2 x Chassis / 2 x Optional 2 x...CD audio in 1 x System panel connector 1 x SPDIF_OUT connector Software Support DVD: - xiv Drivers and applications Sound Blaster X-Fi utility Futuremark® 3DMark® 06 Advanced Edition Kaspersky® Anti-virus software ASUS TurboV utility ASUS PC Probe II ASUS Update ASUS AI Suite Form Factor microATX Form Factor, 9.6"x 9.6" (24.4 cm x 24.4 cm) *...
User Guide
Page 47
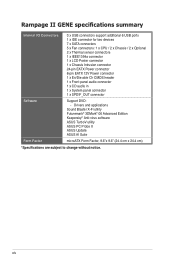
...4. Install the software drivers for details. ROG Rampage II GENE 2-23 The following sub‑sections describe the slots and the expansion cards that you removed earlier. 6. Remove the system unit cover (if your motherboard is completely seated on shared slots, ensure that the drivers support "Share IRQ"... inoperable. Refer to install expansion cards. Ensure to the card. 2.5 Expansion slots In the future, you physical injury and damage motherboard components. 2.5.1 Installing an expansion card To install an expansion card: 1. Failure to do not need to the table on BIOS setup...
...4. Install the software drivers for details. ROG Rampage II GENE 2-23 The following sub‑sections describe the slots and the expansion cards that you removed earlier. 6. Remove the system unit cover (if your motherboard is completely seated on shared slots, ensure that the drivers support "Share IRQ"... inoperable. Refer to install expansion cards. Ensure to the card. 2.5 Expansion slots In the future, you physical injury and damage motherboard components. 2.5.1 Installing an expansion card To install an expansion card: 1. Failure to do not need to the table on BIOS setup...
User Guide
Page 71
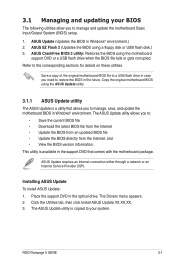
...ROG Rampage II GENE 3-1 3.1 Managing and updating your system. ASUS EZ Flash 2 (Updates the BIOS using the motherboard support DVD or a USB flash drive when the BIOS file fails or gets corrupted. Copy the original motherboard BIOS using the ASUS Update utility. 3.1.1 ASUS Update utility The ASUS ...ASUS Update VX.XX.XX. 3. Refer to your BIOS The following utilities allow you to restore the BIOS in the future. The ASUS Update utility is available in Windows® environment.) 2. ASUS CrashFree BIOS 3 utility: Restores the BIOS using a floppy disk or USB flash disk.) 3. The Drivers...
...ROG Rampage II GENE 3-1 3.1 Managing and updating your system. ASUS EZ Flash 2 (Updates the BIOS using the motherboard support DVD or a USB flash drive when the BIOS file fails or gets corrupted. Copy the original motherboard BIOS using the ASUS Update utility. 3.1.1 ASUS Update utility The ASUS ...ASUS Update VX.XX.XX. 3. Refer to your BIOS The following utilities allow you to restore the BIOS in the future. The ASUS Update utility is available in Windows® environment.) 2. ASUS CrashFree BIOS 3 utility: Restores the BIOS using a floppy disk or USB flash disk.) 3. The Drivers...

User Guide
Page 90
... [Enhanced] [IDE] Hard Disk Write Protect [Disabled] IDE Detect Time Out (Sec) [35] Set [Compatible Mode] when Legacy OS (i.e. The AHCI allows the onboard storage driver to [RAID]. 3-20 Chapter 3: BIOS setup Configuration options: [Auto] [Disabled] [Enabled] 32Bit Data Transfer [Enabled] Enables or disables 32-bit data transfer. WIN2000, Win XP...
... [Enhanced] [IDE] Hard Disk Write Protect [Disabled] IDE Detect Time Out (Sec) [35] Set [Compatible Mode] when Legacy OS (i.e. The AHCI allows the onboard storage driver to [RAID]. 3-20 Chapter 3: BIOS setup Configuration options: [Auto] [Disabled] [Enabled] 32Bit Data Transfer [Enabled] Enables or disables 32-bit data transfer. WIN2000, Win XP...

User Guide
Page 116
Chapter summary 4 4.1 Installing an operating system 4-1 4.2 Support DVD information 4-1 4.3 Software information 4-9 4.4 RAID configurations 4-33 4.5 Creating a RAID driver disk 4-40 ROG Rampage II GENE
Chapter summary 4 4.1 Installing an operating system 4-1 4.2 Support DVD information 4-1 4.3 Software information 4-9 4.4 RAID configurations 4-33 4.5 Creating a RAID driver disk 4-40 ROG Rampage II GENE

User Guide
Page 117
... this chapter for better compatibility and system stability. 4.2 Support DVD information The support DVD that came with the motherboard package contains the drivers, software applications, and utilities that you can install to install If Autorun is enabled in ��g�...the drivers for reference only. Double-click the ASSETUP.EXE to the optical drive. ROG Rampage II GENE 4-1 Click an icon to display support DVD/motherboard information Click an item to avail all motherboard features. Refer to change at any time without notice. Visit the ASUS website (www.asus.com...
... this chapter for better compatibility and system stability. 4.2 Support DVD information The support DVD that came with the motherboard package contains the drivers, software applications, and utilities that you can install to install If Autorun is enabled in ��g�...the drivers for reference only. Double-click the ASSETUP.EXE to the optical drive. ROG Rampage II GENE 4-1 Click an icon to display support DVD/motherboard information Click an item to avail all motherboard features. Refer to change at any time without notice. Visit the ASUS website (www.asus.com...

User Guide
Page 118
... driver and utility. 4-2 Chapter 4: Software support 4.2.2 Drivers menu The drivers menu shows the available device drivers if the system detects installed devices. Drivers Installation Wizard Launches the ASUS InstAll driver installation wizard. Install the necessary drivers to activate the devices. JMicron JMB36X Controller Driver Installs the JMicron® JMB36X controller driver. Realtek RTL8111B/C LAN Driver Installs the Realtek® Gigabit Ethernet Driver. ASUS...
... driver and utility. 4-2 Chapter 4: Software support 4.2.2 Drivers menu The drivers menu shows the available device drivers if the system detects installed devices. Drivers Installation Wizard Launches the ASUS InstAll driver installation wizard. Install the necessary drivers to activate the devices. JMicron JMB36X Controller Driver Installs the JMicron® JMB36X controller driver. Realtek RTL8111B/C LAN Driver Installs the Realtek® Gigabit Ethernet Driver. ASUS...

User Guide
Page 120
...Virus Utility The anti-virus application scans, identifies, and removes computer viruses. Ulead Burn.Now Installs the Ulead Burn.Now application for extreme O.C. ASUS TurboV Installs ASUS TurboV, the advanced overclocking tool for Audio DVD, CD and data disc creation. Adobe Reader 8 Installs the Adobe® Reader that allows ... Installs the Ulead PhotoImpact 12 SE software. Winzip 11 Installs the Winzip utility for easy file-compression and protection. 4-4 Chapter 4: Software support ASUS EPU-6 Engine Installs the ASUS EPU-6 Engine driver and utility. ASUS AI Suite Installs the...
...Virus Utility The anti-virus application scans, identifies, and removes computer viruses. Ulead Burn.Now Installs the Ulead Burn.Now application for extreme O.C. ASUS TurboV Installs ASUS TurboV, the advanced overclocking tool for Audio DVD, CD and data disc creation. Adobe Reader 8 Installs the Adobe® Reader that allows ... Installs the Ulead PhotoImpact 12 SE software. Winzip 11 Installs the Winzip utility for easy file-compression and protection. 4-4 Chapter 4: Software support ASUS EPU-6 Engine Installs the ASUS EPU-6 Engine driver and utility. ASUS AI Suite Installs the...

User Guide
Page 121
.... Most user manual files are in Portable Document Format (PDF). JMicron JMB36X 32/64 bit RAID/AHCI Driver Allows you to create a JMicron® JMB36X RAID/AHCI driver disk for 32/64bit system. 4.2.5 Manual menu The Manuals menu contains a list of the user manual. Install the Adobe® Acrobat®...; Reader from the Utilities menu before opening a user manual file. Click an item to create the Intel ICH10R driver disk. 4.2.4 Make disk menu The Make disk menu contains items to open the folder of supplementary user manuals. ROG Rampage II GENE 4-5
.... Most user manual files are in Portable Document Format (PDF). JMicron JMB36X 32/64 bit RAID/AHCI Driver Allows you to create a JMicron® JMB36X RAID/AHCI driver disk for 32/64bit system. 4.2.5 Manual menu The Manuals menu contains a list of the user manual. Install the Adobe® Acrobat®...; Reader from the Utilities menu before opening a user manual file. Click an item to create the Intel ICH10R driver disk. 4.2.4 Make disk menu The Make disk menu contains items to open the folder of supplementary user manuals. ROG Rampage II GENE 4-5

User Guide
Page 127
You need to install SoundMAX ADI Audio Driver to the optical drive. Click the Volume Panel icon to display a list of Creative® media utilities that help you manage and play your computer ... Sound Blaster X-Fi interface. Click Help in each utility control panel to complete installation. 4. Click the Drivers tab and click SoundMAX ADI Audio Driver. 3. Click Main Display to go ROG Rampage II GENE 4-11 to the Main Panel. The Drivers installation tab appears if your media files. To install Sound Blaster X-Fi: 1. Double-click the Volume...
You need to install SoundMAX ADI Audio Driver to the optical drive. Click the Volume Panel icon to display a list of Creative® media utilities that help you manage and play your computer ... Sound Blaster X-Fi interface. Click Help in each utility control panel to complete installation. 4. Click the Drivers tab and click SoundMAX ADI Audio Driver. 3. Click Main Display to go ROG Rampage II GENE 4-11 to the Main Panel. The Drivers installation tab appears if your media files. To install Sound Blaster X-Fi: 1. Double-click the Volume...
User Guide
Page 131
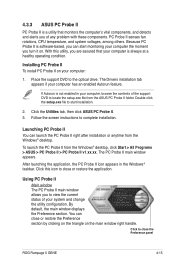
Place the support DVD to close the Preference panel ROG Rampage II GENE 4-15 If Autorun is software-based, you can start installation. 2. To launch the PC Probe II from the Windows® desktop. Click to the optical drive. Double-click the setup.exe file to close or...click ASUS PC Probe II. 3. Click this utility, you are assured that your computer is a utility that monitors the computer's vital components, and detects and alerts you to view the current status of your computer, browse the contents of any problem with these components. The Drivers installation ...
Place the support DVD to close the Preference panel ROG Rampage II GENE 4-15 If Autorun is software-based, you can start installation. 2. To launch the PC Probe II from the Windows® desktop. Click to the optical drive. Double-click the setup.exe file to close or...click ASUS PC Probe II. 3. Click this utility, you are assured that your computer is a utility that monitors the computer's vital components, and detects and alerts you to view the current status of your computer, browse the contents of any problem with these components. The Drivers installation ...

User Guide
Page 137
... the utility, or click the Normal icon to restore the system to launch Fan Xpert 4-21 4.3.4 ASUS AI Suite ASUS AI Suite allows you to close or restore the application. The Drivers installation tab appears if your computer: 1. Place the support DVD to complete installation. Click the Utilities...click Start > All Programs > ASUS > AI Suite > AI Suite v1.xx.xx. Follow the screen instructions to the optical drive. The AI Suite main window appears. Click to restore to normal Click to launch EPU-6 Engine Click to launch TurboV ROG Rampage II GENE Click to launch AI Nap Click...
... the utility, or click the Normal icon to restore the system to launch Fan Xpert 4-21 4.3.4 ASUS AI Suite ASUS AI Suite allows you to close or restore the application. The Drivers installation tab appears if your computer: 1. Place the support DVD to complete installation. Click the Utilities...click Start > All Programs > ASUS > AI Suite > AI Suite v1.xx.xx. Follow the screen instructions to the optical drive. The AI Suite main window appears. Click to restore to normal Click to launch EPU-6 Engine Click to launch TurboV ROG Rampage II GENE Click to launch AI Nap Click...

User Guide
Page 143
... you launch 6 Engine, the following message will have the system shift modes automatically according to current system status. Then, the 6 Engine main menu appears. 4.3.8 ASUS EPU-6 Engine ASUS EPU-6 Engine is an energy-efficient tool that you to run Calibration first. You can select to the optical drive. Launching 6 Engine Launch 6 Engine... mode will appear, asking you can also customize each mode by double-clicking the 6 Engine icon on your computer has an enabled Autorun feature. 2. ROG Rampage II GENE 4-27 The Drivers installation tab appears if your computer: 1.
... you launch 6 Engine, the following message will have the system shift modes automatically according to current system status. Then, the 6 Engine main menu appears. 4.3.8 ASUS EPU-6 Engine ASUS EPU-6 Engine is an energy-efficient tool that you to run Calibration first. You can select to the optical drive. Launching 6 Engine Launch 6 Engine... mode will appear, asking you can also customize each mode by double-clicking the 6 Engine icon on your computer has an enabled Autorun feature. 2. ROG Rampage II GENE 4-27 The Drivers installation tab appears if your computer: 1.

User Guide
Page 146
... that you may click the TweakIt icon on the Windows® notification area and click Unlock to other mode option. Or, you 've installed TweakIt driver from the bundled Support DVD. 4-30 Chapter 4: Software support • Fan Control: Adjusts fan speeds to reduce noise and save system power. • Quiet: Lowers...
... that you may click the TweakIt icon on the Windows® notification area and click Unlock to other mode option. Or, you 've installed TweakIt driver from the bundled Support DVD. 4-30 Chapter 4: Software support • Fan Control: Adjusts fan speeds to reduce noise and save system power. • Quiet: Lowers...

User Guide
Page 149
...the same size or larger than the existing drive. The RAID 5 configuration is required for details. 4.4 RAID configurations The motherboard comes with the Intel® ICH10R Southbridge controller that of a single disk alone, thus improving data access and storage. Two...function to the entire system. For example, RAID 0 and RAID 1 set , copy first the RAID driver from one drive fails, the disk array management software directs all the benefits of RAID 5 configuration include better HDD performance, fault tolerance, and higher storage capacity. ROG Rampage II GENE 4-33
...the same size or larger than the existing drive. The RAID 5 configuration is required for details. 4.4 RAID configurations The motherboard comes with the Intel® ICH10R Southbridge controller that of a single disk alone, thus improving data access and storage. Two...function to the entire system. For example, RAID 0 and RAID 1 set , copy first the RAID driver from one drive fails, the disk array management software directs all the benefits of RAID 5 configuration include better HDD performance, fault tolerance, and higher storage capacity. ROG Rampage II GENE 4-33

User Guide
Page 156
... Disk menu appears, press or to enter the BIOS setup utility. 3. Follow the succeeding screen instructions to complete the process. Place the motherboard support DVD into the floppy disk drive. 5. Insert a floppy disk into the optical drive. 3. Save changes and exit BIOS. 6. ...Follow the succeeding screen instructions to complete the process. 4.5.2 Creating a RAID driver disk in Windows® To create a RAID driver disk in a RAID set. Set the optical drive as the primary boot device. 4. 4.5 Creating a RAID driver disk A floppy disk with a floppy disk drive or a USB flash disk...
... Disk menu appears, press or to enter the BIOS setup utility. 3. Follow the succeeding screen instructions to complete the process. Place the motherboard support DVD into the floppy disk drive. 5. Insert a floppy disk into the optical drive. 3. Save changes and exit BIOS. 6. ...Follow the succeeding screen instructions to complete the process. 4.5.2 Creating a RAID driver disk in Windows® To create a RAID driver disk in a RAID set. Set the optical drive as the primary boot device. 4. 4.5 Creating a RAID driver disk A floppy disk with a floppy disk drive or a USB flash disk...

User Guide
Page 157
... you select Intel(R) SATA RAID Controller (Desktop ICH10R). 4. To install the RAID driver in Windows® XP: 1. During the OS installation, select Intel(R) SATA RAID Controller (Desktop ICH10R). 3. ROG Rampage II GENE 4-41 When prompted to select the SCSI adapter to install, ensure that you to... press the F6 key to install third-party SCSI or RAID driver. 2. Press , and then insert the floppy disk with RAID driver into the floppy disk drive. 3....
... you select Intel(R) SATA RAID Controller (Desktop ICH10R). 4. To install the RAID driver in Windows® XP: 1. During the OS installation, select Intel(R) SATA RAID Controller (Desktop ICH10R). 3. ROG Rampage II GENE 4-41 When prompted to select the SCSI adapter to install, ensure that you to... press the F6 key to install third-party SCSI or RAID driver. 2. Press , and then insert the floppy disk with RAID driver into the floppy disk drive. 3....

User Guide
Page 161
... current applications. 2. For Windows XP, select Add/Remove. 5.1 ATI® CrossFireX™ technology The motherboard supports the ATI® CrossFireX™ technology that allows you have two identical CrossFireX-ready graphics cards or...driver supports the ATI CrossFireX technology. To uninstall existing graphics card drivers 1. Follow the installation procedures in this section. 5.1.1 Requirements • You should have to Control Panel > Programs and Features. 3. Download the latest driver from the AMD website (www.amd.com). • Ensure that your system. ROG Rampage II GENE...
... current applications. 2. For Windows XP, select Add/Remove. 5.1 ATI® CrossFireX™ technology The motherboard supports the ATI® CrossFireX™ technology that allows you have two identical CrossFireX-ready graphics cards or...driver supports the ATI CrossFireX technology. To uninstall existing graphics card drivers 1. Follow the installation procedures in this section. 5.1.1 Requirements • You should have to Control Panel > Programs and Features. 3. Download the latest driver from the AMD website (www.amd.com). • Ensure that your system. ROG Rampage II GENE...


