

User manual 80 811 96 Asko T712C EN
Page 2
...? 9 Electrical installation 24 Materials that can be tumble dried 9 Reversing the door 27 Materials that should not be Reversing the door 27 tumble dried 9 Quick guide 32 Static electricity 9 Fabrics 32 Operating instructions 10 Turn on the main power switch 32 Sort your fabrics 10 Load the laundry 32 Turn on the main power switch. 10 Select a program and any options 32 Open the door, load the items, and Press the Start/Stop button...
...? 9 Electrical installation 24 Materials that can be tumble dried 9 Reversing the door 27 Materials that should not be Reversing the door 27 tumble dried 9 Quick guide 32 Static electricity 9 Fabrics 32 Operating instructions 10 Turn on the main power switch 32 Sort your fabrics 10 Load the laundry 32 Turn on the main power switch. 10 Select a program and any options 32 Open the door, load the items, and Press the Start/Stop button...

User manual 80 811 96 Asko T712C EN
Page 4
... servicing unless specifically recommended in , or spotted with controls. • Do not attempt to repair or replace any part of the dryer for future reference Installation See the "Installation" chapter. When it will be done by a certified professional. • Provide sufficient ventilation, otherwise smoke from open fires or fumes from the home. • Do not heat dry items that have been previously cleaned...
... servicing unless specifically recommended in , or spotted with controls. • Do not attempt to repair or replace any part of the dryer for future reference Installation See the "Installation" chapter. When it will be done by a certified professional. • Provide sufficient ventilation, otherwise smoke from open fires or fumes from the home. • Do not heat dry items that have been previously cleaned...

User manual 80 811 96 Asko T712C EN
Page 5
... drain the condensed water container beforehand. Do not exhaust into an appropriate outlet that may occur. Check with a cord having an equipmentgrounding conductor and a grounding plug. To reduce the risk of electric shock. tomatically. • Pressing the main power switch. • Press the Start/Stop button for future reference Customer Care Center 5 1-800-898-1879 www.askousa.com Save these instructions for three...
... drain the condensed water container beforehand. Do not exhaust into an appropriate outlet that may occur. Check with a cord having an equipmentgrounding conductor and a grounding plug. To reduce the risk of electric shock. tomatically. • Pressing the main power switch. • Press the Start/Stop button for future reference Customer Care Center 5 1-800-898-1879 www.askousa.com Save these instructions for three...

User manual 80 811 96 Asko T712C EN
Page 15
... a little dishwashing detergent if necessary. Care and maintenance instructions Cleaning the lint filter The lint filter must be washed with water to remove any limescale deposits. Additionally, the filter should be cleaned after each load. Replace the filter in the lint filter. Note! Do not allow dust to accumulate around the tumble dryer clean and cool; Keep the area around the machine. Open the filter and remove the lint from the retailer where you . 2.
... a little dishwashing detergent if necessary. Care and maintenance instructions Cleaning the lint filter The lint filter must be washed with water to remove any limescale deposits. Additionally, the filter should be cleaned after each load. Replace the filter in the lint filter. Note! Do not allow dust to accumulate around the tumble dryer clean and cool; Keep the area around the machine. Open the filter and remove the lint from the retailer where you . 2.

User manual 80 811 96 Asko T712C EN
Page 17
... cut-off the tumble dryer if the temperature is too high, caused by opening doors and/or windows, for instance. • Clean the filter. • Check that any plug is running, which disrupts the moisture monitoring function. Drying takes too long • Check that is on to do. Error messages • - To cancel Delayed Start, press the Start/Stop button for obstructions. The hose should be shown...
... cut-off the tumble dryer if the temperature is too high, caused by opening doors and/or windows, for instance. • Clean the filter. • Check that any plug is running, which disrupts the moisture monitoring function. Drying takes too long • Check that is on to do. Error messages • - To cancel Delayed Start, press the Start/Stop button for obstructions. The hose should be shown...
User manual 80 811 96 Asko T712C EN
Page 20
... installation. 6. Write to be responsible for any incidental or consequential damages. Correct house plumbing, including drainage problems related to : 1. stallation, misuse or abuse. 3. Replace house fuses or correct house wiring. 5. Clean or service air device in - Some states will not pay for other rights which vary from accident, fire, floods, acts of the model, type name, and serial number. Before calling for units operated...
... installation. 6. Write to be responsible for any incidental or consequential damages. Correct house plumbing, including drainage problems related to : 1. stallation, misuse or abuse. 3. Replace house fuses or correct house wiring. 5. Clean or service air device in - Some states will not pay for other rights which vary from accident, fire, floods, acts of the model, type name, and serial number. Before calling for units operated...

User manual 80 811 96 Asko T712C EN
Page 21
... of air. Installation instructions WARNING! Install the clothes dryer according to the limited quantity of fire. If the room is located should not be of a ASKO washing machine. Flexible venting materials are known to the bottom left open when the dryer is too small. Tip! Do not install a clothes dryer with clothes dryers. If the unit must not be freestanding or stacked. Stacked The tumble dryer can be blocked by...
... of air. Installation instructions WARNING! Install the clothes dryer according to the limited quantity of fire. If the room is located should not be of a ASKO washing machine. Flexible venting materials are known to the bottom left open when the dryer is too small. Tip! Do not install a clothes dryer with clothes dryers. If the unit must not be freestanding or stacked. Stacked The tumble dryer can be blocked by...

User manual 80 811 96 Asko T712C EN
Page 22
...top panel and the back wall. Install the dryer so the condensed water will continuously flow into a drain or sink, you will need a drain outlet behind the unit. Built-in ASKO dryers can be at least 24-1/2" (622 mm). The condensing models work best when they have good air circulation.... Do not raise it higher than 34-1/2" (876 mm). Hole measurements are from center of hole. 22 Customer Care Center 1-800-898-1879 www.askousa.com Installation instructions C. Notes The height adjustment for the dryer is 40" (1016 mm). The opening...
...top panel and the back wall. Install the dryer so the condensed water will continuously flow into a drain or sink, you will need a drain outlet behind the unit. Built-in ASKO dryers can be at least 24-1/2" (622 mm). The condensing models work best when they have good air circulation.... Do not raise it higher than 34-1/2" (876 mm). Hole measurements are from center of hole. 22 Customer Care Center 1-800-898-1879 www.askousa.com Installation instructions C. Notes The height adjustment for the dryer is 40" (1016 mm). The opening...

User manual 80 811 96 Asko T712C EN
Page 24
.... Connection to accommodate ASKO washers ONLY (rated 208-240 V.) To use the ready-fitted plug supplied with the dryer to a grounded wall socket. The machine should only be connected to the blue nipple (2). 3. Refer to access terminal box. (Requires a 20-Torx screwdriver.) 24 Customer Care Center 1-800-898-1879 www.askousa.com As supplied: Single-phase, 230 V, 60 Hz, 2500W heater rating 30 A circuit required 2a Remove cover...
.... Connection to accommodate ASKO washers ONLY (rated 208-240 V.) To use the ready-fitted plug supplied with the dryer to a grounded wall socket. The machine should only be connected to the blue nipple (2). 3. Refer to access terminal box. (Requires a 20-Torx screwdriver.) 24 Customer Care Center 1-800-898-1879 www.askousa.com As supplied: Single-phase, 230 V, 60 Hz, 2500W heater rating 30 A circuit required 2a Remove cover...

User manual 80 811 96 Asko T712C EN
Page 25
.... Turn the power off at the breaker or fuse box. 2. Loosen or remove center terminal block screw. 4 5 6 Customer Care Center 25 1-800-898-1879 www.askousa.com Each connection instruction identifies the appropriate Power Supply Cord and covers requirements for installing the dryer in a location where grounding through the neutral. 4-wire connection. Only a 4-conductor cord shall be used when the applience is delivered ready-fitted with a four-prong plug intended for all 4-wire installations. The...
.... Turn the power off at the breaker or fuse box. 2. Loosen or remove center terminal block screw. 4 5 6 Customer Care Center 25 1-800-898-1879 www.askousa.com Each connection instruction identifies the appropriate Power Supply Cord and covers requirements for installing the dryer in a location where grounding through the neutral. 4-wire connection. Only a 4-conductor cord shall be used when the applience is delivered ready-fitted with a four-prong plug intended for all 4-wire installations. The...

User manual 80 811 96 Asko T712C EN
Page 26
.... 7. Replace terminal box cover on back of power supply cord to external ground conductor screw. 7. Turn power on at breaker/fuse box. Remove ground wire (green with a white cover and the ground conductor by a green cover. Connect neutral (white) wire of cord under center screw of NEMA Type 14-30R, as illustrated below correlate to outer screws. 9. Plug dryer into wall receptacle. 10. Use the strain relief attached below . Before starting...
.... 7. Replace terminal box cover on back of power supply cord to external ground conductor screw. 7. Turn power on at breaker/fuse box. Remove ground wire (green with a white cover and the ground conductor by a green cover. Connect neutral (white) wire of cord under center screw of NEMA Type 14-30R, as illustrated below correlate to outer screws. 9. Plug dryer into wall receptacle. 10. Use the strain relief attached below . Before starting...

User manual 80 811 97 Asko T712C FR
Page 25
...; dans la boîte du disjoncteur/fusibles. The dryer frame is grounded by direct wiring. Read the Electrical requirements and grounding instructions before connecting the tumble dryer. Electric models of the above connections can be made with an approved power supply cord or by a link to the neutral conductor on the dryer must be removed for direct wiring. Retirez le couvercle du bloc des bornes. 3. Assemblez...
...; dans la boîte du disjoncteur/fusibles. The dryer frame is grounded by direct wiring. Read the Electrical requirements and grounding instructions before connecting the tumble dryer. Electric models of the above connections can be made with an approved power supply cord or by a link to the neutral conductor on the dryer must be removed for direct wiring. Retirez le couvercle du bloc des bornes. 3. Assemblez...
User manual Quick Start Guide T712C EN
Page 2
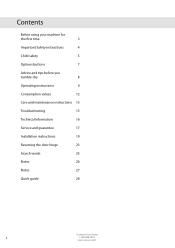
Contents Before using your machine for the first time 3 Important Safety instructions 4 Child safety 5 Options buttons 7 Advice and tips before you tumble-dry 8 Operating instructions 9 Consumption values 12 Care and maintenance instructions 13 Troubleshooting 15 Technical information 16 Service and guarantee 17 Installation instructions 19 Reversing the door hinge 23 Search words 25 Notes 26 Notes 27 Quick guide 28 Custumer Care Center 2 1-800-898-1879 www.askousa.com
Contents Before using your machine for the first time 3 Important Safety instructions 4 Child safety 5 Options buttons 7 Advice and tips before you tumble-dry 8 Operating instructions 9 Consumption values 12 Care and maintenance instructions 13 Troubleshooting 15 Technical information 16 Service and guarantee 17 Installation instructions 19 Reversing the door hinge 23 Search words 25 Notes 26 Notes 27 Quick guide 28 Custumer Care Center 2 1-800-898-1879 www.askousa.com

User manual Quick Start Guide T712C EN
Page 4
... is properly installed and grounded in accordance with controls. • Do not attempt to repair or replace any part of the appliance or perform any servicing unless specifically recommended in your dryer. During the program, the back of fire, electric shock, or injury to cooking oils in this guide. • Do not use fabric softeners or dryer sheets unless...
... is properly installed and grounded in accordance with controls. • Do not attempt to repair or replace any part of the appliance or perform any servicing unless specifically recommended in your dryer. During the program, the back of fire, electric shock, or injury to cooking oils in this guide. • Do not use fabric softeners or dryer sheets unless...

User manual Quick Start Guide T712C EN
Page 9
... the items after drying. Iron dry This program shuts off the heat once the load is dry without being "bone-dry". Operating instructions Warning! Heavy This program is for ironing or pressing. Wrinkle free This option means that are prone to remove the load as soon as jeans with one exception - sort the items and adjust load and temperature. . 2 Turn on the main power switch 3 Open the door, load the items...
... the items after drying. Iron dry This program shuts off the heat once the load is dry without being "bone-dry". Operating instructions Warning! Heavy This program is for ironing or pressing. Wrinkle free This option means that are prone to remove the load as soon as jeans with one exception - sort the items and adjust load and temperature. . 2 Turn on the main power switch 3 Open the door, load the items...

User manual Quick Start Guide T712C EN
Page 15
... lint filter nor the condenser are intact, swap two circuit breakers. If so, the time remaining until start Check • that the outer door is properly closed. • that the main power switch is connected. • that the tumble dryer has access to the condenser dryer being placed in a room that is too small and the air in the "Troubleshooting" section. The hose should be blocked...
... lint filter nor the condenser are intact, swap two circuit breakers. If so, the time remaining until start Check • that the outer door is properly closed. • that the main power switch is connected. • that the tumble dryer has access to the condenser dryer being placed in a room that is too small and the air in the "Troubleshooting" section. The hose should be blocked...

User manual Quick Start Guide T712C EN
Page 18
Service calls to improper installation. 6. Replace house fuses or correct house wiring. 5. Replacement parts or repair labor costs for parts during the limited warranty period. F. Some states will not pay for any incidental or consequential damages. This warranty gives you specific legal rights and you may not apply to use . Instruct how to you. B. D. For warranty service, contact our Customer Care Center at : AM Appliance Group P. Write...
Service calls to improper installation. 6. Replace house fuses or correct house wiring. 5. Replacement parts or repair labor costs for parts during the limited warranty period. F. Some states will not pay for any incidental or consequential damages. This warranty gives you specific legal rights and you may not apply to use . Instruct how to you. B. D. For warranty service, contact our Customer Care Center at : AM Appliance Group P. Write...

User manual Quick Start Guide T712C EN
Page 20
.... 4. Then remove the paper from the self-adhesive surface under the metal angles, keeping the front edge raised 0.5-1" (1-2 cm). 7. B A Custumer Care Center 20 1-800-898-1879 www.askousa.com Open the knock-out holes on the back of the unit. Attach the plastic cups for mounting the tumble dryer's front feet to install the stacking kit: 1. Lower...
.... 4. Then remove the paper from the self-adhesive surface under the metal angles, keeping the front edge raised 0.5-1" (1-2 cm). 7. B A Custumer Care Center 20 1-800-898-1879 www.askousa.com Open the knock-out holes on the back of the unit. Attach the plastic cups for mounting the tumble dryer's front feet to install the stacking kit: 1. Lower...

User manual Quick Start Guide T712C EN
Page 21
... water Install the dryer so the condensed water will continuously flow into a drain or sink. ASKO washers rated 208-240 V have two internal fuses of the machine is designed to accommodate ASKO washers ONLY (rated 208-240 V.) To use the ready-fitted plug supplied with the dryer to the blue nipple (2). 3.Run the hose to the "Important Safety Instructions" on the rear of 15 A each. 2 1 3 3 Remove cover to access terminal...
... water Install the dryer so the condensed water will continuously flow into a drain or sink. ASKO washers rated 208-240 V have two internal fuses of the machine is designed to accommodate ASKO washers ONLY (rated 208-240 V.) To use the ready-fitted plug supplied with the dryer to the blue nipple (2). 3.Run the hose to the "Important Safety Instructions" on the rear of 15 A each. 2 1 3 3 Remove cover to access terminal...

User manual Quick Start Guide T712C EN
Page 22
... remove center terminal block � screw. 5.Connect neutral (white ) wire of dryer. 9.Plug dryer into wall receptacle. 12. Before starting this procedure, be sure the power is turned off at breaker/fuse box. nector screw. Power Supply Cord You will need a 3-wire power supply cord with four No. 10 copper wires and a matching 4-wire receptacle of NEMA Type 1430R, as illustrated below: To connect a 3-wire power cord to outer screws. 7.Tighten the strain relief screws. 8.Replace terminal box cover...
... remove center terminal block � screw. 5.Connect neutral (white ) wire of dryer. 9.Plug dryer into wall receptacle. 12. Before starting this procedure, be sure the power is turned off at breaker/fuse box. nector screw. Power Supply Cord You will need a 3-wire power supply cord with four No. 10 copper wires and a matching 4-wire receptacle of NEMA Type 1430R, as illustrated below: To connect a 3-wire power cord to outer screws. 7.Tighten the strain relief screws. 8.Replace terminal box cover...


