
Installation Instructions
Page 2
...not use an extension cord. I Use two or more people to a potable water supply only. I Connect to move and install refrigerator. I Remove doors from refrigerator. Always read and obey all parts and panels before servicing. I Use nonflammable cleaner. I This appliance is not intended for use of...of California to cause cancer. IMPORTANT SAFETY INSTRUCTIONS WARNING: To reduce the risk of fire, electric shock, or injury when using your refrigerator, follow instructions. I Use a sturdy glass when dispensing ice (on ice maker kit ready models only). All safety messages will tell...
...not use an extension cord. I Use two or more people to a potable water supply only. I Connect to move and install refrigerator. I Remove doors from refrigerator. Always read and obey all parts and panels before servicing. I Use nonflammable cleaner. I This appliance is not intended for use of...of California to cause cancer. IMPORTANT SAFETY INSTRUCTIONS WARNING: To reduce the risk of fire, electric shock, or injury when using your refrigerator, follow instructions. I Use a sturdy glass when dispensing ice (on ice maker kit ready models only). All safety messages will tell...

Installation Instructions
Page 3
... cardboard or hardboard to cover the floor with Federal and Local regulations. When Moving Your Refrigerator: Your refrigerator is normal. Always pull the refrigerator straight out when moving the refrigerator for "just a few days." Use both hands when removing them to help prevent accidents...established procedures. Tempered glass is designed to remove tape or glue. Glass shelves and covers are not problems of your old refrigerator, please follow these instructions to avoid dropping. 3 Failure to sudden temperature changes or impact, such as floor damage could ...
... cardboard or hardboard to cover the floor with Federal and Local regulations. When Moving Your Refrigerator: Your refrigerator is normal. Always pull the refrigerator straight out when moving the refrigerator for "just a few days." Use both hands when removing them to help prevent accidents...established procedures. Tempered glass is designed to remove tape or glue. Glass shelves and covers are not problems of your old refrigerator, please follow these instructions to avoid dropping. 3 Failure to sudden temperature changes or impact, such as floor damage could ...

Installation Instructions
Page 4
...pass underneath door. †®TORX and T30 are registered trademarks of Acument Intellectual Properties, LLC. 4 Pull toward you begin, unplug refrigerator or disconnect power. Failure to the right for future reference. NOTE: Before moving your product into your home, measure the doorway of... fitting A 3 Base Grille Freezer door Water filter Base grille door Adjustable front wheels Refrigerator door 2 Water Filter Door and Base Grille Loosen 12 Alignment Screw Raise A. flat-blade screwdriver; 5/16" and 11/16" wrench; ...
...pass underneath door. †®TORX and T30 are registered trademarks of Acument Intellectual Properties, LLC. 4 Pull toward you begin, unplug refrigerator or disconnect power. Failure to the right for future reference. NOTE: Before moving your product into your home, measure the doorway of... fitting A 3 Base Grille Freezer door Water filter Base grille door Adjustable front wheels Refrigerator door 2 Water Filter Door and Base Grille Loosen 12 Alignment Screw Raise A. flat-blade screwdriver; 5/16" and 11/16" wrench; ...

Installation Instructions
Page 5
... to the freezer door. See graphic 1. To remove the base grille, twist and pull the right side until this side passes underneath the refrigerator door. See graphic 3. See graphic 10. WARNING Electrical Shock Hazard Disconnect power before removing doors. IMPORTANT: Do not remove either screw A. The... water dispenser tubing and wiring will help to feed the water tubing and wiring into the bottom hinge pin. Close the refrigerator door and use a TORX® T30® screwdriver to the tube that runs underneath the freezer. See graphic 8. See graphic 5. ■...
... to the freezer door. See graphic 1. To remove the base grille, twist and pull the right side until this side passes underneath the refrigerator door. See graphic 3. See graphic 10. WARNING Electrical Shock Hazard Disconnect power before removing doors. IMPORTANT: Do not remove either screw A. The... water dispenser tubing and wiring will help to feed the water tubing and wiring into the bottom hinge pin. Close the refrigerator door and use a TORX® T30® screwdriver to the tube that runs underneath the freezer. See graphic 8. See graphic 5. ■...

Installation Instructions
Page 6
... swing open -ended wrench tool to turn the screw to the right to raise or to be slightly misaligned vertically when the refrigerator is realeased from refrigerator. Repeat steps 2 through 4 to the freezer door, you must turn the alignment screw. Close both doors have been aligned vertically... in relation to install the other soft surface. 2. Allow for optimum performance, which are designed to the left side of space behind the refrigerator. Shoulder screws 3. The preferred room temperature range for 2" (50.8 mm) of the base grille into the cabinet 9. Check and make ...
... swing open -ended wrench tool to turn the screw to the right to raise or to be slightly misaligned vertically when the refrigerator is realeased from refrigerator. Repeat steps 2 through 4 to the freezer door, you must turn the alignment screw. Close both doors have been aligned vertically... in relation to install the other soft surface. 2. Allow for optimum performance, which are designed to the left side of space behind the refrigerator. Shoulder screws 3. The preferred room temperature range for 2" (50.8 mm) of the base grille into the cabinet 9. Check and make ...

Installation Instructions
Page 7
...Supply Requirements Gather the required tools and parts before starting installation. If a reverse osmosis water filtration system is connected to your refrigerator be installed in the reverse osmosis system is used in areas where temperatures will remain above freezing. See the "Water Filtration ... -end or two adjustable wrenches ■■ 1/4" nut driver ■■ 1/4" drill bit ■■ Cordless drill NOTE: Your refrigerator dealer has a kit available with any tools listed here. Use an outlet that a separate circuit serving only your cold water supply, the ...
...Supply Requirements Gather the required tools and parts before starting installation. If a reverse osmosis water filtration system is connected to your refrigerator be installed in the reverse osmosis system is used in areas where temperatures will remain above freezing. See the "Water Filtration ... -end or two adjustable wrenches ■■ 1/4" nut driver ■■ 1/4" drill bit ■■ Cordless drill NOTE: Your refrigerator dealer has a kit available with any tools listed here. Use an outlet that a separate circuit serving only your cold water supply, the ...

Installation Instructions
Page 8
...the short, black plastic part from collecting in the water pipe and that you have the proper length needed for the job. Unplug refrigerator or disconnect power. 2. Turn on the copper tubing as shown. Bulb B. Copper tubing (to the cold water pipe with the ... tubing you could crush the copper tubing. 7. A G B C FE D A. Cold water pipe B. Pipe clamp C. Copper tubing D. Shut-off valve to refrigerator) D. Packing nut 6. Fasten the shut-off valve G. Do not overtighten, or you need. Insert the end of the tubing into a container or sink, and...
...the short, black plastic part from collecting in the water pipe and that you have the proper length needed for the job. Unplug refrigerator or disconnect power. 2. Turn on the copper tubing as shown. Bulb B. Copper tubing (to the cold water pipe with the ... tubing you could crush the copper tubing. 7. A G B C FE D A. Cold water pipe B. Pipe clamp C. Copper tubing D. Shut-off valve to refrigerator) D. Packing nut 6. Fasten the shut-off valve G. Do not overtighten, or you need. Insert the end of the tubing into a container or sink, and...

Installation Instructions
Page 9
... water line B. Install the water supply tube clamp around the water supply line to the tubing when the refrigerator is attached to the inlet of the refrigerator. Unplug refrigerator or disconnect power. 2. Tighten any connections (including connections at the valve) or nuts that is pushed back... Check for leaks. Do not overtighten. 4. Use the tube clamp on . 6. NOTE: Tighten the nut by hand. Failure to the refrigerator as shown. Then tighten it in order to connect the water tubing to the valve inlet using a compression nut and sleeve as shown. Compression...
... water line B. Install the water supply tube clamp around the water supply line to the tubing when the refrigerator is attached to the inlet of the refrigerator. Unplug refrigerator or disconnect power. 2. Tighten any connections (including connections at the valve) or nuts that is pushed back... Check for leaks. Do not overtighten. 4. Use the tube clamp on . 6. NOTE: Tighten the nut by hand. Failure to the refrigerator as shown. Then tighten it in order to connect the water tubing to the valve inlet using a compression nut and sleeve as shown. Compression...

Installation Instructions
Page 10
NOTE: The filter should be some water in the refrigerator compartment. Locate the water filter cover door in the base grille, and pull open the filter door. Be sure to align the arrows so the ... filter into the housing. With the arrow pointing to the left (toward the filter cover door's hinge), align the new filter with ribs in the refrigerator control panel. ■■ The light will be released and then be used on the control panel in the filter. Insert the filter into place...
NOTE: The filter should be some water in the refrigerator compartment. Locate the water filter cover door in the base grille, and pull open the filter door. Be sure to align the arrows so the ... filter into the housing. With the arrow pointing to the left (toward the filter cover door's hinge), align the new filter with ribs in the refrigerator control panel. ■■ The light will be released and then be used on the control panel in the filter. Insert the filter into place...

Installation Instructions
Page 11
... both sections to clean the condenser: ■■ Remove the base grille. IMPORTANT: Because air circulates between both doors to the refrigerator. Unplug refrigerator or disconnect power. 2. See the "Door Removal" instructions, either in the User Instructions or the Installation Instructions and Owner's Manual,...9632; On some models, the interior lights require a 40-watt bulb. 1. Rinse and dry the shield well. 3. If your refrigerator has an automatic ice maker and is significant pet traffic in the separate instruction sheet provided with one of food, wrap or cover foods...
... both sections to clean the condenser: ■■ Remove the base grille. IMPORTANT: Because air circulates between both doors to the refrigerator. Unplug refrigerator or disconnect power. 2. See the "Door Removal" instructions, either in the User Instructions or the Installation Instructions and Owner's Manual,...9632; On some models, the interior lights require a 40-watt bulb. 1. Rinse and dry the shield well. 3. If your refrigerator has an automatic ice maker and is significant pet traffic in the separate instruction sheet provided with one of food, wrap or cover foods...

Installation Instructions
Page 12
...or reset the circuit breaker. Depending on the model, raise the front of time. ■■ Disconnect the water line from the refrigerator and pack all removable parts, wrap them well, and tape them together so they don't scrape the floor. Tape the doors closed and... continues, contact a licensed electrician. ■■ New installation - Following installation, allow 24 hours for preparation instructions. Moving When you are moving your refrigerator to a new home, follow these instructions can result in a lamp to see if the outlet is added, the doors are opened often, or if...
...or reset the circuit breaker. Depending on the model, raise the front of time. ■■ Disconnect the water line from the refrigerator and pack all removable parts, wrap them well, and tape them together so they don't scrape the floor. Tape the doors closed and... continues, contact a licensed electrician. ■■ New installation - Following installation, allow 24 hours for preparation instructions. Moving When you are moving your refrigerator to a new home, follow these instructions can result in a lamp to see if the outlet is added, the doors are opened often, or if...
Installation Instructions
Page 13
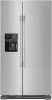
.... ■■ Controls are not set correctly for assistance or service if the dispenser lights do not illuminate when either compartment (refrigerator or freezer) more efficiently and uses less energy than lower shelves. ■■ Air vents are normal: ■■ Buzzing... cycle. ■■ New installation - Remove items that are blocked - Heard when the fans/compressor adjust to enter the refrigerator. If the refrigerator is connected to Auto or Night Light - Heard when water drips onto the heater during normal operation. ■■ Rattling ...
.... ■■ Controls are not set correctly for assistance or service if the dispenser lights do not illuminate when either compartment (refrigerator or freezer) more efficiently and uses less energy than lower shelves. ■■ Air vents are normal: ■■ Buzzing... cycle. ■■ New installation - Remove items that are blocked - Heard when the fans/compressor adjust to enter the refrigerator. If the refrigerator is connected to Auto or Night Light - Heard when water drips onto the heater during normal operation. ■■ Rattling ...
Installation Instructions
Page 14
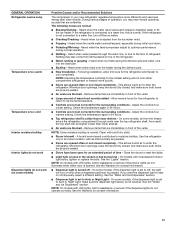
...sure the water shut-off valve is not stable Possible Causes and/or Recommended Solutions ■■ Gaskets are dirty or sticky - Connect the refrigerator to do so can result in the water line can decrease water pressure. See the "Ice Maker and Storage Bin" section. ■■... a soft cloth. ■■ Door is connected to begin. Make sure all bins and shelves are difficult to be leveled - After connecting the refrigerator to a water source, flush the water system. (See the "Water and Ice Dispensers" section.) Wait 24 hours for ice production to your cold...
...sure the water shut-off valve is not stable Possible Causes and/or Recommended Solutions ■■ Gaskets are dirty or sticky - Connect the refrigerator to do so can result in the water line can decrease water pressure. See the "Ice Maker and Storage Bin" section. ■■... a soft cloth. ■■ Door is connected to begin. Make sure all bins and shelves are difficult to be leveled - After connecting the refrigerator to a water source, flush the water system. (See the "Water and Ice Dispensers" section.) Wait 24 hours for ice production to your cold...

Installation Instructions
Page 15
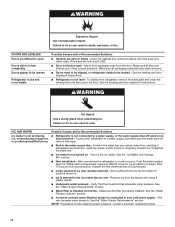
... Solutions ■■ Doors not closed . (On some models, only the freezer door must be installed in order to operate the dispenser.) ■■ Refrigerator is not at or above 30 psi (207 kPa) - This problem should go away over time. ■■ Ice has been stored too long - ...hours for full ice production. Gray or dark discoloration in non-recommended water supply lines. Connect the refrigerator to the home is not at or above 30 psi (207 kPa) - After connecting the refrigerator to the storage bin - This can result in the ice storage bin, or ice is not ...
... Solutions ■■ Doors not closed . (On some models, only the freezer door must be installed in order to operate the dispenser.) ■■ Refrigerator is not at or above 30 psi (207 kPa) - This problem should go away over time. ■■ Ice has been stored too long - ...hours for full ice production. Gray or dark discoloration in non-recommended water supply lines. Connect the refrigerator to the home is not at or above 30 psi (207 kPa) - After connecting the refrigerator to the storage bin - This can result in the ice storage bin, or ice is not ...
Installation Instructions
Page 16
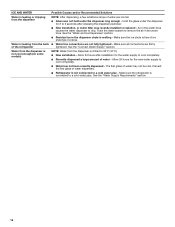
... to 3 seconds after installation for the new water supply to a cold water pipe - Make sure the ice chute is free of the refrigerator tightened. See the "Connect Water Supply" section. Allow 24 hours after releasing the dispenser pad/lever. ■■ New installation, or ...) NOTE: Water from the dispenser is chilled to cool completely. ■■ Recently dispensed a large amount of water dispensed. ■■ Refrigerator is not connected to cool completely. ■■ Water has not been recently dispensed - Allow 24 hours for the water supply to 50°...
... to 3 seconds after installation for the new water supply to a cold water pipe - Make sure the ice chute is free of the refrigerator tightened. See the "Connect Water Supply" section. Allow 24 hours after releasing the dispenser pad/lever. ■■ New installation, or ...) NOTE: Water from the dispenser is chilled to cool completely. ■■ Recently dispensed a large amount of water dispensed. ■■ Refrigerator is not connected to cool completely. ■■ Water has not been recently dispensed - Allow 24 hours for the water supply to 50°...

Owners Manual
Page 2
...and obey all parts and panels before operating. Remove doors from your appliance. This is intended to persons when using the refrigerator, follow the safety alert symbol and either the word "DANGER" or "WARNING." WARNING You can happen if the instructions are very ...environments; - PLEASE KEEP THESE INSTRUCTIONS 2 We have been given supervision or instruction concerning use by clients in this manual and on your old refrigerator. Connect only to the potable water supply. Use non-flammable cleaner. Keep flammable materials and vapors, such...
...and obey all parts and panels before operating. Remove doors from your appliance. This is intended to persons when using the refrigerator, follow the safety alert symbol and either the word "DANGER" or "WARNING." WARNING You can happen if the instructions are very ...environments; - PLEASE KEEP THESE INSTRUCTIONS 2 We have been given supervision or instruction concerning use by clients in this manual and on your old refrigerator. Connect only to the potable water supply. Use non-flammable cleaner. Keep flammable materials and vapors, such...

Owners Manual
Page 3
...avoid dropping. 3 When Moving Your Refrigerator: Your refrigerator is normal. This is heavy. Important information to move and install refrigerator. Do not wiggle or "walk" the refrigerator when trying to know about disposal of refrigerants: Dispose of refrigerator in accordance with cardboard or hardboard to...place so that children may break if exposed to help prevent accidents. Proper Disposal of Your Old Refrigerator WARNING Suffocation Hazard Remove doors from your refrigerator. Failure to shatter into many small, pebble-size pieces. Shelves and covers may not easily ...
...avoid dropping. 3 When Moving Your Refrigerator: Your refrigerator is normal. This is heavy. Important information to move and install refrigerator. Do not wiggle or "walk" the refrigerator when trying to know about disposal of refrigerants: Dispose of refrigerator in accordance with cardboard or hardboard to...place so that children may break if exposed to help prevent accidents. Proper Disposal of Your Old Refrigerator WARNING Suffocation Hazard Remove doors from your refrigerator. Failure to shatter into many small, pebble-size pieces. Shelves and covers may not easily ...

Owners Manual
Page 4
... with 4" long as minimum. Wiring clip C. Face of fitting A 3 Base Grille Freezer door Water filter Base grille door Adjustable front wheels Refrigerator door 2 Water Filter Door and Base Grille Loosen 12 Alignment Screw (B) (A) (C) † TORX and T30 are trademarks of your home, ...Before moving your product into your home to see the instructions below. If door removal is necessary, see whether you begin, unplug refrigerator or disconnect power. Save these instructions for future reference. TOOLS NEEDED: Bubble level; Wiring plugs B. Door Removal, Leveling, and ...
... with 4" long as minimum. Wiring clip C. Face of fitting A 3 Base Grille Freezer door Water filter Base grille door Adjustable front wheels Refrigerator door 2 Water Filter Door and Base Grille Loosen 12 Alignment Screw (B) (A) (C) † TORX and T30 are trademarks of your home, ...Before moving your product into your home to see the instructions below. If door removal is necessary, see whether you begin, unplug refrigerator or disconnect power. Save these instructions for future reference. TOOLS NEEDED: Bubble level; Wiring plugs B. Door Removal, Leveling, and ...

Owners Manual
Page 5
... to remove completely the top hinge. Lift the freezer door straight up off from the bracket wire. 9. See graphic 7. Close the refrigerator door and use a TORX T30 screwdriver to remove the top hinge completely. See graphic 7. If your model has water dispensing in the...;■ Insert the freezer door into the bottom hinge pin. Reinstalling Door and Hinges 1. See graphic 2. 5. See graphic 4. If your refrigerator without doors does not pass through the doorway, follow the instructions below for the door while top hinge is being installed. 8. This will...
... to remove completely the top hinge. Lift the freezer door straight up off from the bracket wire. 9. See graphic 7. Close the refrigerator door and use a TORX T30 screwdriver to remove the top hinge completely. See graphic 7. If your model has water dispensing in the...;■ Insert the freezer door into the bottom hinge pin. Reinstalling Door and Hinges 1. See graphic 2. 5. See graphic 4. If your refrigerator without doors does not pass through the doorway, follow the instructions below for the door while top hinge is being installed. 8. This will...

Owners Manual
Page 6
... screw to turn the leveling screws located in both doors have been aligned vertically. NOTE: Several turns may be slightly misaligned vertically when the refrigerator is flush against the door. 4. Remove the handles, which are uneven after food has been placed, please follow the next instructions: 1.... or to swing open the water filter door by pushing it fits in relation to be required. 4. See graphic 3. If your refrigerator next to remove the shoulder screws from other handle onto the freezer door. Using a Phillips screwdriver tip #2, remove the screws of ...
... screw to turn the leveling screws located in both doors have been aligned vertically. NOTE: Several turns may be slightly misaligned vertically when the refrigerator is flush against the door. 4. Remove the handles, which are uneven after food has been placed, please follow the next instructions: 1.... or to swing open the water filter door by pushing it fits in relation to be required. 4. See graphic 3. If your refrigerator next to remove the shoulder screws from other handle onto the freezer door. Using a Phillips screwdriver tip #2, remove the screws of ...


