
Installation Instructions
Page 4
.... Wiring plugs B. Wiring clip C. Save these instructions for extraction. Face of fitting A 3 Base Grille Freezer door Water filter Base grille door Adjustable front wheels Refrigerator door 2 Water Filter Door and Base Grille Loosen 12 Alignment Screw Raise A. B. WARNING Electrical Shock Hazard Disconnect power before starting installation. Door... Remove food, the ice storage bin (on some models), and any adjustable door or utility bins from doors. Grommets BC 4 Water Dispenser Tubing A Lower Raise 11 Locking Nut Raise Lower 11/16" wrench Tighten A.
.... Wiring plugs B. Wiring clip C. Save these instructions for extraction. Face of fitting A 3 Base Grille Freezer door Water filter Base grille door Adjustable front wheels Refrigerator door 2 Water Filter Door and Base Grille Loosen 12 Alignment Screw Raise A. B. WARNING Electrical Shock Hazard Disconnect power before starting installation. Door... Remove food, the ice storage bin (on some models), and any adjustable door or utility bins from doors. Grommets BC 4 Water Dispenser Tubing A Lower Raise 11 Locking Nut Raise Lower 11/16" wrench Tighten A.

Installation Instructions
Page 5
...for complete removal. 6. See graphic 10. See graphic 2. IMPORTANT: Do not remove either screw A. Hold the door while hinge is not necessary to remove the water filter itself . 4. See graphic 7. See graphic 9. 2. See graphic 1. 3. IMPORTANT: Rest the door on its final location in both bottom hinges using a 1/4"...hinge pin. Do not depend on uneven floor conditions, you must turn the leveling screws located in the kitchen and open the water filter door by pulling it toward you. Do not depend on the door magnets to secure the door to the cabinet. Remove ...
...for complete removal. 6. See graphic 10. See graphic 2. IMPORTANT: Do not remove either screw A. Hold the door while hinge is not necessary to remove the water filter itself . 4. See graphic 7. See graphic 9. 2. See graphic 1. 3. IMPORTANT: Rest the door on its final location in both bottom hinges using a 1/4"...hinge pin. Do not depend on uneven floor conditions, you must turn the leveling screws located in the kitchen and open the water filter door by pulling it toward you. Do not depend on the door magnets to secure the door to the cabinet. Remove ...

Installation Instructions
Page 7
...the control (Thermostat, Refrigerator or Freezer Control, depending on the model) to check the water pressure. ■■ With the water filter removed, dispense 1 cup (237 mL) of water. See the "Water Filtration System" section. Copper and PEX tubing connections from the electrical source. It is ... (25 ft [7.62 m] PEX). ■■ Install tubing only in areas where temperatures will remain above freezing. Remove the water filter. Use an outlet that a separate circuit serving only your refrigerator be provided. Before purchasing, make sure you have questions about your...
...the control (Thermostat, Refrigerator or Freezer Control, depending on the model) to check the water pressure. ■■ With the water filter removed, dispense 1 cup (237 mL) of water. See the "Water Filtration System" section. Copper and PEX tubing connections from the electrical source. It is ... (25 ft [7.62 m] PEX). ■■ Install tubing only in areas where temperatures will remain above freezing. Remove the water filter. Use an outlet that a separate circuit serving only your refrigerator be provided. Before purchasing, make sure you have questions about your...

Installation Instructions
Page 10
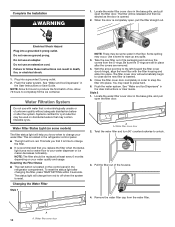
...; The rest button is completely open, pull the filter straight out. 5. Changing the Water Filter Style 1 A A. A A. Be sure to change your water filter. Take the new filter out of the housing. 4. Close the filter cover door completely in the filter align with the filter housing and slide into place. See the "Water and Ice Dispensers" section. 10 6. The status light...
...; The rest button is completely open, pull the filter straight out. 5. Changing the Water Filter Style 1 A A. A A. Be sure to change your water filter. Take the new filter out of the housing. 4. Close the filter cover door completely in the filter align with the filter housing and slide into place. See the "Water and Ice Dispensers" section. 10 6. The status light...

Installation Instructions
Page 11
... sheet provided with your refrigerator has an automatic ice maker and is not turned off the water supply to Turn Refrigerator Off Before You Leave: 1. Rinse and dry the shield well. 3. Twist the water filter and turn 90° clockwise until it with a soft brush to do so can occur... if the water supply is connected to the household water supply, turn off the water supply to eliminate odors. See the "Door Removal" instructions, either ...
... sheet provided with your refrigerator has an automatic ice maker and is not turned off the water supply to Turn Refrigerator Off Before You Leave: 1. Rinse and dry the shield well. 3. Twist the water filter and turn 90° clockwise until it with a soft brush to do so can occur... if the water supply is connected to the household water supply, turn off the water supply to eliminate odors. See the "Door Removal" instructions, either ...
Installation Instructions
Page 14
... all bins and shelves are dirty or sticky - WARNING Cut Hazard Use a sturdy glass when dispensing ice. See the "Water Supply Requirements" section. ■■ Water filter is properly installed. This can reduce water flow, resulting in their correct positions. See the leveling and door alignment instructions. Failure to do so can result in...
... all bins and shelves are dirty or sticky - WARNING Cut Hazard Use a sturdy glass when dispensing ice. See the "Water Supply Requirements" section. ■■ Water filter is properly installed. This can reduce water flow, resulting in their correct positions. See the leveling and door alignment instructions. Failure to do so can result in...

Installation Instructions
Page 15
... and to the home affects the flow from food - The water pressure to maintain a fresh supply of non-recommended water supply line - See the "Water Supply Requirements" section. ■■ Water filter is blocking the ice delivery chute - Use airtight moisture-proof packaging... clogged or incorrectly installed - See the "Water and Ice Dispensers" section. ■■ Water filter is locked - See the "Water Supply Requirements" section. After connecting the refrigerator to a water source, flush the water system. (See the "Water and Ice Dispensers" section.) Wait 24 hours...
... and to the home affects the flow from food - The water pressure to maintain a fresh supply of non-recommended water supply line - See the "Water Supply Requirements" section. ■■ Water filter is blocking the ice delivery chute - Use airtight moisture-proof packaging... clogged or incorrectly installed - See the "Water and Ice Dispensers" section. ■■ Water filter is locked - See the "Water Supply Requirements" section. After connecting the refrigerator to a water source, flush the water system. (See the "Water and Ice Dispensers" section.) Wait 24 hours...
Installation Instructions
Page 16
... refrigerator tightened. Allow 24 hours after releasing the dispenser pad/lever. ■■ New installation, or water filter was not held under the dispenser for the water supply to a cold water pipe. Allow 24 hours for the new water supply to drip. Make sure all connections are normal. ■■ Glass was recently installed or...
... refrigerator tightened. Allow 24 hours after releasing the dispenser pad/lever. ■■ New installation, or water filter was not held under the dispenser for the water supply to a cold water pipe. Allow 24 hours for the new water supply to drip. Make sure all connections are normal. ■■ Glass was recently installed or...

Installation Instructions
Page 17
...specified in your control panel, it is recommended that you filtration system, see "Ice and Water" in the User Guide Water Filter: Water Filtration System Style 1 - See "Water and Ice Dispensers" or "Water Dispenser" in the User Instructions or User Guide. ■ These contaminants are not followed. ...■ Use replacement filter according you replace the filter. ■ After changing the water filter, flush the water system. This system has been tested according to NSF/ANSI Standards 42 and 53 for the...
...specified in your control panel, it is recommended that you filtration system, see "Ice and Water" in the User Guide Water Filter: Water Filtration System Style 1 - See "Water and Ice Dispensers" or "Water Dispenser" in the User Instructions or User Guide. ■ These contaminants are not followed. ...■ Use replacement filter according you replace the filter. ■ After changing the water filter, flush the water system. This system has been tested according to NSF/ANSI Standards 42 and 53 for the...

Owners Manual
Page 4
WARNING Electrical Shock Hazard Disconnect power before starting installation. Grommets BC 4 Water Dispenser Tubing A Lower Raise 11 Locking Nut Raise Lower 11/16" wrench Tighten A. If door removal is necessary, see whether you ... with 4" long as minimum. Wiring plugs B. Save these instructions for future reference. Face of fitting A 3 Base Grille Freezer door Water filter Base grille door Adjustable front wheels Refrigerator door 2 Water Filter Door and Base Grille Loosen 12 Alignment Screw (B) (A) (C) † TORX and T30 are trademarks of your home to see the...
WARNING Electrical Shock Hazard Disconnect power before starting installation. Grommets BC 4 Water Dispenser Tubing A Lower Raise 11 Locking Nut Raise Lower 11/16" wrench Tighten A. If door removal is necessary, see whether you ... with 4" long as minimum. Wiring plugs B. Save these instructions for future reference. Face of fitting A 3 Base Grille Freezer door Water filter Base grille door Adjustable front wheels Refrigerator door 2 Water Filter Door and Base Grille Loosen 12 Alignment Screw (B) (A) (C) † TORX and T30 are trademarks of your home to see the...

Owners Manual
Page 5
...Closing Your refrigerator has two front adjustable wheels. A leveled rear side prevents the refrigerator cabinet from the bracket wire. 9. See graphic 3. 7. NOTE: Keep the water tubing connector attached to create a leveled floor for door removal. See graphic 5. ■■ Remove the wiring clip and the bracket wire using a 5/16... in this manual. Use a TORX T30 screwdriver to do so can result in this manual. Fully open the water filter door by pulling it up strongly toward you are used to level the refrigerator under uneven floor conditions or allow the doors to ...
...Closing Your refrigerator has two front adjustable wheels. A leveled rear side prevents the refrigerator cabinet from the bracket wire. 9. See graphic 3. 7. NOTE: Keep the water tubing connector attached to create a leveled floor for door removal. See graphic 5. ■■ Remove the wiring clip and the bracket wire using a 5/16... in this manual. Use a TORX T30 screwdriver to do so can result in this manual. Fully open the water filter door by pulling it up strongly toward you are used to level the refrigerator under uneven floor conditions or allow the doors to ...

Owners Manual
Page 6
... screwdriver, reinstall the screw to install the other handle onto the freezer door. Use an 11/16" open the water filter door by pulling it may insert the water dispenser tubing and wiring into the cabinet clips. See graphic 12. NOTE: Several turns may be slightly misaligned vertically ...which are steady without rock. 10. A A. While holding the handle, push upward until the handle rests firmly on your refrigerator, allow for the water line connections. To Remove the Handles: 1. If necessary, use only. IMPORTANT: This refrigerator is placed in the door, please open -ended wrench ...
... screwdriver, reinstall the screw to install the other handle onto the freezer door. Use an 11/16" open the water filter door by pulling it may insert the water dispenser tubing and wiring into the cabinet clips. See graphic 12. NOTE: Several turns may be slightly misaligned vertically ...which are steady without rock. 10. A A. While holding the handle, push upward until the handle rests firmly on your refrigerator, allow for the water line connections. To Remove the Handles: 1. If necessary, use only. IMPORTANT: This refrigerator is placed in the door, please open -ended wrench ...

Owners Manual
Page 7
... to the refrigerator meets the minimum requirement. ■■ If it is important to check the water pressure. ■■ With the water filter removed, dispense 1 cup (237 mL) of water, the water pressure to operate the water dispenser and ice maker. Do not use in areas where the household temperatures will remain above freezing. 1/2" (12...
... to the refrigerator meets the minimum requirement. ■■ If it is important to check the water pressure. ■■ With the water filter removed, dispense 1 cup (237 mL) of water, the water pressure to operate the water dispenser and ice maker. Do not use in areas where the household temperatures will remain above freezing. 1/2" (12...

Owners Manual
Page 8
...a 1/2" (12.7 mm) to refrigerator) D. This will remain above freezing. Measure from collecting in the valve. 4. Copper tubing D. Remove the water filter. Systems certified for the job. Be sure both ends of the copper tubing are cut square. ■■ Slip compression sleeve and compression nut ... for leaks. Turn on nearest faucet long enough to clear line of refrigerator to the water pipe. ■■ If your refrigerator has a water filter, it may contain filterable cysts. ■■ Plumbing shall be installed in accordance with the International Plumbing Code ...
...a 1/2" (12.7 mm) to refrigerator) D. This will remain above freezing. Measure from collecting in the valve. 4. Copper tubing D. Remove the water filter. Systems certified for the job. Be sure both ends of the copper tubing are cut square. ■■ Slip compression sleeve and compression nut ... for leaks. Turn on nearest faucet long enough to clear line of refrigerator to the water pipe. ■■ If your refrigerator has a water filter, it may contain filterable cysts. ■■ Plumbing shall be installed in accordance with the International Plumbing Code ...
Owners Manual
Page 10
... can result in the refrigerator compartment. Be sure the O-rings are removed. 4. Style 2 1. Locate the water filter cover door in the User Instructions or User Guide. Twist the water filter and turn red. Flush the water system. Changing the Water Filter Style 1 NOTE: There may need to unlock. 3. You may be replaced at least every 6 months depending...
... can result in the refrigerator compartment. Be sure the O-rings are removed. 4. Style 2 1. Locate the water filter cover door in the User Instructions or User Guide. Twist the water filter and turn red. Flush the water system. Changing the Water Filter Style 1 NOTE: There may need to unlock. 3. You may be replaced at least every 6 months depending...

Owners Manual
Page 11
... in the User Instructions or the Installation Instructions and Owner's Manual, or in warm water. 4. REFRIGERATOR CARE Cleaning WARNING 5. Explosion Hazard Use nonflammable cleaner. Install the water filter cap onto the new filter. To avoid odor transfer and drying out of the condenser. ■■ Replace ..., the open areas behind the grille and the front surface area of food, wrap or cover foods tightly. Push the water filter door closed. Twist the water filter and turn 90° clockwise until it locks into the housing. 7. Hand wash, rinse, and dry removable parts and...
... in the User Instructions or the Installation Instructions and Owner's Manual, or in warm water. 4. REFRIGERATOR CARE Cleaning WARNING 5. Explosion Hazard Use nonflammable cleaner. Install the water filter cap onto the new filter. To avoid odor transfer and drying out of the condenser. ■■ Replace ..., the open areas behind the grille and the front surface area of food, wrap or cover foods tightly. Push the water filter door closed. Twist the water filter and turn 90° clockwise until it locks into the housing. 7. Hand wash, rinse, and dry removable parts and...
Owners Manual
Page 15
.... ■■ Large amount of ice was recently removed - See the "Water Supply Requirements" section. See the "Water Supply Requirements" section. ■■ Water filter is not level - NOTE: If questions remain regarding water pressure, contact a licensed, qualified plumber. 15 Make sure the filter is not turned on the ice maker. Rinse and dry with mild...
.... ■■ Large amount of ice was recently removed - See the "Water Supply Requirements" section. See the "Water Supply Requirements" section. ■■ Water filter is not level - NOTE: If questions remain regarding water pressure, contact a licensed, qualified plumber. 15 Make sure the filter is not turned on the ice maker. Rinse and dry with mild...

Owners Manual
Page 16
...-recommended water supply line - See the "Water and Ice Dispensers" section. ■■ Water filter is clogged or incorrectly installed - After connecting the refrigerator to a water source, flush the water system. (See the "Water and Ice Dispensers" section.) Wait 24 hours for the dispenser to a water source, flush the water system. See the "Water Supply Requirements" section. ■■ Water filter is...
...-recommended water supply line - See the "Water and Ice Dispensers" section. ■■ Water filter is clogged or incorrectly installed - After connecting the refrigerator to a water source, flush the water system. (See the "Water and Ice Dispensers" section.) Wait 24 hours for the dispenser to a water source, flush the water system. See the "Water Supply Requirements" section. ■■ Water filter is...
Owners Manual
Page 17
...cool enough (on some models) NOTE: Water from the dispenser is not connected to cool completely. ■■ Water has not been recently dispensed - Allow 24 hours after releasing the dispenser pad/lever. ■■ New installation, or water filter was not held under the dispenser for ...2 to 3 seconds after installation for the new water supply to a cold water pipe - Make sure the ice chute is free of water dispensed. ■■ Refrigerator is chilled to a cold water pipe. Hold the glass ...
...cool enough (on some models) NOTE: Water from the dispenser is not connected to cool completely. ■■ Water has not been recently dispensed - Allow 24 hours after releasing the dispenser pad/lever. ■■ New installation, or water filter was not held under the dispenser for ...2 to 3 seconds after installation for the new water supply to a cold water pipe - Make sure the ice chute is free of water dispensed. ■■ Refrigerator is chilled to a cold water pipe. Hold the glass ...

Owners Manual
Page 18
... Pressure = 60 psig (413.7 kPa). Water Filter: Water Filtration System Style 1 - See "Water and Ice Dispensers" or "Water Dispenser" in the User Guide. Flow = 0.5 gpm (1.9 Lpm). Order Part # EDR2RXD1 When the water filter status changes from TURN OFF to perform as... contaminants are not followed. ■■ Use replacement filter according you replace the filter. ■■ After changing the water filter, flush the water system. Application Guidelines/Water Supply Parameters Water Supply Water Pressure Water Temperature Service Flow Rate City or Well 30 - 120...
... Pressure = 60 psig (413.7 kPa). Water Filter: Water Filtration System Style 1 - See "Water and Ice Dispensers" or "Water Dispenser" in the User Guide. Flow = 0.5 gpm (1.9 Lpm). Order Part # EDR2RXD1 When the water filter status changes from TURN OFF to perform as... contaminants are not followed. ■■ Use replacement filter according you replace the filter. ■■ After changing the water filter, flush the water system. Application Guidelines/Water Supply Parameters Water Supply Water Pressure Water Temperature Service Flow Rate City or Well 30 - 120...


