
X203W LCD Monitor User's Guide
Page 1
Connect the video cable to perform this monitor LCD Monitor Quick Setup Guide monitor and connect the other enclosed space, be sure to unplug the monitor first. The monitor's power indicator is off the monitor and check the video cable pins. You can use the computer's power cable to the computer. Ensure ..., and keep the cable away from an electrical outlet. · Openings in your location. · Locate your monitor near water. Do not allow anything metallic into the monitor openings. c. (only Dual-Input Model) Connect one end of the 24-pin DVI cable to the back of ...
Connect the video cable to perform this monitor LCD Monitor Quick Setup Guide monitor and connect the other enclosed space, be sure to unplug the monitor first. The monitor's power indicator is off the monitor and check the video cable pins. You can use the computer's power cable to the computer. Ensure ..., and keep the cable away from an electrical outlet. · Openings in your location. · Locate your monitor near water. Do not allow anything metallic into the monitor openings. c. (only Dual-Input Model) Connect one end of the 24-pin DVI cable to the back of ...
X203W LCD Monitor User's Guide
Page 2
... the FCC Rules. Remarque à l'intention des utilisateurs canadiens Cet appareil numérique de la classe B est conforme a la norme NMB-003 du Canada. LCD Monitor Quick Setup Guide English Regulations and safety notices X203W FCC notice This device has been tested and found to comply with the limits for a Class...
... the FCC Rules. Remarque à l'intention des utilisateurs canadiens Cet appareil numérique de la classe B est conforme a la norme NMB-003 du Canada. LCD Monitor Quick Setup Guide English Regulations and safety notices X203W FCC notice This device has been tested and found to comply with the limits for a Class...

X203W LCD Monitor User's Guide
Page 3
... information about /sustainability.htm Disposal of Waste Equipment by Users in Private Household in a manner that protects human health and the environment. LCD Monitor Quick Setup Guide mandates that this product. Instead, it is recycled in the European Union This symbol on the product or on its ... provide Material Content Declarations for sale after July 1, 2006. FOR LAMP SPECIFIC DISPOSAL INFORMATION CHECK WWW.LAMPRECYCLE.ORG. Visit http://global.acer.com/about where you can drop off your waste equipment for this product must not be disposed of your waste equipment at the ...
... information about /sustainability.htm Disposal of Waste Equipment by Users in Private Household in a manner that protects human health and the environment. LCD Monitor Quick Setup Guide mandates that this product. Instead, it is recycled in the European Union This symbol on the product or on its ... provide Material Content Declarations for sale after July 1, 2006. FOR LAMP SPECIFIC DISPOSAL INFORMATION CHECK WWW.LAMPRECYCLE.ORG. Visit http://global.acer.com/about where you can drop off your waste equipment for this product must not be disposed of your waste equipment at the ...

X203W LCD Monitor User's Guide
Page 5
... Weight (N. English SPECIFICATION X203W Environmental Considerations Operating Temp: 50 to 350C Storage Temp.: -200 to 600C Operating Humidity: 10% to change without notice. Regulatory Compliance LCD Monitor Quick Setup Guide
... Weight (N. English SPECIFICATION X203W Environmental Considerations Operating Temp: 50 to 350C Storage Temp.: -200 to 600C Operating Humidity: 10% to change without notice. Regulatory Compliance LCD Monitor Quick Setup Guide
X203W LCD Monitor User's Guide
Page 6
TABLE OF CONTENTS Special notes on LCD monitors 1 Information for your safety and comfort 2 Unpacking 5 Attaching/Removing the base 6 Screen position adjustment 6 Connecting the power cord 7 Safety precaution 7 Cleaning your monitor 7 Power saving 8 DDC 8 Connector Pin Assignment 9 Standard Timing Table 11 Installation 12 User controls 13 How to adjust a setting 14 Troubleshooting 19
TABLE OF CONTENTS Special notes on LCD monitors 1 Information for your safety and comfort 2 Unpacking 5 Attaching/Removing the base 6 Screen position adjustment 6 Connecting the power cord 7 Safety precaution 7 Cleaning your monitor 7 Power saving 8 DDC 8 Connector Pin Assignment 9 Standard Timing Table 11 Installation 12 User controls 13 How to adjust a setting 14 Troubleshooting 19
X203W LCD Monitor User's Guide
Page 7
In this case, the screen is displayed for hours. EN-1 Turn off the Power Switch for hours. X203W SPECIAL NOTES ON LCD MONITORS The following symptoms are normal with LCD monitor and do not indicate a problem. It may include blemishes of 0.01% or less such as a missing pixel or a pixel lit all of... the time. · Due to the nature of the previous screen may flicker during initial use . · The LCD screen has effective pixels...
In this case, the screen is displayed for hours. EN-1 Turn off the Power Switch for hours. X203W SPECIAL NOTES ON LCD MONITORS The following symptoms are normal with LCD monitor and do not indicate a problem. It may include blemishes of 0.01% or less such as a missing pixel or a pixel lit all of... the time. · Due to the nature of the previous screen may flicker during initial use . · The LCD screen has effective pixels...

X203W LCD Monitor User's Guide
Page 8
If the product falls, it could result in installation unless proper ventilation is easily accessible and located as close to the equipment operator as disconnecting device Observe the follwing guidelines when connecting and disconnecting power to unplug the power cord from lithium battery pack. If the system has multiple sources of power, disconnect power from the system by unplugging all warnings and instructions marked on the product. When you need to disconnect power to the equipment, be sure to the power supply unit: Install the power supply unit before removing the ...
If the product falls, it could result in installation unless proper ventilation is easily accessible and located as close to the equipment operator as disconnecting device Observe the follwing guidelines when connecting and disconnecting power to unplug the power cord from lithium battery pack. If the system has multiple sources of power, disconnect power from the system by unplugging all warnings and instructions marked on the product. When you need to disconnect power to the equipment, be sure to the power supply unit: Install the power supply unit before removing the ...
X203W LCD Monitor User's Guide
Page 9
... discomfort and/or pain related to computer use Computer users may lead to carpal tunnel syndrome, tendonitis, tenosynovitis or other risks. LCD Pixel Statement The LCD unit is damaged, cut or frayed • liquid was spilled into the product • the product was exposed to rain ... the viewing angle of a computer. X203W Product servicing Do not attempt to service this product from staying too long in front of the monitor, using a footrest, or raising your company's health and safety department. This has no effect on your comfort zone by a qualified technician...
... discomfort and/or pain related to computer use Computer users may lead to carpal tunnel syndrome, tendonitis, tenosynovitis or other risks. LCD Pixel Statement The LCD unit is damaged, cut or frayed • liquid was spilled into the product • the product was exposed to rain ... the viewing angle of a computer. X203W Product servicing Do not attempt to service this product from staying too long in front of the monitor, using a footrest, or raising your company's health and safety department. This has no effect on your comfort zone by a qualified technician...
X203W LCD Monitor User's Guide
Page 10
...small typefaces and low-contrast displays could stress your display to an awkward viewing angle. • Avoid looking away from the monitor and focusing on how to reduce eyestrain. Developing good work habits to make your documents, place the display at bright light ...and reflections by: • placing your display in recycling, please visit the following work habits Develop the following websites: Worldwide: http://global.acer.com/about/sustainability.htm EN-4 Warning! We do some stretching exercises. • Breathe fresh air as often as possible. • Exercise...
...small typefaces and low-contrast displays could stress your display to an awkward viewing angle. • Avoid looking away from the monitor and focusing on how to reduce eyestrain. Developing good work habits to make your documents, place the display at bright light ...and reflections by: • placing your display in recycling, please visit the following work habits Develop the following websites: Worldwide: http://global.acer.com/about/sustainability.htm EN-4 Warning! We do some stretching exercises. • Breathe fresh air as often as possible. • Exercise...

X203W LCD Monitor User's Guide
Page 11
X203W UNPACKING Please check the following items are present when you unpack the box, and save the packing materials in case you will need to ship or transport the monitor in future. · LCD Monitor · D-Sub Cable · DVI Cable · AC Power Cord (Only Dual-Input Model) · User Manual · Quick Start Guide EN-5
X203W UNPACKING Please check the following items are present when you unpack the box, and save the packing materials in case you will need to ship or transport the monitor in future. · LCD Monitor · D-Sub Cable · DVI Cable · AC Power Cord (Only Dual-Input Model) · User Manual · Quick Start Guide EN-5

X203W LCD Monitor User's Guide
Page 12
... Attaching / Removing the Base Install: Align the release button on the bottom of the monitor with the corresponding slots on the bottom of the monitor as shown in the figure below . The monitor can adjust the tilt of the monitor by arrow below . EN-6 Remove: Depress the release button as indicated by using both...
... Attaching / Removing the Base Install: Align the release button on the bottom of the monitor with the corresponding slots on the bottom of the monitor as shown in the figure below . The monitor can adjust the tilt of the monitor by arrow below . EN-6 Remove: Depress the release button as indicated by using both...
X203W LCD Monitor User's Guide
Page 13
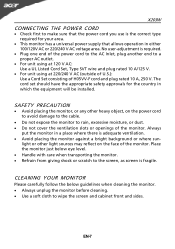
...CONNECTING THE POWER CORD · Check first to make sure that the power cord you use is adequate ventilation. · Avoid placing the monitor against a bright background or where sun- The cord set should have the appropriate safety approvals for your area. · This...AC voltage area. EN-7 No user-adjustment is fragile. light or other heavy object, on the face of the monitor. Place the monitor just below guidelines when cleaning the monitor. · Always unplug the monitor before cleaning. · Use a soft cloth to rain, excessive moisture, or dust. · Do not cover...
...CONNECTING THE POWER CORD · Check first to make sure that the power cord you use is adequate ventilation. · Avoid placing the monitor against a bright background or where sun- The cord set should have the appropriate safety approvals for your area. · This...AC voltage area. EN-7 No user-adjustment is fragile. light or other heavy object, on the face of the monitor. Place the monitor just below guidelines when cleaning the monitor. · Always unplug the monitor before cleaning. · Use a soft cloth to rain, excessive moisture, or dust. · Do not cover...
X203W LCD Monitor User's Guide
Page 14
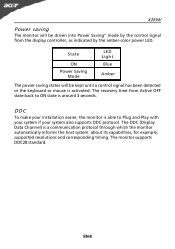
...Data Channel) is able to ON state is activated. EN-8 DDC To make your system also supports DDC protocol. X203W Power saving The monitor will be driven into Power Saving" mode by the control signal from Active OFF state back to Plug and Play with your system if... your installation easier, the monitor is a communication protocol through which the monitor automatically informs the host system about its capabilities, for example, supported resolutions and corresponding timing. State ON Power Saving Mode...
...Data Channel) is able to ON state is activated. EN-8 DDC To make your system also supports DDC protocol. X203W Power saving The monitor will be driven into Power Saving" mode by the control signal from Active OFF state back to Plug and Play with your system if... your installation easier, the monitor is a communication protocol through which the monitor automatically informs the host system about its capabilities, for example, supported resolutions and corresponding timing. State ON Power Saving Mode...

X203W LCD Monitor User's Guide
Page 15
DESCRIPTION Red Green Blue Monitor Ground DDC-return R-Ground G-Ground B-Ground PIN NO. 9. 10. 11. 12. 13. 14. 15. DESCRIPTION +5V Logic Ground Monitor Ground DDC-Serial Data H-Sync V-Sync DDC-Serial Clock EN-9 CONNECTOR PIN ASSIGNMENT X203W 15-Pin Color Display Signal Cable PIN NO. 1. 2. 3. 4. 5. 6. 7. 8.
DESCRIPTION Red Green Blue Monitor Ground DDC-return R-Ground G-Ground B-Ground PIN NO. 9. 10. 11. 12. 13. 14. 15. DESCRIPTION +5V Logic Ground Monitor Ground DDC-Serial Data H-Sync V-Sync DDC-Serial Clock EN-9 CONNECTOR PIN ASSIGNMENT X203W 15-Pin Color Display Signal Cable PIN NO. 1. 2. 3. 4. 5. 6. 7. 8.

X203W LCD Monitor User's Guide
Page 16
TMDS Data2- 13. Hot Plug Detect 5. DDC Data 19. NC 10. TMDS Data 1/3 Shield 23. NC 24. TMDS Data0- 6. TMDS Data 0/5 Shield 8. NC 9. TMDS Clock Shield 11. TMDS Clock+ 12. GND(return for +5V hsync.vsync) 4. NC 16. DDC TMDS Clock- NC 2. NC 17. TMDS Data1- 21. TMDS Data2+ 14. +5V Power 3. EN-10 DDC Clock 18. X203W 24-Pin Color Display Signal Cable PIN Meaning PIN Meaning 1. TMDS Data1+ 22. TMDS Data 2/4 Shield 15. TMDS Data0+ 7. NC 20.
TMDS Data2- 13. Hot Plug Detect 5. DDC Data 19. NC 10. TMDS Data 1/3 Shield 23. NC 24. TMDS Data0- 6. TMDS Data 0/5 Shield 8. NC 9. TMDS Clock Shield 11. TMDS Clock+ 12. GND(return for +5V hsync.vsync) 4. NC 16. DDC TMDS Clock- NC 2. NC 17. TMDS Data1- 21. TMDS Data2+ 14. +5V Power 3. EN-10 DDC Clock 18. X203W 24-Pin Color Display Signal Cable PIN Meaning PIN Meaning 1. TMDS Data1+ 22. TMDS Data 2/4 Shield 15. TMDS Data0+ 7. NC 20.

X203W LCD Monitor User's Guide
Page 17
... the new display information must have 1 KHz difference for horizontal frequency or 1 Hz for different modes, the monitor has default setting modes that are different from the default modes. Mode 1 VGA 2 VGA 3 MAC 4 VESA 5 VESA 6 7 VESA 8 VESA 9 VESA 10 VESA 11 MAC 12 ...
... the new display information must have 1 KHz difference for horizontal frequency or 1 Hz for different modes, the monitor has default setting modes that are different from the default modes. Mode 1 VGA 2 VGA 3 MAC 4 VESA 5 VESA 6 7 VESA 8 VESA 9 VESA 10 VESA 11 MAC 12 ...

X203W LCD Monitor User's Guide
Page 18
... troubleshooting section to the computer's port. 2. Make sure both the monitor and computer are powered-OFF. Connect the VGA video cable to a properly grounded AC outlet. 3. Power-ON Monitor and Computer Power-ON the monitor first, then power-ON the computer. Connect power cord Connect the ...power cord to the monitor, then to the computer. 1-2 Digital Cable (Only Dual-Input Model) a. X203W ...
... troubleshooting section to the computer's port. 2. Make sure both the monitor and computer are powered-OFF. Connect the VGA video cable to a properly grounded AC outlet. 3. Power-ON Monitor and Computer Power-ON the monitor first, then power-ON the computer. Connect power cord Connect the ...power cord to the monitor, then to the computer. 1-2 Digital Cable (Only Dual-Input Model) a. X203W ...

X203W LCD Monitor User's Guide
Page 19
USER CONTROLS X203W 3 4 6 5 5 12 Front Panel Controls 1.Power Switch: To turn ON or OFF the power. 2.Power LED: Lights up to indicate the power is turned ON. 3.Empowering / Exit: 1) When OSD menu is in active status, this button will act as EXIT-KEY(EXIT OSD menu). 2) When OSD menu is in off status, press this button to select scenario mode. 4.Auto Adjust button / Exit: 1)When OSD menu is in active status, this button will act as EXIT-KEY (EXIT OSD menu). 2)When OSD menu is in off status, press this button for 2 seconds to activate the AutoAdjustment function.The Auto Adjustment ...
USER CONTROLS X203W 3 4 6 5 5 12 Front Panel Controls 1.Power Switch: To turn ON or OFF the power. 2.Power LED: Lights up to indicate the power is turned ON. 3.Empowering / Exit: 1) When OSD menu is in active status, this button will act as EXIT-KEY(EXIT OSD menu). 2) When OSD menu is in off status, press this button to select scenario mode. 4.Auto Adjust button / Exit: 1)When OSD menu is in active status, this button will act as EXIT-KEY (EXIT OSD menu). 2)When OSD menu is in off status, press this button for 2 seconds to activate the AutoAdjustment function.The Auto Adjustment ...

X203W LCD Monitor User's Guide
Page 20
... Model II. Press < or > to select the desired function. 3. USER If selected to "Acer eColor Management " item, will appear the Standard OSD I. Only Dual Input Model EN-14 Acer eColor Management If selected to "USER" item, will appear the Acer eColor" OSD B. Press the MENU-button to adjust any other function, repeat steps...
... Model II. Press < or > to select the desired function. 3. USER If selected to "Acer eColor Management " item, will appear the Standard OSD I. Only Dual Input Model EN-14 Acer eColor Management If selected to "USER" item, will appear the Acer eColor" OSD B. Press the MENU-button to adjust any other function, repeat steps...

X203W LCD Monitor User's Guide
Page 21
Acer eColor Management X203W Main Menu icon Sub Menu icon N/A N/A N/A N/A N/A Sub Menu item Description User mode User defined. The most comfortable way to suit any situation ...
Acer eColor Management X203W Main Menu icon Sub Menu icon N/A N/A N/A N/A N/A Sub Menu item Description User mode User defined. The most comfortable way to suit any situation ...
