
Quick Start Guide
Page 2
... Directive 2006/95/EC, and RoHS Directive 2002/95/EC and Directive 2009/125/EC with regard to establishing a framework for the setting of ecodesign requirements for the recycling of waste equipment by the manufacturer could void the user authority, which the receiver is connected. &#...des utilisateurs canadiens Cet appareil numerique de la classe B est conforme a la norme NMB-003 du Canada. CE declaration of conformity Hereby, Acer Inc., declares that this product. For more of the FCC Rules. Caution Changes or modifications not expressly approved by user in private household in...
... Directive 2006/95/EC, and RoHS Directive 2002/95/EC and Directive 2009/125/EC with regard to establishing a framework for the setting of ecodesign requirements for the recycling of waste equipment by the manufacturer could void the user authority, which the receiver is connected. &#...des utilisateurs canadiens Cet appareil numerique de la classe B est conforme a la norme NMB-003 du Canada. CE declaration of conformity Hereby, Acer Inc., declares that this product. For more of the FCC Rules. Caution Changes or modifications not expressly approved by user in private household in...
User Manual
Page 4
... points or short-out parts that could be blocked or covered. Warnings • Do not use it clearly and comfortably and without distortion. • After setting the volume level, do not be operated from the type of time listening to music at high volume. • Avoid turning up the volume to...
... points or short-out parts that could be blocked or covered. Warnings • Do not use it clearly and comfortably and without distortion. • After setting the volume level, do not be operated from the type of time listening to music at high volume. • Avoid turning up the volume to...

User Manual
Page 5
... a power outlet that the total rating of the power strip's input rating. • This product's power cord is equipped with the supplied power supply cord set , make sure that is damaged, cut or frayed • liquid was exposed to rain or water • the product has been dropped or the case... into a non-grounded power outlet. Warning! If power strips are used, the load should not exceed 80% of all servicing to replace the power cord set . Product servicing Do not attempt to service this product yourself, as opening or removing covers may expose you need for details.
... a power outlet that the total rating of the power strip's input rating. • This product's power cord is equipped with the supplied power supply cord set , make sure that is damaged, cut or frayed • liquid was exposed to rain or water • the product has been dropped or the case... into a non-grounded power outlet. Warning! If power strips are used, the load should not exceed 80% of all servicing to replace the power cord set . Product servicing Do not attempt to service this product yourself, as opening or removing covers may expose you need for details.

User Manual
Page 9
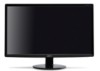
... SA Via Cantonale, Centro Galleria 2 6928 Manno Switzerland Hereby declare that: Product: Trade Name: Model Number: SKU Number: LCD Monitor Acer S221HQL/S211HL S221HQL/S211HL 0~9, a ~ z, or A ~ Z) Is compliant with the essential requirements and other relevant provisions of the following EC directives, and that all the... (PBB's) 0.1% Mercury 0.1% Polybrominated Diphenyl Ethers (PBDE's) 0.1% Hexavalent Chromium 0.1% Cadmium 0.01% Directive 2009/125/EC with regard to establishing a framework for the setting of ecodesign requirements for energy-related product. Mar. 12, 2010 Date
... SA Via Cantonale, Centro Galleria 2 6928 Manno Switzerland Hereby declare that: Product: Trade Name: Model Number: SKU Number: LCD Monitor Acer S221HQL/S211HL S221HQL/S211HL 0~9, a ~ z, or A ~ Z) Is compliant with the essential requirements and other relevant provisions of the following EC directives, and that all the... (PBB's) 0.1% Mercury 0.1% Polybrominated Diphenyl Ethers (PBDE's) 0.1% Hexavalent Chromium 0.1% Cadmium 0.01% Directive 2009/125/EC with regard to establishing a framework for the setting of ecodesign requirements for energy-related product. Mar. 12, 2010 Date

User Manual
Page 11
... color display signal cable 4 24-pin color display signal cable 5 19-pin color display signal cable 5 Standard timing table 6 Installation 7 Users controls 8 Front panel controls 8 Acer eColor Management 9 Operation instructions 9 Features and benefits 9 Adjusting the OSD settings 10 Adjusting the picture quality 10 Adjusting the OSD position 11 Adjusting the...
... color display signal cable 4 24-pin color display signal cable 5 19-pin color display signal cable 5 Standard timing table 6 Installation 7 Users controls 8 Front panel controls 8 Acer eColor Management 9 Operation instructions 9 Features and benefits 9 Adjusting the OSD settings 10 Adjusting the picture quality 10 Adjusting the OSD position 11 Adjusting the...

User Manual
Page 15
... other end into an AC outlet. • For units using 120 V AC: Use a UL-listed cord set, type SVT wire and plug rated 10 A/125 V. • For units using 220/240 V AC: Use a cord set should have the appropriate safety approvals for your hands to 15 degrees up or 5 degrees down. No... viewing position, you use is the correct type required for the country in either 100/120 V AC or 220/240 V AC voltage area. The cord set consisting of the monitor.
... other end into an AC outlet. • For units using 120 V AC: Use a UL-listed cord set, type SVT wire and plug rated 10 A/125 V. • For units using 220/240 V AC: Use a cord set should have the appropriate safety approvals for your hands to 15 degrees up or 5 degrees down. No... viewing position, you use is the correct type required for the country in either 100/120 V AC or 220/240 V AC voltage area. The cord set consisting of the monitor.

User Manual
Page 20
...button/Exit If the OSD is active, press Auto to view the OSD. Once the OSD is active, press the Minus or Plus buttons to "Acer eColor Management" on page 11 for more details. OSD functions Press to exit the OSD. Blue indicates power on /off. Press again to open the... Management OSD and access the scenario modes. Empowering Key Press the Empowering Key to enter a selection in the OSD. Please refer to "Adjusting the OSD settings" on page 10 for more details. Amber indicates standby/power saving mode. / Minus / Plus If the OSD is inactive, press Auto and the monitor will...
...button/Exit If the OSD is active, press Auto to view the OSD. Once the OSD is active, press the Minus or Plus buttons to "Acer eColor Management" on page 11 for more details. OSD functions Press to exit the OSD. Blue indicates power on /off. Press again to open the... Management OSD and access the scenario modes. Empowering Key Press the Empowering Key to enter a selection in the OSD. Please refer to "Adjusting the OSD settings" on page 10 for more details. Amber indicates standby/power saving mode. / Minus / Plus If the OSD is inactive, press Auto and the monitor will...

User Manual
Page 21
... 1 Press the Empowering Key to open the Acer eColor Management OSD and access the scenario modes. 2 Press " " or " " to select the mode. 3 Press the Auto-adjust button to suit any situation. Standard mode Default settings. Pictures and photographs appear in vibrant colors with... sharp detail. Graphic mode Movie mode Enhances colors and emphasizes fine detail. Settings can be fine-tuned to confirm the mode and exit Acer eColor Management. Features and benefits ...
... 1 Press the Empowering Key to open the Acer eColor Management OSD and access the scenario modes. 2 Press " " or " " to select the mode. 3 Press the Auto-adjust button to suit any situation. Standard mode Default settings. Pictures and photographs appear in vibrant colors with... sharp detail. Graphic mode Movie mode Enhances colors and emphasizes fine detail. Settings can be fine-tuned to confirm the mode and exit Acer eColor Management. Features and benefits ...

User Manual
Page 22
...keys to adjust the sliding scales. 4 The Picture menu can use the OSD to adjust the picture quality, OSD position and general settings. English 10 Adjusting the OSD settings Note: The following page: Adjusting the picture quality 1 Press the Menu key to bring up the OSD. 2 Using the / keys..., select Picture from the OSD. For advanced settings, please refer to following content is for adjusting the settings of your LCD Monitor. Actual product specifications may vary. The OSD can be used for general reference only.
...keys to adjust the sliding scales. 4 The Picture menu can use the OSD to adjust the picture quality, OSD position and general settings. English 10 Adjusting the OSD settings Note: The following page: Adjusting the picture quality 1 Press the Menu key to bring up the OSD. 2 Using the / keys..., select Picture from the OSD. For advanced settings, please refer to following content is for adjusting the settings of your LCD Monitor. Actual product specifications may vary. The OSD can be used for general reference only.

User Manual
Page 24
Setting from the OSD. Then navigate to the 3 The Setting menu can be used to adjust. 12 Adjusting the setting English 1 Press the Menu key to bring up the OSD. 2 Using the / keys, select feature you wish to adjust the screen Menu Language and other important settings.
Setting from the OSD. Then navigate to the 3 The Setting menu can be used to adjust. 12 Adjusting the setting English 1 Press the Menu key to bring up the OSD. 2 Using the / keys, select feature you wish to adjust the screen Menu Language and other important settings.

User Manual
Page 26
... or switching off -center, too large or too small on the screen. Image is in power saving/ standby mode. Check the display setting on and in compliance which may be causing the input signal frequency mismatch. VGA mode Problem No picture visible LED status Blue Off Remedy ...to maximum or reset to see if you can self-diagnose the problem. Wait for servicing, please check the troubleshooting list below to their default settings. Using the OSD, adjust focus, clock, Hposition and V-position with nonstandard signals. Check the power switch. Check if the video signal cable ...
... or switching off -center, too large or too small on the screen. Image is in power saving/ standby mode. Check the display setting on and in compliance which may be causing the input signal frequency mismatch. VGA mode Problem No picture visible LED status Blue Off Remedy ...to maximum or reset to see if you can self-diagnose the problem. Wait for servicing, please check the troubleshooting list below to their default settings. Using the OSD, adjust focus, clock, Hposition and V-position with nonstandard signals. Check the power switch. Check if the video signal cable ...

User Manual
Page 27
Check that the computer system is properly connected to their default settings. Amber Check if the AC power cord is switched on and in power saving/ standby mode. Check the power switch. Check if the video signal cable is properly connected at the back of monitor. 15 English DVI/HDMI mode Problem No picture visible LED status Blue Off Remedy Using the OSD, adjust brightness and contrast to maximum or reset to the monitor.
Check that the computer system is properly connected to their default settings. Amber Check if the AC power cord is switched on and in power saving/ standby mode. Check the power switch. Check if the video signal cable is properly connected at the back of monitor. 15 English DVI/HDMI mode Problem No picture visible LED status Blue Off Remedy Using the OSD, adjust brightness and contrast to maximum or reset to the monitor.


