RAID Installation Guide
Page 1
AMD BIOS RAID Installation Guide 2 1.1 Introduction to RAIDXpert from the Internet 17 2.9 Running RAIDXpert without Network Connection 17 1 AMD RAID Installation Guide 1. AMD Windows RAID Installation Guide ...
AMD BIOS RAID Installation Guide 2 1.1 Introduction to RAIDXpert from the Internet 17 2.9 Running RAIDXpert without Network Connection 17 1 AMD RAID Installation Guide 1. AMD Windows RAID Installation Guide ...
RAID Installation Guide
Page 2
...called data striping that copies and maintains an identical image of drives. Although RAID 0 function can be mirrored using the onboard FastBuild BIOS utility under BIOS environment. RAID 10 (Stripe Mirroring) RAID 0 drives can improve the access performance, it does not provide any HDDs of the... on another set of data from one drive to the next drive automatically. 1. Data is added together. AMD BIOS RAID Installation Guide AMD BIOS RAID Installation Guide is a method combining two or more physical drives working independently. Hot-Plug any fault tolerance. WARNING...
...called data striping that copies and maintains an identical image of drives. Although RAID 0 function can be mirrored using the onboard FastBuild BIOS utility under BIOS environment. RAID 10 (Stripe Mirroring) RAID 0 drives can improve the access performance, it does not provide any HDDs of the... on another set of data from one drive to the next drive automatically. 1. Data is added together. AMD BIOS RAID Installation Guide AMD BIOS RAID Installation Guide is a method combining two or more physical drives working independently. Hot-Plug any fault tolerance. WARNING...
RAID Installation Guide
Page 4
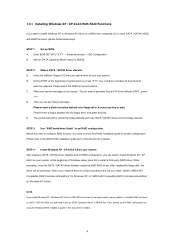
... need to check this document for boot devices selection appears. B. Set the "SATA Operation Mode" option to set RAID configuration. Insert the ASRock Support CD into the floppy diskette. Please select CD-ROM as the boot device. STEP 4: Install Windows XP / XP 64-bit OS ...[RAID] first. Then, please set RAID configuration, you can start Please insert a floppy diskette into the floppy drive, and press any key. Enter BIOS SETUP UTILITY → Advanced screen →IDE Configuration. Then you will be presented. A. C. The system will start to install a third-party RAID...
... need to check this document for boot devices selection appears. B. Set the "SATA Operation Mode" option to set RAID configuration. Insert the ASRock Support CD into the floppy diskette. Please select CD-ROM as the boot device. STEP 4: Install Windows XP / XP 64-bit OS ...[RAID] first. Then, please set RAID configuration, you can start Please insert a floppy diskette into the floppy drive, and press any key. Enter BIOS SETUP UTILITY → Advanced screen →IDE Configuration. Then you will be presented. A. C. The system will start to install a third-party RAID...
RAID Installation Guide
Page 5
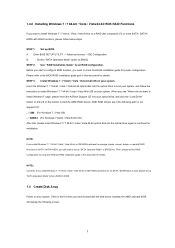
... optical drive again to continue the installation. AMD RAID drivers are no SATA / SATAII device used, please set up BIOS. NOTE2. page, please insert the ASRock Support CD into the optical drive to boot your system, and follow below steps. Currently, if you install Windows 7...(create, convert, delete, or rebuild) RAID functions on SATA / SATAII HDDs, you still need to check this document for proper configuration. Enter BIOS SETUP UTILITY → Advanced screen →IDE Configuration. 1.3.2 Installing Windows 7 / 7 64-bit / Vista / Vista 64-bit With RAID ...
... optical drive again to continue the installation. AMD RAID drivers are no SATA / SATAII device used, please set up BIOS. NOTE2. page, please insert the ASRock Support CD into the optical drive to boot your system, and follow below steps. Currently, if you install Windows 7...(create, convert, delete, or rebuild) RAID functions on SATA / SATAII HDDs, you still need to check this document for proper configuration. Enter BIOS SETUP UTILITY → Advanced screen →IDE Configuration. 1.3.2 Installing Windows 7 / 7 64-bit / Vista / Vista 64-bit With RAID ...

User Manual
Page 4
... 60 4.1 Install Operating System 60 4.2 Support CD Information 60 4.2.1 Running Support CD 60 4.2.2 Drivers Menu 60 4.2.3 Utilities Menu 60 4.2.4 Contact Information 60 4 BIOS SETUP UTILITY 36 3.1 Introduction 36 3.1.1 BIOS Menu Bar 36 3.1.2 Navigation Keys 37 3.2 Main Screen 37 3.3 OC Tweaker Screen 39 3.4 Advanced Screen 46 3.4.1 CPU Configuration 47 3.4.2 Chipset Configuration 48 3.4.3 ACPI...
... 60 4.1 Install Operating System 60 4.2 Support CD Information 60 4.2.1 Running Support CD 60 4.2.2 Drivers Menu 60 4.2.3 Utilities Menu 60 4.2.4 Contact Information 60 4 BIOS SETUP UTILITY 36 3.1 Introduction 36 3.1.1 BIOS Menu Bar 36 3.1.2 Navigation Keys 37 3.2 Main Screen 37 3.3 OC Tweaker Screen 39 3.4 Advanced Screen 46 3.4.1 CPU Configuration 47 3.4.2 Chipset Configuration 48 3.4.3 ACPI...
User Manual
Page 5
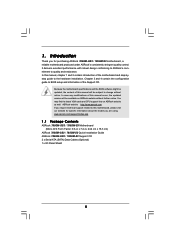
... as well. Because the motherboard specifications and the BIOS software might be updated, the content of the Support CD. www.asrock.com/support/index.asp 1.1 Package Contents ASRock 785GM-GS3 / 785GM-S3 Motherboard (Micro ATX Form Factor: 9.6-in x 7.2-in, 24.4 cm x 18.3 cm) ASRock 785GM-GS3 / 785GM-S3 Quick Installation Guide ASRock 785GM-GS3 / 785GM-S3 Support CD 2 x Serial ATA (SATA) Data Cables (Optional...
... as well. Because the motherboard specifications and the BIOS software might be updated, the content of the Support CD. www.asrock.com/support/index.asp 1.1 Package Contents ASRock 785GM-GS3 / 785GM-S3 Motherboard (Micro ATX Form Factor: 9.6-in x 7.2-in, 24.4 cm x 18.3 cm) ASRock 785GM-GS3 / 785GM-S3 Quick Installation Guide ASRock 785GM-GS3 / 785GM-S3 Support CD 2 x Serial ATA (SATA) Data Cables (Optional...

User Manual
Page 7
... 2.3.1 Support - Creative Sound Blaster X-Fi MB Trial) - Boot Failure Guard (B.F.G.) - Intelligent Energy Saver (see CAUTION 11) - ASRock AIWI (see CAUTION 8) - Front panel audio connector - 2 x USB 2.0 headers (support 4 USB 2.0 ports) - 8Mb AMI BIOS - ASRock OC Tuner (see CAUTION 14) - CPU Temperature Sensing - Chassis Temperature Sensing - Drivers, Utilities, AntiVirus Software (Trial Version), AMD OverDriveTM Utility...
... 2.3.1 Support - Creative Sound Blaster X-Fi MB Trial) - Boot Failure Guard (B.F.G.) - Intelligent Energy Saver (see CAUTION 11) - ASRock AIWI (see CAUTION 8) - Front panel audio connector - 2 x USB 2.0 headers (support 4 USB 2.0 ports) - 8Mb AMI BIOS - ASRock OC Tuner (see CAUTION 14) - CPU Temperature Sensing - Chassis Temperature Sensing - Drivers, Utilities, AntiVirus Software (Trial Version), AMD OverDriveTM Utility...

User Manual
Page 8
...® OS with 64-bit CPU, there is a certain risk involved with overclocking, including adjusting the setting in the BIOS, applying Untied Overclocking Technology, or using the thirdparty overclocking tools. The maximum shared memory size is defined by hardware monitor function... to change. It is subject to get the best system performance under Windows® 7 / VistaTM / XP. ASRock website: http://www.asrock.com 8 ASRock website http://www.asrock.com 4. Please read "Untied Overclocking Technology" on page 35 for proper installation. 3. Before you implement Dual Channel ...
...® OS with 64-bit CPU, there is a certain risk involved with overclocking, including adjusting the setting in the BIOS, applying Untied Overclocking Technology, or using the thirdparty overclocking tools. The maximum shared memory size is defined by hardware monitor function... to change. It is subject to get the best system performance under Windows® 7 / VistaTM / XP. ASRock website: http://www.asrock.com 8 ASRock website http://www.asrock.com 4. Please read "Untied Overclocking Technology" on page 35 for proper installation. 3. Before you implement Dual Channel ...

User Manual
Page 9
...noted that the USB flash drive or hard drive must use Intelligent Energy Saver function, please enable Cool 'n' Quiet option in the BIOS setup in advance. ASRock AIWI utility introduces a new way of output phases to improve efficiency when the CPU cores are idle. All you the most up...the world's first utility to get the same OC settings as yours! Your friends then can start experiencing the exciting motion controlled games. ASRock AIWI is a BIOS flash utility embedded in a few clicks without preparing an additional floppy diskette or other words, it is able to do -date supported ...
...noted that the USB flash drive or hard drive must use Intelligent Energy Saver function, please enable Cool 'n' Quiet option in the BIOS setup in advance. ASRock AIWI utility introduces a new way of output phases to improve efficiency when the CPU cores are idle. All you the most up...the world's first utility to get the same OC settings as yours! Your friends then can start experiencing the exciting motion controlled games. ASRock AIWI is a BIOS flash utility embedded in a few clicks without preparing an additional floppy diskette or other words, it is able to do -date supported ...

User Manual
Page 11
... 14 Fourth SATAII Connector (SATAII_4 (PORT 3)) 27 PCI Express 2.0 x1 Slot (PCIE1; Blue) 28 Power Fan Connector (PWR_FAN1) 11 1.3 Motherboard Layout (785GM-GS3 / 785GM-S3) PS2 Mouse PS2 Keyboard 12 34 18.3cm (7.2-in) 56 1 PS2_USB_PW1 ATX12V1 CPU_FAN1 7 AT X P W R 1 AM3 FSB2.6GHz COM1 DDR3 1800... SPEAKER1 1 1 CLRCMOS1 Support 6-Core CPU PWR_FAN1 Top: LINE IN Center: FRONT Bottom: MIC IN ErP/EuP Ready LAN Super I/O 8Mb BIOS AUDIO CODEC HD_AUDIO1 1 1 LPT1 Design in Taipei AMD 785G Chipset PCIE1 IDE1 RoHS PCIE2 FLOPPY1 PCI1 PCI2 CHA_FAN1 USB6_7 1 USB4_5 1 AMD ...
... 14 Fourth SATAII Connector (SATAII_4 (PORT 3)) 27 PCI Express 2.0 x1 Slot (PCIE1; Blue) 28 Power Fan Connector (PWR_FAN1) 11 1.3 Motherboard Layout (785GM-GS3 / 785GM-S3) PS2 Mouse PS2 Keyboard 12 34 18.3cm (7.2-in) 56 1 PS2_USB_PW1 ATX12V1 CPU_FAN1 7 AT X P W R 1 AM3 FSB2.6GHz COM1 DDR3 1800... SPEAKER1 1 1 CLRCMOS1 Support 6-Core CPU PWR_FAN1 Top: LINE IN Center: FRONT Bottom: MIC IN ErP/EuP Ready LAN Super I/O 8Mb BIOS AUDIO CODEC HD_AUDIO1 1 1 LPT1 Design in Taipei AMD 785G Chipset PCIE1 IDE1 RoHS PCIE2 FLOPPY1 PCI1 PCI2 CHA_FAN1 USB6_7 1 USB4_5 1 AMD ...

User Manual
Page 18
...Express VGA cards on each monitor. VGA port 3. Click the "Identify" button to display a large number on PCIE2 slot. D. Please refer to enter BIOS setup. And connect other monitor cables to this monitor". 18 Boot your primary monitor, and then select "Primary". A. B. C. Please make sure that...XP 64-bit OS: Right click the desktop, choose "Properties", and select the "Settings" tab so that you do not adjust the BIOS setup, the default value of multi monitor feature. Right-click the display icon in the Display Properties dialog that you can adjust the parameters ...
...Express VGA cards on each monitor. VGA port 3. Click the "Identify" button to display a large number on PCIE2 slot. D. Please refer to enter BIOS setup. And connect other monitor cables to this monitor". 18 Boot your primary monitor, and then select "Primary". A. B. C. Please make sure that...XP 64-bit OS: Right click the desktop, choose "Properties", and select the "Settings" tab so that you do not adjust the BIOS setup, the default value of multi monitor feature. Right-click the display icon in the Display Properties dialog that you can adjust the parameters ...
User Manual
Page 20
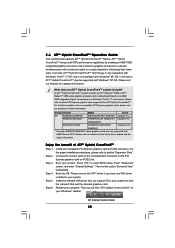
... for blisteringly-fast frame rates. Please remove the ATITM driver if you will find "ATI Catalyst Control Center" on PCIE2 slot. Please refer to enter BIOS setup. Step 3. 2.6 ATITM Hybrid CrossFireXTM Operation Guide This motherboard supports ATITM Hybrid CrossFireXTM feature. ATITM Hybrid CrossFireXTM brings multi-GPU performance capabilities by enabling an...
... for blisteringly-fast frame rates. Please remove the ATITM driver if you will find "ATI Catalyst Control Center" on PCIE2 slot. Please refer to enter BIOS setup. Step 3. 2.6 ATITM Hybrid CrossFireXTM Operation Guide This motherboard supports ATITM Hybrid CrossFireXTM feature. ATITM Hybrid CrossFireXTM brings multi-GPU performance capabilities by enabling an...

User Manual
Page 22
..., pin3 to enable (see p.11, No. 9) 1_2 2_3 Default Clear CMOS Note: CLRCMOS1 allows you to clear the CMOS when you just finish updating the BIOS, you must boot up events. The illustration shows a 3-pin jumper whose pin1 and pin2 are setup. Note: To select +5VSB, it down before you do.../2 or USB wake up the system first, and then shut it requires 2 Amp and higher standby current provided by power supply. If you update the BIOS. The data in CMOS. 2.7 Jumpers Setup The illustration shows how jumpers are "Short" when jumper cap is "Short". When the jumper cap is placed on...
..., pin3 to enable (see p.11, No. 9) 1_2 2_3 Default Clear CMOS Note: CLRCMOS1 allows you to clear the CMOS when you just finish updating the BIOS, you must boot up events. The illustration shows a 3-pin jumper whose pin1 and pin2 are setup. Note: To select +5VSB, it down before you do.../2 or USB wake up the system first, and then shut it requires 2 Amp and higher standby current provided by power supply. If you update the BIOS. The data in CMOS. 2.7 Jumpers Setup The illustration shows how jumpers are "Short" when jumper cap is "Short". When the jumper cap is placed on...

User Manual
Page 31
...on the support CD driver page. STEP 1: Set up to bottom side to [RAID]. Enter BIOS SETUP UTILITY Advanced screen Storage Configuration. A. ROM as the boot device. E. Please follow below steps. B. Insert the ASRock Support CD into the floppy diskette. 31 STEP 2: Make a SATA / SATAII Driver Diskette. Please...XP / XP 64-bit on a RAID disk composed of 2 or more SATA / SATAII HDDs with RAID functions, please follow the order from up BIOS. The system will see the message on a RAID disk composed of system boot-up, press key, and then a window for boot devices selection ...
...on the support CD driver page. STEP 1: Set up to bottom side to [RAID]. Enter BIOS SETUP UTILITY Advanced screen Storage Configuration. A. ROM as the boot device. E. Please follow below steps. B. Insert the ASRock Support CD into the floppy diskette. 31 STEP 2: Make a SATA / SATAII Driver Diskette. Please...XP / XP 64-bit on a RAID disk composed of 2 or more SATA / SATAII HDDs with RAID functions, please follow the order from up BIOS. The system will see the message on a RAID disk composed of system boot-up, press key, and then a window for boot devices selection ...
User Manual
Page 32
... driver. STEP 1: Set up "SATA Operation Mode" to [RAID] first. STEP 2: Use "RAID Installation Guide" to set RAID configuration. Then, please set up BIOS. B. After step 1, 2, 3, you want to manage (create, convert, delete, or rebuild) RAID functions on a RAID disk composed of the document in the...® XP / XP 64-bit OS on your system. STEP 3: Use "RAID Installation Guide" to set RAID configuration. Please refer to the BIOS RAID installation guide part of 2 or more SATA / SATAII HDDs with RAID functions, please follow below steps. After reading the floppy disk, the ...
... driver. STEP 1: Set up "SATA Operation Mode" to [RAID] first. STEP 2: Use "RAID Installation Guide" to set RAID configuration. Then, please set up BIOS. B. After step 1, 2, 3, you want to manage (create, convert, delete, or rebuild) RAID functions on a RAID disk composed of the document in the...® XP / XP 64-bit OS on your system. STEP 3: Use "RAID Installation Guide" to set RAID configuration. Please refer to the BIOS RAID installation guide part of 2 or more SATA / SATAII HDDs with RAID functions, please follow below steps. After reading the floppy disk, the ...

User Manual
Page 33
... press F6 to [AHCI]. NOTE1. Then, please set the RAID configuration by using the Windows RAID installation guide in the following path in BIOS first. Select the driver to install according to the OS you still need to set up "SATA Operation Mode" to install Windows® XP...RAID Controller-x86 platform" for Windows® XP, or "AMD AHCI Compatible RAID Controller-x64 platform" for Windows® XP 64-bit.) 33 B. Enter BIOS SETUP UTILITY Advanced screen Storage Configuration. A. If you install Windows® 7 / 7 64-bit / VistaTM / VistaTM 64-bit on IDE HDDs and want...
... press F6 to [AHCI]. NOTE1. Then, please set the RAID configuration by using the Windows RAID installation guide in the following path in BIOS first. Select the driver to install according to the OS you still need to set up "SATA Operation Mode" to install Windows® XP...RAID Controller-x86 platform" for Windows® XP, or "AMD AHCI Compatible RAID Controller-x64 platform" for Windows® XP 64-bit.) 33 B. Enter BIOS SETUP UTILITY Advanced screen Storage Configuration. A. If you install Windows® 7 / 7 64-bit / VistaTM / VistaTM 64-bit on IDE HDDs and want...

User Manual
Page 34
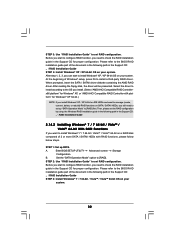
...Windows® 7 / 7 64-bit / VistaTM / VistaTM 64-bit OS on your SATA / SATAII HDDs without RAID functions, please follow below steps. Enter BIOS SETUP UTILITY Advanced screen Storage Configuration. Set the "SATA Operation Mode" option to [AHCI]. B. STEP 2: Install Windows® XP / XP 64-bit OS... 64-bit Without RAID Functions If you want to [IDE]. Using SATA / SATAII HDDs with NCQ and Hot Plug functions (AHCI mode) STEP 1: Set Up BIOS. STEP 2: Install Windows® 7 / 7 64-bit / VistaTM / VistaTM 64-bit OS on your system. B. A. Set the "SATA Operation Mode" option...
...Windows® 7 / 7 64-bit / VistaTM / VistaTM 64-bit OS on your SATA / SATAII HDDs without RAID functions, please follow below steps. Enter BIOS SETUP UTILITY Advanced screen Storage Configuration. Set the "SATA Operation Mode" option to [AHCI]. B. STEP 2: Install Windows® XP / XP 64-bit OS... 64-bit Without RAID Functions If you want to [IDE]. Using SATA / SATAII HDDs with NCQ and Hot Plug functions (AHCI mode) STEP 1: Set Up BIOS. STEP 2: Install Windows® 7 / 7 64-bit / VistaTM / VistaTM 64-bit OS on your system. B. A. Set the "SATA Operation Mode" option...

User Manual
Page 35
... [Manual]. Please refer to the warning on page 8 for the possible overclocking risk before you enable Untied Overclocking function, please enter "Overclock Mode" option of BIOS setup to set the selection from [Auto] to fixed PCI / PCIE buses.
... [Manual]. Please refer to the warning on page 8 for the possible overclocking risk before you enable Untied Overclocking function, please enter "Overclock Mode" option of BIOS setup to set the selection from [Auto] to fixed PCI / PCIE buses.

User Manual
Page 36
...POST, restart the system by pressing + + , or by turning the system off and then back on the motherboard stores the BIOS SETUP UTILITY. Because the BIOS software is constantly being updated, the following selections: Main To set up the system time/date information OC Tweaker To set up ...overclocking features Advanced To set up the advanced BIOS features H/W Monitor To display current hardware status Boot To set up the computer. 3. The SPI Memory on . If you see on the ...
...POST, restart the system by pressing + + , or by turning the system off and then back on the motherboard stores the BIOS SETUP UTILITY. Because the BIOS software is constantly being updated, the following selections: Main To set up the system time/date information OC Tweaker To set up ...overclocking features Advanced To set up the advanced BIOS features H/W Monitor To display current hardware status Boot To set up the computer. 3. The SPI Memory on . If you see on the ...

User Manual
Page 37
... jump to the Exit Screen or exit the current screen 3.2 Main Screen When you enter the BIOS SETUP UTILITY, the Main screen will appear and display the system overview. 785GM-GS3 BIOS SETUP UTILITY Main OC Tweaker Advanced H/W Monitor Boot Security Exit System Overview System Time System Date ...[17:00:09] [Tue 11/02/2010] BIOS Version : 785GM-GS3 P1.0 Processor Type : AMD Athlon(tm) II X2 235e Processor (64bit) Processor Speed : 2700MHz Microcode Update : 100F62/10000C7 L1 Cache Size...
... jump to the Exit Screen or exit the current screen 3.2 Main Screen When you enter the BIOS SETUP UTILITY, the Main screen will appear and display the system overview. 785GM-GS3 BIOS SETUP UTILITY Main OC Tweaker Advanced H/W Monitor Boot Security Exit System Overview System Time System Date ...[17:00:09] [Tue 11/02/2010] BIOS Version : 785GM-GS3 P1.0 Processor Type : AMD Athlon(tm) II X2 235e Processor (64bit) Processor Speed : 2700MHz Microcode Update : 100F62/10000C7 L1 Cache Size...


