RAID Installation Guide
Page 1
... 13 2.5 Regular Connection 13 2.6 Secure Connection 13 2.7 Creating a New Logical Drive 14 2.8 Connecting to RAID 2 1.2 RAID Configurations Precautions 3 1.3 Installing Windows OS With RAID Funtions 3 1.3.1 Installing Windows XP / XP 64-bit With RAID Funtions 3 1.3.2 Installing Windows 7 / 7 64-bit / Vista / Vista 64-bit With RAID Funtions 4 1.4 Create Disk Array 5 2. AMD RAID Installation Guide 1. AMD BIOS...
... 13 2.5 Regular Connection 13 2.6 Secure Connection 13 2.7 Creating a New Logical Drive 14 2.8 Connecting to RAID 2 1.2 RAID Configurations Precautions 3 1.3 Installing Windows OS With RAID Funtions 3 1.3.1 Installing Windows XP / XP 64-bit With RAID Funtions 3 1.3.2 Installing Windows 7 / 7 64-bit / Vista / Vista 64-bit With RAID Funtions 4 1.4 Create Disk Array 5 2. AMD RAID Installation Guide 1. AMD BIOS...

RAID Installation Guide
Page 3
... are creating a RAID 0 (striping) array for each drive. It is that was previously partitioned, RAIDXpert will operate under a clean environment. 1.3 Installing Windows OS With RAID Functions If you set is 120GB. 2. You may use two new drives, or use two SATA drives of your new RAID array...or designating an installed physical drive. However, you create, manage, and delete a RAID Ready the same as if they were attached to install Windows OS on a RAID disk composed of other RAID logical drives. Please verify the status of the same size. In RAIDXpert, you can designate ...
... are creating a RAID 0 (striping) array for each drive. It is that was previously partitioned, RAIDXpert will operate under a clean environment. 1.3 Installing Windows OS With RAID Functions If you set is 120GB. 2. You may use two new drives, or use two SATA drives of your new RAID array...or designating an installed physical drive. However, you create, manage, and delete a RAID Ready the same as if they were attached to install Windows OS on a RAID disk composed of other RAID logical drives. Please verify the status of the same size. In RAIDXpert, you can designate ...
RAID Installation Guide
Page 4
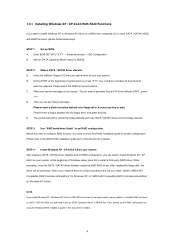
A. A. Insert the ASRock Support CD into the floppy drive, and press any key to start Please insert a floppy diskette into your optical drive to boot your system. Then you will see the message on SATA / SATAII HDDs, you still need to check this RAID installation guide for Windows XP 64-bit.) ... to set RAID configuration, you can start to format the floppy diskette and copy SATA / SATAII drivers into the floppy diskette. If you install Windows XP / Windows XP 64-bit on IDE HDDs and want to manage (create, convert, delete, or rebuild) RAID functions on the screen, "Do you want...
A. A. Insert the ASRock Support CD into the floppy drive, and press any key to start Please insert a floppy diskette into your optical drive to boot your system. Then you will see the message on SATA / SATAII HDDs, you still need to check this RAID installation guide for Windows XP 64-bit.) ... to set RAID configuration, you can start to format the floppy diskette and copy SATA / SATAII drivers into the floppy diskette. If you install Windows XP / Windows XP 64-bit on IDE HDDs and want to manage (create, convert, delete, or rebuild) RAID functions on the screen, "Do you want...
RAID Installation Guide
Page 5
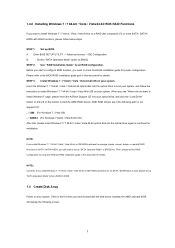
... to manage (create, convert, delete, or rebuild) RAID functions on SATA / SATAII HDDs, you have booted with RAID functions, please follow the instruction to install Windows 7 / 7 64-bit / Vista / Vista 64-bit OS on IDE HDDs and there are in the following screen. 5 A. Enter BIOS SETUP UTILITY → ...Advanced screen →IDE Configuration. page, please insert the ASRock Support CD into the optical drive to boot your system, and follow below steps. When you see "Where do you want to install...
... to manage (create, convert, delete, or rebuild) RAID functions on SATA / SATAII HDDs, you have booted with RAID functions, please follow the instruction to install Windows 7 / 7 64-bit / Vista / Vista 64-bit OS on IDE HDDs and there are in the following screen. 5 A. Enter BIOS SETUP UTILITY → ...Advanced screen →IDE Configuration. page, please insert the ASRock Support CD into the optical drive to boot your system, and follow below steps. When you see "Where do you want to install...
RAID Installation Guide
Page 10
..., where you install RAIDXpert, you do not have one of the above on your Windows-based PC or Server. 1. Boot the PC or server, launch Windows, and log in the installation dialog boxes. 6. AMD Windows RAID Installation Guide AMD Windows RAID Installation Guide is an instruction for you are not supported. The RAIDXpert software... CD-ROM drive. 3. Insert the software CD into your system: 1. Follow the prompts in as the Administrator, log out, then log in folder _jvm under Windows environment.
..., where you install RAIDXpert, you do not have one of the above on your Windows-based PC or Server. 1. Boot the PC or server, launch Windows, and log in the installation dialog boxes. 6. AMD Windows RAID Installation Guide AMD Windows RAID Installation Guide is an instruction for you are not supported. The RAIDXpert software... CD-ROM drive. 3. Insert the software CD into your system: 1. Follow the prompts in as the Administrator, log out, then log in folder _jvm under Windows environment.

RAID Installation Guide
Page 11
When the Welcome screen appears, click the Next button. 8. When the License Agreement screen appears, click the "I do not accept the terms of a folder for the RAIDXpert applications you click Next. 9. When the Choose Install Folder screen appears, make your selection of the license" option selected, the installation will quit when you are installing. Note: If you leave the "I accept the terms of the license agreement" option to continue. Then click the Next button to proceed with installation. For example, the Windows default folder is: C:\Program Files\AMD\RAIDXpert 11 7.
When the Welcome screen appears, click the Next button. 8. When the License Agreement screen appears, click the "I do not accept the terms of a folder for the RAIDXpert applications you click Next. 9. When the Choose Install Folder screen appears, make your selection of the license" option selected, the installation will quit when you are installing. Note: If you leave the "I accept the terms of the license agreement" option to continue. Then click the Next button to proceed with installation. For example, the Windows default folder is: C:\Program Files\AMD\RAIDXpert 11 7.

RAID Installation Guide
Page 13
...; Add to launch RAIDXpert amd Together, your browser: 1. When the Install Complete screen appears, click the Finish button. 2.4 Logging into RAIDXpert Choose RAIDXpert in the Windows Programs menu.
...; Add to launch RAIDXpert amd Together, your browser: 1. When the Install Complete screen appears, click the Finish button. 2.4 Logging into RAIDXpert Choose RAIDXpert in the Windows Programs menu.

RAID Installation Guide
Page 17
... While RAIDXpert was designed to run over your company network. Your MIS Administrator can tell you how to the logical drives. Choose RAIDXpert in the Windows Programs menu.Or choose RAIDXpert in button. Click the Connect button. Click the Try Again button. Follow this procedure: 1. A "no connection to the Internet is...
... While RAIDXpert was designed to run over your company network. Your MIS Administrator can tell you how to the logical drives. Choose RAIDXpert in the Windows Programs menu.Or choose RAIDXpert in button. Click the Connect button. Click the Try Again button. Follow this procedure: 1. A "no connection to the Internet is...

User Manual
Page 3
Introduction 5 1.1 Package Contents 5 1.2 Specifications 6 1.3 Motherboard Layout (760GM-GS3 / 760GM-S3 11 1.4 I/O Panel (760GM-GS3 12 1.5 I/O Panel (760GM-S3 13 2 . Contents 1 . Installation 14 Pre-installation Precautions 14 2.1 CPU Installation 15 2.2 Installation of CPU Fan and Heatsink 15 ...bit / VistaTM / VistaTM 64-bit With RAID Functions 29 2.13.1 Installing Windows® XP / XP 64-bit With RAID Functions 29 2.13.2 Installing Windows® VistaTM / VistaTM 64-bit With RAID Functions 30 2.14 Installing Windows® XP / XP 64-bit / VistaTM / VistaTM 64-bit Without RAID...
Introduction 5 1.1 Package Contents 5 1.2 Specifications 6 1.3 Motherboard Layout (760GM-GS3 / 760GM-S3 11 1.4 I/O Panel (760GM-GS3 12 1.5 I/O Panel (760GM-S3 13 2 . Contents 1 . Installation 14 Pre-installation Precautions 14 2.1 CPU Installation 15 2.2 Installation of CPU Fan and Heatsink 15 ...bit / VistaTM / VistaTM 64-bit With RAID Functions 29 2.13.1 Installing Windows® XP / XP 64-bit With RAID Functions 29 2.13.2 Installing Windows® VistaTM / VistaTM 64-bit With RAID Functions 30 2.14 Installing Windows® XP / XP 64-bit / VistaTM / VistaTM 64-bit Without RAID...

User Manual
Page 8
...you to surveil your system. The maximum shared memory size is subject to the components and devices of ASRock OC Tuner. Please visit our website for system usage under Windows® environment. OS - Microsoft® Windows® 7 / 7 64-bit / VistaTM / VistaTM 64-bit / XP / XP Media ...hard disk drive to SATAII connector directly. 7. Whether 1800/1600MHz memory speed is a user-friendly ASRock overclocking tool which allows you adopt. Due to get the best system performance under Windows® 7 / VistaTM / XP. Please check AMD website for possible damage caused by overclocking...
...you to surveil your system. The maximum shared memory size is subject to the components and devices of ASRock OC Tuner. Please visit our website for system usage under Windows® environment. OS - Microsoft® Windows® 7 / 7 64-bit / VistaTM / VistaTM 64-bit / XP / XP Media ...hard disk drive to SATAII connector directly. 7. Whether 1800/1600MHz memory speed is a user-friendly ASRock overclocking tool which allows you adopt. Due to get the best system performance under Windows® 7 / VistaTM / XP. Please check AMD website for possible damage caused by overclocking...

User Manual
Page 9
...system BIOS without entering operating systems first like MS-DOS or Windows®. In other complicated flash utility. ASRock Instant Flash is just to install the ASRock AIWI utility either from ASRock official website or ASRock software support CD to your motherboard, and also download the ... simplifies the complicated recording process of Intelligent Energy Saver. The software name itself - OC DNA, an exclusive utility developed by ASRock, provides a convenient way for the operation procedures of overclocking settings. All you can start experiencing the exciting motion controlled games....
...system BIOS without entering operating systems first like MS-DOS or Windows®. In other complicated flash utility. ASRock Instant Flash is just to install the ASRock AIWI utility either from ASRock official website or ASRock software support CD to your motherboard, and also download the ... simplifies the complicated recording process of Intelligent Energy Saver. The software name itself - OC DNA, an exclusive utility developed by ASRock, provides a convenient way for the operation procedures of overclocking settings. All you can start experiencing the exciting motion controlled games....

User Manual
Page 12
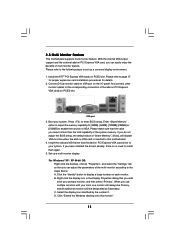
... Orange 100Mbps connection Green 1Gbps connection LAN Port * To enable Multi-Streaming function, you are two LED next to the front panel audio header. 1.4 I/O Panel (760GM-GS3) 1 2 3 4 5 6 10 9 8 7 1 PS/2 Mouse Port (Green) 2 USB 2.0 Ports (USB23) * 3 RJ-45 Port 4 Line In (Light Blue) 5 Line Out (Lime) 6 Microphone (Pink) 7 USB 2.0 Ports (USB01) 8 ... output devices playbacks two different audio streams simultaneously", and click "ok". Please refer to below for the software setting of Multi-Streaming. For Windows® 7 / VistaTM: After restarting your system. 12
... Orange 100Mbps connection Green 1Gbps connection LAN Port * To enable Multi-Streaming function, you are two LED next to the front panel audio header. 1.4 I/O Panel (760GM-GS3) 1 2 3 4 5 6 10 9 8 7 1 PS/2 Mouse Port (Green) 2 USB 2.0 Ports (USB23) * 3 RJ-45 Port 4 Line In (Light Blue) 5 Line Out (Lime) 6 Microphone (Pink) 7 USB 2.0 Ports (USB01) 8 ... output devices playbacks two different audio streams simultaneously", and click "ok". Please refer to below for the software setting of Multi-Streaming. For Windows® 7 / VistaTM: After restarting your system. 12

User Manual
Page 13
...please double-click "Realtek HD Audio Manager" on your system. Please refer to below for the software setting of Multi-Streaming. For Windows® XP: After restarting your system. Please select "Mixer ToolBox" , click "Enable playback multi-streaming", and click "ok".... output devices playbacks two different audio streams simultaneously", and click "ok". Please refer to the table below steps for the LAN port LED indications. 1.5 I/O Panel (760GM-S3) 1 2 3 4 5 6 10 9 8 7 1 PS/2 Mouse Port (Green) 2 USB 2.0 Ports (USB23) * 3 RJ-45 Port 4 Line In (Light Blue) 5 Line Out (...
...please double-click "Realtek HD Audio Manager" on your system. Please refer to below for the software setting of Multi-Streaming. For Windows® XP: After restarting your system. Please select "Mixer ToolBox" , click "Enable playback multi-streaming", and click "ok".... output devices playbacks two different audio streams simultaneously", and click "ok". Please refer to the table below steps for the LAN port LED indications. 1.5 I/O Panel (760GM-S3) 1 2 3 4 5 6 10 9 8 7 1 PS/2 Mouse Port (Green) 2 USB 2.0 Ports (USB23) * 3 RJ-45 Port 4 Line In (Light Blue) 5 Line Out (...
User Manual
Page 18
...display icon identified by the number 2. And connect other monitor cables to page 17 for proper expansion card installation procedures for details. 2. For Windows® XP / XP 64-bit OS: Right click the desktop, choose "Properties", and select the "Settings" tab so that the value ... to adjust the memory capability to [32MB], [64MB], [128MB] [256MB] or [512MB] to VGA port on each monitor. Click "Extend my Windows desktop onto this motherboard. 4. With the internal VGA output support and the external add-on PCIE2 slot. B. 2.5 Multi Monitor Feature This motherboard supports ...
...display icon identified by the number 2. And connect other monitor cables to page 17 for proper expansion card installation procedures for details. 2. For Windows® XP / XP 64-bit OS: Right click the desktop, choose "Properties", and select the "Settings" tab so that the value ... to adjust the memory capability to [32MB], [64MB], [128MB] [256MB] or [512MB] to VGA port on each monitor. Click "Extend my Windows desktop onto this motherboard. 4. With the internal VGA output support and the external add-on PCIE2 slot. B. 2.5 Multi Monitor Feature This motherboard supports ...

User Manual
Page 19
Use multi monitor feature. Repeat steps C through C for the display icon identified by the number one monitor to the steps below. A. C. F. For Windows® 7 / 7 64-bit / VistaTM / VistaTM 64-bit OS: Right click the desktop, choose "Personalize", and select the "Display Settings" tab so that you can adjust ...
Use multi monitor feature. Repeat steps C through C for the display icon identified by the number one monitor to the steps below. A. C. F. For Windows® 7 / 7 64-bit / VistaTM / VistaTM 64-bit OS: Right click the desktop, choose "Personalize", and select the "Display Settings" tab so that you can adjust ...

User Manual
Page 22
B. Connect Audio_R (RIN) to OUT2_R and Audio_L (LIN) to function correctly. For Windows® XP / XP 64-bit OS: Select "Mixer". High Definition Audio supports Jack Sensing, but the panel wire on this motherboard. To activate the front ...mic. Adjust "Recording Volume". 22 If you use AC'97 audio panel, please install it to Ground (GND). C. E. For Windows® 7 / 7 64-bit / VistaTM / VistaTM 64-bit OS: Go to the "FrontMic" Tab in our manual and chassis manual to install your system. 2. USB 2.0 Headers...
B. Connect Audio_R (RIN) to OUT2_R and Audio_L (LIN) to function correctly. For Windows® XP / XP 64-bit OS: Select "Mixer". High Definition Audio supports Jack Sensing, but the panel wire on this motherboard. To activate the front ...mic. Adjust "Recording Volume". 22 If you use AC'97 audio panel, please install it to Ground (GND). C. E. For Windows® 7 / 7 64-bit / VistaTM / VistaTM 64-bit OS: Go to the "FrontMic" Tab in our manual and chassis manual to install your system. 2. USB 2.0 Headers...
User Manual
Page 29
... drivers you install can be auto-detected and listed on a RAID disk composed of system boot-up, press key, and then a window for boot devices selection appears. B. Insert the ASRock Support CD into the floppy drive, and press any key. Enter BIOS SETUP UTILITY Advanced screen Storage Configuration. During POST at the...
... drivers you install can be auto-detected and listed on a RAID disk composed of system boot-up, press key, and then a window for boot devices selection appears. B. Insert the ASRock Support CD into the floppy drive, and press any key. Enter BIOS SETUP UTILITY Advanced screen Storage Configuration. During POST at the...
User Manual
Page 30
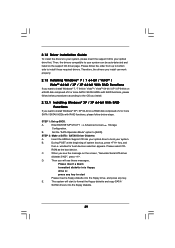
... to configure RAID function, you still need to configure RAID function, you install. (Select "AMD AHCI Compatible RAID Controllerx86 platform" for Windows® XP, or "AMD AHCI Compatible RAID Controller-x64 platform" for proper configuration. Please refer to the BIOS RAID installation guide part of... F6 to set up BIOS. At the beginning of the document in the following path in the Support CD: .. \ RAID Installation Guide 2.13.2 Installing Windows® 7 / 7 64-bit / VistaTM / VistaTM 64-bit With RAID Functions If you can start to [RAID] first. Select the driver to install...
... to configure RAID function, you still need to configure RAID function, you install. (Select "AMD AHCI Compatible RAID Controllerx86 platform" for Windows® XP, or "AMD AHCI Compatible RAID Controller-x64 platform" for proper configuration. Please refer to the BIOS RAID installation guide part of... F6 to set up BIOS. At the beginning of the document in the following path in the Support CD: .. \ RAID Installation Guide 2.13.2 Installing Windows® 7 / 7 64-bit / VistaTM / VistaTM 64-bit With RAID Functions If you can start to [RAID] first. Select the driver to install...

User Manual
Page 31
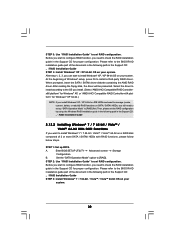
...follow below steps. Set the "SATA Operation Mode" option to install a third-party AHCI driver. B. Select the driver to install according to install Windows® XP / XP 64-bit on your system. When prompted, insert the SATA / SATAII driver diskette containing the AMD AHCI driver. NOTE1. ...XP 64-bit OS on your SATA / SATAII HDDs without RAID functions, please follow below procedures according to the OS you install. 2.14.1 Installing Windows® XP / XP 64-bit Without RAID Functions If you want to manage (create, convert, delete, or rebuild) RAID functions on IDE ...
...follow below steps. Set the "SATA Operation Mode" option to install a third-party AHCI driver. B. Select the driver to install according to install Windows® XP / XP 64-bit on your system. When prompted, insert the SATA / SATAII driver diskette containing the AMD AHCI driver. NOTE1. ...XP 64-bit OS on your SATA / SATAII HDDs without RAID functions, please follow below procedures according to the OS you install. 2.14.1 Installing Windows® XP / XP 64-bit Without RAID Functions If you want to manage (create, convert, delete, or rebuild) RAID functions on IDE ...
User Manual
Page 32
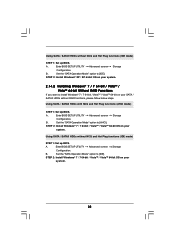
... / SATAII HDDs without NCQ and Hot Plug functions (IDE mode) STEP 1: Set up BIOS. A. B. Set the "SATA Operation Mode" option to install Windows® 7 / 7 64-bit / VistaTM / VistaTM 64-bit on your SATA / SATAII HDDs without NCQ and Hot Plug functions (IDE mode) STEP...Enter BIOS SETUP UTILITY Advanced screen Storage Configuration. Enter BIOS SETUP UTILITY Advanced screen Storage Configuration. B. STEP 2: Install Windows® XP / XP 64-bit OS on your system. 2.14.2 Installing Windows® 7 / 7 64-bit / VistaTM / VistaTM 64-bit Without RAID Functions If you want to [IDE...
... / SATAII HDDs without NCQ and Hot Plug functions (IDE mode) STEP 1: Set up BIOS. A. B. Set the "SATA Operation Mode" option to install Windows® 7 / 7 64-bit / VistaTM / VistaTM 64-bit on your SATA / SATAII HDDs without NCQ and Hot Plug functions (IDE mode) STEP...Enter BIOS SETUP UTILITY Advanced screen Storage Configuration. Enter BIOS SETUP UTILITY Advanced screen Storage Configuration. B. STEP 2: Install Windows® XP / XP 64-bit OS on your system. 2.14.2 Installing Windows® 7 / 7 64-bit / VistaTM / VistaTM 64-bit Without RAID Functions If you want to [IDE...


