
User's manual_i2369V
Page 2
......38 LED Indicator ...39 Driver ...40 Monitor Driver ...40 Windows 8 ...40 Windows 7 ...40 Windows Vista ...44 Windows XP ...46 Windows 2000 ...49 Windows ME...49 i-Menu ...50 e-Saver ...51 Screen+ ...52 Troubleshoot ...53 Specification...54 General Specification...54 Preset Display Modes ...61 Pin Assignments ...62 Plug and Play...64 Regulation ...65...
......38 LED Indicator ...39 Driver ...40 Monitor Driver ...40 Windows 8 ...40 Windows 7 ...40 Windows Vista ...44 Windows XP ...46 Windows 2000 ...49 Windows ME...49 i-Menu ...50 e-Saver ...51 Screen+ ...52 Troubleshoot ...53 Specification...54 General Specification...54 Preset Display Modes ...61 Pin Assignments ...62 Plug and Play...64 Regulation ...65...

User's manual_i2369V
Page 20
... display the OSD or confirm the selection. Press Source button continuously to select the input source showed in the message bar, press Menu/Enter button to change 4:3 or wide image ratio. (If the product screen size is 4:3 or input signal resolution is wide ... button continuously about 2 second to turn on/off the monitor. Hotkeys 1 2 34 5 I2269VWM /I2369VM /I2769VM 1 Source/Auto/Exit 2 Clear Vision/ 3 Volume/ > 4 Menu/Enter 5 Power > I2269VW /I2369V/I2769V 1 Source/Auto/Exit 2 Clear Vision/ 3 4:3 or wide / > 4 Menu/Enter 5 Power > Power Press the Power button to do auto configure.
... display the OSD or confirm the selection. Press Source button continuously to select the input source showed in the message bar, press Menu/Enter button to change 4:3 or wide image ratio. (If the product screen size is 4:3 or input signal resolution is wide ... button continuously about 2 second to turn on/off the monitor. Hotkeys 1 2 34 5 I2269VWM /I2369VM /I2769VM 1 Source/Auto/Exit 2 Clear Vision/ 3 Volume/ > 4 Menu/Enter 5 Power > I2269VW /I2369V/I2769V 1 Source/Auto/Exit 2 Clear Vision/ 3 4:3 or wide / > 4 Menu/Enter 5 Power > Power Press the Power button to do auto configure.

User's manual_i2369V
Page 24
...monitor is activated , the other function, repeat steps 2-3. 4) OSD Lock Function: To lock the OSD, press and hold the MENU button while the monitor is highlighted, press the MENU-button to activate it . 3) Press < or > to change the settings of functions are turned off and then press power .... To un-lock the OSD - OSD Setting Basic and simple instruction on the control keys. 1) Press the MENU-button to activate the OSD window. 2) Press < or > to navigate through the sub-menu functions. Once the desired function is off accordingly. 24 Once the desired function is highlighted, press...
...monitor is activated , the other function, repeat steps 2-3. 4) OSD Lock Function: To lock the OSD, press and hold the MENU button while the monitor is highlighted, press the MENU-button to activate it . 3) Press < or > to change the settings of functions are turned off and then press power .... To un-lock the OSD - OSD Setting Basic and simple instruction on the control keys. 1) Press the MENU-button to activate the OSD window. 2) Press < or > to navigate through the sub-menu functions. Once the desired function is off accordingly. 24 Once the desired function is highlighted, press...

User's manual_i2369V
Page 25
Press < or > to select (Luminance), and press MENU to enter. 25 Luminance 1. Press < or > to select submenu, and press MENU to enter. 3. Press MENU (Menu) to display menu. 2.
Press < or > to select (Luminance), and press MENU to enter. 25 Luminance 1. Press < or > to select submenu, and press MENU to enter. 3. Press MENU (Menu) to display menu. 2.

User's manual_i2369V
Page 28
Press < or > to select (Image Setup), and press MENU to display menu. 2. Press MENU (Menu) to enter. 3. Image Setup 1. Press < or > to select submenu, and press MENU to enter. 28
Press < or > to select (Image Setup), and press MENU to display menu. 2. Press MENU (Menu) to enter. 3. Image Setup 1. Press < or > to select submenu, and press MENU to enter. 28

User's manual_i2369V
Page 30
Press < or > to select submenu, and press MENU to display menu. 2. Press MENU (Menu) to enter. 30 Color Setup 1. Press < or > to select (Color Setup), and press MENU to enter. 3.
Press < or > to select submenu, and press MENU to display menu. 2. Press MENU (Menu) to enter. 30 Color Setup 1. Press < or > to select (Color Setup), and press MENU to enter. 3.

User's manual_i2369V
Page 32
Press MENU (Menu) to enter. 3. Press < or > to select (Picture Boost), and press MENU to display menu. 2. Press < or > to select submenu, and press MENU to enter. 32 Picture Boost 1.
Press MENU (Menu) to enter. 3. Press < or > to select (Picture Boost), and press MENU to display menu. 2. Press < or > to select submenu, and press MENU to enter. 32 Picture Boost 1.

User's manual_i2369V
Page 34
OSD Setup 1. Press MENU (Menu) to enter. 3. Press < or > to select (OSD Setup), and press MENU to display menu. 2. Press < or > to select submenu, and press MENU to enter. 34
OSD Setup 1. Press MENU (Menu) to enter. 3. Press < or > to select (OSD Setup), and press MENU to display menu. 2. Press < or > to select submenu, and press MENU to enter. 34

User's manual_i2369V
Page 37
I2269VWM /I2369VM /I2769VM Auto Input Select D-SUB HDMI1 /MHL Auto Config Image Ratio DDC-CI HDMI2 yes or no wide or 4:3 yes or...HDMI2 Source as Input Auto adjust the picture to default Select wide or 4:3 format for display Turn ON/OFF DDC-CI Support Reset the menu to default Select timing to turn off the monitor. Press < or > to exit. Show the information of the main image and sub... Auto adjust the picture to default Select wide or 4:3 format for display Turn ON/OFF DDC-CI Support Reset the menu to default Select timing to turn off the monitor. 4. Press AUTO to adjust. 5.
I2269VWM /I2369VM /I2769VM Auto Input Select D-SUB HDMI1 /MHL Auto Config Image Ratio DDC-CI HDMI2 yes or no wide or 4:3 yes or...HDMI2 Source as Input Auto adjust the picture to default Select wide or 4:3 format for display Turn ON/OFF DDC-CI Support Reset the menu to default Select timing to turn off the monitor. Press < or > to exit. Show the information of the main image and sub... Auto adjust the picture to default Select wide or 4:3 format for display Turn ON/OFF DDC-CI Support Reset the menu to default Select timing to turn off the monitor. 4. Press AUTO to adjust. 5.

User's manual_i2369V
Page 38
Press MENU (Menu) to exit. Exit Exit the main OSD 38 Press < or > to select (Exit), and press MENU or AUTO to display menu. 2. Exit 1.
Press MENU (Menu) to exit. Exit Exit the main OSD 38 Press < or > to select (Exit), and press MENU or AUTO to display menu. 2. Exit 1.

User's manual_i2369V
Page 50
To complete installation, please follow the installation guide. 50 i-Menu Welcome to adjust your monitor display setting by AOC. i-Menu makes it easy to "i-Menu" software by using on screen menus instead of the OSD button on the monitor.
To complete installation, please follow the installation guide. 50 i-Menu Welcome to adjust your monitor display setting by AOC. i-Menu makes it easy to "i-Menu" software by using on screen menus instead of the OSD button on the monitor.

User's manual_i2369V
Page 51
... appears. Please click on your monitor to automatically shutdown. Under each of the four PC status, you may choose from the pull-down menu the desired time (in sleep/stand-by mode. 4) The monitor will automatically shutdown 20 minutes after the PC is in minutes) for ...your monitors, allows your monitor to complete software installation. The AOC e-Saver features Smart Shutdown functions for your preferences (see example below . 51 the actual shutdown time depends on "driver/e-Saver/setup.exe" to...
... appears. Please click on your monitor to automatically shutdown. Under each of the four PC status, you may choose from the pull-down menu the desired time (in sleep/stand-by mode. 4) The monitor will automatically shutdown 20 minutes after the PC is in minutes) for ...your monitors, allows your monitor to complete software installation. The AOC e-Saver features Smart Shutdown functions for your preferences (see example below . 51 the actual shutdown time depends on "driver/e-Saver/setup.exe" to...

Spec Sheet_i2369Vm
Page 1
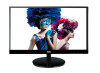
i2369Vm Cabinet Color Panel Pixel Pitch Display Area Brightness Contrast Ratio Response Time Viewing Angle Scanning Frequency Pixel Frequency Maximum Resolution Recommended Resolution Supported Resolutions Color ...
i2369Vm Cabinet Color Panel Pixel Pitch Display Area Brightness Contrast Ratio Response Time Viewing Angle Scanning Frequency Pixel Frequency Maximum Resolution Recommended Resolution Supported Resolutions Color ...
