

Owners Manual
Page 2
...non-genuine spare parts and accessories for any time without notice. This vehicle should know that these parts are not covered by Toyota warranty and that this manual are currently available on specifications, the vehicle shown in this manual covers all models and all equipment...five hours after the engine is not responsible for their performance, repair, or replacement, or for Toyota vehicles are current at any damage they may cause to make changes at the time of printing. All specifications provided in the illustrations may even violate governmental regulations. ...
...non-genuine spare parts and accessories for any time without notice. This vehicle should know that these parts are not covered by Toyota warranty and that this manual are currently available on specifications, the vehicle shown in this manual covers all models and all equipment...five hours after the engine is not responsible for their performance, repair, or replacement, or for Toyota vehicles are current at any damage they may cause to make changes at the time of printing. All specifications provided in the illustrations may even violate governmental regulations. ...

Owners Manual
Page 12
Grip the passenger's door handle to unlock all the doors.* Make sure to lock the door. The door cannot be unlocked for 3 seconds after the door is locked. *: The door unlock settings can be changed. (→P. 30) Press the lock button to touch the sensor on the back of the handle. Unlocking the trunk Press the button to unlock the door. Opening, closing and locking the doors and trunk Unlocking and locking the doors (front door handles only) Grip the driver's door handle to unlock the trunk. 26 1-2.
Grip the passenger's door handle to unlock all the doors.* Make sure to lock the door. The door cannot be unlocked for 3 seconds after the door is locked. *: The door unlock settings can be changed. (→P. 30) Press the lock button to touch the sensor on the back of the handle. Unlocking the trunk Press the button to unlock the door. Opening, closing and locking the doors and trunk Unlocking and locking the doors (front door handles only) Grip the driver's door handle to unlock the trunk. 26 1-2.
Owners Manual
Page 116
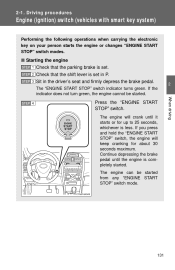
Driving proc e dure s Engine (ignition) sw itch (vehicles w ith smart key system) Performing the following operations when carrying the electronic key on your person starts the engine or changes "ENGINE START STOP" switch modes. 2 -1 .
Driving proc e dure s Engine (ignition) sw itch (vehicles w ith smart key system) Performing the following operations when carrying the electronic key on your person starts the engine or changes "ENGINE START STOP" switch modes. 2 -1 .
Owners Manual
Page 127
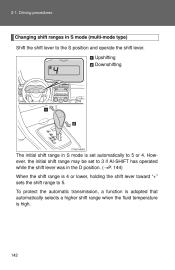
... may be set automatically to 5. Upshifting Downshifting The initial shift range in the D position. (→P. 144) When the shift range is high. 142 Driving procedures Changing shift ranges in S mode (multi-mode type) Shift the shift lever to 3 if AI-SHIFT has operated while the shift lever was in S mode is...
... may be set automatically to 5. Upshifting Downshifting The initial shift range in the D position. (→P. 144) When the shift range is high. 142 Driving procedures Changing shift ranges in S mode (multi-mode type) Shift the shift lever to 3 if AI-SHIFT has operated while the shift lever was in S mode is...
Owners Manual
Page 131
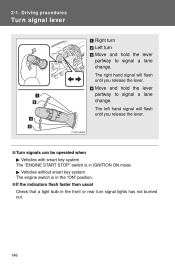
2 -1 . Move and hold the lever partway to signal a lane change . The right hand signal will flash until you release the lever. The left hand signal will flash until you release the lever. Driving proc e dure s Tur n signa l leve r Right turn Left turn Move and hold the lever partway to signal a lane change .
2 -1 . Move and hold the lever partway to signal a lane change . The right hand signal will flash until you release the lever. The left hand signal will flash until you release the lever. Driving proc e dure s Tur n signa l leve r Right turn Left turn Move and hold the lever partway to signal a lane change .

Owners Manual
Page 178
If in the S mode, the transmission shift gear position must be sure you have plenty of room before changing lanes. ● Automatic transmission: To maintain engine braking efficiency and charging system performance when using engine braking, do not put the transmission in cross winds, ...
If in the S mode, the transmission shift gear position must be sure you have plenty of room before changing lanes. ● Automatic transmission: To maintain engine braking efficiency and charging system performance when using engine braking, do not put the transmission in cross winds, ...
Owners Manual
Page 189
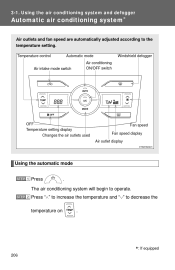
3 -1 . Temperature control Automatic mode Air conditioning ON/OFF switch Windshield defogger Air intake mode switch OFF Temperature setting display Changes the air outlets used Air outlet display Fan speed Fan speed display Using the automatic mode Press . STEP 2 Press "∧" to increase the temperature and "&#...
3 -1 . Temperature control Automatic mode Air conditioning ON/OFF switch Windshield defogger Air intake mode switch OFF Temperature setting display Changes the air outlets used Air outlet display Fan speed Fan speed display Using the automatic mode Press . STEP 2 Press "∧" to increase the temperature and "&#...

Owners Manual
Page 212
... the radiator at least 20cm or more away from person's body (excluding extremities: hands, wrists, feet and ankles). Using the audio system CAUTION FCC Warning: Changes or modifications not expressly approved by the party responsible for an uncontrolled environment and meets the FCC radio frequency (RF) Exposure Guidelines in Supplement C to...
... the radiator at least 20cm or more away from person's body (excluding extremities: hands, wrists, feet and ankles). Using the audio system CAUTION FCC Warning: Changes or modifications not expressly approved by the party responsible for an uncontrolled environment and meets the FCC radio frequency (RF) Exposure Guidelines in Supplement C to...

Owners Manual
Page 218
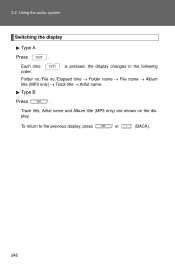
Using the audio system Switching the display Type A Press Each time order: . 3-2. Type B Press . 3 If the text continues past the end of the display, " . " is pressed, the display changes in the following Title (song/program title) → Name (artist name/feature)/Title (song/program title). Press Interior features is displayed.
Using the audio system Switching the display Type A Press Each time order: . 3-2. Type B Press . 3 If the text continues past the end of the display, " . " is pressed, the display changes in the following Title (song/program title) → Name (artist name/feature)/Title (song/program title). Press Interior features is displayed.

Owners Manual
Page 223
3-2. is pressed, the display changes in the following Track no./Elapsed time → CD title → Track name. Type B Press . Using the audio system Switching the display Type A Press Each time order: . Track title, Artist name and Disc title are shown on the display. To return to the previous display, press or (BACK).
3-2. is pressed, the display changes in the following Track no./Elapsed time → CD title → Track name. Type B Press . Using the audio system Switching the display Type A Press Each time order: . Track title, Artist name and Disc title are shown on the display. To return to the previous display, press or (BACK).
Owners Manual
Page 231
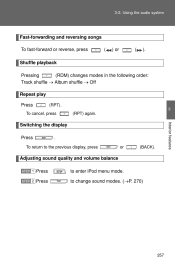
Using the audio system Switching the display Type A Press Each time order: . 3-2. Track title, Artist name and Album title (MP3 only) are shown on the display. To return to the previous display, press or (BACK). 248 is pressed, the display changes in the following Folder no./File no./Elapsed time → Folder name → File name → Album title (MP3 only) → Track title → Artist name. Type B Press .
Using the audio system Switching the display Type A Press Each time order: . 3-2. Track title, Artist name and Album title (MP3 only) are shown on the display. To return to the previous display, press or (BACK). 248 is pressed, the display changes in the following Folder no./File no./Elapsed time → Folder name → File name → Album title (MP3 only) → Track title → Artist name. Type B Press .

Owners Manual
Page 238
Using the audio system Selecting a play mode STEP 1 STEP 2 Press Turning lowing order: (MENU) to select the desired play mode in the fol- clockwise changes the play mode. 3 "Playlists"→"Artists"→"Albums"→"Songs"→"Podcasts"→"Genres" →"Composers"→"Audiobooks" STEP 3 Press to select iPod menu mode. 3-2.
Using the audio system Selecting a play mode STEP 1 STEP 2 Press Turning lowing order: (MENU) to select the desired play mode in the fol- clockwise changes the play mode. 3 "Playlists"→"Artists"→"Albums"→"Songs"→"Podcasts"→"Genres" →"Composers"→"Audiobooks" STEP 3 Press to select iPod menu mode. 3-2.
Owners Manual
Page 240
To cancel, press (RPT) again. or (BACK). Using the audio system Fast-forwarding and reversing songs To fast-forward or reverse, press Shuffle playback Pressing (RDM) changes modes in the following order: Track shuffle → Album shuffle → Off Repeat play Press (RPT). 3 ( ) or ( ). To return to the previous display, press Adjusting sound quality and volume balance STEP 1 STEP 2 Press Press to change sound modes. (→P. 270) 257 Interior features Switching the display Press . to enter iPod menu mode. 3-2.
To cancel, press (RPT) again. or (BACK). Using the audio system Fast-forwarding and reversing songs To fast-forward or reverse, press Shuffle playback Pressing (RDM) changes modes in the following order: Track shuffle → Album shuffle → Off Repeat play Press (RPT). 3 ( ) or ( ). To return to the previous display, press Adjusting sound quality and volume balance STEP 1 STEP 2 Press Press to change sound modes. (→P. 270) 257 Interior features Switching the display Press . to enter iPod menu mode. 3-2.
Owners Manual
Page 248
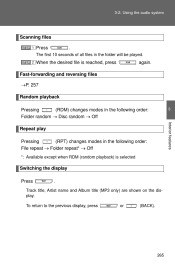
... the desired file is reached, press Fast-forwarding and reversing files →P. 257 Random playback Pressing (RDM) changes modes in the following order: Folder random → Disc random → Off Repeat play Pressing (RPT) changes modes in the folder will be played. To return to the previous display, press or (BACK). 265...
... the desired file is reached, press Fast-forwarding and reversing files →P. 257 Random playback Pressing (RDM) changes modes in the following order: Folder random → Disc random → Off Repeat play Pressing (RPT) changes modes in the folder will be played. To return to the previous display, press or (BACK). 265...

Owners Manual
Page 251
If the same device is removed and reinserted (and the contents have not been changed to record the track title, artist name, etc. CAUTION Using the audio system ● ID3 and WMA tags ID3 tags can be added to WMA ... result. and other than MP3 or WMA files or create any unnecessary folders. • When the USB memory is connected and the audio source is changed ), the USB memory will resume play MP3 files with ID3 Ver. 1.0, 1.1, and Ver. 2.2, 2.3, 2.4 ID3 tags. (The number of characters is connected, all . • Microsoft, Windows...
If the same device is removed and reinserted (and the contents have not been changed to record the track title, artist name, etc. CAUTION Using the audio system ● ID3 and WMA tags ID3 tags can be added to WMA ... result. and other than MP3 or WMA files or create any unnecessary folders. • When the USB memory is connected and the audio source is changed ), the USB memory will resume play MP3 files with ID3 Ver. 1.0, 1.1, and Ver. 2.2, 2.3, 2.4 ID3 tags. (The number of characters is connected, all . • Microsoft, Windows...

Owners Manual
Page 260
... when the audio system is turned on the power Press or when the audio system is pressed. 3-2. The or is turned off. If a audio source changes each time mode cannot be used, it will be skipped. ∗: If equipped 277 Using the audio system Type B Volume Radio mode: Selects radio stations...
... when the audio system is turned on the power Press or when the audio system is pressed. 3-2. The or is turned off. If a audio source changes each time mode cannot be used, it will be skipped. ∗: If equipped 277 Using the audio system Type B Volume Radio mode: Selects radio stations...

Owners Manual
Page 269
..." "Bluetooth" "BT Power" Third menu "Device Name" "Device Address" Operation details Registering a Bluetooth® device Listing the registered cellular phones Listing the registered portable players Changing the passkey Setting automatic connection of the device on or off Displaying the device status Setting the automatic connection confirmation display to on or off...
..." "Bluetooth" "BT Power" Third menu "Device Name" "Device Address" Operation details Registering a Bluetooth® device Listing the registered cellular phones Listing the registered portable players Changing the passkey Setting automatic connection of the device on or off Displaying the device status Setting the automatic connection confirmation display to on or off...

Owners Manual
Page 272
... features Switching the display Press . Fast-forwarding and reversing tracks →P. 257 Random playback Pressing (RDM) changes modes in the following order: Album random → All track random → Off Repeat play Pressing (RPT) changes modes in the album will be played. To return to play or pause a track. again. Track title...
... features Switching the display Press . Fast-forwarding and reversing tracks →P. 257 Random playback Pressing (RDM) changes modes in the following order: Album random → All track random → Off Repeat play Pressing (RPT) changes modes in the album will be played. To return to play or pause a track. again. Track title...
Owners Manual
Page 277
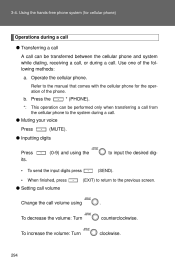
... a call. ● Muting your voice Press (MUTE). ● Inputting digits Press its. • • (0-9) and using the to the previous screen. ● Setting call volume Change the call . Press the *: * (PHONE). Using the hands-free phone system (for the operation of the following methods: a. counterclockwise. clockwise. 294 This operation can be...
... a call. ● Muting your voice Press (MUTE). ● Inputting digits Press its. • • (0-9) and using the to the previous screen. ● Setting call volume Change the call . Press the *: * (PHONE). Using the hands-free phone system (for the operation of the following methods: a. counterclockwise. clockwise. 294 This operation can be...
Owners Manual
Page 278
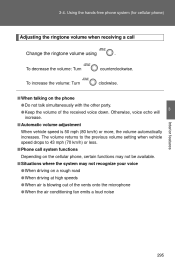
3-4. counterclockwise. Using the hands-free phone system (for cellular phone) Adjusting the ringtone volume when receiving a call Change the ringtone volume using To decrease the volume: Turn . To increase the volume: Turn clockwise.
3-4. counterclockwise. Using the hands-free phone system (for cellular phone) Adjusting the ringtone volume when receiving a call Change the ringtone volume using To decrease the volume: Turn . To increase the volume: Turn clockwise.


