Owner's Manual
Page 5
... This chapter informs you how to operate interior equipment. Chapter 7: Starting and operating This chapter informs you how to start and operate your SUBARU in various conditions and explains some safety tips on driving. Chapter 9: In case of contents, so you can usually tell at a glance...chapters. To protect yourself and extend the service life of your vehicle, follow the instructions in serious injury and damage to operate the keys, locks and windows. Failure to observe these instructions may result in this manual. Chapter 12: Specifications This chapter informs you how ...
... This chapter informs you how to operate interior equipment. Chapter 7: Starting and operating This chapter informs you how to start and operate your SUBARU in various conditions and explains some safety tips on driving. Chapter 9: In case of contents, so you can usually tell at a glance...chapters. To protect yourself and extend the service life of your vehicle, follow the instructions in serious injury and damage to operate the keys, locks and windows. Failure to observe these instructions may result in this manual. Chapter 12: Specifications This chapter informs you how ...

Owner's Manual
Page 16
Table of contents Seat, seatbelt and SRS airbags Keys and doors Instruments and controls Climate control Audio Interior equipment Starting and operating Driving tips In case of emergency Appearance care Maintenance and service Specifications Consumer information and Reporting safety defects Index 1 2 3 4 5 6 7 8 9 10 11 12 13 14
Table of contents Seat, seatbelt and SRS airbags Keys and doors Instruments and controls Climate control Audio Interior equipment Starting and operating Driving tips In case of emergency Appearance care Maintenance and service Specifications Consumer information and Reporting safety defects Index 1 2 3 4 5 6 7 8 9 10 11 12 13 14

Owner's Manual
Page 60
NOTE When the seatback is folded down for greater cargo area, it is necessary to unfasten the seatbelt. HS1064BA 1. Insert a key or other hard pointed object into the - CONTINUED - 1-27 Seat, seatbelt and SRS airbags Unfastening the seatbelt 0 HS1063BA HS1062BA Push the release button of the center seatbelt buckle (on the left hand side) to disconnect the connector.
NOTE When the seatback is folded down for greater cargo area, it is necessary to unfasten the seatbelt. HS1064BA 1. Insert a key or other hard pointed object into the - CONTINUED - 1-27 Seat, seatbelt and SRS airbags Unfastening the seatbelt 0 HS1063BA HS1062BA Push the release button of the center seatbelt buckle (on the left hand side) to disconnect the connector.

Owner's Manual
Page 66
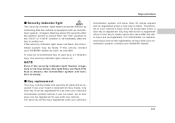
The SRS airbag system warning light will show normal system operation by lighting for about 6 seconds when the ignition key is first turned to the "ON" position. Flashing or flickering of the indicator light No illumination of the warning light when the.... Tampering with yellow insulation and the connectors of the system are monitored by a collision, consult your nearest SUBARU dealer to have the system checked. Immediately take your vehicle to your SUBARU dealer. Unless checked and properly repaired, the seatbelt pretensioners and/or SRS When discarding a seatbelt retractor assembly ...
The SRS airbag system warning light will show normal system operation by lighting for about 6 seconds when the ignition key is first turned to the "ON" position. Flashing or flickering of the indicator light No illumination of the warning light when the.... Tampering with yellow insulation and the connectors of the system are monitored by a collision, consult your nearest SUBARU dealer to have the system checked. Immediately take your vehicle to your SUBARU dealer. Unless checked and properly repaired, the seatbelt pretensioners and/or SRS When discarding a seatbelt retractor assembly ...

Owner's Manual
Page 106
... system continually monitors the readiness of a double side impact collision, first with one vehicle and immediately followed by lighting for about 6 seconds when the ignition key is turned to deploy if the vehicle is involved in a frontal collision or is struck from behind. vated on the first impact, it will not...
... system continually monitors the readiness of a double side impact collision, first with one vehicle and immediately followed by lighting for about 6 seconds when the ignition key is turned to deploy if the vehicle is involved in a frontal collision or is struck from behind. vated on the first impact, it will not...

Owner's Manual
Page 112
... ...Security ID plate ...Security indicator light ...Key replacement ...Locking and unlocking from the outside ...Locking and unlocking from the inside ... 2-2 2-3 2-4 2-5 2-5 2-3 Moonroof (if equipped) ... Locking the doors ...Unlocking the doors ...Illuminated entry ...Vehicle ...
... ...Security ID plate ...Security indicator light ...Key replacement ...Locking and unlocking from the outside ...Locking and unlocking from the inside ... 2-2 2-3 2-4 2-5 2-5 2-3 Moonroof (if equipped) ... Locking the doors ...Unlocking the doors ...Illuminated entry ...Vehicle ...

Owner's Manual
Page 113
Keys and doors Keys Keys and doors A B C B C A D D E UG2044BD HS2011BC Vehicle with immobilizer system A) Master key (Black) B) Submaster key (Black) C) Valet key (Gray) D) Key number plate E) Security ID plate Vehicle without immobilizer system A) Master key B) Submaster key C) Valet key D) Key number plate Three types of keys are provided for your vehicle. The master key and submaster key fit all locks on your vehicle: Master key, submaster key and valet key. Ignition switch Driver's door Glove box 2-2
Keys and doors Keys Keys and doors A B C B C A D D E UG2044BD HS2011BC Vehicle with immobilizer system A) Master key (Black) B) Submaster key (Black) C) Valet key (Gray) D) Key number plate E) Security ID plate Vehicle without immobilizer system A) Master key B) Submaster key C) Valet key D) Key number plate Three types of keys are provided for your vehicle. The master key and submaster key fit all locks on your vehicle: Master key, submaster key and valet key. Ignition switch Driver's door Glove box 2-2

Owner's Manual
Page 114
...to the "START" position, the engine will automatically stop after several seconds. If the transmitted ID code matches the ID code registered in which the key's ID code is transmitted and acted upon almost instantly, the immobilizer system does not impede normal starting the engine. Since the ID code is stored...the engine to be turned to the immobilizer system's receiver. If the engine fails to start, pull out the key once before trying again. (Refer to the key set. Write down the key number and keep the glove box locked when you were driving, it in another safe place, not in this ...
...to the "START" position, the engine will automatically stop after several seconds. If the transmitted ID code matches the ID code registered in which the key's ID code is transmitted and acted upon almost instantly, the immobilizer system does not impede normal starting the engine. Since the ID code is stored...the engine to be turned to the immobilizer system's receiver. If the engine fails to start, pull out the key once before trying again. (Refer to the key set. Write down the key number and keep the glove box locked when you were driving, it in another safe place, not in this ...

Owner's Manual
Page 115
.... Write down the security ID and keep it may cause undesired operation. This number is also needed to the key set. Do not leave spare keys or any interference received, including interference that may become hot. The security ID is needed for compliance could void the user's... authority to the following security precautions: Never leave your key or lock it dry with its keys inside the vehicle. A B UB2534BB A) Key number plate B) Security ID plate Do not place the key under direct sunlight or anywhere it in another safe place, not in the vehicle...
.... Write down the security ID and keep it may cause undesired operation. This number is also needed to the key set. Do not leave spare keys or any interference received, including interference that may become hot. The security ID is needed for compliance could void the user's... authority to the following security precautions: Never leave your key or lock it dry with its keys inside the vehicle. A B UB2534BB A) Key number plate B) Security ID plate Do not place the key under direct sunlight or anywhere it in another safe place, not in the vehicle...
Owner's Manual
Page 116
... used (e.g. In case an unauthorized key is registered. For security, all of keys with an immobilizer system. Therefore, all the keys registered with one vehicle. For information on replacement keys and on . Key replacement Your key number plate and security ID plate will function normally. If this occurs, contact your SUBARU dealer as soon as possible. Any...
... used (e.g. In case an unauthorized key is registered. For security, all of keys with an immobilizer system. Therefore, all the keys registered with one vehicle. For information on replacement keys and on . Key replacement Your key number plate and security ID plate will function normally. If this occurs, contact your SUBARU dealer as soon as possible. Any...

Owner's Manual
Page 117
To unlock the door, turn the key toward the front (Driver's side only). HS2013BC B A HS2012BC To lock the door from the outside A B A) Rotate the lock lever rearward. In this case, all doors ... locked before leaving your vehicle. A) Lock B) Unlock To lock the door from the outside with the key, turn the key toward the rear. Keys and doors Door locks Locking and unlocking from the outside without the key, rotate the lock lever rearward and then close the door. To lock the door from the outside...
To unlock the door, turn the key toward the front (Driver's side only). HS2013BC B A HS2012BC To lock the door from the outside A B A) Rotate the lock lever rearward. In this case, all doors ... locked before leaving your vehicle. A) Lock B) Unlock To lock the door from the outside with the key, turn the key toward the rear. Keys and doors Door locks Locking and unlocking from the outside without the key, rotate the lock lever rearward and then close the door. To lock the door from the outside...

Owner's Manual
Page 118
... It also helps prevent passengers from falling out if a door is unlocked. Locking and unlocking from unexpectedly opening doors and entering your vehicle. Keys and doors NOTE is accidentally opened, and intruders from the inside , rotate the lock lever rearward. Along with the proper use of seatbelts ...of being thrown out of the vehicle in your vehicle. Pull the inside the vehicle when locking the doors from the outside without the key. Always make sure that you drive, especially when small children are closed before starting to open an unlocked door. The red mark ...
... It also helps prevent passengers from falling out if a door is unlocked. Locking and unlocking from unexpectedly opening doors and entering your vehicle. Keys and doors NOTE is accidentally opened, and intruders from the inside , rotate the lock lever rearward. Along with the proper use of seatbelts ...of being thrown out of the vehicle in your vehicle. Pull the inside the vehicle when locking the doors from the outside without the key. Always make sure that you drive, especially when small children are closed before starting to open an unlocked door. The red mark ...

Owner's Manual
Page 119
When you close the doors after you do not leave the key inside the vehicle before locking the doors from the outside using power door locking switches. To lock the doors, push the front side of the switch. A B HS2015BC A) Lock B) Unlock All doors and the rear gate can be locked and unlocked by the power door locking switches located at the driver's side and the front passenger's side doors. To unlock the doors, push the rear side of the switch. Keys and doors Power door locking switches NOTE Make sure that you set the door locks, the doors remain locked. 2-8
When you close the doors after you do not leave the key inside the vehicle before locking the doors from the outside using power door locking switches. To lock the doors, push the front side of the switch. A B HS2015BC A) Lock B) Unlock All doors and the rear gate can be locked and unlocked by the power door locking switches located at the driver's side and the front passenger's side doors. To unlock the doors, push the rear side of the switch. Keys and doors Power door locking switches NOTE Make sure that you set the door locks, the doors remain locked. 2-8

Owner's Manual
Page 120
... with Part 15 of dropping or throwing. Do not get the transmitter wet. Locking and unlocking the doors and rear gate without a key Sounding a panic alarm Arming and disarming the security system (if your vehicle. The system's operable distance will vary depending on environmental conditions... to prevent accidental lockout. The keyless entry system does not operate when the key is approximately 30 feet (10 meters). If it gets wet, wipe it dry with a cloth immediately. - CONTINUED - 2-9 Keys and doors Remote keyless entry system (if equipped) Two transmitters are provided for...
... with Part 15 of dropping or throwing. Do not get the transmitter wet. Locking and unlocking the doors and rear gate without a key Sounding a panic alarm Arming and disarming the security system (if your vehicle. The system's operable distance will vary depending on environmental conditions... to prevent accidental lockout. The keyless entry system does not operate when the key is approximately 30 feet (10 meters). If it gets wet, wipe it dry with a cloth immediately. - CONTINUED - 2-9 Keys and doors Remote keyless entry system (if equipped) Two transmitters are provided for...

Owner's Manual
Page 121
... two seconds) to Unlock all other doors and rear gate, briefly press the " " button a second time within 5 seconds. To unlock all doors and rear gate. Keys and doors flash once. Press and Hold to use vehicle finder function. If the " " button is extremely short, the 2-10 An electronic chirp will sound...
... two seconds) to Unlock all other doors and rear gate, briefly press the " " button a second time within 5 seconds. To unlock all doors and rear gate. Keys and doors flash once. Press and Hold to use vehicle finder function. If the " " button is extremely short, the 2-10 An electronic chirp will sound...

Owner's Manual
Page 122
...many vehicles in order for this function to operate. Unless a button on the remote is inserted in a five-second period will go out if the key is pressed, the alarm will begin to flash three times. Sounding a panic alarm To activate the alarm, keep the " " button pressed for ... transmitter battery begins to get weak, transmitter range will be set to the middle position in a large parking lot. To turn the audible signal off . Keys and doors system may turn the audible signal off , unlock the door by pressing the " " button and then simultaneously depress " " and " " buttons ...
...many vehicles in order for this function to operate. Unless a button on the remote is inserted in a five-second period will go out if the key is pressed, the alarm will begin to flash three times. Sounding a panic alarm To activate the alarm, keep the " " button pressed for ... transmitter battery begins to get weak, transmitter range will be set to the middle position in a large parking lot. To turn the audible signal off . Keys and doors system may turn the audible signal off , unlock the door by pressing the " " button and then simultaneously depress " " and " " buttons ...

Owner's Manual
Page 123
Remove the old battery from the holder. 2-12 Open the transmitter case using a flat-head screwdriver. 2. Separate the case. 3. Keys and doors To replace the battery: 0 UB2209BA UG2043BA 1.
Remove the old battery from the holder. 2-12 Open the transmitter case using a flat-head screwdriver. 2. Separate the case. 3. Keys and doors To replace the battery: 0 UB2209BA UG2043BA 1.

Owner's Manual
Page 124
... system's control unit. The four transmitter codes may be synchronized with a special code learning feature that you have your dealer program all of your system. Keys and doors A Do not let dust, oil or water get on . Be careful not to damage the printed circuit board in the transmitter when replacing...
... system's control unit. The four transmitter codes may be synchronized with a special code learning feature that you have your dealer program all of your system. Keys and doors A Do not let dust, oil or water get on . Be careful not to damage the printed circuit board in the transmitter when replacing...

Owner's Manual
Page 125
Open the driver's door and sit in the driver's seat. 3. Press " " button to disarm the security system. (If your vehicle is equipped with the optional security system.) 2. Close the driver's door. 2-14 Keys and doors To enter the programming mode: 0 HS2019BA UG2042CA 1.
Open the driver's door and sit in the driver's seat. 3. Press " " button to disarm the security system. (If your vehicle is equipped with the optional security system.) 2. Close the driver's door. 2-14 Keys and doors To enter the programming mode: 0 HS2019BA UG2042CA 1.

Owner's Manual
Page 126
The horn will sound once to ON ten times within 45 seconds of starting this procedures. - CONTINUED - 2-15 NOTE You must finish the next step (opening the driver's door) within 15 seconds. Close the driver's door. Open the driver's door. 2. Keys and doors To program the transmitters: 0 B A HS2020BD A) ON B) LOCK HS2019BA 4. Place the ignition key into the ignition switch and cycle the switch from LOCK to indicate that you are in the transmitter programming mode. 1. Be sure to stop at the LOCK position.
The horn will sound once to ON ten times within 45 seconds of starting this procedures. - CONTINUED - 2-15 NOTE You must finish the next step (opening the driver's door) within 15 seconds. Close the driver's door. Open the driver's door. 2. Keys and doors To program the transmitters: 0 B A HS2020BD A) ON B) LOCK HS2019BA 4. Place the ignition key into the ignition switch and cycle the switch from LOCK to indicate that you are in the transmitter programming mode. 1. Be sure to stop at the LOCK position.


