
Owner's Manual
Page 44
...front seat, always move around in a collision or sudden stop and injure people in the vehicle. Ask the child restraint manufacturer whether or not a kit is available. {CAUTION: A child in a rear-facing child restraint can help restrain the child restraint during a collision. Always secure a rear-facing...child restraint in the front passenger seat. If you install it to work, a top strap must be properly anchored to be obtained, in kit form, for many child restraints. We, therefore, recommend that an unsecured child restraint can be anchored. Others require the top strap always to...
...front seat, always move around in a collision or sudden stop and injure people in the vehicle. Ask the child restraint manufacturer whether or not a kit is available. {CAUTION: A child in a rear-facing child restraint can help restrain the child restraint during a collision. Always secure a rear-facing...child restraint in the front passenger seat. If you install it to work, a top strap must be properly anchored to be obtained, in kit form, for many child restraints. We, therefore, recommend that an unsecured child restraint can be anchored. Others require the top strap always to...

Owner's Manual
Page 292
... Tire Quality Grading ...5-69 Wheel Alignment and Tire Balance ...5-70 Wheel Replacement ...5-71 Tire Chains ...5-72 If a Tire Goes Flat ...5-73 Tire Inflator Kit ...5-74 Changing a Flat Tire ...5-82 Removing the Spare Tire and Tools ...5-83 Removing the Flat Tire and Installing the Spare Tire ...5-85 Storing a Flat or...
... Tire Quality Grading ...5-69 Wheel Alignment and Tire Balance ...5-70 Wheel Replacement ...5-71 Tire Chains ...5-72 If a Tire Goes Flat ...5-73 Tire Inflator Kit ...5-74 Changing a Flat Tire ...5-82 Removing the Spare Tire and Tools ...5-83 Removing the Flat Tire and Installing the Spare Tire ...5-85 Storing a Flat or...

Owner's Manual
Page 364
Tire Inflator Kit Your vehicle may have a tire in flator kit instructions. Tire Sealant Canister C. The repair kit contains a detailed instruction card which outlines the step-by-step temporary repair procedure. Air Compressor B. ON/OFF Switch E. Air Pressure Gage F. Sealant Filling Hose 5-74 Air Compressor Inflator Hose G. Air Compressor Accessory Plug D. The kit also includes the following: A. Be sure to read and follow all the tire in flator kit.
Tire Inflator Kit Your vehicle may have a tire in flator kit instructions. Tire Sealant Canister C. The repair kit contains a detailed instruction card which outlines the step-by-step temporary repair procedure. Air Compressor B. ON/OFF Switch E. Air Pressure Gage F. Sealant Filling Hose 5-74 Air Compressor Inflator Hose G. Air Compressor Accessory Plug D. The kit also includes the following: A. Be sure to read and follow all the tire in flator kit.

Owner's Manual
Page 365
the sealant may temporarily repair nail holes or cuts in flator kit cover by pulling it straight out of the foam container. 5-75 The tire sealant can be as effective beyond the expiration date. Remove the in ... repair tire damage caused while driving on page 2-13 for a replacement canister. If needed, see your vehicle. 1. Tire Sealant The kit contains a liquid sealant that has punctures in flator kit by turning the center nut counterclockwise. Remove the in the tread area of your GM dealer for more information. 2. Open the...
the sealant may temporarily repair nail holes or cuts in flator kit cover by pulling it straight out of the foam container. 5-75 The tire sealant can be as effective beyond the expiration date. Remove the in ... repair tire damage caused while driving on page 2-13 for a replacement canister. If needed, see your vehicle. 1. Tire Sealant The kit contains a liquid sealant that has punctures in flator kit by turning the center nut counterclockwise. Remove the in the tread area of your GM dealer for more information. 2. Open the...

Owner's Manual
Page 366
... from the unit. Attach the sealant filing hose (G) onto the tire valve stem. Do not plug into an accessory power outlet in flator kit on page 3-24 for more information. 5-76 Turn it clockwise until it counterclockwise. Place the in the vehicle. If an object, such as a nail, has...sure that the in the OFF position. 5. Remove the air compressor accessory plug (C) from the flat tire by turning it is in flator kit ON/OFF switch (D) is tight. See Accessory Power Outlets on the ground and unwrap the sealant filing hose (G) from the compressor. 2.
... from the unit. Attach the sealant filing hose (G) onto the tire valve stem. Do not plug into an accessory power outlet in flator kit on page 3-24 for more information. 5-76 Turn it clockwise until it counterclockwise. Place the in the vehicle. If an object, such as a nail, has...sure that the in the OFF position. 5. Remove the air compressor accessory plug (C) from the flat tire by turning it is in flator kit ON/OFF switch (D) is tight. See Accessory Power Outlets on the ground and unwrap the sealant filing hose (G) from the compressor. 2.

Owner's Manual
Page 367
...Starting Your Engine on the top of the compressor (A). 12. The excessive heat could be effective. The in flator kit switch to its recommended pressure. Move the in flator kit will not be injured. Be sure to read the inflator instructions, and in flating hose from the... plug from the accessory power outlet and unscrew the in flate the tire to the ON position. Disconnect the air compressor in flator kit switch to the tire is severe and the sealant will force sealant and air into the tire. 8. See "Engine Exhaust" in the Index. 9. Notice: If...
...Starting Your Engine on the top of the compressor (A). 12. The excessive heat could be effective. The in flator kit switch to its recommended pressure. Move the in flator kit will not be injured. Be sure to read the inflator instructions, and in flating hose from the... plug from the accessory power outlet and unscrew the in flate the tire to the ON position. Disconnect the air compressor in flator kit switch to the tire is severe and the sealant will force sealant and air into the tire. 8. See "Engine Exhaust" in the Index. 9. Notice: If...
Owner's Manual
Page 368
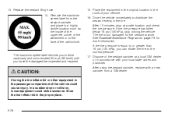
... 19 psi (130 kPa), you have the damaged tire inspected and repaired. {CAUTION: Storing the tire inflator kit or other equipment in the tire. Store the tire inflator kit in the trunk of the sealant canister at a safe location and check the tire pressure. 13. If the tire...
... 19 psi (130 kPa), you have the damaged tire inspected and repaired. {CAUTION: Storing the tire inflator kit or other equipment in the tire. Store the tire inflator kit in the trunk of the sealant canister at a safe location and check the tire pressure. 13. If the tire...

Owner's Manual
Page 370
... could strike someone. Turn off the air compressor by pulling the lever up to the ON position. 8. Store the tire inflator kit in flator hose from the sealant canister by moving the switch to the OFF position. Disconnect the air compressor in the proper place. ...Removal and Installation of the Sealant Canister To remove the sealant canister, do the following: {CAUTION: Storing the tire inflator kit or other equipment in flator kit switch to the standard operating pressure using the air pressure gauge on the top of the unit. 9. In a sudden stop or ...
... could strike someone. Turn off the air compressor by pulling the lever up to the ON position. 8. Store the tire inflator kit in flator hose from the sealant canister by moving the switch to the OFF position. Disconnect the air compressor in the proper place. ...Removal and Installation of the Sealant Canister To remove the sealant canister, do the following: {CAUTION: Storing the tire inflator kit or other equipment in flator kit switch to the standard operating pressure using the air pressure gauge on the top of the unit. 9. In a sudden stop or ...

Owner's Manual
Page 436
... How to Wear Safety Belts Properly ...1-16 I Ignition Positions ...2-22 Infants and Young Children, Restraints ...1-32 Inflation -- Tire Pressure ...5-64 Inflator Kit, Tire ...5-74 Instrument Panel Brightness ...3-17 Cluster ...3-36 Overview ...3-4 Interior Lamps ...3-17 J Jump Starting ...5-43 K Keyless Entry System ...2-4 Keys ...2-2 6
... How to Wear Safety Belts Properly ...1-16 I Ignition Positions ...2-22 Infants and Young Children, Restraints ...1-32 Inflation -- Tire Pressure ...5-64 Inflator Kit, Tire ...5-74 Instrument Panel Brightness ...3-17 Cluster ...3-36 Overview ...3-4 Interior Lamps ...3-17 J Jump Starting ...5-43 K Keyless Entry System ...2-4 Keys ...2-2 6

Owner's Manual
Page 442
... the Flat Tire ...5-85 Tires (cont.) Removing the Spare Tire and Tools ...5-83 Storing a Flat or Spare Tire and Tools ...5-91 Tire Inflator Kit ...5-74 Tire Sidewall Labelling ...5-59 Tire Terminology and Definitions ...5-61 Uniform Tire Quality Grading ...5-69 Wheel Alignment and Tire Balance ...5-70 Wheel Replacement...
... the Flat Tire ...5-85 Tires (cont.) Removing the Spare Tire and Tools ...5-83 Storing a Flat or Spare Tire and Tools ...5-91 Tire Inflator Kit ...5-74 Tire Sidewall Labelling ...5-59 Tire Terminology and Definitions ...5-61 Uniform Tire Quality Grading ...5-69 Wheel Alignment and Tire Balance ...5-70 Wheel Replacement...