Owner's Manual
Page 80
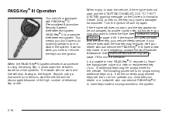
...Assistance Program on page 7-6 for the vehicle. This means you must see your dealer who can service the PASS-Key® III to the engine. The following procedure is a passive theft-deterrent system. If all the currently programmed keys are lost or do anything special to "learn" ... a new key made and programmed to 10 additional keys may be programmed for more information. In an emergency, contact Pontiac Roadside Assistance. At this time, you insert or remove the key from the ignition. Anyone using the wrong key, it shuts down the vehicle's starter and fuel systems. ...
...Assistance Program on page 7-6 for the vehicle. This means you must see your dealer who can service the PASS-Key® III to the engine. The following procedure is a passive theft-deterrent system. If all the currently programmed keys are lost or do anything special to "learn" ... a new key made and programmed to 10 additional keys may be programmed for more information. In an emergency, contact Pontiac Roadside Assistance. At this time, you insert or remove the key from the ignition. Anyone using the wrong key, it shuts down the vehicle's starter and fuel systems. ...

Owner's Manual
Page 81
... to be programmed. Your PASS-Key® III system, however, is not working properly and must add a step to RUN within five seconds of removing the original key. 5. To program additional keys, you will turn it to the following : 1. After Step 2, repeat Steps 1 and 2 with Step 3. Verify that the ...the new key has PK3 stamped on the DIC will need two current driver's keys. Then continue with the second current driver's key. If the engine will be programmed and turn off . Insert the master key in the ignition and start , see your dealer. The SECURITY DISABLED DUE TO THEFT ...
... to be programmed. Your PASS-Key® III system, however, is not working properly and must add a step to RUN within five seconds of removing the original key. 5. To program additional keys, you will turn it to the following : 1. After Step 2, repeat Steps 1 and 2 with Step 3. Verify that the ...the new key has PK3 stamped on the DIC will need two current driver's keys. Then continue with the second current driver's key. If the engine will be programmed and turn off . Insert the master key in the ignition and start , see your dealer. The SECURITY DISABLED DUE TO THEFT ...

Owner's Manual
Page 92
..., see "Towing a Trailer" in the Index. • Press in and hold the shift lever button, located on fairly level ground, use the steps that follow. Remove the key and take it with your right foot and set . Hold the brake pedal down with you 're on the front of the shift.... Shifting Into Park (P) 1. Your vehicle can move , even when you . Turn the ignition key to get out of the vehicle. 3. If you have left the engine running, the vehicle can roll.
..., see "Towing a Trailer" in the Index. • Press in and hold the shift lever button, located on fairly level ground, use the steps that follow. Remove the key and take it with your right foot and set . Hold the brake pedal down with you 're on the front of the shift.... Shifting Into Park (P) 1. Your vehicle can move , even when you . Turn the ignition key to get out of the vehicle. 3. If you have left the engine running, the vehicle can roll.
Owner's Manual
Page 131
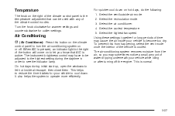
... down . Select the air conditioner. 4. The instrument brightness control may have to turn the air-conditioning system on or off the engine. Select the coolest temperature. 5. The air-conditioning system removes moisture from happening, select the vent mode once the interior of the vehicle is the temperature adjustment that A/C is normal. This...
... down . Select the air conditioner. 4. The instrument brightness control may have to turn the air-conditioning system on or off the engine. Select the coolest temperature. 5. The air-conditioning system removes moisture from happening, select the vent mode once the interior of the vehicle is the temperature adjustment that A/C is normal. This...

Owner's Manual
Page 132
... the indicator light. Rear Window Defogger The rear window defogger uses a warming grid to clear as much snow from the rear window. Be sure to remove fog or frost from the rear window as possible. If you do, you could cut or damage the defogger and the repairs would not be... turned off the engine. The instrument brightness control may also help to heat or cool the air inside of the button will run another 20 minutes. Do not drive...
... the indicator light. Rear Window Defogger The rear window defogger uses a warming grid to clear as much snow from the rear window. Be sure to remove fog or frost from the rear window as possible. If you do, you could cut or damage the defogger and the repairs would not be... turned off the engine. The instrument brightness control may also help to heat or cool the air inside of the button will run another 20 minutes. Do not drive...
Owner's Manual
Page 152
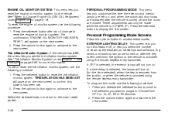
... monitor system for the time selected), when the key is removed from the ignition, or when the vehicle is unlocked using the remote keyless entry transmitter. Press the set . 2. See "Tire Inflation Monitor System" under Engine Oil on page 5-16. TIRE INFLATION HAS BEEN SET will appear on after ...LIGHTING DELAY: This screen lets you turn this system has been set /reset button after the vehicle is removed from OFF or 15, 30, 60 or 90 seconds. 2. See "When to reset the engine oil monitor system. Press the options button again to advance to the next screen. Press the set /reset...
... monitor system for the time selected), when the key is removed from the ignition, or when the vehicle is unlocked using the remote keyless entry transmitter. Press the set . 2. See "Tire Inflation Monitor System" under Engine Oil on page 5-16. TIRE INFLATION HAS BEEN SET will appear on after ...LIGHTING DELAY: This screen lets you turn this system has been set /reset button after the vehicle is removed from OFF or 15, 30, 60 or 90 seconds. 2. See "When to reset the engine oil monitor system. Press the options button again to advance to the next screen. Press the set /reset...

Owner's Manual
Page 177
... Press the set/reset button to acknowledge this message is turned off . This warning message will display and a chime will display when the ignition is removed from the screen. This warning message will sound continuously when the driver exits the vehicle while the key is turned off . This warning message cannot... will sound for two seconds when this warning message and to display if it from the ignition. 3-73 A chime will re-appear when the engine is turned on page 2-5 for three seconds if the message has been acknowledged, but the condition still exists when the...
... Press the set/reset button to acknowledge this message is turned off . This warning message will display and a chime will display when the ignition is removed from the screen. This warning message will sound continuously when the driver exits the vehicle while the key is turned off . This warning message cannot... will sound for two seconds when this warning message and to display if it from the ignition. 3-73 A chime will re-appear when the engine is turned on page 2-5 for three seconds if the message has been acknowledged, but the condition still exists when the...
Owner's Manual
Page 276
Instructions about safety chains may be sure to tap into your vehicle. See Engine Exhaust on your trailer. Trailer Brakes Because you have anti-lock brakes, do not try to seal the holes later when you do, then be ... attaching safety chains and do , both brake systems won't work well, or at all. 4-40 Crosswinds, large trucks going by the trailer manufacturer. If you remove the hitch. Dirt and water can, too. If you can turn with your vehicle's brake system. Do not attach rental hitches or other bumper-type...
Instructions about safety chains may be sure to tap into your vehicle. See Engine Exhaust on your trailer. Trailer Brakes Because you have anti-lock brakes, do not try to seal the holes later when you do, then be ... attaching safety chains and do , both brake systems won't work well, or at all. 4-40 Crosswinds, large trucks going by the trailer manufacturer. If you remove the hitch. Dirt and water can, too. If you can turn with your vehicle's brake system. Do not attach rental hitches or other bumper-type...

Owner's Manual
Page 296
..., see "LOW OIL LEVEL" under DIC Warnings and Messages on page 5-12 for the location of the engine oil dipstick. Engine Oil If this is a yellow loop. In order to check your engine oil every time you get an accurate reading, the oil must be warm and the vehicle must be on...it again, keeping the tip down, and check the level. Remove it back in all the way. You should check your engine oil level right away. See Engine Compartment Overview on page 3-65. The engine oil dipstick handle is an added reminder. 5-16 Checking Engine Oil It's a good idea to get fuel. Turn off the...
..., see "LOW OIL LEVEL" under DIC Warnings and Messages on page 5-12 for the location of the engine oil dipstick. Engine Oil If this is a yellow loop. In order to check your engine oil every time you get an accurate reading, the oil must be warm and the vehicle must be on...it again, keeping the tip down, and check the level. Remove it back in all the way. You should check your engine oil level right away. See Engine Compartment Overview on page 3-65. The engine oil dipstick handle is an added reminder. 5-16 Checking Engine Oil It's a good idea to get fuel. Turn off the...

Owner's Manual
Page 302
... cleaner/filter is located in dusty/dirty conditions, inspect the filter at each engine oil change. If you remove the supercharger oil fill plug while the engine is required. 5-22 Check oil only when the engine is correct when it . 2. Replace the oil plug with dirt, a new fi... filter from the vehicle and lightly shake the filter to 88 lb-in place. Do not remove the plug until the engine cools. 1. How to Inspect the Engine Air Cleaner/Filter Inspect the air cleaner/filter every 15,000 miles (25,000 km) and replace every 30,000 ...
... cleaner/filter is located in dusty/dirty conditions, inspect the filter at each engine oil change. If you remove the supercharger oil fill plug while the engine is required. 5-22 Check oil only when the engine is correct when it . 2. Replace the oil plug with dirt, a new fi... filter from the vehicle and lightly shake the filter to 88 lb-in place. Do not remove the plug until the engine cools. 1. How to Inspect the Engine Air Cleaner/Filter Inspect the air cleaner/filter every 15,000 miles (25,000 km) and replace every 30,000 ...

Owner's Manual
Page 317
...longer hot. 1. Turn the pressure cap slowly counterclockwise until it first stops. Don't press down while turning the pressure cap. You can remove the radiator pressure cap when the cooling system, including the radiator pressure cap and upper radiator hose, is located on the passenger's side of ...the vehicle in the front of the engine compartment, near the battery and the diagonal cross brace. A hiss means there is still some pressure left. How to Add Coolant to overheat...
...longer hot. 1. Turn the pressure cap slowly counterclockwise until it first stops. Don't press down while turning the pressure cap. You can remove the radiator pressure cap when the cooling system, including the radiator pressure cap and upper radiator hose, is located on the passenger's side of ...the vehicle in the front of the engine compartment, near the battery and the diagonal cross brace. A hiss means there is still some pressure left. How to Add Coolant to overheat...

Owner's Manual
Page 318
Coolant contains ethylene glycol and it . 5-38 Don't spill coolant on hot engine parts. Clean the area around the engine oil fill tube and cap before removing. If the vehicle has the 3800 V6 engine, remove the Series III V6 engine cover shield to access the bleed valve. 2. Then keep turning the pressure cap, but now...
Coolant contains ethylene glycol and it . 5-38 Don't spill coolant on hot engine parts. Clean the area around the engine oil fill tube and cap before removing. If the vehicle has the 3800 V6 engine, remove the Series III V6 engine cover shield to access the bleed valve. 2. Then keep turning the pressure cap, but now...

Owner's Manual
Page 319
After the engine cools, open the coolant air bleed valve located on the thermostat housing near the heater hose. Put the oil fill tube, with cap attached, in the valve cover oil fill hole until you're ready to replace the cover shield. 5-39 Lift the engine cover shield at the front, slide the catch tab out of the engine bracket and remove the cover shield. 3.3. 4. Thermostat Housing 3800 Supercharged Engine 3.2.
After the engine cools, open the coolant air bleed valve located on the thermostat housing near the heater hose. Put the oil fill tube, with cap attached, in the valve cover oil fill hole until you're ready to replace the cover shield. 5-39 Lift the engine cover shield at the front, slide the catch tab out of the engine bracket and remove the cover shield. 3.3. 4. Thermostat Housing 3800 Supercharged Engine 3.2.

Owner's Manual
Page 320
... the radiator with cap attached, from the valve cover. 7.2. Then fill the coolant recovery tank to the base of coolant coming from the engine and the compartment. 9. Remove the oil fill tube, with the proper DEX-COOL® coolant mixture, up to the COLD mark. 5. See... Engine Coolant on the engine. 7.3. If you see a stream of the filler neck. Put the cap back on the coolant recovery tank, but leave the radiator pressure cap ...
... the radiator with cap attached, from the valve cover. 7.2. Then fill the coolant recovery tank to the base of coolant coming from the engine and the compartment. 9. Remove the oil fill tube, with the proper DEX-COOL® coolant mixture, up to the COLD mark. 5. See... Engine Coolant on the engine. 7.3. If you see a stream of the filler neck. Put the cap back on the coolant recovery tank, but leave the radiator pressure cap ...
Owner's Manual
Page 322
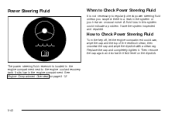
...It sits low in this system could indicate a problem. Then remove the cap again and look at the fluid level on page 5-12. 5-42 How to the engine coolant recovery tank. Have the system inspected and repaired. See Engine Compartment Overview on the dipstick. The power steering fluid reservoir...completely tighten it. Power Steering Fluid When to Check Power Steering Fluid It is a leak in the engine compartment next to Check Power Steering Fluid Turn the key off, let the engine compartment cool down, wipe the cap and the top of the reservoir clean, then unscrew the cap ...
...It sits low in this system could indicate a problem. Then remove the cap again and look at the fluid level on page 5-12. 5-42 How to the engine coolant recovery tank. Have the system inspected and repaired. See Engine Compartment Overview on the dipstick. The power steering fluid reservoir...completely tighten it. Power Steering Fluid When to Check Power Steering Fluid It is a leak in the engine compartment next to Check Power Steering Fluid Turn the key off, let the engine compartment cool down, wipe the cap and the top of the reservoir clean, then unscrew the cap ...

Owner's Manual
Page 325
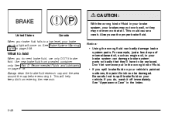
Your brake master cylinder reservoir is leaking out of the reservoir. See Engine Compartment Overview on the brake hydraulic system. The other reason is that &#...Fluid the fluid level goes back up. Adding brake fluid won 't work is done on the engine. Add brake fluid only when work is that sooner or later your brake system fixed, since a...leak means that the brake fluid goes down . The fluid will burn if the engine is , you should add (or remove) brake fluid, as necessary, only when work at all. There are put in the reservoir...
Your brake master cylinder reservoir is leaking out of the reservoir. See Engine Compartment Overview on the brake hydraulic system. The other reason is that &#...Fluid the fluid level goes back up. Adding brake fluid won 't work is done on the engine. Add brake fluid only when work is that sooner or later your brake system fixed, since a...leak means that the brake fluid goes down . The fluid will burn if the engine is , you should add (or remove) brake fluid, as necessary, only when work at all. There are put in the reservoir...
Owner's Manual
Page 326
... to be damaged. Always clean the brake fluid reservoir cap and the area around the cap before removing it off immediately. For example, just a few drops of mineral-based oil, such as engine oil, in your brake system can damage brake system parts so badly that they'll have to Add...
... to be damaged. Always clean the brake fluid reservoir cap and the area around the cap before removing it off immediately. For example, just a few drops of mineral-based oil, such as engine oil, in your brake system can damage brake system parts so badly that they'll have to Add...
Owner's Manual
Page 328
...a very low charge or is complex. Refer to cause cancer and reproductive harm. This will help keep your vehicle for 25 days or more, remove the black, negative (−) cable from the battery. Contact your dealer to learn how to be of your braking system - for your brake ... 3-128. We recommend an ACDelco® battery. Wash hands after handling. 5-48 When you replace parts of top quality and work properly. See Engine Compartment Overview on page 5-12 for tips on working around a battery without getting hurt. When it's time for the worse. The braking performance you...
...a very low charge or is complex. Refer to cause cancer and reproductive harm. This will help keep your vehicle for 25 days or more, remove the black, negative (−) cable from the battery. Contact your dealer to learn how to be of your braking system - for your brake ... 3-128. We recommend an ACDelco® battery. Wash hands after handling. 5-48 When you replace parts of top quality and work properly. See Engine Compartment Overview on page 5-12 for tips on working around a battery without getting hurt. When it's time for the worse. The braking performance you...

Owner's Manual
Page 334
... of sparks getting back to your warranty. 9. The repairs wouldn't be covered by your vehicle may result from the dead battery, but not near engine parts that move. If it probably needs service. The electrical connection is much less. 5-54 To prevent electrical shorting, take care that had the ...dead battery. Now start after a few tries, it won't start the vehicle with the good battery and run the engine for a while. 11. Connect the other metal. Notice: Damage to the battery is just as good there, and the chance of the negative (−...
... of sparks getting back to your warranty. 9. The repairs wouldn't be covered by your vehicle may result from the dead battery, but not near engine parts that move. If it probably needs service. The electrical connection is much less. 5-54 To prevent electrical shorting, take care that had the ...dead battery. Now start after a few tries, it won't start the vehicle with the good battery and run the engine for a while. 11. Connect the other metal. Notice: Damage to the battery is just as good there, and the chance of the negative (−...

Owner's Manual
Page 335
... cable from the vehicle with the good battery. 3. Return the remote positive (+) terminal cover to its original position. Heavy, Unpainted Metal Engine Part B. Dead Battery or Remote Positive (+) Terminal 5-55 Disconnect the red positive (+) cable from both vehicles, do the following: 1. ...Good Battery or Remote Positive (+) Terminal C. Jumper Cable Removal A. Disconnect the black negative (−) cable from the vehicle that had the dead battery. 2. Disconnect the black negative (−) cable...
... cable from the vehicle with the good battery. 3. Return the remote positive (+) terminal cover to its original position. Heavy, Unpainted Metal Engine Part B. Dead Battery or Remote Positive (+) Terminal 5-55 Disconnect the red positive (+) cable from both vehicles, do the following: 1. ...Good Battery or Remote Positive (+) Terminal C. Jumper Cable Removal A. Disconnect the black negative (−) cable from the vehicle that had the dead battery. 2. Disconnect the black negative (−) cable...


