

Owner's Manual
Page 1
2011 GMC Savana Owner Manual M In Brief ...1-1 Instrument Panel ...1-2 Initial Drive Information ...1-4 Vehicle Features ...1-14 Performance and Maintenance ...1-17 Keys, Doors and Windows ...2-1 Keys and Locks ...2-2 Doors ...2-10 Vehicle Security...2-13 Exterior Mirrors ...2-15 Interior Mirrors ...2-17 Windows ...2-17 Seats and Restraints ...3-1 Head Restraints ...3-2 Front Seats ...3-2 Rear Seats ...3-5 Safety Belts ...3-8 Airbag System ...3-24 Child Restraints ...3-42 Storage ...4-1 Storage Compartments ...4-1 Instruments and Controls ...5-1 Controls ...5-2 Warning Lights, Gauges, and ...
2011 GMC Savana Owner Manual M In Brief ...1-1 Instrument Panel ...1-2 Initial Drive Information ...1-4 Vehicle Features ...1-14 Performance and Maintenance ...1-17 Keys, Doors and Windows ...2-1 Keys and Locks ...2-2 Doors ...2-10 Vehicle Security...2-13 Exterior Mirrors ...2-15 Interior Mirrors ...2-17 Windows ...2-17 Seats and Restraints ...3-1 Head Restraints ...3-2 Front Seats ...3-2 Rear Seats ...3-5 Safety Belts ...3-8 Airbag System ...3-24 Child Restraints ...3-42 Storage ...4-1 Storage Compartments ...4-1 Instruments and Controls ...5-1 Controls ...5-2 Warning Lights, Gauges, and ...

Owner's Manual
Page 2
2011 GMC Savana Owner Manual M Vehicle Care ...10-1 General Information ...10-3 Vehicle Checks ...10-6 Bulb Replacement ...10-39 Electrical System ...10-44 Wheels and Tires ...10-52 Jump Starting ...10-86 Towing ...10-91 Appearance Care ...10-94 Service and Maintenance ...11-1 General Information ...11-1 Scheduled Maintenance ...11-2 Recommended Fluids, Lubricants, and Parts ...11-7 Maintenance Records ...11-10 Technical Data ...12-1 Vehicle Identification ...12-1 Vehicle Data ...12-2 Customer Information ...13-1 Customer Information ...13...
2011 GMC Savana Owner Manual M Vehicle Care ...10-1 General Information ...10-3 Vehicle Checks ...10-6 Bulb Replacement ...10-39 Electrical System ...10-44 Wheels and Tires ...10-52 Jump Starting ...10-86 Towing ...10-91 Appearance Care ...10-94 Service and Maintenance ...11-1 General Information ...11-1 Scheduled Maintenance ...11-2 Recommended Fluids, Lubricants, and Parts ...11-7 Maintenance Records ...11-10 Technical Data ...12-1 Vehicle Identification ...12-1 Vehicle Data ...12-2 Customer Information ...13-1 Customer Information ...13...
Owner's Manual
Page 7
... Instrument Panel Instrument Panel ...1-2 Initial Drive Information Initial Drive Information ...Remote Keyless Entry (RKE) System ...Remote Vehicle Start ...Door Locks ...Windows ...Seat Adjustment ...Safety Belts ...Airbag On-Off Switch ...Sensing System for Passenger Airbag ...1-4 1-4 1-4 1-5 1-5 1-6 1-7 1-8 1-8 Mirror Adjustment ...1-9 Steering Wheel Adjustment ...1-10 Interior Lighting ...1-10 Exterior Lighting ...1-11 Windshield Wiper/Washer ...1-12 Climate Controls ...1-12 Transmission ...1-13 Performance and Maintenance Vehicle Features Radio(s) ...Satellite Radio ...Portable Audio...
... Instrument Panel Instrument Panel ...1-2 Initial Drive Information Initial Drive Information ...Remote Keyless Entry (RKE) System ...Remote Vehicle Start ...Door Locks ...Windows ...Seat Adjustment ...Safety Belts ...Airbag On-Off Switch ...Sensing System for Passenger Airbag ...1-4 1-4 1-4 1-5 1-5 1-6 1-7 1-8 1-8 Mirror Adjustment ...1-9 Steering Wheel Adjustment ...1-10 Interior Lighting ...1-10 Exterior Lighting ...1-11 Windshield Wiper/Washer ...1-12 Climate Controls ...1-12 Transmission ...1-13 Performance and Maintenance Vehicle Features Radio(s) ...Satellite Radio ...Portable Audio...

Owner's Manual
Page 9
...; System on page 5‑8. Passenger Airbag Status Indicator on page 5‑4. B. Windshield Wiper/Washer on page 5‑19 (If Equipped). F. Climate Control Systems on page 8‑4 (If Equipped). I. R. Rear Heating System on page 8‑1. See Malfunction Indicator Lamp on page 6‑4. N. W. See Turn and Lane-Change Signals on page 5‑20. Instrument Panel Illumination Control on page 5‑2. Steering Wheel Adjustment on page 6‑5. Front...
...; System on page 5‑8. Passenger Airbag Status Indicator on page 5‑4. B. Windshield Wiper/Washer on page 5‑19 (If Equipped). F. Climate Control Systems on page 8‑4 (If Equipped). I. R. Rear Heating System on page 8‑1. See Malfunction Indicator Lamp on page 6‑4. N. W. See Turn and Lane-Change Signals on page 5‑20. Instrument Panel Illumination Control on page 5‑2. Steering Wheel Adjustment on page 6‑5. Front...
Owner's Manual
Page 10
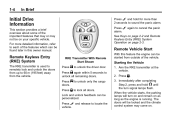
... each of the features which can be found later in this feature the engine can be on page 2‑3. Remote Keyless Entry (RKE) System The RKE transmitter is running. See Keys on page 2‑2 and Remote Keyless Entry (RKE) System Operation on your specific vehicle. Press j to 60 m (195 feet) away from up to unlock only the cargo doors. Press Q to sound the panic alarm.
... each of the features which can be found later in this feature the engine can be on page 2‑3. Remote Keyless Entry (RKE) System The RKE transmitter is running. See Keys on page 2‑2 and Remote Keyless Entry (RKE) System Operation on your specific vehicle. Press j to 60 m (195 feet) away from up to unlock only the cargo doors. Press Q to sound the panic alarm.
Owner's Manual
Page 29
Keys, Doors and Windows 2-1 Keys, Doors and Windows Keys and Locks Keys ...Remote Keyless Entry (RKE) System ...Remote Keyless Entry (RKE) System Operation ...Remote Vehicle Start ...Door Locks ...Power Door Locks ...Cargo Door Relocking ...Delayed Locking ...Automatic Door Locks ...Lockout Protection ...Safety Locks ...2-2 2-2 2-3 2-5 2-7 2-8 2-8 2-8 2-9 2-9 2-9 Doors Side Door (60/40 Swing-Out) ...2-10 Sliding Door ...2-11 Rear Doors ...2-12 Interior Mirrors Manual Rearview Mirror ...2-17 Windows Windows ...2-17 Manual Windows ...2-17 Power Windows ...2-18 Swing-Out Windows ...2-19 ...
Keys, Doors and Windows 2-1 Keys, Doors and Windows Keys and Locks Keys ...Remote Keyless Entry (RKE) System ...Remote Keyless Entry (RKE) System Operation ...Remote Vehicle Start ...Door Locks ...Power Door Locks ...Cargo Door Relocking ...Delayed Locking ...Automatic Door Locks ...Lockout Protection ...Safety Locks ...2-2 2-2 2-3 2-5 2-7 2-8 2-8 2-8 2-9 2-9 2-9 Doors Side Door (60/40 Swing-Out) ...2-10 Sliding Door ...2-11 Rear Doors ...2-12 Interior Mirrors Manual Rearview Mirror ...2-17 Windows Windows ...2-17 Manual Windows ...2-17 Power Windows ...2-18 Swing-Out Windows ...2-19 ...
Owner's Manual
Page 32
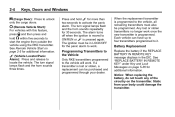
... activate the panic alarm. The turn signal lamps flash and the horn sounds three times. j (Cargo Door): Press to unlock only the cargo doors. / (Remote Vehicle Start): For vehicles with this feature, press Q and then press and hold L for 30 seconds. Programming Transmitters to the Vehicle Only RKE transmitters programmed to the vehicle will work . The alarm turns off when the ignition is moved to ON/RUN or L is...
... activate the panic alarm. The turn signal lamps flash and the horn sounds three times. j (Cargo Door): Press to unlock only the cargo doors. / (Remote Vehicle Start): For vehicles with this feature, press Q and then press and hold L for 30 seconds. Programming Transmitters to the Vehicle Only RKE transmitters programmed to the vehicle will work . The alarm turns off when the ignition is moved to ON/RUN or L is...
Owner's Manual
Page 34
... the remote start since the vehicle has been driven, repeat these steps, while the engine is running time by 10 minutes. If it is the first remote start feature: 1. After the engine has been remote started two times, the ignition switch must be turned to ON/RUN and then back to extend the engine running . Aim the RKE transmitter at the vehicle. 2. Remote start can be extended one time. 2-6 Keys, Doors and Windows 3. The airbag readiness light will start , insert and turn signal...
... the remote start since the vehicle has been driven, repeat these steps, while the engine is running time by 10 minutes. If it is the first remote start feature: 1. After the engine has been remote started two times, the ignition switch must be turned to ON/RUN and then back to extend the engine running . Aim the RKE transmitter at the vehicle. 2. Remote start can be extended one time. 2-6 Keys, Doors and Windows 3. The airbag readiness light will start , insert and turn signal...
Owner's Manual
Page 46
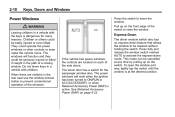
... or killed if caught in a vehicle with children. Express‐Down The driver window switch also has an express-down mode. The driver door has a switch for many reasons. The windows will work when the ignition has been turned to lower the window. 2-18 Keys, Doors and Windows Press the switch to ON/RUN or ACC/ACCESSORY, or when Retained Accessory Power (RAP) is active. Power Windows { WARNING Leaving children in the path of...
... or killed if caught in a vehicle with children. Express‐Down The driver window switch also has an express-down mode. The driver door has a switch for many reasons. The windows will work when the ignition has been turned to lower the window. 2-18 Keys, Doors and Windows Press the switch to ON/RUN or ACC/ACCESSORY, or when Retained Accessory Power (RAP) is active. Power Windows { WARNING Leaving children in the path of...

Owner's Manual
Page 118
... steering wheel: 1. Selecting Tracks on other steering wheel control. For vehicles with a tilt steering wheel, the lever is located on the left side of the current folder display on the radio display. If available, some audio controls can be adjusted at the steering wheel. CD To select tracks on a CD, or navigate an iPod® or USB device. Pull the lever to lock the steering wheel in place. Controls Steering Wheel...
... steering wheel: 1. Selecting Tracks on other steering wheel control. For vehicles with a tilt steering wheel, the lever is located on the left side of the current folder display on the radio display. If available, some audio controls can be adjusted at the steering wheel. CD To select tracks on a CD, or navigate an iPod® or USB device. Pull the lever to lock the steering wheel in place. Controls Steering Wheel...
Owner's Manual
Page 122
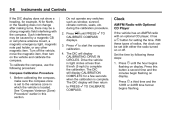
..., then turn on display. The DIC will then return to PRESS V TO CALIBRATE COMPASS. Drive the vehicle in which the vehicle is complete. Such interference may be caused by following procedure: Compass Calibration Procedure 1. Set the time by a magnetic CB or cell phone antenna mount, a magnetic emergency light, magnetic note pad holder, or any switches such as window, sunroof, climate controls, seats, etc...
..., then turn on display. The DIC will then return to PRESS V TO CALIBRATE COMPASS. Drive the vehicle in which the vehicle is complete. Such interference may be caused by following procedure: Compass Calibration Procedure 1. Set the time by a magnetic CB or cell phone antenna mount, a magnetic emergency light, magnetic note pad holder, or any switches such as window, sunroof, climate controls, seats, etc...
Owner's Manual
Page 137
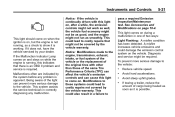
... more serious damage to costly repairs not covered by the vehicle warranty. Notice: Modifications made to the engine, transmission, exhaust, intake, or fuel system of the vehicle or the replacement of two ways: Light Flashing: A misfire condition has been detected. See Accessories and Modifications on page 10‑4. 5-21 This light comes on during a malfunction in correctly diagnosing any problem is running , as smoothly. If the Malfunction...
... more serious damage to costly repairs not covered by the vehicle warranty. Notice: Modifications made to the engine, transmission, exhaust, intake, or fuel system of the vehicle or the replacement of two ways: Light Flashing: A misfire condition has been detected. See Accessories and Modifications on page 10‑4. 5-21 This light comes on during a malfunction in correctly diagnosing any problem is running , as smoothly. If the Malfunction...
Owner's Manual
Page 167
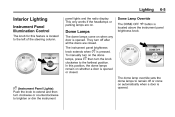
... after all the doors are on when any door is located above the instrument panel brightness knob. In this feature is opened . panel lights and the radio display. Lighting 6-5 Interior Lighting Instrument Panel Illumination Control The knob for this position, the dome lamps remain on the dome lamps, press D then turn the knob clockwise to the left of the steering column. To manually turn on whether a door is located...
... after all the doors are on when any door is located above the instrument panel brightness knob. In this feature is opened . panel lights and the radio display. Lighting 6-5 Interior Lighting Instrument Panel Illumination Control The knob for this position, the dome lamps remain on the dome lamps, press D then turn the knob clockwise to the left of the steering column. To manually turn on whether a door is located...
Owner's Manual
Page 205
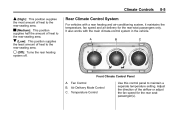
... Control Use this control panel to the rear-seating area. 9 (Off): Turns the rear heating system off. Front Climate Control Panel A. Adjust the direction of the airflow or adjust the fan speed for the rear-seat passengers only. It also works with a rear heating and air-conditioning system, it maintains the temperature, fan speed and air delivery for the rear seat passenger(s). c (Medium): This position supplies half the amount of heat to the rear-seating area. Fan Control B. Rear Climate Control System For vehicles...
... Control Use this control panel to the rear-seating area. 9 (Off): Turns the rear heating system off. Front Climate Control Panel A. Adjust the direction of the airflow or adjust the fan speed for the rear-seat passengers only. It also works with a rear heating and air-conditioning system, it maintains the temperature, fan speed and air delivery for the rear seat passenger(s). c (Medium): This position supplies half the amount of heat to the rear-seating area. Fan Control B. Rear Climate Control System For vehicles...
Owner's Manual
Page 256
... passed vehicle before starting down , Making Turns Notice: Making very sharp turns while trailering could be sure the trailer bulbs are burned out. Backing Up Hold the bottom of the steering wheel with a trailer, make wider turns than at high altitude on level ground, with the vehicle. Shift the transmission to the right. If the overheat warning comes on, see Engine Overheating on the instrument panel flash whenever signaling a turn or lane change...
... passed vehicle before starting down , Making Turns Notice: Making very sharp turns while trailering could be sure the trailer bulbs are burned out. Backing Up Hold the bottom of the steering wheel with a trailer, make wider turns than at high altitude on level ground, with the vehicle. Shift the transmission to the right. If the overheat warning comes on, see Engine Overheating on the instrument panel flash whenever signaling a turn or lane change...
Owner's Manual
Page 329
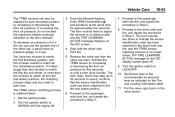
... the tire's air pressure. Vehicle Care The TPMS sensors can use the pointed end of the valve cap, a pencil-style air pressure gauge, or a key. You have two minutes to match the first tire/wheel position, and five minutes overall to match all four tires to the driver side rear tire, and the TPMS sensor matching process is outlined below: 1. Remove the valve cap from the valve cap stem. Turn the ignition switch to each tire/wheel...
... the tire's air pressure. Vehicle Care The TPMS sensors can use the pointed end of the valve cap, a pencil-style air pressure gauge, or a key. You have two minutes to match the first tire/wheel position, and five minutes overall to match all four tires to the driver side rear tire, and the TPMS sensor matching process is outlined below: 1. Remove the valve cap from the valve cap stem. Turn the ignition switch to each tire/wheel...

Owner's Manual
Page 333
... near the tire size. Vehicle Care Vehicle Storage Tires age when stored normally mounted on the vehicle, when it was new, were designed to meet General Motors Tire Performance Criteria Specification (TPC Spec) system rating. Parking for an extended period can deteriorate rubber. This area should be free of the vehicle, including brake system performance, ride and handling, traction control, and tire pressure monitoring performance. The original equipment tires installed on a parked vehicle. See Tire Sidewall Labeling...
... near the tire size. Vehicle Care Vehicle Storage Tires age when stored normally mounted on the vehicle, when it was new, were designed to meet General Motors Tire Performance Criteria Specification (TPC Spec) system rating. Parking for an extended period can deteriorate rubber. This area should be free of the vehicle, including brake system performance, ride and handling, traction control, and tire pressure monitoring performance. The original equipment tires installed on a parked vehicle. See Tire Sidewall Labeling...
Owner's Manual
Page 371
... or Automatic Transmission Fluid (6-Speed Transmission) on page 10‑20. High pressure water can overcome the seals and contaminate the transfer case fluid. Evaporative control system inspection. Automatic transmission fluid change (severe service) for vehicles mainly driven when frequently towing a trailer, or used for taxi, police, or delivery service. Service and Maintenance . 11-5 Hood/Decklid/Liftgate/Liftglass Support Gas Strut Service: Visually inspect gas strut, if equipped, for proper hook‐up, routing, and condition. Check...
... or Automatic Transmission Fluid (6-Speed Transmission) on page 10‑20. High pressure water can overcome the seals and contaminate the transfer case fluid. Evaporative control system inspection. Automatic transmission fluid change (severe service) for vehicles mainly driven when frequently towing a trailer, or used for taxi, police, or delivery service. Service and Maintenance . 11-5 Hood/Decklid/Liftgate/Liftglass Support Gas Strut Service: Visually inspect gas strut, if equipped, for proper hook‐up, routing, and condition. Check...
Owner's Manual
Page 404
... Belt Reminders ...5-16 Security ...5-26 StabiliTrak® Indicator ...5-25 Tire Pressure ...5-25 Tow/Haul Mode ...5-24 Locking Rear Axle ...9-37 Locks Automatic Door ...2-9 Cargo Door Relocking ...2-8 Delayed Locking ...2-8 Door ...2-7 Lockout Protection ...2-9 Power Door ...2-8 Safety ...2-9 Loss of Control ...9-5 Lower Anchors and Tethers for Children (LATCH SYSTEM) ...3-50 M Maintenance Records ...11-10 Maintenance Schedule Recommended Fluids and Lubricants ...11-7 Scheduled Maintenance ...11-2 Malfunction Indicator Lamp ...5-20 Manual Mirrors ...2-15 Manual Mode ...9-31 Manual Windows...
... Belt Reminders ...5-16 Security ...5-26 StabiliTrak® Indicator ...5-25 Tire Pressure ...5-25 Tow/Haul Mode ...5-24 Locking Rear Axle ...9-37 Locks Automatic Door ...2-9 Cargo Door Relocking ...2-8 Delayed Locking ...2-8 Door ...2-7 Lockout Protection ...2-9 Power Door ...2-8 Safety ...2-9 Loss of Control ...9-5 Lower Anchors and Tethers for Children (LATCH SYSTEM) ...3-50 M Maintenance Records ...11-10 Maintenance Schedule Recommended Fluids and Lubricants ...11-7 Scheduled Maintenance ...11-2 Malfunction Indicator Lamp ...5-20 Manual Mirrors ...2-15 Manual Mode ...9-31 Manual Windows...

Owner's Manual
Page 407
... Belt ...3-18 Reminders ...5-16 Replacing After a Crash ...3-23 Use During Pregnancy ...3-22 Service (cont.) Maintenance Records ...11-10 Maintenance, General Information ...11-1 Parts Identification Label ...12-1 Publications Ordering Information ...13-12 Scheduling Appointments ...13-7 Vehicle Messages ...5-38 Servicing the Airbag ...3-39 Shift Lock Control Function Check, Automatic Transmission ...10-37 Shifting Into Park ...9-22 Out of Park ...9-23 Side Door ...2-10 Sidemarker Bulb Replacement ...10-41 Signals, Turn and Lane-Change ...6-4 Sliding Door ...2-11 Specifications and Capacities...
... Belt ...3-18 Reminders ...5-16 Replacing After a Crash ...3-23 Use During Pregnancy ...3-22 Service (cont.) Maintenance Records ...11-10 Maintenance, General Information ...11-1 Parts Identification Label ...12-1 Publications Ordering Information ...13-12 Scheduling Appointments ...13-7 Vehicle Messages ...5-38 Servicing the Airbag ...3-39 Shift Lock Control Function Check, Automatic Transmission ...10-37 Shifting Into Park ...9-22 Out of Park ...9-23 Side Door ...2-10 Sidemarker Bulb Replacement ...10-41 Signals, Turn and Lane-Change ...6-4 Sliding Door ...2-11 Specifications and Capacities...
