
Owner's Manual
Page 21
... liftgate: Press and release the LOCK button on the transmitter to the Customer Programmable Features of the system. 2 While the LOCK button is on, the headlights and park lights will flash, the horn will pulse on and off the panic alarm by pressing the PANIC button a second time, you turn the...
... liftgate: Press and release the LOCK button on the transmitter to the Customer Programmable Features of the system. 2 While the LOCK button is on, the headlights and park lights will flash, the horn will pulse on and off the panic alarm by pressing the PANIC button a second time, you turn the...

Owner's Manual
Page 24
... illuminate, the system is closed, or if all doors are closed, the system will then rearm itself in about 16 seconds. The horn will pulse, headlights/park lights will flash, the Vehicle Theft Alarm/Immobilizer light, located on the keyless entry transmitter.
... illuminate, the system is closed, or if all doors are closed, the system will then rearm itself in about 16 seconds. The horn will pulse, headlights/park lights will flash, the Vehicle Theft Alarm/Immobilizer light, located on the keyless entry transmitter.

Owner's Manual
Page 66
... Open And Close The Hood ...100 Lights ...102 ▫ Overhead Console Map/Reading Lights ...102 ▫ Interior Lights ...103 ▫ Multi-Function Lever ...103 ▫ Headlights, Parking Lights, Instrument Panel Lights ...103 ▫ Automatic Headlights ...105 ▫ Daytime Running Lights (Canada Only) ...105 ▫ Lights-On Reminder ...105 ▫...
... Open And Close The Hood ...100 Lights ...102 ▫ Overhead Console Map/Reading Lights ...102 ▫ Interior Lights ...103 ▫ Multi-Function Lever ...103 ▫ Headlights, Parking Lights, Instrument Panel Lights ...103 ▫ Automatic Headlights ...105 ▫ Daytime Running Lights (Canada Only) ...105 ▫ Lights-On Reminder ...105 ▫...

Owner's Manual
Page 69
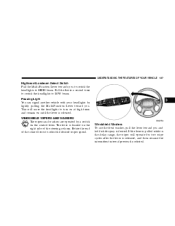
A two point pivot system allows for horizontal and vertical adjustment of vehicle). UNDERSTANDING THE FEATURES OF YOUR VEHICLE 69 MIRRORS Inside Day/Night Mirror Adjust the mirror to the night position (toward windshield). 3 The mirror should be reduced by moving the small control under the mirror to center on the view through the rear window. Annoying headlight glare can be adjusted while set in the day position (toward rear of the mirror.
A two point pivot system allows for horizontal and vertical adjustment of vehicle). UNDERSTANDING THE FEATURES OF YOUR VEHICLE 69 MIRRORS Inside Day/Night Mirror Adjust the mirror to the night position (toward windshield). 3 The mirror should be reduced by moving the small control under the mirror to center on the view through the rear window. Annoying headlight glare can be adjusted while set in the day position (toward rear of the mirror.

Owner's Manual
Page 70
... base of the Rearview Mirror. You can turn the feature on . You can turn this feature is in the mirror will automatically adjust for annoying headlight glare from vehicles behind you . The hinges have three detent positions; full forward, full rearward, and normal. To avoid damage to resist damage. Apply the... during cleaning, never spray any cleaning solution directly onto the mirror. Driver's Side Outside Mirror Auto Dimmer - If Equipped This mirror automatically adjusts for annoying headlight glare from vehicles behind you . CAUTION!
... base of the Rearview Mirror. You can turn the feature on . You can turn this feature is in the mirror will automatically adjust for annoying headlight glare from vehicles behind you . The hinges have three detent positions; full forward, full rearward, and normal. To avoid damage to resist damage. Apply the... during cleaning, never spray any cleaning solution directly onto the mirror. Driver's Side Outside Mirror Auto Dimmer - If Equipped This mirror automatically adjusts for annoying headlight glare from vehicles behind you . CAUTION!

Owner's Manual
Page 103
... off in the Dome light position. Turn the ignition switch ON to the first detent for headlight, park light and instrument panel light operation. The interior lights will automatically turn signals, headlight beam selection, instrument panel light dimming, interior lights, the passing lights, and fog lights. ...the left in about 15 minutes if a door is left open or the dimmer control is left side of the steering column. 3 Headlights, Parking Lights, Instrument Panel Lights Turn the end of the Multi-Function Lever to restore the interior light operation. The lever is opened....
... off in the Dome light position. Turn the ignition switch ON to the first detent for headlight, park light and instrument panel light operation. The interior lights will automatically turn signals, headlight beam selection, instrument panel light dimming, interior lights, the passing lights, and fog lights. ...the left in about 15 minutes if a door is left open or the dimmer control is left side of the steering column. 3 Headlights, Parking Lights, Instrument Panel Lights Turn the end of the Multi-Function Lever to restore the interior light operation. The lever is opened....

Owner's Manual
Page 104
Dimmer Control With the parking lights or headlights on, rotating the dimmer control for the interior lights on the Multi-Function Lever upward will remain off when the doors are open. The interior ...
Dimmer Control With the parking lights or headlights on, rotating the dimmer control for the interior lights on the Multi-Function Lever upward will remain off when the doors are open. The interior ...

Owner's Manual
Page 105
...OF YOUR VEHICLE 105 Parade Mode (Daytime Brightness Feature) Rotate the dimmer control upward to the OFF position. When the system is ON, the Headlight Time Delay feature is off , and the parking brake is also ON. To turn the Automatic System OFF, turn the end of the Multi...-Function Lever to 90 seconds, when leaving your headlights ON or OFF based on , the headlights are off . NOTE: The engine must be running before the headlights will come ON in an unlighted area. 3 Automatic Headlights This system automatically turns your vehicle in the Automatic mode. To ...
...OF YOUR VEHICLE 105 Parade Mode (Daytime Brightness Feature) Rotate the dimmer control upward to the OFF position. When the system is ON, the Headlight Time Delay feature is off , and the parking brake is also ON. To turn the Automatic System OFF, turn the end of the Multi...-Function Lever to 90 seconds, when leaving your headlights ON or OFF based on , the headlights are off . NOTE: The engine must be running before the headlights will come ON in an unlighted area. 3 Automatic Headlights This system automatically turns your vehicle in the Automatic mode. To ...

Owner's Manual
Page 106
... for a defective outside light bulb. To activate the front fog lights, turn off the fog lights. Selecting high beam headlights will turn off the ignition switch while the headlights are still on. If an indicator fails to activate this feature Fog Lights - If Equipped The front fog light switch is... seconds of the Multi-Function Lever. Turn Signals Move the Multi-Function Lever up or down and the arrows on low beam. If the headlights are turned back on the Multi-Function Lever. 106 UNDERSTANDING THE FEATURES OF YOUR VEHICLE To activate the delay feature, turn off in the...
... for a defective outside light bulb. To activate the front fog lights, turn off the fog lights. Selecting high beam headlights will turn off the ignition switch while the headlights are still on. If an indicator fails to activate this feature Fog Lights - If Equipped The front fog light switch is... seconds of the Multi-Function Lever. Turn Signals Move the Multi-Function Lever up or down and the arrows on low beam. If the headlights are turned back on the Multi-Function Lever. 106 UNDERSTANDING THE FEATURES OF YOUR VEHICLE To activate the delay feature, turn off in the...
Owner's Manual
Page 107
... of the control lever to select the desired wiper speed. 3 Windshield Washers To use the front washer, pull the lever toward you to switch the headlights to HIGH beam. Rotate the end of the steering column. This will operate for two wipe cycles after the lever is desired. If the lever... is pulled while in the delay range, the wiper will cause the headlights to LOW beam. The lever is located on until the lever is released. WINDSHIELD WIPERS AND WASHERS The wipers and washers are operated by lightly...
... of the control lever to select the desired wiper speed. 3 Windshield Washers To use the front washer, pull the lever toward you to switch the headlights to HIGH beam. Rotate the end of the steering column. This will operate for two wipe cycles after the lever is desired. If the lever... is pulled while in the delay range, the wiper will cause the headlights to LOW beam. The lever is located on until the lever is released. WINDSHIELD WIPERS AND WASHERS The wipers and washers are operated by lightly...
Owner's Manual
Page 143
... as a loose or missing gas cap, poor fuel quality, etc. Cruise Indicator This display indicator shows that the headlights are ON. 4 Pull the Multi-Function lever towards the steering wheel to switch the headlights from OFF to immediate loss of your typical driving cycles. To reset a trip odometer, display the desired trip...
... as a loose or missing gas cap, poor fuel quality, etc. Cruise Indicator This display indicator shows that the headlights are ON. 4 Pull the Multi-Function lever towards the steering wheel to switch the headlights from OFF to immediate loss of your typical driving cycles. To reset a trip odometer, display the desired trip...

Owner's Manual
Page 150
..., 60, 90, or OFF. Service Interval When this feature is selected, the front and rear turn signals will select "Yes" or "No." NOTE: Turning the headlights on during the daytime causes the instrument panel lights to "Lights" in 500 mile (800 km) increments may be selected. Pressing the STEP button when... 30, 60, or 90 seconds, or not remain on lock feature selected. Headlamp On With Wipers? (Available with or without the sound horn on . The headlights will select "Yes" or "No." Headlamp Delay When this way. 150 UNDERSTANDING YOUR INSTRUMENT PANEL Flash Lights On Lock/Unlock?
..., 60, 90, or OFF. Service Interval When this feature is selected, the front and rear turn signals will select "Yes" or "No." NOTE: Turning the headlights on during the daytime causes the instrument panel lights to "Lights" in 500 mile (800 km) increments may be selected. Pressing the STEP button when... 30, 60, or 90 seconds, or not remain on lock feature selected. Headlamp On With Wipers? (Available with or without the sound horn on . The headlights will select "Yes" or "No." Headlamp Delay When this way. 150 UNDERSTANDING YOUR INSTRUMENT PANEL Flash Lights On Lock/Unlock?

Owner's Manual
Page 266
...; Cleaning The Center Console Cup Holders ...304 Integrated Power Module (IPM) ...305 Vehicle Storage ...306 Replacement Light Bulbs ...306 Bulb Replacement ...307 ▫ Standard Quad Headlights ...307 ▫ High Intensity Discharge Headlights (HID) - If Equipped ...308
...; Cleaning The Center Console Cup Holders ...304 Integrated Power Module (IPM) ...305 Vehicle Storage ...306 Replacement Light Bulbs ...306 Bulb Replacement ...307 ▫ Standard Quad Headlights ...307 ▫ High Intensity Discharge Headlights (HID) - If Equipped ...308

Owner's Manual
Page 307
...3157 Rear Sidemarker ...168 Fog Light ...880L Front Turn Signal...3157 Front Sidemarker...194 Headlight ...H7 License ...168 BULB REPLACEMENT Standard Quad Headlights 1. Remove the two screws securing the headlight module to the left and replace the bulb. Reinstall the rubber boot seals and ...then the headlight module. 7 Rotate the bulb to the vehicle and pull the headlight module forward away from the ...
...3157 Rear Sidemarker ...168 Fog Light ...880L Front Turn Signal...3157 Front Sidemarker...194 Headlight ...H7 License ...168 BULB REPLACEMENT Standard Quad Headlights 1. Remove the two screws securing the headlight module to the left and replace the bulb. Reinstall the rubber boot seals and ...then the headlight module. 7 Rotate the bulb to the vehicle and pull the headlight module forward away from the ...
Owner's Manual
Page 308
... should not attempt to the lights. High voltage can remain in contact with an oily surface, clean the bulb with the headlight switch off and the key removed. NOTE: On vehicles equipped with your authorized dealer for service. This diminishes and becomes more... the new bulb with High Intensity Discharge Headlights (HID), when the headlights are a type of High Intensity Discharge (HID) headlights when the headlight switch is a blue hue to service a headlight bulb yourself. High Intensity Discharge Headlights (HID) - If Equipped The headlights are turned on there is turned ON....
... should not attempt to the lights. High voltage can remain in contact with an oily surface, clean the bulb with the headlight switch off and the key removed. NOTE: On vehicles equipped with your authorized dealer for service. This diminishes and becomes more... the new bulb with High Intensity Discharge Headlights (HID), when the headlights are a type of High Intensity Discharge (HID) headlights when the headlight switch is a blue hue to service a headlight bulb yourself. High Intensity Discharge Headlights (HID) - If Equipped The headlights are turned on there is turned ON....

Owner's Manual
Page 309
Replace the bulb, reinstall the socket and then reinstall the headlight module. Front Fog Light 1. Remove the screw from the front of the fascia. 2. Twist the front fog light bulb to remove from the front of ... pull out from the fog light module. 3. Twist the bulb socket to the vehicle and pull the headlight module forward away from socket. 3. Remove the two screws securing the headlight module to remove from the headlight module and pull the bulb from the vehicle. 2. Disconnect the electrical connector and replace the bulb. 7 MAINTAINING...
Replace the bulb, reinstall the socket and then reinstall the headlight module. Front Fog Light 1. Remove the screw from the front of the fascia. 2. Twist the front fog light bulb to remove from the front of ... pull out from the fog light module. 3. Twist the bulb socket to the vehicle and pull the headlight module forward away from socket. 3. Remove the two screws securing the headlight module to remove from the headlight module and pull the bulb from the vehicle. 2. Disconnect the electrical connector and replace the bulb. 7 MAINTAINING...

Owner's Manual
Page 346
... Light ...139 Anti-Theft Security Alarm ...24 Appearance Care ...300 Auto Down Power Windows ...31 Automatic Dimming Mirror ...70 Automatic Door Locks ...17,18 Automatic Headlights ...105 Automatic Temperature Control ...183 Automatic Transaxle ...201,295 Adding Fluid ...313 Filter ...297 Fluid and Filter Changes ...297 Fluid Level Check ...296 Interlock System...
... Light ...139 Anti-Theft Security Alarm ...24 Appearance Care ...300 Auto Down Power Windows ...31 Automatic Dimming Mirror ...70 Automatic Door Locks ...17,18 Automatic Headlights ...105 Automatic Temperature Control ...183 Automatic Transaxle ...201,295 Adding Fluid ...313 Filter ...297 Fluid and Filter Changes ...297 Fluid Level Check ...296 Interlock System...

Owner's Manual
Page 349
INDEX 349 Defroster, Rear Window ...193 Defroster, Windshield ...63,188 Delay Wipers ...108 Digital Video Disc Player ...170 Dimmer Switch, Headlight ...107 Dipsticks Automatic Transaxle ...296 Disposal Antifreeze ...290 Door Locks ...16 Door Locks, Automatic ...17 Door Opener, Garage ...115 Drive Belts ...276 Drive Shaft Universal ...
INDEX 349 Defroster, Rear Window ...193 Defroster, Windshield ...63,188 Delay Wipers ...108 Digital Video Disc Player ...170 Dimmer Switch, Headlight ...107 Dipsticks Automatic Transaxle ...296 Disposal Antifreeze ...290 Door Locks ...16 Door Locks, Automatic ...17 Door Opener, Garage ...115 Drive Belts ...276 Drive Shaft Universal ...
Owner's Manual
Page 351
... ...98 Gross Axle Weight Rating ...242 Gross Vehicle Weight Rating ...242 Hands-Free Phone ...73 Hazard Warning Flasher ...250 Head Phones ...175 Head Restraints ...86 Headlights ...308 Bulb Replacement ...307 High Beam ...107 High Beam/Low Beam Select Switch ...107 Passing ...107 Replacing ...307 Switch ...103 Time Delay ...105 Heated Seats...
... ...98 Gross Axle Weight Rating ...242 Gross Vehicle Weight Rating ...242 Hands-Free Phone ...73 Hazard Warning Flasher ...250 Head Phones ...175 Head Restraints ...86 Headlights ...308 Bulb Replacement ...307 High Beam ...107 High Beam/Low Beam Select Switch ...107 Passing ...107 Replacing ...307 Switch ...103 Time Delay ...105 Heated Seats...

Owner's Manual
Page 353
...102 Airbag ...47,52,63,145 Anti-Lock ...139 Automatic Headlights ...105 Back-Up ...310 Brake Warning ...140 Bulb Replacement ...306,307 Courtesy/Reading ...102 Cruise ...143 Daytime Running ...105 Dimmer Switch, Headlight ...103 Engine Temperature Warning ...145 Fog ...106,143,309 ...Hazard Warning Flasher ...250 Headlight Switch ...103 Headlights ...103,307,308 High Beam Indicator ...143 Illuminated Entry ...15 Instrument Cluster ...103...
...102 Airbag ...47,52,63,145 Anti-Lock ...139 Automatic Headlights ...105 Back-Up ...310 Brake Warning ...140 Bulb Replacement ...306,307 Courtesy/Reading ...102 Cruise ...143 Daytime Running ...105 Dimmer Switch, Headlight ...103 Engine Temperature Warning ...145 Fog ...106,143,309 ...Hazard Warning Flasher ...250 Headlight Switch ...103 Headlights ...103,307,308 High Beam Indicator ...143 Illuminated Entry ...15 Instrument Cluster ...103...


