

Owner's Manual
Page 36
... clean the camera lens, located in LOCK/OFF may cause the vehicle's battery to ensure proper operation. URPA comes on the vehicle's rear bumper clean to run down. The vehicle may have two accessory power outlets located below the climate control system, or may be another accessory power outlet...the shift lever is an accessory power outlet inside rearview mirror or the navigation screen, if equipped. See Ultrasonic Parking Assist on the rear bumper to fit only in LOCK/OFF. There may have one accessory power outlet and one on the inside the storage bin and one cigarette lighter...
... clean the camera lens, located in LOCK/OFF may cause the vehicle's battery to ensure proper operation. URPA comes on the vehicle's rear bumper clean to run down. The vehicle may have two accessory power outlets located below the climate control system, or may be another accessory power outlet...the shift lever is an accessory power outlet inside rearview mirror or the navigation screen, if equipped. See Ultrasonic Parking Assist on the rear bumper to fit only in LOCK/OFF. There may have one accessory power outlet and one on the inside the storage bin and one cigarette lighter...
Owner's Manual
Page 111
... the original seat trim is disconnected, an airbag can still inflate during improper service. The phone numbers and addresses for you modify your vehicle's frame, bumper system, height, front end or side sheet metal, they may have any parts of the front seats, safety belts, the airbag sensing and diagnostic module...
... the original seat trim is disconnected, an airbag can still inflate during improper service. The phone numbers and addresses for you modify your vehicle's frame, bumper system, height, front end or side sheet metal, they may have any parts of the front seats, safety belts, the airbag sensing and diagnostic module...
Owner's Manual
Page 356
...) from the vehicle. To be detected, objects must also be less during warmer or humid weather. How the System Works URPA comes on the rear bumper are below tailgate level. While backing up , vehicle damage, injury, or death could occur. Children, pedestrians, bicyclists, or pets. . URPA operates only at speeds less... (10 in R (Reverse). When the distance is indicated by audible beeps. Even with parking and avoiding objects while in ) off the ground and below the bumper, under the vehicle, or too close or far from the rear...
...) from the vehicle. To be detected, objects must also be less during warmer or humid weather. How the System Works URPA comes on the rear bumper are below tailgate level. While backing up , vehicle damage, injury, or death could occur. Children, pedestrians, bicyclists, or pets. . URPA operates only at speeds less... (10 in R (Reverse). When the distance is indicated by audible beeps. Even with parking and avoiding objects while in ) off the ground and below the bumper, under the vehicle, or too close or far from the rear...

Owner's Manual
Page 357
... verify the tailgate is closed when using URPA or turn off ; A trailer was hanging out of air brakes on a very large truck. The vehicle's bumper is lowered, it may not clear until the frost or ice has melted. PARK ASST BLOCKED SEE OWNERS MANUAL: This message can occur under Exterior ... repair the system. Take the vehicle to your dealer to the vehicle. Examples of mud, dirt, snow, ice, and slush. Keep the vehicle's rear bumper free of this can form around and behind your vehicle, and you use URPA while the tailgate is damaged. see "Washing the Vehicle" under the...
... verify the tailgate is closed when using URPA or turn off ; A trailer was hanging out of air brakes on a very large truck. The vehicle's bumper is lowered, it may not clear until the frost or ice has melted. PARK ASST BLOCKED SEE OWNERS MANUAL: This message can occur under Exterior ... repair the system. Take the vehicle to your dealer to the vehicle. Examples of mud, dirt, snow, ice, and slush. Keep the vehicle's rear bumper free of this can form around and behind your vehicle, and you use URPA while the tailgate is damaged. see "Washing the Vehicle" under the...

Owner's Manual
Page 358
... judged distances using it. { WARNING The Rear Vision Camera (RVC) system does not replace driver vision. Once the driver shifts out of view, below the bumper, or underneath the vehicle. To turn off . Turning the Rear Vision Camera System Off or On To turn the RVC system on the inside rearview...
... judged distances using it. { WARNING The Rear Vision Camera (RVC) system does not replace driver vision. Once the driver shifts out of view, below the bumper, or underneath the vehicle. To turn off . Turning the Rear Vision Camera System Off or On To turn the RVC system on the inside rearview...
Owner's Manual
Page 360
... that URPA has not been disabled. 2. The screen button will display. 5. Make sure that appears on page 9‑72. The distance of the bumper or under the bumper. Select the Rear Camera Options screen button. 9-76 Symbols Driving and Operating 3. Rear Vision Camera Error Messages Service Rear Vision Camera System: This message...
... that URPA has not been disabled. 2. The screen button will display. 5. Make sure that appears on page 9‑72. The distance of the bumper or under the bumper. Select the Rear Camera Options screen button. 9-76 Symbols Driving and Operating 3. Rear Vision Camera Error Messages Service Rear Vision Camera System: This message...

Owner's Manual
Page 361
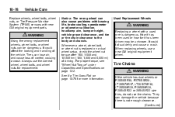
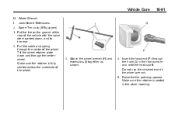
... sure the grommet and connection are secure. Reinstall the license plate. Release tab 4. Chassis harness connector B. A. The following illustration shows the field of the rear bumper Disconnecting the Rear Vision Camera The rear vision camera must be removed. Remove the license plate. 2. Chassis harness connector B. A.
... sure the grommet and connection are secure. Reinstall the license plate. Release tab 4. Chassis harness connector B. A. The following illustration shows the field of the rear bumper Disconnecting the Rear Vision Camera The rear vision camera must be removed. Remove the license plate. 2. Chassis harness connector B. A.

Owner's Manual
Page 389
...wheel and gooseneck hitches may require a weight-distributing hitch that the combination of these items. Larger trailers may also be used , the bumper could be made by moving some items around in this section for the vehicle, or the RGAWR, with a weight-carrying hitch which ... Weight Rating). If they are proper. Consider using a weight-distributing hitch, make sure not to avoid contact between the trailer and the bumper. After loading the trailer, weigh the trailer and then the tongue, separately, to the trailer manufacturer's recommendations and instructions. Ask a trailering...
...wheel and gooseneck hitches may require a weight-distributing hitch that the combination of these items. Larger trailers may also be used , the bumper could be made by moving some items around in this section for the vehicle, or the RGAWR, with a weight-carrying hitch which ... Weight Rating). If they are proper. Consider using a weight-distributing hitch, make sure not to avoid contact between the trailer and the bumper. After loading the trailer, weigh the trailer and then the tongue, separately, to the trailer manufacturer's recommendations and instructions. Ask a trailering...

Owner's Manual
Page 390
...being towed weighs up to help this weight does not cause the vehicle to holes on page 9‑89 for the vehicle. Front of the cab in front of the trailer weight up to 25 percent of the rear axle. Take care that it will contact the back of Vehicle When... 2 271 kg (5,000 lbs) with many pickup models. Trailer pin box extensions and sliding fifth-wheel hitch assemblies can be used with a factory-installed step bumper, safety chains may be attached to exceed GAWR or GVWR. Always A. The hitch should be attached to the tow vehicle and adjusting the hitch. This...
...being towed weighs up to help this weight does not cause the vehicle to holes on page 9‑89 for the vehicle. Front of the cab in front of the trailer weight up to 25 percent of the rear axle. Take care that it will contact the back of Vehicle When... 2 271 kg (5,000 lbs) with many pickup models. Trailer pin box extensions and sliding fifth-wheel hitch assemblies can be used with a factory-installed step bumper, safety chains may be attached to exceed GAWR or GVWR. Always A. The hitch should be attached to the tow vehicle and adjusting the hitch. This...

Owner's Manual
Page 452
... straight out. 3. Install the bulb by pushing the bulb straight into the lamp asembly by turning it one quarter turn clockwise. 6. Reach under the rear bumper for the bulb socket. 1. A. Cargo Lamp B.
... straight out. 3. Install the bulb by pushing the bulb straight into the lamp asembly by turning it one quarter turn clockwise. 6. Reach under the rear bumper for the bulb socket. 1. A. Cargo Lamp B.
Owner's Manual
Page 484
... Pressure Monitor System (TPMS) sensors with new GM original equipment parts. { WARNING Replacing a wheel with bearing life, brake cooling, speedometer or odometer calibration, headlamp aim, bumper height, vehicle ground clearance, and tire or tire chain clearance to the body and chassis. Tires can be unknown. When replacing wheels, use a new GM...
... Pressure Monitor System (TPMS) sensors with new GM original equipment parts. { WARNING Replacing a wheel with bearing life, brake cooling, speedometer or odometer calibration, headlamp aim, bumper height, vehicle ground clearance, and tire or tire chain clearance to the body and chassis. Tires can be unknown. When replacing wheels, use a new GM...

Owner's Manual
Page 489
Vehicle Care H. Open the spare tire lock cover on the bumper and use the chiseled end of the extension (F) connects to remove the spare tire lock (J). Hoist Cable D. Assemble the wheel wrench (H) and the two jack ... G. Hoist End of the extension is used to the ground. Insert the hoist end (open end) (F) of the extension through the hole (G) in the rear bumper. Turn the wheel wrench (H) counterclockwise to lower the spare tire to lower the spare tire. 4. Wheel Wrench I ) as shown. 3. Hoist Assembly C.
Vehicle Care H. Open the spare tire lock cover on the bumper and use the chiseled end of the extension (F) connects to remove the spare tire lock (J). Hoist Cable D. Assemble the wheel wrench (H) and the two jack ... G. Hoist End of the extension is used to the ground. Insert the hoist end (open end) (F) of the extension through the hole (G) in the rear bumper. Turn the wheel wrench (H) counterclockwise to lower the spare tire to lower the spare tire. 4. Wheel Wrench I ) as shown. 3. Hoist Assembly C.
Owner's Manual
Page 497
... the vehicle with the valve stem pointed down and through the center of the wheel wrench. 5. Make sure the retainer is seated in the rear bumper and onto the hoist shaft. J. Jack Handle Extensions Spare Tire Lock (If Equipped) 10-91 1. Tilt the wheel retainer plate down , and to the rear...
... the vehicle with the valve stem pointed down and through the center of the wheel wrench. 5. Make sure the retainer is seated in the rear bumper and onto the hoist shaft. J. Jack Handle Extensions Spare Tire Lock (If Equipped) 10-91 1. Tilt the wheel retainer plate down , and to the rear...

Owner's Manual
Page 548
... Warranty. In addition, for shuttle service. See your dealer for information regarding the allowance amounts for vehicles with the Bumper-to assist in both the U.S. Several Courtesy Transportation options are available to -Bumper (Base Warranty Coverage period in Canada), extended powertrain, and/or hybrid‐specific warranties in reducing inconvenience when warranty...
... Warranty. In addition, for shuttle service. See your dealer for information regarding the allowance amounts for vehicles with the Bumper-to assist in both the U.S. Several Courtesy Transportation options are available to -Bumper (Base Warranty Coverage period in Canada), extended powertrain, and/or hybrid‐specific warranties in reducing inconvenience when warranty...
