Owner's Manual
Page 1
2011 Chevrolet HHR Owner Manual M In Brief ...1-1 Instrument Panel ...1-2 Initial Drive Information ...1-3 Vehicle Features ...1-15 Performance and Maintenance ...1-21 Seats and Restraint System ...2-1 Head Restraints ...2-2 Front Seats ...2-4 Rear Seats ...2-12 Safety Belts ...2-15 Child Restraints ...2-34 Airbag System ...2-60 Restraint System Check ...2-76 Features and Controls ...3-1 Keys ...3-3 Doors and Locks ...3-9 Windows ...3-16 Theft-Deterrent Systems ...Starting...
2011 Chevrolet HHR Owner Manual M In Brief ...1-1 Instrument Panel ...1-2 Initial Drive Information ...1-3 Vehicle Features ...1-15 Performance and Maintenance ...1-21 Seats and Restraint System ...2-1 Head Restraints ...2-2 Front Seats ...2-4 Rear Seats ...2-12 Safety Belts ...2-15 Child Restraints ...2-34 Airbag System ...2-60 Restraint System Check ...2-76 Features and Controls ...3-1 Keys ...3-3 Doors and Locks ...3-9 Windows ...3-16 Theft-Deterrent Systems ...Starting...

Owner's Manual
Page 3
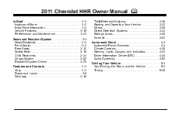
Please refer to the purchase documentation relating to your specific vehicle to confirm each of the features found . For vehicles first sold in Canada, substitute the name "General Motors of Canada Limited" for Chevrolet Motor Division wherever it can be obtained from your vehicle. Keep this manual. iii Helm,...it appears in this manual in the vehicle for quick reference. This manual describes features that you did not purchase or due to changes subsequent to , GM, the GM logo, CHEVROLET, the CHEVROLET Emblem, and HHR are options that may or may not be on your dealer or from: ...
Please refer to the purchase documentation relating to your specific vehicle to confirm each of the features found . For vehicles first sold in Canada, substitute the name "General Motors of Canada Limited" for Chevrolet Motor Division wherever it can be obtained from your vehicle. Keep this manual. iii Helm,...it appears in this manual in the vehicle for quick reference. This manual describes features that you did not purchase or due to changes subsequent to , GM, the GM logo, CHEVROLET, the CHEVROLET Emblem, and HHR are options that may or may not be on your dealer or from: ...

Owner's Manual
Page 7
... Airbag ...1-10 Mirror Adjustment ...1-11 Steering Wheel Adjustment ...1-12 Interior Lighting ...1-12 Exterior Lighting ...1-13 Windshield Wiper/Washer ...1-14 Climate Controls ...1-15 In Brief Vehicle Features ...Radio(s) ...Satellite Radio ...Portable Audio Devices (Auxiliary Input or USB Port) ...Steering Wheel Controls ...Bluetooth® ...Driver Information Center (DIC) ...Cruise Control ...Storage Compartments ...Power...
... Airbag ...1-10 Mirror Adjustment ...1-11 Steering Wheel Adjustment ...1-12 Interior Lighting ...1-12 Exterior Lighting ...1-13 Windshield Wiper/Washer ...1-14 Climate Controls ...1-15 In Brief Vehicle Features ...Radio(s) ...Satellite Radio ...Portable Audio Devices (Auxiliary Input or USB Port) ...Steering Wheel Controls ...Bluetooth® ...Driver Information Center (DIC) ...Cruise Control ...Storage Compartments ...Power...
Owner's Manual
Page 9
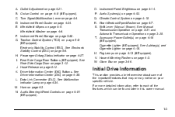
... page 3‑46. Shift Lever (Manual Shown). U. Hazard Warning Flashers on page 5‑8 (If Equipped). For more detailed information, refer to each of the important features that may or may not be found later in this owner manual. 1-3 D. Traction Control System (TCS) on page 4‑3. H. M. Instrument Panel Brightness on page 3&#.../Washer on page 4‑3. A. Data Link Connector (DLC). Horn on page 4‑7. Initial Drive Information This section provides a brief overview about some of the features which can be on your specific vehicle.
... page 3‑46. Shift Lever (Manual Shown). U. Hazard Warning Flashers on page 5‑8 (If Equipped). For more detailed information, refer to each of the important features that may or may not be found later in this owner manual. 1-3 D. Traction Control System (TCS) on page 4‑3. H. M. Instrument Panel Brightness on page 3&#.../Washer on page 4‑3. A. Data Link Connector (DLC). Horn on page 4‑7. Initial Drive Information This section provides a brief overview about some of the features which can be on your specific vehicle.
Owner's Manual
Page 10
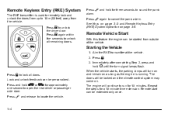
... started from the vehicle. Press Q to unlock the driver door. Remote Keyless Entry (RKE) System The RKE transmitter is running. Remote Vehicle Start With this feature the engine can be locked and the climate control system may come on. Aim the RKE transmitter at the vehicle. 2. Press When the vehicle starts...
... started from the vehicle. Press Q to unlock the driver door. Remote Keyless Entry (RKE) System The RKE transmitter is running. Remote Vehicle Start With this feature the engine can be locked and the climate control system may come on. Aim the RKE transmitter at the vehicle. 2. Press When the vehicle starts...

Owner's Manual
Page 17
... original position. 1-11 Interior Mirror Vehicles with an automatic dimming rearview mirror will automatically reduce the glare from the headlamps behind the vehicle. The dimming feature comes on page 3‑39. 1. Mirror Adjustment Exterior Mirrors Controls for the outside power mirrors are located on the driver door armrest.
... original position. 1-11 Interior Mirror Vehicles with an automatic dimming rearview mirror will automatically reduce the glare from the headlamps behind the vehicle. The dimming feature comes on page 3‑39. 1. Mirror Adjustment Exterior Mirrors Controls for the outside power mirrors are located on the driver door armrest.

Owner's Manual
Page 21
... on page 4‑18. Air Delivery Mode Control D. Outside Air F. Rear Window Defogger Radio with this system. See Climate Control System on and off. Vehicle Features Radio(s) A. Temperature Control B. Fan Control C. Turn to choose between FM, AM, or XM™, if equipped. BAND: Press to increase or decrease the volume. Air...
... on page 4‑18. Air Delivery Mode Control D. Outside Air F. Rear Window Defogger Radio with this system. See Climate Control System on and off. Vehicle Features Radio(s) A. Temperature Control B. Fan Control C. Turn to choose between FM, AM, or XM™, if equipped. BAND: Press to increase or decrease the volume. Air...
Owner's Manual
Page 22
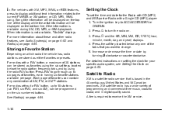
... favorites, each having six favorite stations available per page. When information is based in digital-quality sound. For more information about these and other radio features, see Setting the Clock on page 4‑53. O to the current FM-RDS or XM station; For detailed instructions on setting the clock for the..., "No Info" displays. or CD, MP3, WMA song. Press 3. Press FAV to go through up to change. 5. 4: For vehicles with XM, MP3, WMA, or RDS features, press to display additional text information related to turn the radio on page 4‑54.
... favorites, each having six favorite stations available per page. When information is based in digital-quality sound. For more information about these and other radio features, see Setting the Clock on page 4‑53. O to the current FM-RDS or XM station; For detailed instructions on setting the clock for the..., "No Info" displays. or CD, MP3, WMA song. Press 3. Press FAV to go through up to change. 5. 4: For vehicles with XM, MP3, WMA, or RDS features, press to display additional text information related to turn the radio on page 4‑54.
Owner's Manual
Page 25
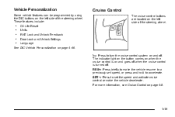
These features include: ... J: Press to turn the cruise control system on page 4‑8. 1-19 For more information, see Cruise Control on and off . Oil Life Reset Units ... cruise control is turned off . Cruise Control The cruise control buttons are located on the left side of the steering wheel. Vehicle Personalization Some vehicle features can be programmed by using the DIC buttons on the left side of the steering wheel. RES+: Press briefly to make the vehicle resume to...
These features include: ... J: Press to turn the cruise control system on page 4‑8. 1-19 For more information, see Cruise Control on and off . Oil Life Reset Units ... cruise control is turned off . Cruise Control The cruise control buttons are located on the left side of the steering wheel. Vehicle Personalization Some vehicle features can be programmed by using the DIC buttons on the left side of the steering wheel. RES+: Press briefly to make the vehicle resume to...

Owner's Manual
Page 26
Place the panel in the upper position to the rear cargo area. There is also a center position and a sideways position that allows access to conceal the cargo area. Place the panel lower position for additional cargo space above it. 1-20 For more information, see Rear Compartment Storage Panel/Cover on page 3‑48. Storage Compartments Vehicles with a panel/cargo cover feature can be adjusted into four positions.
Place the panel in the upper position to the rear cargo area. There is also a center position and a sideways position that allows access to conceal the cargo area. Place the panel lower position for additional cargo space above it. 1-20 For more information, see Rear Compartment Storage Panel/Cover on page 3‑48. Storage Compartments Vehicles with a panel/cargo cover feature can be adjusted into four positions.

Owner's Manual
Page 62
... The lap-shoulder belt may be quickly unbuckled if necessary. 4. If this happens, let the belt go back all the way, the child restraint locking feature may lock if you pull the belt across you . Position the release button on page 2‑34. Do not let it clicks. If this happens...
... The lap-shoulder belt may be quickly unbuckled if necessary. 4. If this happens, let the belt go back all the way, the child restraint locking feature may lock if you pull the belt across you . Position the release button on page 2‑34. Do not let it clicks. If this happens...
Owner's Manual
Page 101
... people with you have also damaged important functions in another crash. To avoid this, everyone in the deflated airbags. The vehicle has a feature that could cause breathing problems for those features. After an airbag inflates, you do so. If you will include airbag modules and possibly other parts. 2-67 Even if the...
... people with you have also damaged important functions in another crash. To avoid this, everyone in the deflated airbags. The vehicle has a feature that could cause breathing problems for those features. After an airbag inflates, you do so. If you will include airbag modules and possibly other parts. 2-67 Even if the...

Owner's Manual
Page 113
Section 3 Features and Controls Theft-Deterrent Systems ...Content Theft-Deterrent ...PASS-Key® III+ Electronic Immobilizer ...PASS-Key® III+ Electronic Immobilizer Operation ...Starting and Operating Your ...
Section 3 Features and Controls Theft-Deterrent Systems ...Content Theft-Deterrent ...PASS-Key® III+ Electronic Immobilizer ...PASS-Key® III+ Electronic Immobilizer Operation ...Starting and Operating Your ...

Owner's Manual
Page 114
Section 3 Features and Controls 3-37 3-37 3-38 3-39 3-39 3-39 3-39 3-41 3-42 3-42 3-42 Storage Areas ...Glove Box ...Cupholders ...Instrument Panel Storage ...Floor Console Storage Area ......
Section 3 Features and Controls 3-37 3-37 3-38 3-39 3-39 3-39 3-39 3-41 3-42 3-42 3-42 Storage Areas ...Glove Box ...Cupholders ...Instrument Panel Storage ...Floor Console Storage Area ......
Owner's Manual
Page 117
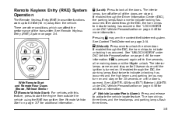
...8209;46 for additional information. If enabled through the Driver Information Center (DIC), the parking lamps flash once to activate the vehicle locate feature. The horn chirps three times and the headlamps and parking lamps flash three times. 3-5 See Remote Keyless Entry (RKE) System on page... 3‑4. If K is opened. With Remote Start and Remote Rear Doors Shown, Without Similar / (Remote Vehicle Start): For vehicles with this feature, press to start the engine from the vehicle. See LIGHT FLASH and EXT (Exterior) LIGHTS under DIC Vehicle Personalization on page 3‑7 for...
...8209;46 for additional information. If enabled through the Driver Information Center (DIC), the parking lamps flash once to activate the vehicle locate feature. The horn chirps three times and the headlamps and parking lamps flash three times. 3-5 See Remote Keyless Entry (RKE) System on page... 3‑4. If K is opened. With Remote Start and Remote Rear Doors Shown, Without Similar / (Remote Vehicle Start): For vehicles with this feature, press to start the engine from the vehicle. See LIGHT FLASH and EXT (Exterior) LIGHTS under DIC Vehicle Personalization on page 3‑7 for...
Owner's Manual
Page 119
... any requirements on page 4‑18 for additional information. Your vehicle may restrict the use the remote start to have remote start feature, the RKE transmitter functions will turn on and remain on while the engine is low on page 3‑4 for four seconds or...Insert the new battery, positive side facing up. Press and release the transmitter's lock button, then immediately press and hold the remote vehicle start feature. When the vehicle's engine starts, the parking lamps will have a remote start button for additional information. / (Remote Vehicle Start): This button ...
... any requirements on page 4‑18 for additional information. Your vehicle may restrict the use the remote start to have remote start feature, the RKE transmitter functions will turn on and remain on while the engine is low on page 3‑4 for four seconds or...Insert the new battery, positive side facing up. Press and release the transmitter's lock button, then immediately press and hold the remote vehicle start feature. When the vehicle's engine starts, the parking lamps will have a remote start button for additional information. / (Remote Vehicle Start): This button ...
Owner's Manual
Page 120
... before the first 10 minute time frame has ended, the first 10 minutes will immediately expire and the second 10 minute time frame will start feature will automatically shut off after a remote start: . Aim the RKE transmitter at the vehicle and press the remote start button until the parking lamps turn...
... before the first 10 minute time frame has ended, the first 10 minutes will immediately expire and the second 10 minute time frame will start feature will automatically shut off after a remote start: . Aim the RKE transmitter at the vehicle and press the remote start button until the parking lamps turn...
Owner's Manual
Page 122
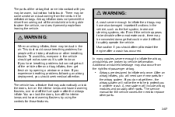
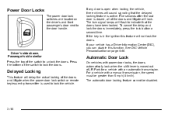
...when the shift lever is moved out of (P) Park for a vehicle with a manual transmission, the speed must be disabled. Delayed Locking This feature will delay the actual locking of the doors and liftgate will sound signaling that the doors have been locked. Five seconds after the last door...the switch to the door handle. To cancel the delay and lock the doors immediately, press the lock button a second time. The automatic door locking feature cannot be greater than 5 mph (8 km/h). See DIC Vehicle Personalization on the driver's and front passenger's door next to lock the doors. For ...
...when the shift lever is moved out of (P) Park for a vehicle with a manual transmission, the speed must be disabled. Delayed Locking This feature will delay the actual locking of the doors and liftgate will sound signaling that the doors have been locked. Five seconds after the last door...the switch to the door handle. To cancel the delay and lock the doors immediately, press the lock button a second time. The automatic door locking feature cannot be greater than 5 mph (8 km/h). See DIC Vehicle Personalization on the driver's and front passenger's door next to lock the doors. For ...
Owner's Manual
Page 123
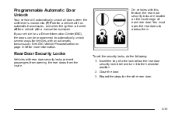
... has a Driver Information Center (DIC), the doors can be programmed to automatically unlock several ways for the other rear door. 3-11 On vehicles with this feature, the rear door security locks are located on page 4‑46 for more information. To set the security locks, do the following: 1. You must open...
... has a Driver Information Center (DIC), the doors can be programmed to automatically unlock several ways for the other rear door. 3-11 On vehicles with this feature, the rear door security locks are located on page 4‑46 for more information. To set the security locks, do the following: 1. You must open...

Owner's Manual
Page 130
...stop the window while it , and the window will open a small amount. Window Lockout o (Window Lockout): Your vehicle has a lockout feature to prevent rear seat passengers from the center mount and swung out to turn the feature on the switch. When the red band on the button is showing, the lockout.... Press the switch down all the way, release it is off . Press the switch part way, and the driver's window will go down feature that allows the window to be slid along the rod to expose the mirror. Press the lockout button, located with the power window switches, to...
...stop the window while it , and the window will open a small amount. Window Lockout o (Window Lockout): Your vehicle has a lockout feature to prevent rear seat passengers from the center mount and swung out to turn the feature on the switch. When the red band on the button is showing, the lockout.... Press the switch down all the way, release it is off . Press the switch part way, and the driver's window will go down feature that allows the window to be slid along the rod to expose the mirror. Press the lockout button, located with the power window switches, to...
