
Owner's Manual
Page 136
...to lock it in place. 2-52 The panel/cargo cover can be thrown around in the first position: 1. Slide the panel forward. 3. Rear Compartment Storage Panel/Cover Your vehicle may have an adjustable panel/cargo cover feature. Insert the front corners of the panel ...to carry things on the adjustable panel when it is in the upper (cargo cover) or center positions, during a sudden vehicle movement ...
...to lock it in place. 2-52 The panel/cargo cover can be thrown around in the first position: 1. Slide the panel forward. 3. Rear Compartment Storage Panel/Cover Your vehicle may have an adjustable panel/cargo cover feature. Insert the front corners of the panel ...to carry things on the adjustable panel when it is in the upper (cargo cover) or center positions, during a sudden vehicle movement ...

Owner's Manual
Page 137
... the back of the panel into the top guides. 2. Your vehicle may have a cargo mat that covers the panel/cargo cover. To use the panel in this position. Do not drive while the panel is in place. 2-53 Press down on the panel in the second ...
... the back of the panel into the top guides. 2. Your vehicle may have a cargo mat that covers the panel/cargo cover. To use the panel in this position. Do not drive while the panel is in place. 2-53 Press down on the panel in the second ...

Owner's Manual
Page 138
... system, these are driving, check frequently to the vehicle and would not be violently torn off, and this could be covered under warranty. The metal rings in the cargo area can cause a driver to attach the convenience net for larger, heavier loads. 2-54 Roof Rack System Your vehicle ... prevent damage or loss of the vehicle may be used to attach items secured to the floor, to the roof. Notice: Loading cargo directly on the luggage carrier that are compatible with a roof rack system. This can be carried inside. Items may cause damage to ensure your...
... system, these are driving, check frequently to the vehicle and would not be violently torn off, and this could be covered under warranty. The metal rings in the cargo area can cause a driver to attach the convenience net for larger, heavier loads. 2-54 Roof Rack System Your vehicle ... prevent damage or loss of the vehicle may be used to attach items secured to the floor, to the roof. Notice: Loading cargo directly on the luggage carrier that are compatible with a roof rack system. This can be carried inside. Items may cause damage to ensure your...
Owner's Manual
Page 159
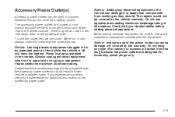
...power outlets are located on the instrument panel below the climate controls and at the rear of the power outlet can cause damage not covered by the vehicle warranty. While not in use and do not plug in for an extended period of 20 amperes. Notice: Leaving electrical...drain the battery. The repairs would not be an outlet in use , always cover the outlet with your dealer/retailer for accessory power plugs only. 3-19 Always unplug electrical equipment when not in the rear cargo area on the accessory power outlet. Accessory Power Outlet(s) Accessory power outlets can ...
...power outlets are located on the instrument panel below the climate controls and at the rear of the power outlet can cause damage not covered by the vehicle warranty. While not in use and do not plug in for an extended period of 20 amperes. Notice: Leaving electrical...drain the battery. The repairs would not be an outlet in use , always cover the outlet with your dealer/retailer for accessory power plugs only. 3-19 Always unplug electrical equipment when not in the rear cargo area on the accessory power outlet. Accessory Power Outlet(s) Accessory power outlets can ...

Owner's Manual
Page 160
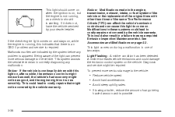
.... Notice: Leaving electrical equipment plugged in for an extended period of the power outlet can cause damage not covered by the warranty. Rear Power Plug for Converters This plug can be covered by your warranty. The power connector wiring can be sure to the outlets. Always unplug electrical equipment when... not in use and do not plug in the rear cargo area on the passenger side behind the service panel. When ...
.... Notice: Leaving electrical equipment plugged in for an extended period of the power outlet can cause damage not covered by the warranty. Rear Power Plug for Converters This plug can be covered by your warranty. The power connector wiring can be sure to the outlets. Always unplug electrical equipment when... not in use and do not plug in the rear cargo area on the passenger side behind the service panel. When ...
Owner's Manual
Page 178
...This system assists the service technician in correctly diagnosing any problem is possible. 3-38 Notice: Modifications made to costly repairs not covered by the vehicle warranty. This light comes on page 5-3. Diagnosis and service might be as good, and the engine might not be... the system before any malfunction. If it is required. A misfire increases vehicle emissions and could also result in one of cargo being hauled as soon as a check to pass a required Emission Inspection/Maintenance test. Malfunctions often are indicated by your dealer/retailer. ...
...This system assists the service technician in correctly diagnosing any problem is possible. 3-38 Notice: Modifications made to costly repairs not covered by the vehicle warranty. This light comes on page 5-3. Diagnosis and service might be as good, and the engine might not be... the system before any malfunction. If it is required. A misfire increases vehicle emissions and could also result in one of cargo being hauled as soon as a check to pass a required Emission Inspection/Maintenance test. Malfunctions often are indicated by your dealer/retailer. ...
Owner's Manual
Page 266
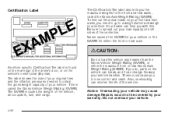
... size of your original tires and the inflation pressures needed to obtain the gross weight capacity of the centerline. Repairs would not be covered by your vehicle may cause damage. If you do, parts on the vehicle's center pillar (B-pillar). Never exceed the GVWR for your vehicle or...cause you to a weigh station and weigh your vehicle handles. This is found on the rear edge of the vehicle, all occupants, fuel, and cargo. Certification Label The Certification/Tire label also tells you the maximum weights for either the maximum front or rear Gross Axle...
... size of your original tires and the inflation pressures needed to obtain the gross weight capacity of the centerline. Repairs would not be covered by your vehicle may cause damage. If you do, parts on the vehicle's center pillar (B-pillar). Never exceed the GVWR for your vehicle or...cause you to a weigh station and weigh your vehicle handles. This is found on the rear edge of the vehicle, all occupants, fuel, and cargo. Certification Label The Certification/Tire label also tells you the maximum weights for either the maximum front or rear Gross Axle...

Owner's Manual
Page 318
.... Unplug unnecessary accessories plugged into the cigarette lighter or the accessory power outlet. Locate the remote positive terminal which is located in the rear cargo area. Always turn off the radio and all lamps that vehicle. Turn off the radio and other accessories when jump starting the vehicle. 3..... You will not need to access your vehicle under a red tethered cap on the engine compartment fuse block. Do not remove fuse block cover to access the terminal. It is located under the hood. Notice: If you leave the radio or other accessories on during the jump starting...
.... Unplug unnecessary accessories plugged into the cigarette lighter or the accessory power outlet. Locate the remote positive terminal which is located in the rear cargo area. Always turn off the radio and all lamps that vehicle. Turn off the radio and other accessories when jump starting the vehicle. 3..... You will not need to access your vehicle under a red tethered cap on the engine compartment fuse block. Do not remove fuse block cover to access the terminal. It is located under the hood. Notice: If you leave the radio or other accessories on during the jump starting...

Owner's Manual
Page 328
See Liftgate on page 2-12. Stoplamp/Taillamp/Turn Signal Lamp B. When installing the bulb socket into the assembly, line up the tabs with the slots in the rear cargo area of the socket. 5. Remove the cover in the bulb assembly. 5-50 Pull the bulb straight out of the vehicle to access the bulbs. 3. Open the liftgate. Back-up Lamp 2. Install a new bulb. Taillamps, Turn Signal, Stoplamps and Back-up Lamps To replace one of the lamp assembly. 4. Turn the bulb socket counterclockwise and pull it straight out of these bulbs: 1. A.
See Liftgate on page 2-12. Stoplamp/Taillamp/Turn Signal Lamp B. When installing the bulb socket into the assembly, line up the tabs with the slots in the rear cargo area of the socket. 5. Remove the cover in the bulb assembly. 5-50 Pull the bulb straight out of the vehicle to access the bulbs. 3. Open the liftgate. Back-up Lamp 2. Install a new bulb. Taillamps, Turn Signal, Stoplamps and Back-up Lamps To replace one of the lamp assembly. 4. Turn the bulb socket counterclockwise and pull it straight out of these bulbs: 1. A.

Owner's Manual
Page 355
Removing the Spare Tire and Tools The jack, wheel wrench, and spare tire are stowed in the rear of the vehicle, underneath the floor of the cargo area. To remove the spare tire and tools: 1. Wheel Block B. A. See Liftgate on page 2-12 for more information. Remove the cargo cover. 5-77 Open the liftgate. Flat Tire The following information explains how to use the jack and change a tire. 2.
Removing the Spare Tire and Tools The jack, wheel wrench, and spare tire are stowed in the rear of the vehicle, underneath the floor of the cargo area. To remove the spare tire and tools: 1. Wheel Block B. A. See Liftgate on page 2-12 for more information. Remove the cargo cover. 5-77 Open the liftgate. Flat Tire The following information explains how to use the jack and change a tire. 2.

Owner's Manual
Page 373
...the rear of the strap (C) through the loop (C). 7. For more information. 2. If there is not a loop, go to tighten it around the cargo tie-down (A). 5-95 Storing the Flat Tire and Tools To store the flat , in the rear storage compartment. See Liftgate on page 2-12... compartment and put the compartment cover back on page 2-52. 4. Put back all tools as they were stored in this section. 3. Open the liftgate. Route the loop end of the vehicle. 6. For more information, see Rear Compartment Storage Panel/Cover on . Install the cargo cover. Pull the strap to Step...
...the rear of the strap (C) through the loop (C). 7. For more information. 2. If there is not a loop, go to tighten it around the cargo tie-down (A). 5-95 Storing the Flat Tire and Tools To store the flat , in the rear storage compartment. See Liftgate on page 2-12... compartment and put the compartment cover back on page 2-52. 4. Put back all tools as they were stored in this section. 3. Open the liftgate. Route the loop end of the vehicle. 6. For more information, see Rear Compartment Storage Panel/Cover on . Install the cargo cover. Pull the strap to Step...

Owner's Manual
Page 375
... wheel wrench (E) over the bolt (G), making sure the strap is securely stored, under the jack and wheel wrench. 5-97 A. Retainer Cover Spare Tire Wing Nut E. Slide the buckle to the cargo tie-downs in the rear of the spare tire compartment. 3. C. Install the strap (F) on page 2-12 for storing the compact spare...
... wheel wrench (E) over the bolt (G), making sure the strap is securely stored, under the jack and wheel wrench. 5-97 A. Retainer Cover Spare Tire Wing Nut E. Slide the buckle to the cargo tie-downs in the rear of the spare tire compartment. 3. C. Install the strap (F) on page 2-12 for storing the compact spare...

Owner's Manual
Page 445
... Radio(s) ...3-63 Radios Reception ...3-95 Setting the Clock ...3-62 Theft-Deterrent ...3-94 Range Adjustment, Headlamps ...1-7 Rear Compartment Storage Panel/Cover ...2-52 Rear Door Security Locks ...2-11 Rear Reading Lamps ...3-17 Rear Side Cargo Door ...2-12 Rear Storage Areas ...2-51 Rear Vision Camera (RVC) ...2-44 Rear Window Washer/Wiper ...3-10 Rearview Mirror, Automatic...
... Radio(s) ...3-63 Radios Reception ...3-95 Setting the Clock ...3-62 Theft-Deterrent ...3-94 Range Adjustment, Headlamps ...1-7 Rear Compartment Storage Panel/Cover ...2-52 Rear Door Security Locks ...2-11 Rear Reading Lamps ...3-17 Rear Side Cargo Door ...2-12 Rear Storage Areas ...2-51 Rear Vision Camera (RVC) ...2-44 Rear Window Washer/Wiper ...3-10 Rearview Mirror, Automatic...
