Owner's Manual
Page 1
... Rear Seats ...1-9 Safety Belts ...1-12 Child Restraints ...1-32 Airbag System ...1-55 Restraint System Check ...1-66 Features and Controls ...2-1 Keys ...2-3 Doors and Locks ...2-11 Windows ...2-16 Theft-Deterrent Systems ...2-18 Starting and Operating Your Vehicle ...2-22 Mirrors ...2-38 OnStar® System ...2-44 Universal Home Remote System ...2-46 Storage Areas ...2-50 Sunroof ...2-53 Instrument Panel ...3-1 Instrument Panel Overview ...3-4 Climate Controls ...3-22 Warning Lights, Gages, and Indicators ...3-32 M Driver Information Center (DIC) ...3-47 Audio System(s) ...3-54 Driving...
... Rear Seats ...1-9 Safety Belts ...1-12 Child Restraints ...1-32 Airbag System ...1-55 Restraint System Check ...1-66 Features and Controls ...2-1 Keys ...2-3 Doors and Locks ...2-11 Windows ...2-16 Theft-Deterrent Systems ...2-18 Starting and Operating Your Vehicle ...2-22 Mirrors ...2-38 OnStar® System ...2-44 Universal Home Remote System ...2-46 Storage Areas ...2-50 Sunroof ...2-53 Instrument Panel ...3-1 Instrument Panel Overview ...3-4 Climate Controls ...3-22 Warning Lights, Gages, and Indicators ...3-32 M Driver Information Center (DIC) ...3-47 Audio System(s) ...3-54 Driving...

Owner's Manual
Page 9
... the handle up or down repeatedly to increase lumbar support. Six-Way Power Driver Seat If your vehicle has this feature, the power seat control is located on the outboard side of the driver's seat. Manual Lumbar To adjust the power seat, do the following: • Move the seat forward or rearward by pushing the control toward the front or back of the vehicle. • Raise or lower...
... the handle up or down repeatedly to increase lumbar support. Six-Way Power Driver Seat If your vehicle has this feature, the power seat control is located on the outboard side of the driver's seat. Manual Lumbar To adjust the power seat, do the following: • Move the seat forward or rearward by pushing the control toward the front or back of the vehicle. • Raise or lower...
Owner's Manual
Page 73
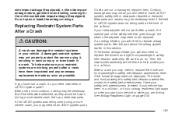
... equipped), or the side impact airbag module, garnish trim and ceiling covering for the roof-mounted side impact airbags (if equipped). If your vehicle or while you will be replaced. The driver and front passenger's safety belt retractor assemblies contain the safety belt pretensioners. Replacing Restraint System Parts After a Crash If belts are cut or damaged, replace them inspected and any necessary replacements made as soon as they would be necessary...
... equipped), or the side impact airbag module, garnish trim and ceiling covering for the roof-mounted side impact airbags (if equipped). If your vehicle or while you will be replaced. The driver and front passenger's safety belt retractor assemblies contain the safety belt pretensioners. Replacing Restraint System Parts After a Crash If belts are cut or damaged, replace them inspected and any necessary replacements made as soon as they would be necessary...

Owner's Manual
Page 75
...22 New Vehicle Break-In ...2-22 Ignition Positions ...2-23 Retained Accessory Power (RAP) ...2-24 Starting the Engine ...2-24 Adjustable Throttle and Brake Pedal ...2-25 Engine Coolant Heater ...2-26 Automatic Transaxle Operation (Base Models) ...2-27 Automatic Transaxle Operation (SS Models) ...2-30 Parking Brake ...2-33 Shifting Into Park (P) ...2-34 Shifting Out of Park (P) ...2-35 Parking Over Things That Burn ...2-36 Engine Exhaust ...2-36 Running the Engine While Parked ...2-37 Keys ...2-3 Remote Keyless Entry System ...2-5 Remote Keyless Entry System Operation ...2-6 Doors and Locks...
...22 New Vehicle Break-In ...2-22 Ignition Positions ...2-23 Retained Accessory Power (RAP) ...2-24 Starting the Engine ...2-24 Adjustable Throttle and Brake Pedal ...2-25 Engine Coolant Heater ...2-26 Automatic Transaxle Operation (Base Models) ...2-27 Automatic Transaxle Operation (SS Models) ...2-30 Parking Brake ...2-33 Shifting Into Park (P) ...2-34 Shifting Out of Park (P) ...2-35 Parking Over Things That Burn ...2-36 Engine Exhaust ...2-36 Running the Engine While Parked ...2-37 Keys ...2-3 Remote Keyless Entry System ...2-5 Remote Keyless Entry System Operation ...2-6 Doors and Locks...
Owner's Manual
Page 83
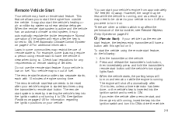
... the remote start , and the engine is started two times using the transmitter's remote start the vehicle's heating or air conditioning systems and rear window defogger. See Ignition Positions on page 2-23 for information regarding the ignition positions on fuel. Check local regulations for additional information. There are other conditions which may affect the performance of the transmitter, see Remote Keyless Entry System on page 2-5. / (Remote Start): If your vehicle to turn it off automatically after the key...
... the remote start , and the engine is started two times using the transmitter's remote start the vehicle's heating or air conditioning systems and rear window defogger. See Ignition Positions on page 2-23 for information regarding the ignition positions on fuel. Check local regulations for additional information. There are other conditions which may affect the performance of the transmitter, see Remote Keyless Entry System on page 2-5. / (Remote Start): If your vehicle to turn it off automatically after the key...
Owner's Manual
Page 89
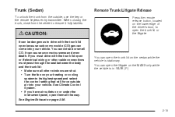
... open or if electrical wiring or other windows are shut. • Turn the fan on the MAXX only while the vehicle is stationary. You can come into your vehicle. You cannot see or smell CO. Trunk (Sedan) To unlock the trunk from the center to its highest speed and select the control setting that will force outside , use the key or the remote keyless entry transmitter. When...
... open or if electrical wiring or other windows are shut. • Turn the fan on the MAXX only while the vehicle is stationary. You can come into your vehicle. You cannot see or smell CO. Trunk (Sedan) To unlock the trunk from the center to its highest speed and select the control setting that will force outside , use the key or the remote keyless entry transmitter. When...

Owner's Manual
Page 90
...-dark emergency trunk release handle located inside the trunk of the driver's door. See "Remote Trunk/Liftgate Release" under Trunk (Sedan) on page 2-15. The emergency trunk release handle is a glow-in warm or hot weather. Emergency Trunk Release Handle Liftgate (MAXX) To open the liftgate, press the trunk/liftgate button on the remote keyless entry transmitter or the remote trunk/liftgate release button located on the lower edge of the sedan model on the trunk latch. This handle will...
...-dark emergency trunk release handle located inside the trunk of the driver's door. See "Remote Trunk/Liftgate Release" under Trunk (Sedan) on page 2-15. The emergency trunk release handle is a glow-in warm or hot weather. Emergency Trunk Release Handle Liftgate (MAXX) To open the liftgate, press the trunk/liftgate button on the remote keyless entry transmitter or the remote trunk/liftgate release button located on the lower edge of the sedan model on the trunk latch. This handle will...
Owner's Manual
Page 95
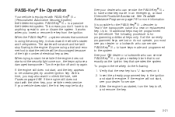
... + decoder to off and try another ignition key. If the engine still does not start the engine. If your vehicle does start , and the key appears to arm or disarm the system. To program the new key do anything special to be programmed for service. 3. After the engine has started, turn the key to "learn" the transponder value of electrical key codes. PASS-Key® III + is equipped with the...
... + decoder to off and try another ignition key. If the engine still does not start the engine. If your vehicle does start , and the key appears to arm or disarm the system. To program the new key do anything special to be programmed for service. 3. After the engine has started, turn the key to "learn" the transponder value of electrical key codes. PASS-Key® III + is equipped with the...

Owner's Manual
Page 98
... driver's door is opened . They will turn the ignition key to START. Excessive heat can damage your shift lever to PARK (P) or NEUTRAL (N). It is recommended that is designed to work with the electronics in very cold weather. Starting the Engine Move your starter motor. Wait about 15 seconds between each try to help avoid draining your battery or damaging your vehicle. Once the key is turned from START to ON. Shift...
... driver's door is opened . They will turn the ignition key to START. Excessive heat can damage your shift lever to PARK (P) or NEUTRAL (N). It is recommended that is designed to work with the electronics in very cold weather. Starting the Engine Move your starter motor. Wait about 15 seconds between each try to help avoid draining your battery or damaging your vehicle. Once the key is turned from START to ON. Shift...
Owner's Manual
Page 129
... ...3-20 Rear Reading Lamps ...3-20 Trunk Lamp ...3-20 Cargo Lamp ...3-20 Battery Run-Down Protection ...3-20 Accessory Power Outlet(s) ...3-21 Cigarette Lighter ...3-22 Climate Controls ...3-22 Climate Control System ...3-22 Automatic Climate Control System ...3-27 Outlet Adjustment ...3-31 Warning Lights, Gages, and Indicators ...3-32 Instrument Panel Cluster ...3-33 Speedometer and Odometer ...3-34 Trip Odometer ...3-34 Tachometer ...3-34 Safety Belt Reminder Light ...3-34 Airbag Readiness Light ...3-35 Charging System Light ...3-36 Brake System Warning Light...
... ...3-20 Rear Reading Lamps ...3-20 Trunk Lamp ...3-20 Cargo Lamp ...3-20 Battery Run-Down Protection ...3-20 Accessory Power Outlet(s) ...3-21 Cigarette Lighter ...3-22 Climate Controls ...3-22 Climate Control System ...3-22 Automatic Climate Control System ...3-27 Outlet Adjustment ...3-31 Warning Lights, Gages, and Indicators ...3-32 Instrument Panel Cluster ...3-33 Speedometer and Odometer ...3-34 Trip Odometer ...3-34 Tachometer ...3-34 Safety Belt Reminder Light ...3-34 Airbag Readiness Light ...3-35 Charging System Light ...3-36 Brake System Warning Light...

Owner's Manual
Page 133
... Audio Steering Wheel Controls (Three Spoke) on page 3-105 or Audio Steering Wheel Controls (Four Spoke) on page 3-22. U. Shift Lever. See Shifting Into Park (P) on page 3-7. Center Console Storage Compartment. X. Rear Wiper/Washer Controls (If Equipped). B. See Turn Signal/Multifunction Lever on page 2-34. Instrument Panel Cluster. Hazard Warning Flasher. K. See Glove Box on page 3-6. Adjustable Pedal Buttons (If Equipped). Q. See Horn on page 2-50. See Accessory Power Outlet(s) on page 2-25. Side Window Outlets...
... Audio Steering Wheel Controls (Three Spoke) on page 3-105 or Audio Steering Wheel Controls (Four Spoke) on page 3-22. U. Shift Lever. See Shifting Into Park (P) on page 3-7. Center Console Storage Compartment. X. Rear Wiper/Washer Controls (If Equipped). B. See Turn Signal/Multifunction Lever on page 2-34. Instrument Panel Cluster. Hazard Warning Flasher. K. See Glove Box on page 3-6. Adjustable Pedal Buttons (If Equipped). Q. See Horn on page 2-50. See Accessory Power Outlet(s) on page 2-25. Side Window Outlets...

Owner's Manual
Page 285
Section 5 Service and Appearance Care Overheated Engine Protection Operating Mode (3.5L V6 and 3.9L V6 Engines) ...5-31 Cooling System ...5-32 Power Steering Fluid (3.9L V6 Engine) ...5-37 Windshield Washer Fluid ...5-38 Brakes ...5-39 Battery ...5-42 Jump Starting ...5-43 Bulb Replacement ...5-47 Halogen Bulbs ...5-47 Headlamps, Front Turn Signal, and Parking Lamps ...5-48 Taillamps, Turn Signal, Stoplamps and Back-up Lamps ...5-50 Replacement Bulbs ...5-51 Windshield Wiper Blade Replacement ...5-52 Tires ...5-54 Tire Sidewall Labeling ...5-56 Tire Terminology and Definitions...
Section 5 Service and Appearance Care Overheated Engine Protection Operating Mode (3.5L V6 and 3.9L V6 Engines) ...5-31 Cooling System ...5-32 Power Steering Fluid (3.9L V6 Engine) ...5-37 Windshield Washer Fluid ...5-38 Brakes ...5-39 Battery ...5-42 Jump Starting ...5-43 Bulb Replacement ...5-47 Halogen Bulbs ...5-47 Headlamps, Front Turn Signal, and Parking Lamps ...5-48 Taillamps, Turn Signal, Stoplamps and Back-up Lamps ...5-50 Replacement Bulbs ...5-51 Windshield Wiper Blade Replacement ...5-52 Tires ...5-54 Tire Sidewall Labeling ...5-56 Tire Terminology and Definitions...

Owner's Manual
Page 293
... installed. When replacing the fuel cap, turn it clockwise until it clicks. Then unscrew the cap all the way. Clean fuel from painted surfaces as soon as possible. The diagnostic system can happen if your fuel tank and emissions system. If you need a new fuel cap, be sure to stop. See Washing Your Vehicle on the Driver Information Center (DIC) if the fuel cap is not...
... installed. When replacing the fuel cap, turn it clockwise until it clicks. Then unscrew the cap all the way. Clean fuel from painted surfaces as soon as possible. The diagnostic system can happen if your fuel tank and emissions system. If you need a new fuel cap, be sure to stop. See Washing Your Vehicle on the Driver Information Center (DIC) if the fuel cap is not...
Owner's Manual
Page 342
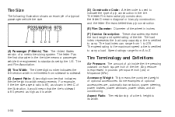
... Z. (A) Passenger (P-Metric) Tire: The United States version of a metric tire sizing system. Tire and Rim Association. (B) Tire Width: The three-digit number indicates the tire section width in inches. (F) Service Description: These characters represent the load range and speed rating of the tire. For example, if the tire size aspect ratio is 60, as shown in the tire. Accessory Weight: This means the combined weight of optional accessories are, automatic transmission, power steering, power brakes, power windows, power seats, and air conditioning. Some...
... Z. (A) Passenger (P-Metric) Tire: The United States version of a metric tire sizing system. Tire and Rim Association. (B) Tire Width: The three-digit number indicates the tire section width in inches. (F) Service Description: These characters represent the load range and speed rating of the tire. For example, if the tire size aspect ratio is 60, as shown in the tire. Accessory Weight: This means the combined weight of optional accessories are, automatic transmission, power steering, power brakes, power windows, power seats, and air conditioning. Some...

Owner's Manual
Page 344
... tire placard. Vehicle Capacity Weight: The number of grip provided. Vehicle Maximum Load on the Tire: Load on a vehicle. Passenger (P-Metric) Tire: A tire used on page 5-66. See Inflation - Sidewall: The portion of tread remains. Treadwear Indicators: Narrow bands, sometimes called wear bars, that comes into the sidewall of the tread. Ratings are seated. See Uniform Tire Quality Grading on passenger cars and some light...
... tire placard. Vehicle Capacity Weight: The number of grip provided. Vehicle Maximum Load on the Tire: Load on a vehicle. Passenger (P-Metric) Tire: A tire used on page 5-66. See Inflation - Sidewall: The portion of tread remains. Treadwear Indicators: Narrow bands, sometimes called wear bars, that comes into the sidewall of the tread. Ratings are seated. See Uniform Tire Quality Grading on passenger cars and some light...
Owner's Manual
Page 385
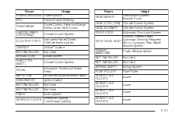
..., Driver Shift Control Climate Control System Instrument Panel Cluster, Theft Deterrent System OnStar® System Not Used Airbag System Climate Control System Adjustable Throttle and Brake Pedal Windshield Wiper/Washer Switch Ignition Switch Not Used Not Used Audio System Fuses REAR WIPER Usage Rear Wiper System/ Washer Pump Climate Control System Automatic Door Lock System POWER MIRRORS Power Mirrors HVAC CTRL (IGN) Climate Control System HVAC BLOWER DOOR LOCK Sunroof, Heated Seats, Automatic Dimming Rearview ROOF/HEAT SEAT Mirror, Compass, Rear Wiper/ Washer System POWER WINDOWS NOT...
..., Driver Shift Control Climate Control System Instrument Panel Cluster, Theft Deterrent System OnStar® System Not Used Airbag System Climate Control System Adjustable Throttle and Brake Pedal Windshield Wiper/Washer Switch Ignition Switch Not Used Not Used Audio System Fuses REAR WIPER Usage Rear Wiper System/ Washer Pump Climate Control System Automatic Door Lock System POWER MIRRORS Power Mirrors HVAC CTRL (IGN) Climate Control System HVAC BLOWER DOOR LOCK Sunroof, Heated Seats, Automatic Dimming Rearview ROOF/HEAT SEAT Mirror, Compass, Rear Wiper/ Washer System POWER WINDOWS NOT...

Owner's Manual
Page 423
...-5170 Transmission, Transaxle, Transfer Case Unit Repair Manual This manual provides information on engines, transmission, axle suspension, brakes, electrical, steering, body, etc. Reporting Safety Defects to General Motors In addition to notifying NHTSA (or Transport Canada) in a situation like this, we certainly hope you should immediately notify Transport Canada, in Canada, and you believe that your vehicle has a safety defect, you will notify General Motors. Reporting Safety Defects...
...-5170 Transmission, Transaxle, Transfer Case Unit Repair Manual This manual provides information on engines, transmission, axle suspension, brakes, electrical, steering, body, etc. Reporting Safety Defects to General Motors In addition to notifying NHTSA (or Transport Canada) in a situation like this, we certainly hope you should immediately notify Transport Canada, in Canada, and you believe that your vehicle has a safety defect, you will notify General Motors. Reporting Safety Defects...

Owner's Manual
Page 432
...13 Rear Door Security Locks ...2-14 Loss of Control ...4-17 Lumbar Manual Controls ...1-3 Maintenance Schedule Additional Required Services ...6-6 At Each Fuel Fill ...6-8 At Least Once a Month ...6-9 At Least Once a Year ...6-9 Introduction ...6-2 Maintenance Footnotes ...6-7 Maintenance Record ...6-14 M Maintenance Schedule (cont.) Maintenance Requirements ...6-2 Normal Maintenance Replacement Parts ...6-13 Owner Checks and Services ...6-8 Recommended Fluids and Lubricants ...6-12 Scheduled Maintenance ...6-4 Using ...6-2 Your Vehicle and the Environment ...6-2 Malfunction Indicator Light...
...13 Rear Door Security Locks ...2-14 Loss of Control ...4-17 Lumbar Manual Controls ...1-3 Maintenance Schedule Additional Required Services ...6-6 At Each Fuel Fill ...6-8 At Least Once a Month ...6-9 At Least Once a Year ...6-9 Introduction ...6-2 Maintenance Footnotes ...6-7 Maintenance Record ...6-14 M Maintenance Schedule (cont.) Maintenance Requirements ...6-2 Normal Maintenance Replacement Parts ...6-13 Owner Checks and Services ...6-8 Recommended Fluids and Lubricants ...6-12 Scheduled Maintenance ...6-4 Using ...6-2 Your Vehicle and the Environment ...6-2 Malfunction Indicator Light...

Owner's Manual
Page 433
...Door Locks ...2-12 Electrical System ...5-99 Lift Seat ...1-8 Retained Accessory (RAP) ...2-24 Steering Fluid ...5-37 Windows ...2-17 Pretensioners, Safety Belt ...1-32 Programmable Automatic Door Locks ...2-13 O Odometer ...3-34 Odometer, Trip ...3-34 Off-Road Recovery ...4-15 Oil Engine ...5-17 Pressure Light ...3-44 Oil, Engine Oil Life System ...5-20 Older Children, Restraints ...1-32 Online Owner Center ...7-3 OnStar® System, see OnStar® Manual ...2-44 Other Warning Devices ...3-6 Outlet Adjustment ...3-31 Outside Convex Mirror ...2-43 Power Heated Mirrors ...2-43 Power Mirrors...
...Door Locks ...2-12 Electrical System ...5-99 Lift Seat ...1-8 Retained Accessory (RAP) ...2-24 Steering Fluid ...5-37 Windows ...2-17 Pretensioners, Safety Belt ...1-32 Programmable Automatic Door Locks ...2-13 O Odometer ...3-34 Odometer, Trip ...3-34 Off-Road Recovery ...4-15 Oil Engine ...5-17 Pressure Light ...3-44 Oil, Engine Oil Life System ...5-20 Older Children, Restraints ...1-32 Online Owner Center ...7-3 OnStar® System, see OnStar® Manual ...2-44 Other Warning Devices ...3-6 Outlet Adjustment ...3-31 Outside Convex Mirror ...2-43 Power Heated Mirrors ...2-43 Power Mirrors...
Owner's Manual
Page 434
... Belt Comfort Guides ...1-28 Rear Seat Audio (RSA) ...3-101, 3-103 Rear Seat Entertainment System ...3-86 Rear Seat Operation ...1-9 Rear Seat Passengers, Safety Belts ...1-25 Rear Windshield Washer/Wiper ...3-10 Rearview Mirror, Automatic Dimming with Compass ...2-41 Rearview Mirror, Automatic Dimming with OnStar® ...2-38 Rearview Mirror, Automatic Dimming with OnStar® and Compass ...2-39 Rearview Mirror with OnStar® ...2-38 Rearview Mirrors ...2-38 Reclining Seatbacks ...1-4 Recommended Fluids and Lubricants ...6-12 Recreational Vehicle Towing ...4-39 Remote Keyless Entry...
... Belt Comfort Guides ...1-28 Rear Seat Audio (RSA) ...3-101, 3-103 Rear Seat Entertainment System ...3-86 Rear Seat Operation ...1-9 Rear Seat Passengers, Safety Belts ...1-25 Rear Windshield Washer/Wiper ...3-10 Rearview Mirror, Automatic Dimming with Compass ...2-41 Rearview Mirror, Automatic Dimming with OnStar® ...2-38 Rearview Mirror, Automatic Dimming with OnStar® and Compass ...2-39 Rearview Mirror with OnStar® ...2-38 Rearview Mirrors ...2-38 Reclining Seatbacks ...1-4 Recommended Fluids and Lubricants ...6-12 Recreational Vehicle Towing ...4-39 Remote Keyless Entry...


